When sourcing data from Tableau for Metrics, Reports, External Reports, Dimensions, and Datasets, you can pre-filter data before fetching it. This function allows to focus on the slice of data that you really need and exclude those values that are currently irrelevant for the research.
PREREQUISITES:
SPECIAL CHARACTERS HANDLING:
The following characters used in filter Names or in Tableau data cause NO issues : ! * ' ( ) ; : @ & = + $ , / ? # [ ] {}
NOTE: Values with a backslash (\) symbol in the Filter Names may be either returned without this symbol or not included in result set at all, so we recommend that you avoid using the backslash (\) symbol.
FILTERS
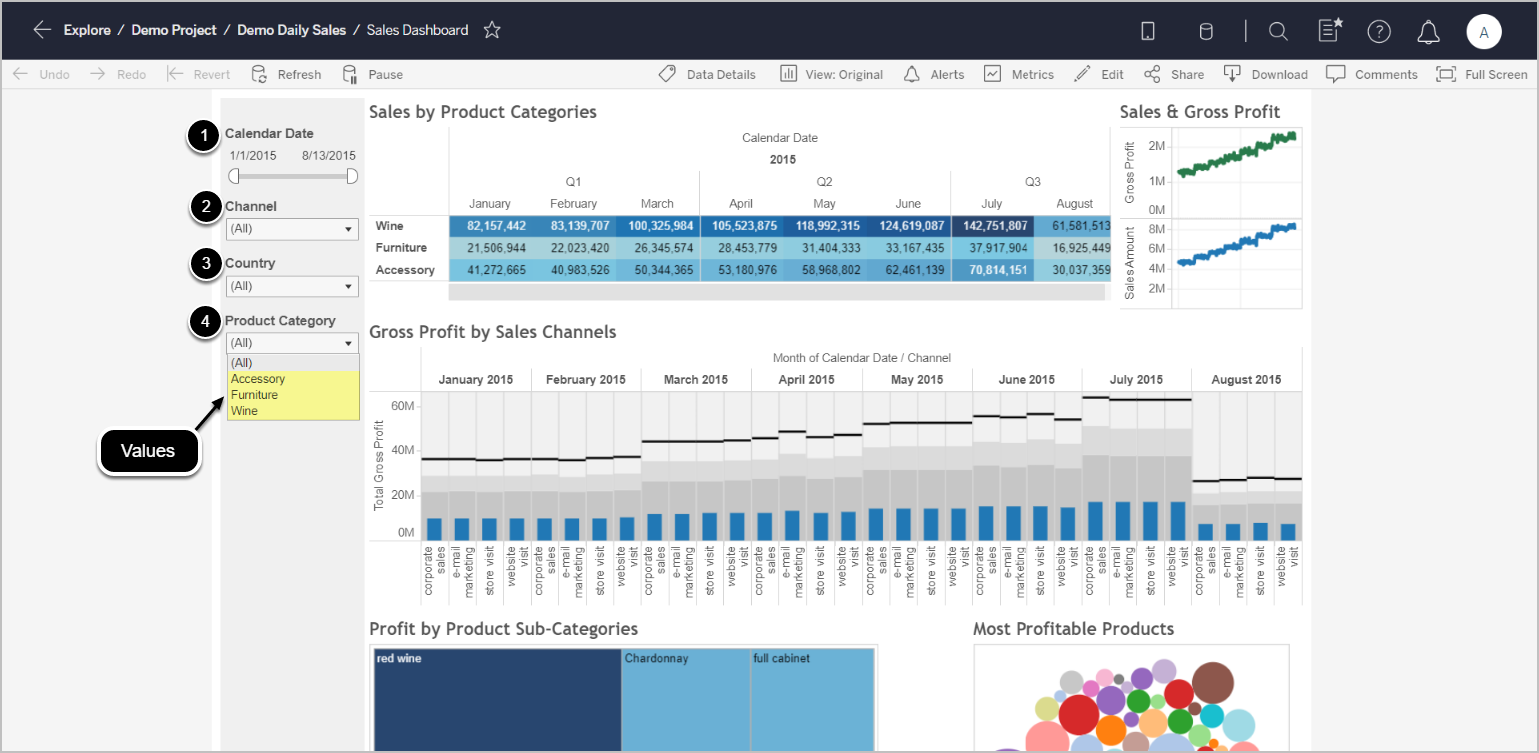
Most of the data displayed on the Tableau Views can be filtered by different criteria. You can choose to include all measurements or exclude information that is currently irrelevant for you.
On the example below, all available filters are located to the left of Sales Dashboard. They can also be located at the top or to the left of the View. The given example allows modifying the View by including or excluding values from the following filters:
- Calendar Date
- Channel
- Country
- Product Category
PARAMETERS
You can pass Parameters in the same manner as Filters. In Metric Insights UI, they can be considered Filters.
NOTE: The Parameter names can be hidden or different than is what is in the UI. Inspect the page to find the right name.
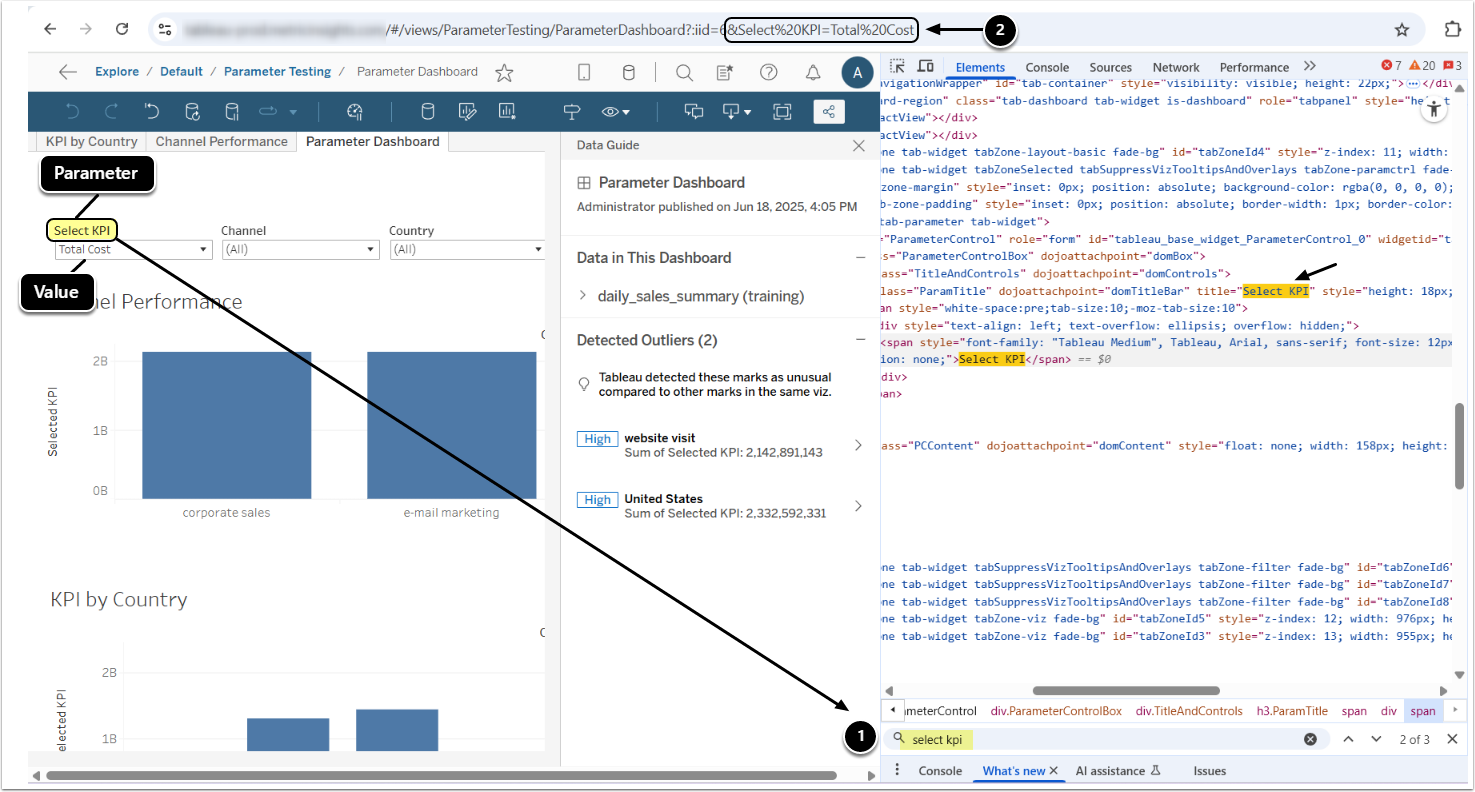
- Inspect the page to identify the Parameter name.
- If the Parameter/Parameter Value contains two or more words, replace spaces with either %20 or an underscore (_), depending on the required format.
- To test it, append &ParameterName=ParameterValue to the Tableau URL and check if the intended page opens correctly with the Parameter applied. If the page loads correctly, this confirms the correct Parameter-Value pair to use in Metric Insights, i.e.: Select20%KPI and Total20%Cost.
2. Define a Source Object for Data Collection
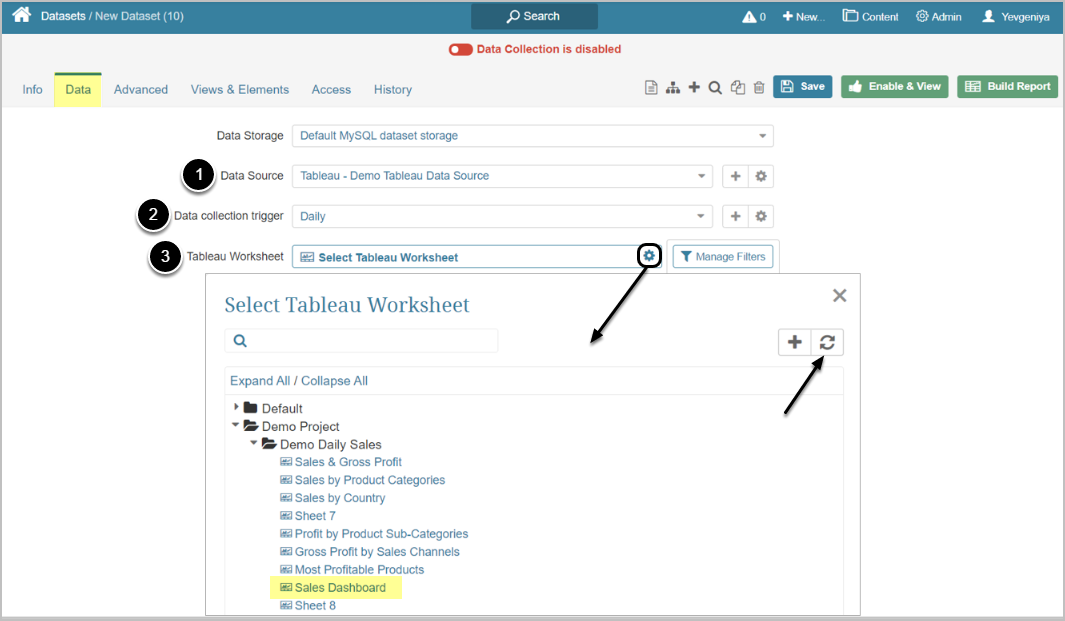
Start by creating an element. Once you get to the process of Data Collection, define the following:
- Choose Data Source that connects Tableau and Metric Insights.
- For more information, see Establish Connectivity to Tableau Server
- Choose Data Collection Trigger that is going to initiate updating information in this Element
- Choose Tableau Worksheet from the pop-up list of available Tableau objects that can be a source of data
- Each item in the list is represented as the path (hierarchy) to the respective Report in Tableau.
- If the required item is not displayed, click the Refresh icon at the upper right corner of the pop-up
3. Adding Tableau Filters to Metric Insights
Once filters are added to a Metric/Dataset or External Report for the first time, they are going to be automatically added to all new respective elements with the same Data Source/Report.
NOTE:
- External filters are tied to Tableau Worksheets, not Metric Insights' elements. This allows Filters to be reused for multiple elements (without creating new Filters every time an element is created in Metric Insights).
- If there are more External Filters or Filter Values that you would like to use for the current element, you can always set the redundant ones to "ignore".
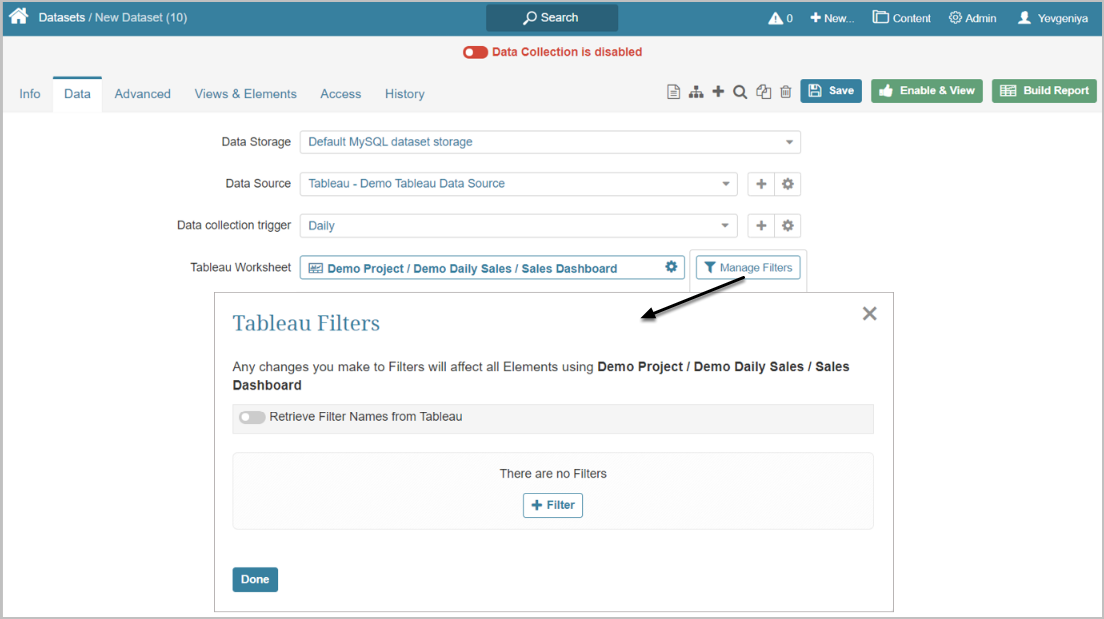
When creating a Metric/Dataset/External Report from Tableau, after you define the Worksheet that should serve as a Data Source, you may pre-filter information that is going to be fetched.
- Under Manage Filters, you can toggle on Retrieve Filter Names from Tableau. The system will auto-collect all available Tableau filters.
- Under Manage Filters > [+Filter], you can choose one of the five options for adding filters individually. Sections below provide information on how to do this.
NOTE:
- Examples given below are taken from the Tableau Worksheet shown at the top of the page.
- Tableau Filter Name must exactly match filter names from a Tableau Worksheet. Filter names are case sensitive. Unless the match is exact, the Filter will not work.
3.1. [NOT RECOMMENDED] Load Filter Values from Tableau
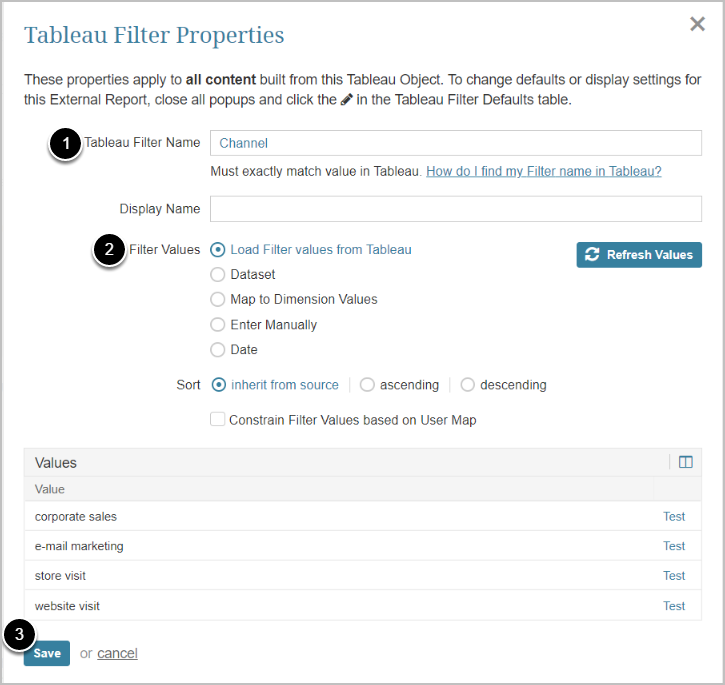
- Enter Tableau Filter Name
- Choose the corresponding option for filter creation
-
[Save]
- Filter Values will be loaded automatically in the Values grid
3.2. Dataset
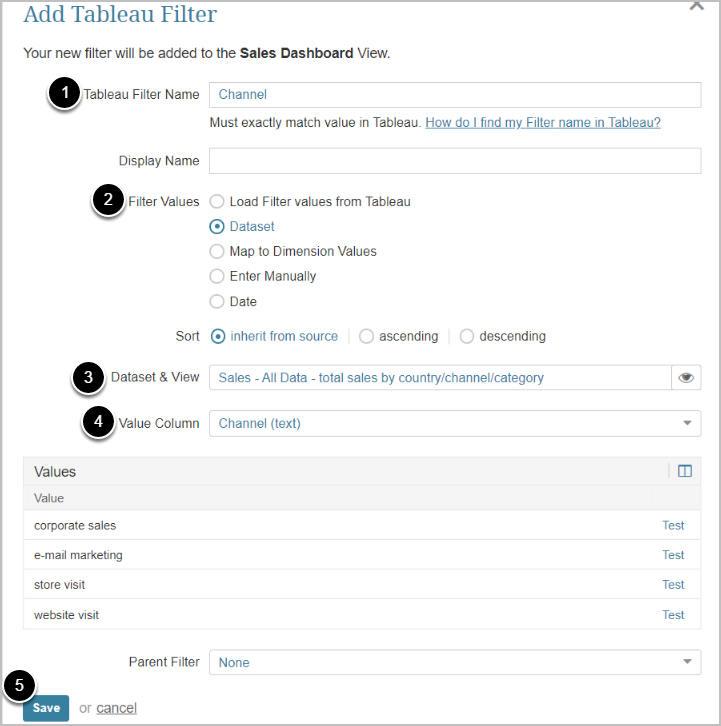
If you have already created Datasets from Tableau in Metric Insights, you can choose one for pre-filtering:
- Enter Tableau Filter Name
- Choose the corresponding option for filter creation
- Select Dataset & View
- Specify Value Column
- [Save]
NOTE: Datasets used here must have Values that exactly match the Filter Values in Tableau (if the Values do not match, the Filter will not work).
3.3. Map to Dimension Values
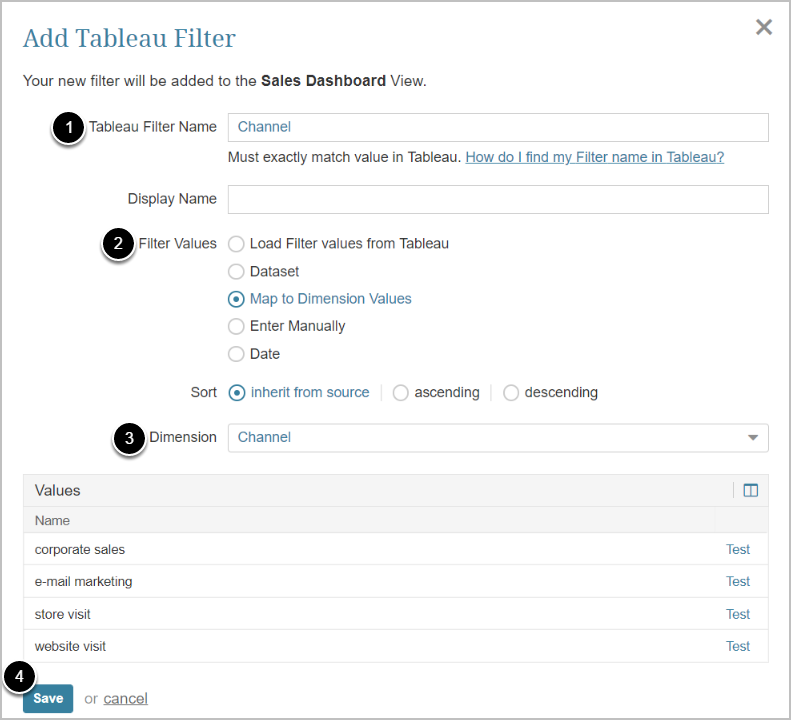
If you have already used Tableau filters to create Dimensions in Metric Insights, you can quickly choose which Dimension Values you want to use for pre-filtering:
- Enter Tableau Filter Name
- Choose the corresponding option for filter creation
- Select Dimension
- All Dimension Values are going to be loaded to the Values list automatically
- [Save]
NOTE: Dimensions used here must have Values that exactly match the Filter Values in Tableau (if the Values do not match, the Filter will not work).
3.4. Enter Manually

- Enter Tableau Filter Name
- Choose the corresponding option for filter creation and [Save] to display the [+Add Value] button
- [+ Add Value]
- Enter the name of the filter value
- [Save]
- [Save]
3.5. Date
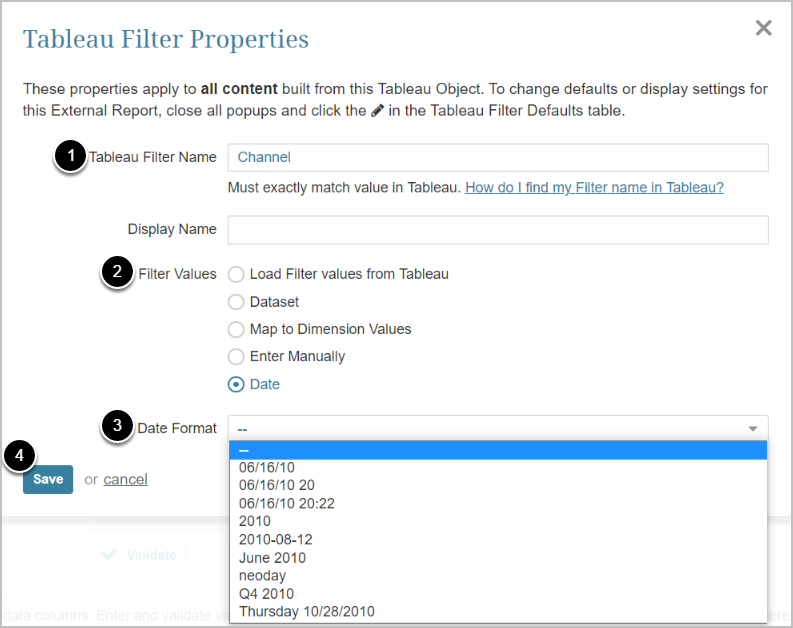
- Enter Tableau Filter Name
- Choose the corresponding option for filter creation
- Select Date Format used in Tableau
- [Save]
4. Adding Filters to a Results Set from Tableau
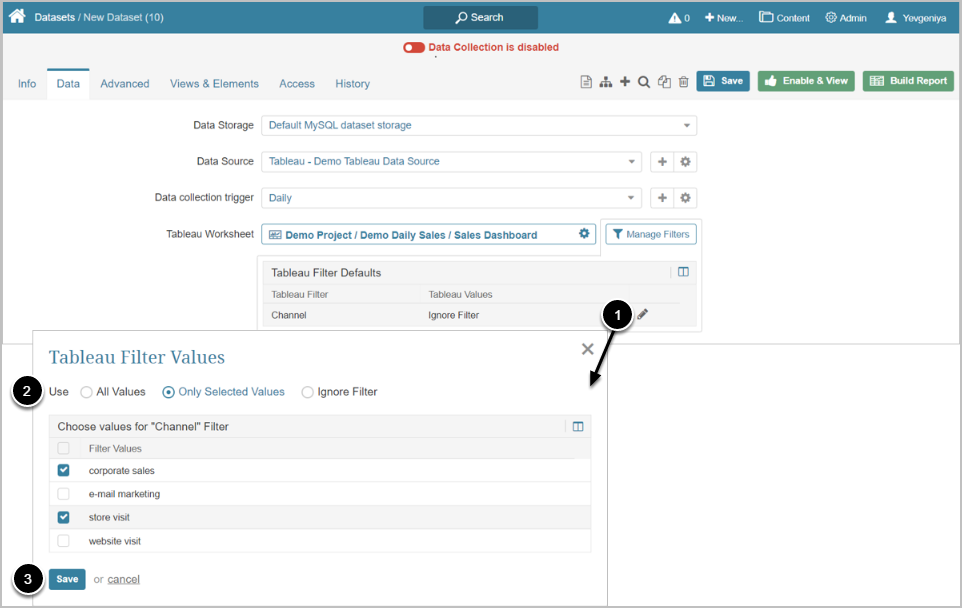
- Click the Pencil icon in the filter row
- Choose how you want to use the filter
- [Save]
5. Deleting Filters
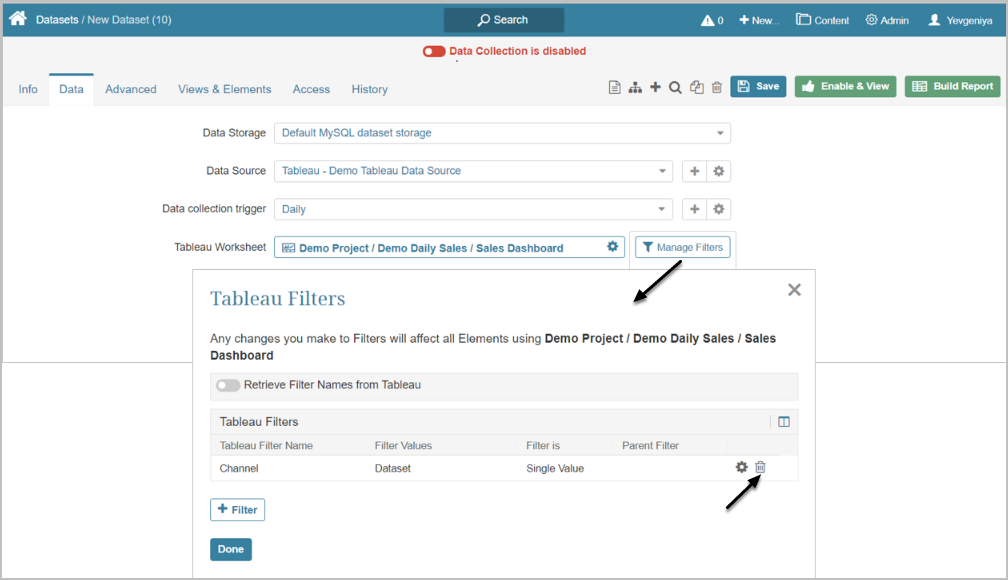
From Manage Filters, click the Trashcan icon next to the filter and confirm your consent.