Admins and Power Users have an ability to create Metrics from a Dataset View. This way the User can minimize the number of data entry fields that are usually required to create a Metric. This article describes how to create a Metric from Dataset View.
PREREQUISITES:
NOTE: Since Metrics always represent time series data, the source Dataset View must contain a date column and a column with values.
1. Open a Public Dataset View
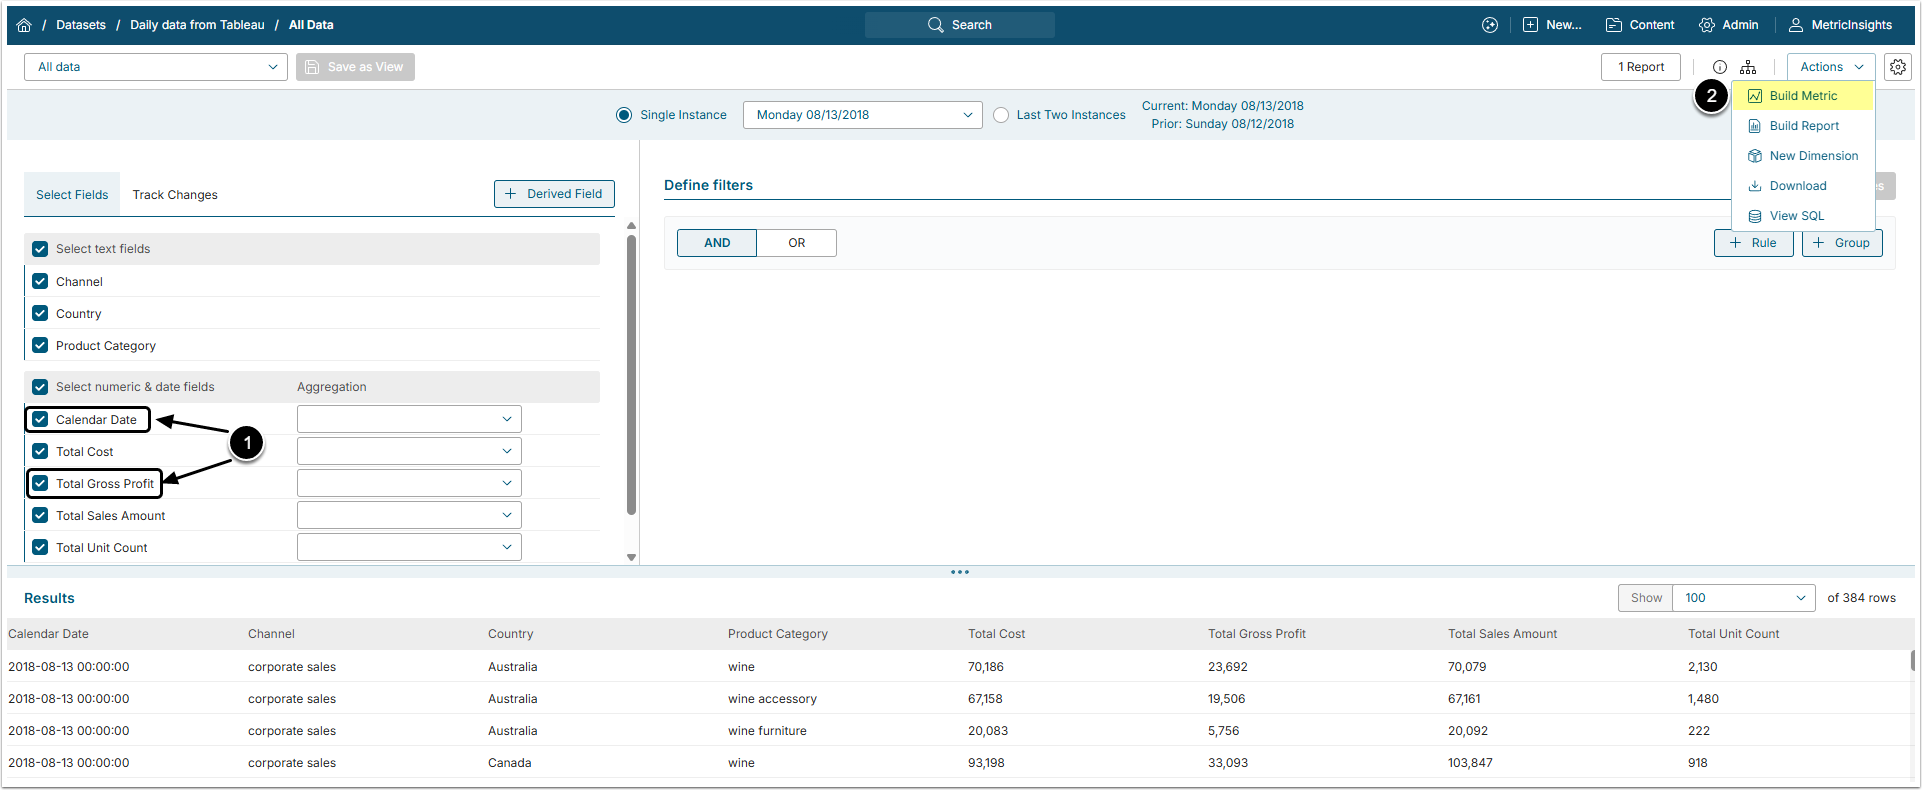
- Ensure that the selected View has a date column and a column containing values. If your Dataset is a snapshot, the Snapshot date may serve as a date column.
- For more details about snapshot Datasets, refer to the Snapshot Datasets Overview article.
- At the top right corner of the page, open the Actions menu and select the Build Metric option.
- If this Dataset View was Private, the system will automatically make it accessible to other users (Public).
- If at least one Element (Report or Metric) has already been built from this View, it cannot be changed to Private.
2. Define the Basic Settings
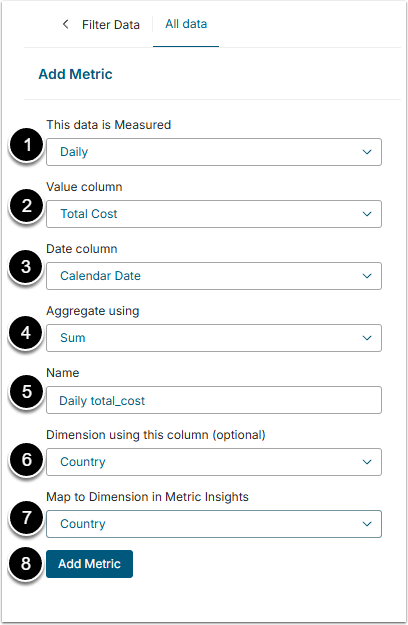
- This data is Measured: Select the Measurement Interval that applies to the level of aggregation that you want in your result set.
- Value column: Select the name of a numeric field containing values.
- Date column: This may be either a date column from the Dataset or the Snapshot date, if applicable.
- Aggregate using: Select how to aggregate the values.
- Name: Is populated automatically based on the selection made in the fields above, but you can change it to a unique and descriptive name of your choice.
- Dimension using this column: Dataset's text columns may serve to Dimension the Metric, meaning creating a separate Chart per each Dimension Value.
- Map to Dimension in Metric Insights: If you already have a Dimension with values matching to those in the selected Dataset column, you can choose it from the drop-down list; otherwise, you can create one on the fly by clicking: "None - create new Dimension".
- [Add Metric] to save these settings and preview the resulting Metric.
NOTE: Settings such as Data Source (the method used to fetch the data) and Trigger (how often this Metric is updated), and Category, are automatically inherited from the source Dataset.
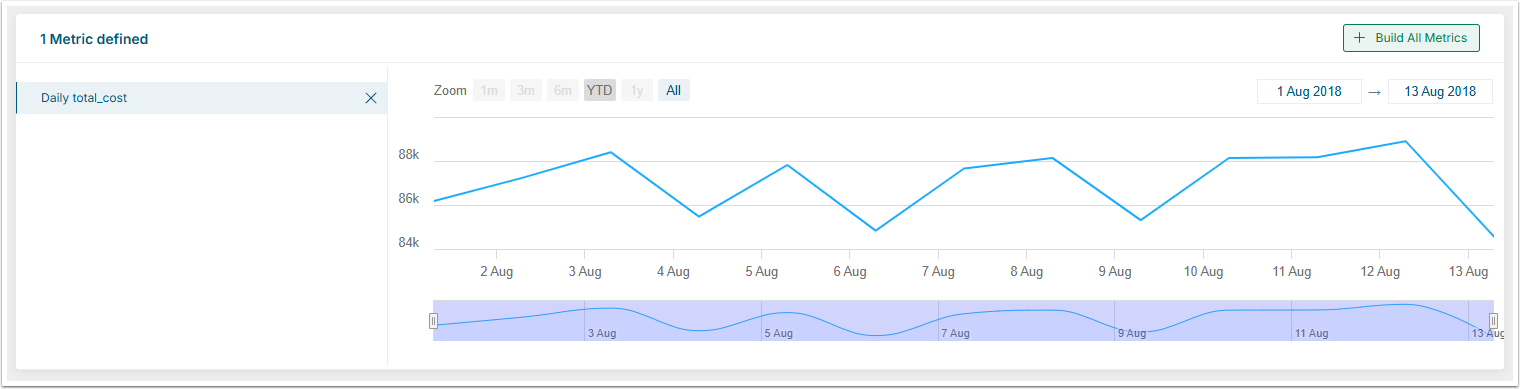
Preview the Resulting Metric
If only one Metric is being built, click Build Metric and let the system finish the procedure.
3. Build Additional Metrics
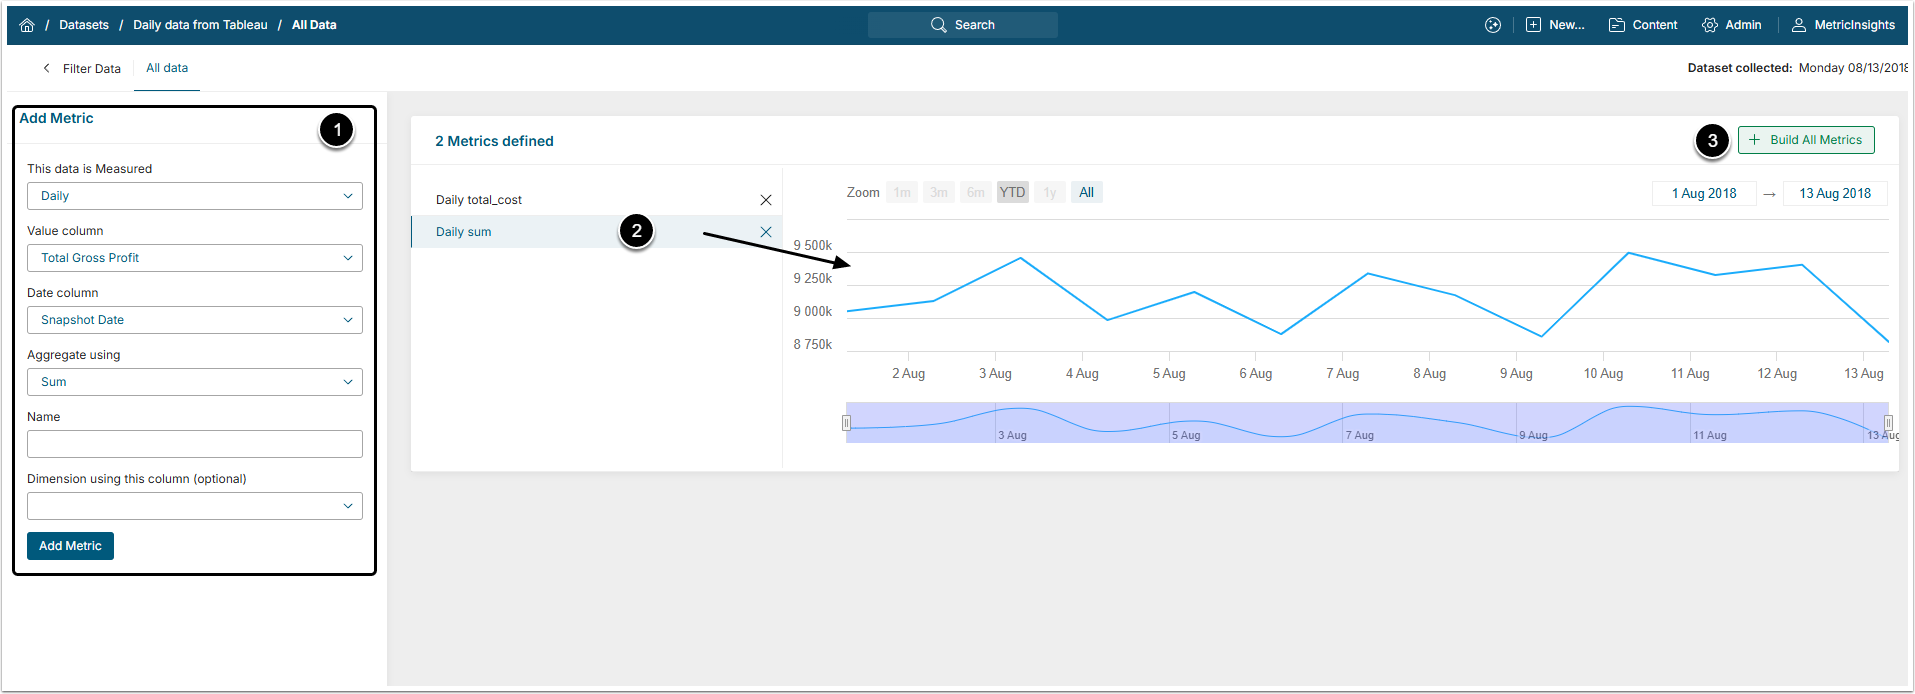
Be aware, that Metrics in the Metrics defined section are just prepared, they are not built yet.
- Change the settings in the Add Metric section to build another Element.
- Preview any of the prepared Metrics by clicking the name of the Metric.
- When ready to publish all Metrics, click [Build All Metrics].
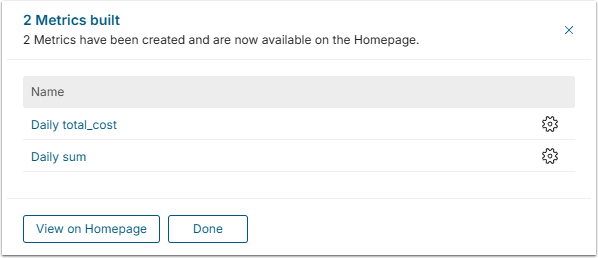
4. View Result
The Metrics that have been built are available on the Homepage.