Dimensioned Multi-Metric can be created using the same procedure as for an Undimensioned Multi-Metric, except that once you designate the Multi-Metric as being "Dimensioned", only Undimensioned Metrics and those Metrics dimensioned by the same value will be available for inclusion.
For more details on how to create an Undimensioned Multi-Metric, check here
NOTE: As of version 7.0.1, the Multi-Metrics feature is no longer supported.
1. Create a New Multi-Metric
Access +New > Metric > Multi-Metric

- Name: Give the Multi-Metric a descriptive name
- Dimension by: Select a Dimension from the drop-down menu
- Category: Choose the Category to which place the Multi-Metric
- [Next: Define Details] to open the Multi-Metric Editor.
2. Complete the Info Tab
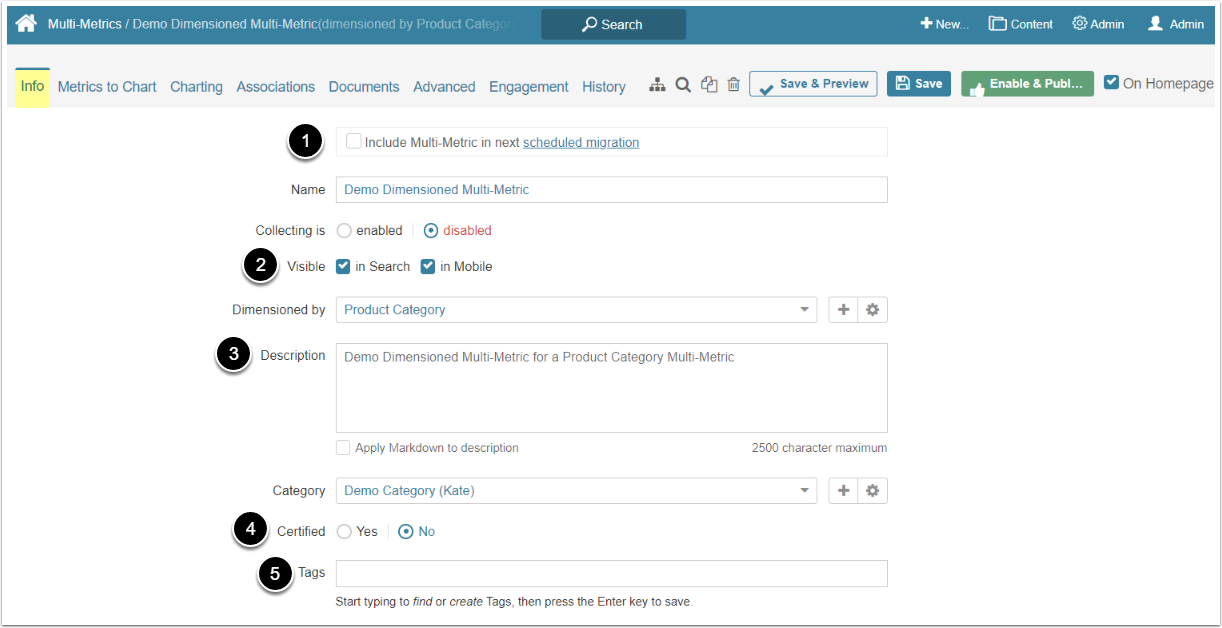
- Select this checkbox to migrate content using our Export/Import Migration Scripts
- Visible: Choose whether the Multi-Metric will be visible in Search results and on Mobile devices
- Description: This field defaults from the Name, but if this is not sufficiently descriptive, you may change it
- Certified: Certification is a means for Admin and Power Users to identify elements that have been approved as being valid and accurate
-
Tags: Tags are used to relate Elements to each other for purposes of identifying similar Charts when the See Related drop-down list in the Metric Viewer is populated allowing a more in-depth analysis of trends
- For more details refer to Create a Tag
3. Add Metrics
Open the Metric to Chart tab
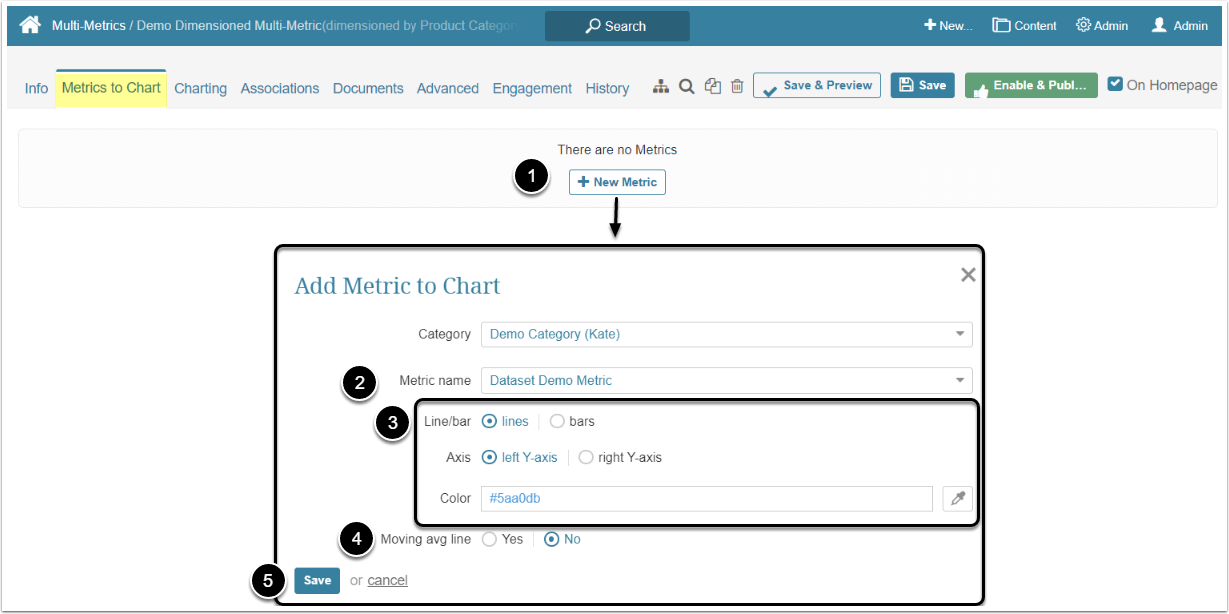
- [+ New Metric]
- Metric name: Select the Metric from the dropdown that contains Undimensioned Metrics and Metrics dimensioned by the same Dimension as your Multi-Metric
- Select visual charting options for this Multi-Metric
- [Save] the changes
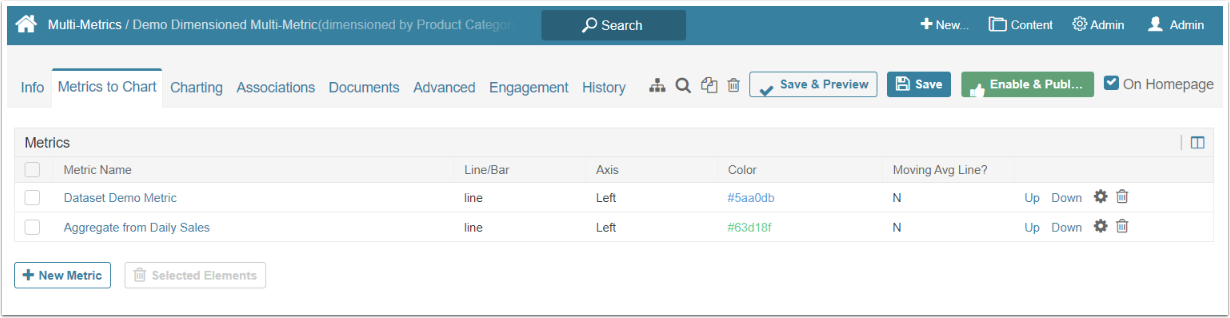
Repeat those steps to add as many Metrics as necessary.
4. Check the Grid
Click [Enable & Publish] to view resulting Chart.
To make some changes to the Chart appearance – go to the Charting or Advanced tabs. The functionality there is the same as for the regular Metrics, so for more details, check the Metric Editor Overview article.