This article will guide you through the process of creating a Dimensioned External Report sourced from Tableau.
PREREQUISITES:
- Data Source: Make sure you have already established connection to a Tableau Server
- Dimension: Before proceeding to creating an External Report, create a dimension with values collected from Tableau.
As of Release 5.4.1, you can create a Dimension with Multiple Values.
- To build Visualizations for multiple Filter selections, besides adding Multiple Values to your Dimension, you also need to specify the delimiter for Multiple Dimension Values in the "Advanced Configuration" section for the Tableau Data Source. To learn more, refer to Establish Connectivity to Tableau Server
- The Delimiter that you specify in the Tableau Data Source Editor must match the Delimiter you used when creating a Dimension with Multiple Values.
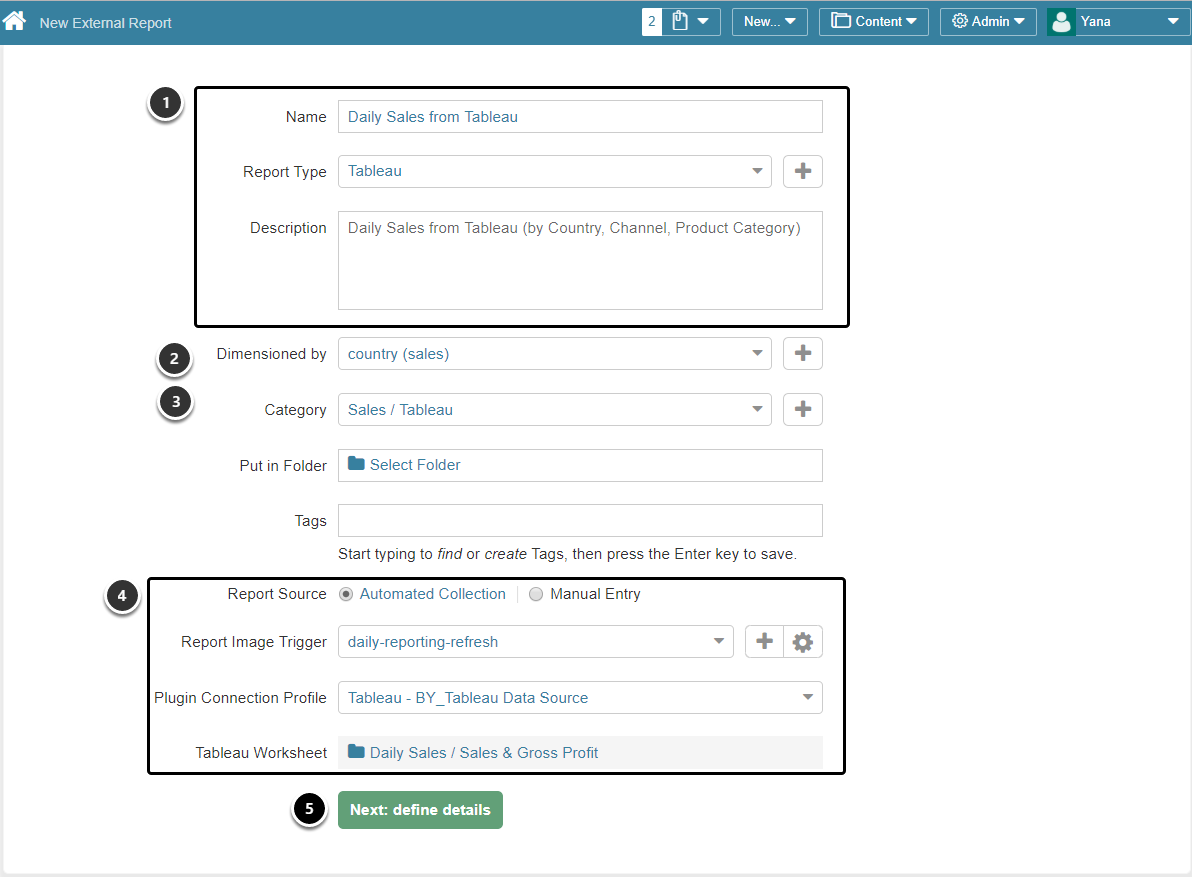
1. Access New > External Report > Tableau
NOTE: If there is no Tableau Report Type in the list, you can create one by following instructions in this article: Create a new External Report Type
- Give your new report a Name, preferably matching the name in Tableau
- Choose the Dimension you have created as a prerequisite to creating an External Report (For more details refer to: Create a Dimension with Values collected from Tableau). This Dimension must be mapped to the corresponding Tableau Filter. See details in Step 3 below
- Specify a Category for your External Report
- Define whether you want Report content to be updated manually or automatically. In case you choose Automatic Collection, define the following settings:
- Define how often you want the External Report image to be updated by choosing one of the triggers in the Report Image Trigger field. You can create a new Trigger on the go by scrolling down to the bottom of the drop-down list and selecting an Add New Data Collection Trigger option
- Select an existing Plugin Connection Profile
- Select a Tableau Workbook and Worksheet available for that connection profile
- Click Next: define details to proceed with Report creation
2. Define Display options for your External Report
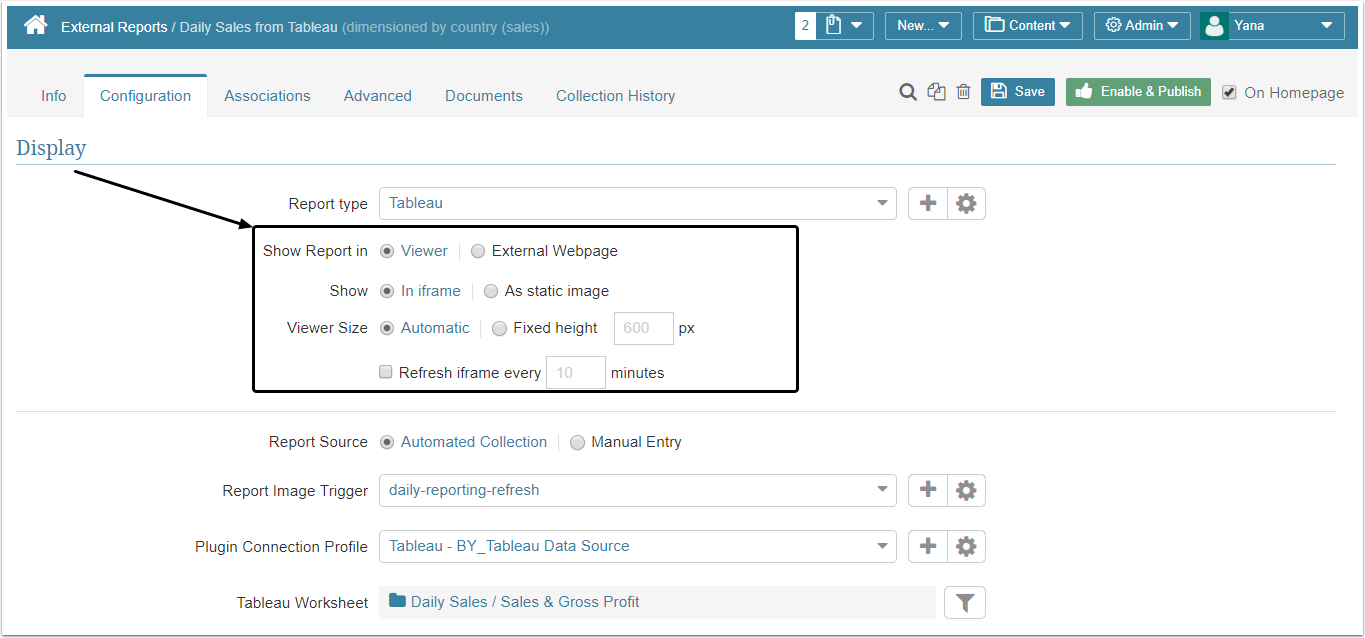
Most of these fields will be completed based on your previous entries. Adjust as required.
Show Report in: two options are available:
- External web page [default]: user is redirected to the corresponding Tableau page
-
Viewer: the Tableau external Report is embedded into the Metric Insights Viewer. There are several ways to display your External Report in Viewer:
- in iframe: selecting this option also allows to define Viewer Size as "automatic" or "fixed-height", and if required, to switch on iframe refresh
- as static image: to see the Report as a static image, this image has to be first collected in the Report Editor (Step 4 shows how to collect a Report image)
3. Add the "Required" and "Optional" External Filters
NOTE:
- If your External Report is Dimensioned, you must map the Dimension you have used for this Report to the corresponding Tableau Filter (this External Filter is considered "required"). Otherwise, you will not be able to save your Report.
- Adding any other Filters is optional. These Filters may be edited to allow the Tableau plugin to fetch data for all or selected Filter Values.
- For more details on Tableau filters: How to find Filter names in Tableau
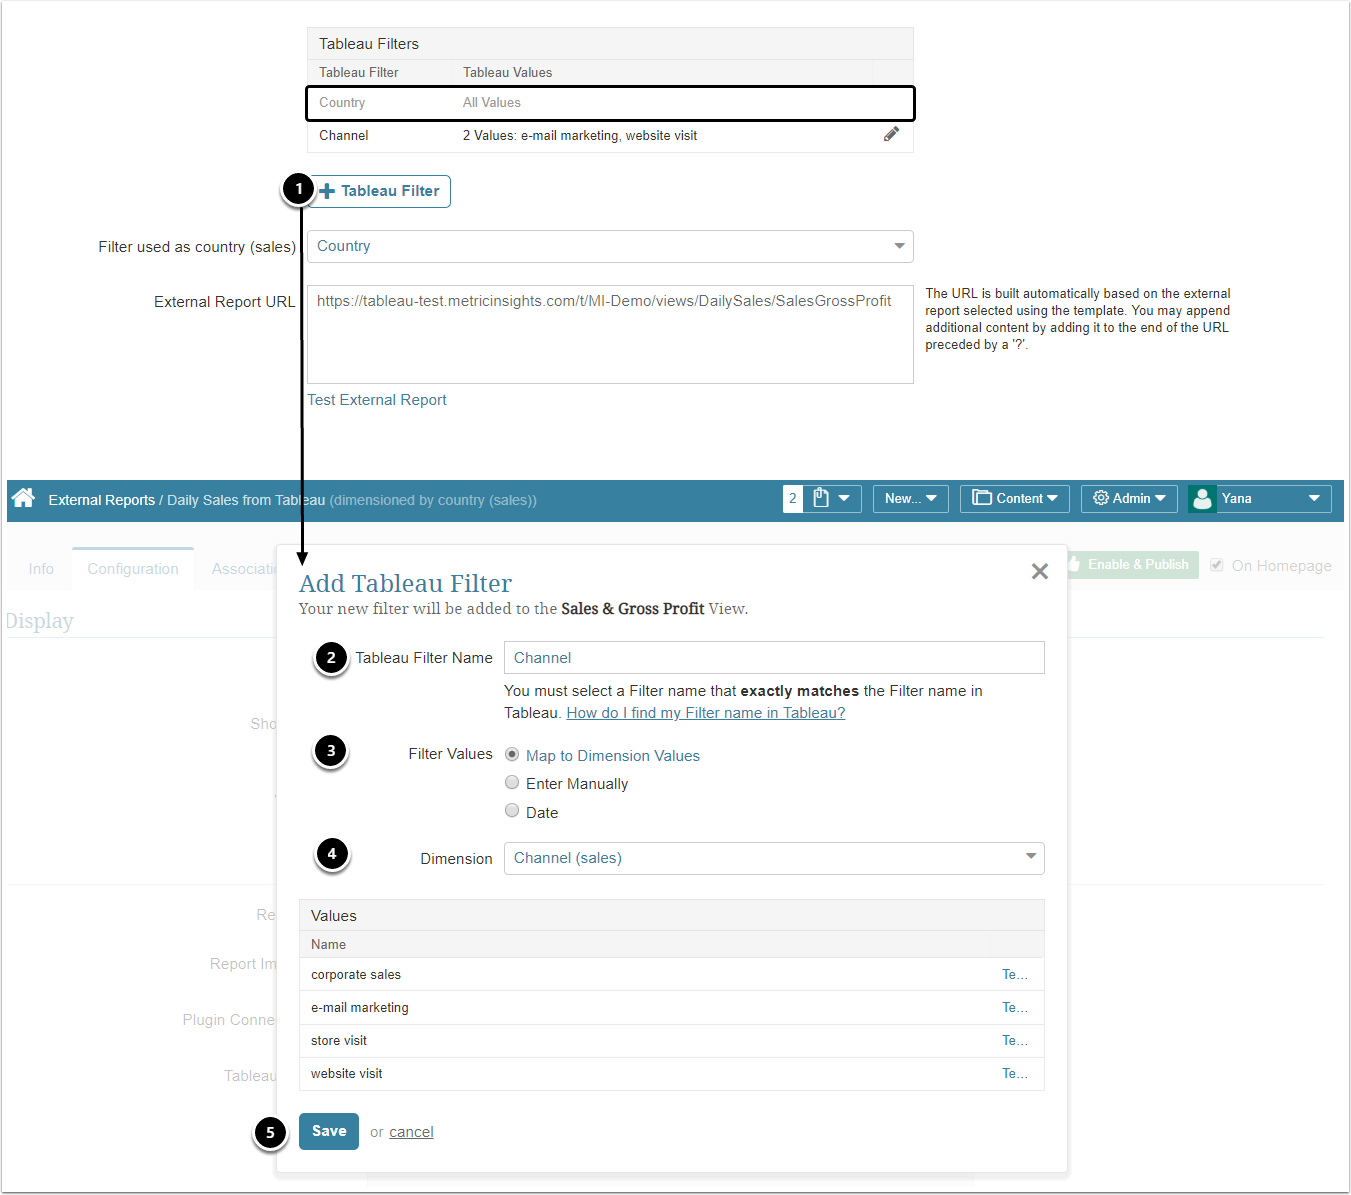
To add an External Filter for Tableau:
- Click [+ Tableau Filter]. The Add Tableau Filter pop-up opens
- Tableau Filter Name: Copy the name of the filter from Tableau
- Filter Values: choose "Map to Dimension Values" if you want Dimension Values to be loaded to the Values list automatically
- Dimension: select the Dimension that you have previously created and its values will be loaded to the values list
- Save your selection to confirm your actions
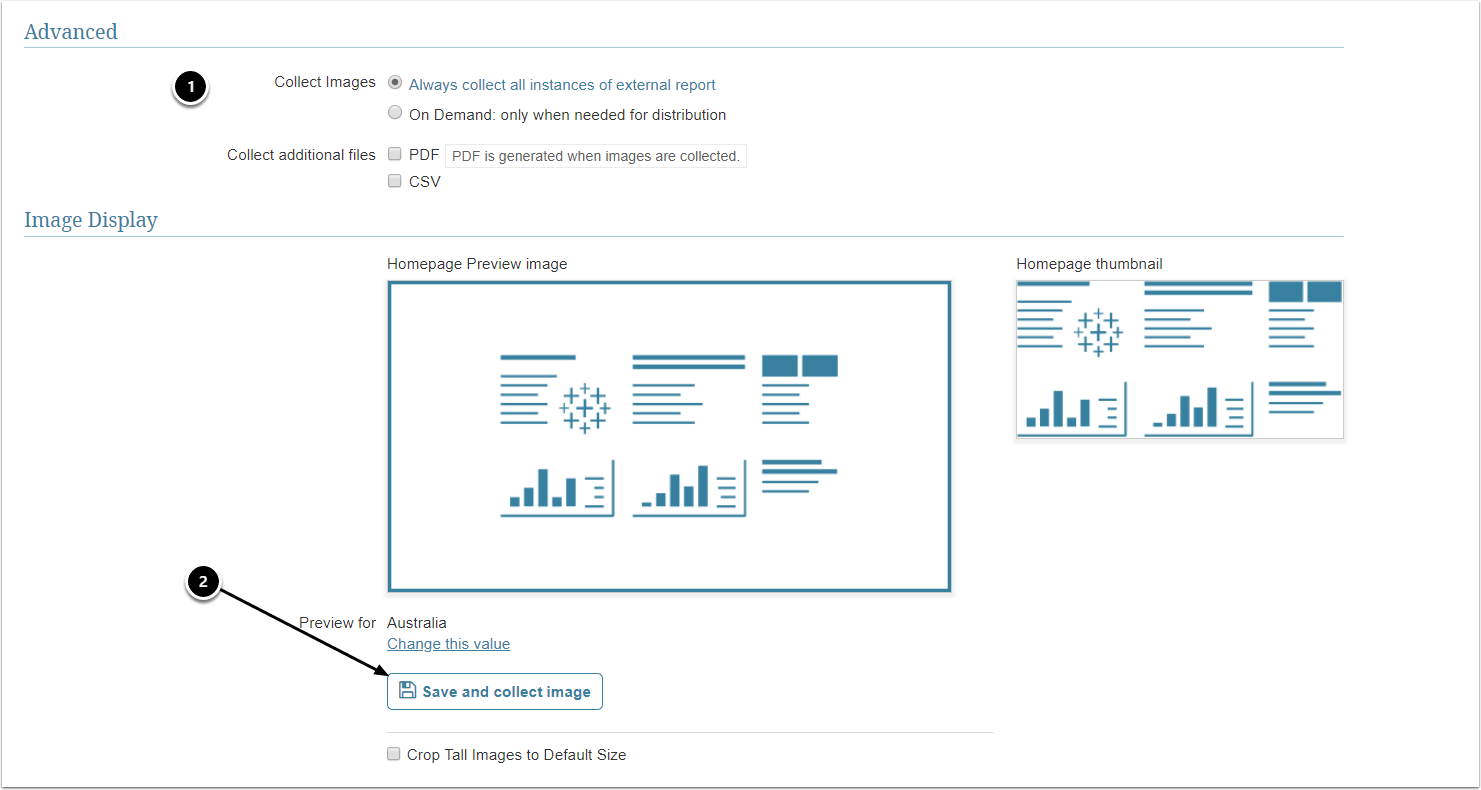
4. Collecting an Image
-
Collect Images:
- Always collect all instances of external report: Collect all images and cache them on a schedule
- On Demand: only when needed for distribution: Individual images are only collected when they need to be included in an email.
Example:
One of your external reports is dimensioned and has 50+ Dimension Values. You may either choose to always update images for all of them after the data collection trigger runs or select On Demand image collection (when it should be included into Digest, shared, etc.)
NOTE: This setting is only available if the element is NOT made visible on Homepage.
- Click Save and collect image to create the Preview and Thumbnail images for display on the Homepage and Notifications.
- This step is required if you chose to display your External Report as a "Static Image" (if you do not collect image, nothing will be shown in Viewer).
- If you selected "iframe" display, you can omit this step.
5. Enable and Publish

You now have a drop-down list above the External Report where you can filter to each particular Country or several countries at once (if you have configured a Dimension with Multiple Values beforehand).