This article describes how to configure CyberArk authentication for a Data Source by creating an Identity Profile.
- For details on how the CyberArk integration works, see Overview of CyberArk Integration.
1. Create a New Identity Profile
Access Admin > System > Identity Profiles
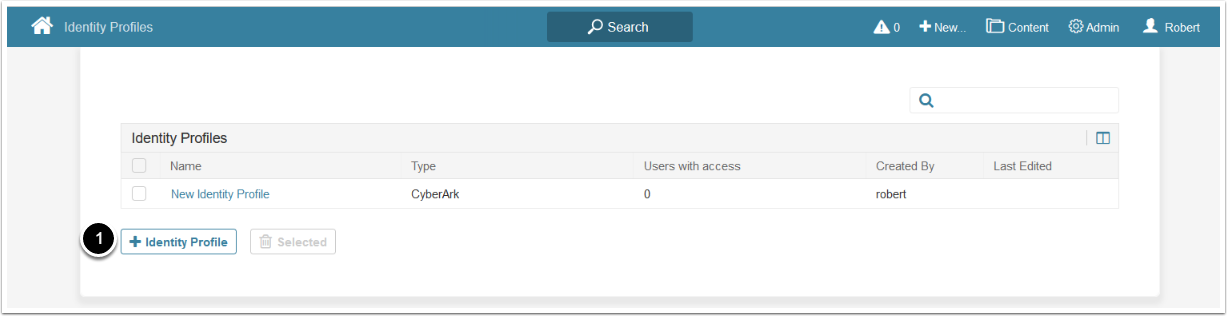
A list page containing all the Identity Profiles opens.
- Below the grid, click [+ Identity Profile]
2. Configure Identity Profile
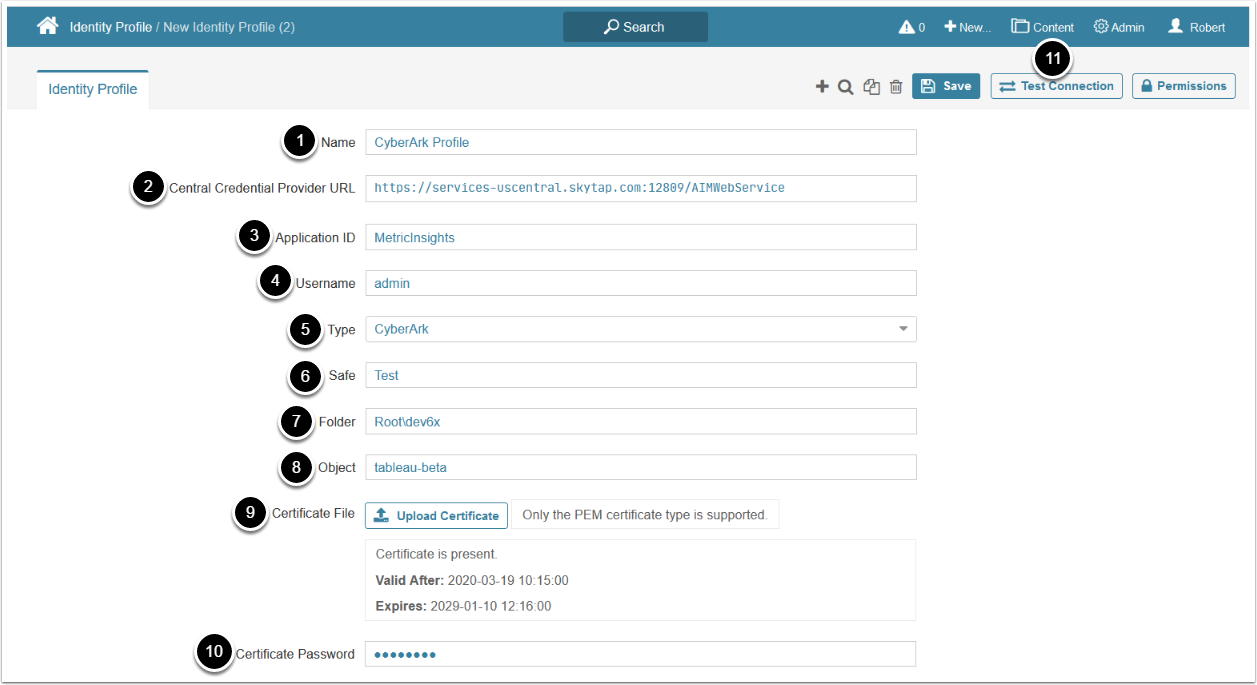
See Where to Find the Parameters for CyberArk Configuration for details on parameters location in CyberArk account.
- Give a Name to the Identity Profile
- Enter Central Credential Provider URL in the following format:
https://<CCP host and port>/AIMWebService - Enter Application ID
- Access your CyberArk account > Applications > Applications List
- Enter Username
- Type: CyberArk
- Enter Safe name
- Access Policies > Access Control (Safes)
- Enter Folder name
- Access Accounts > Accounts View (Classic UI) >Advanced tab
- Enter Object name
- Access Accounts > Accounts View (Classic UI) >Advanced tab > Name parameter
- Certificate File: click [Upload Certificate]
- Enter the Certificate Password
- Click [Test Connection], this will also save your entries
Where to Find the Parameters for CyberArk Configuration
Application ID
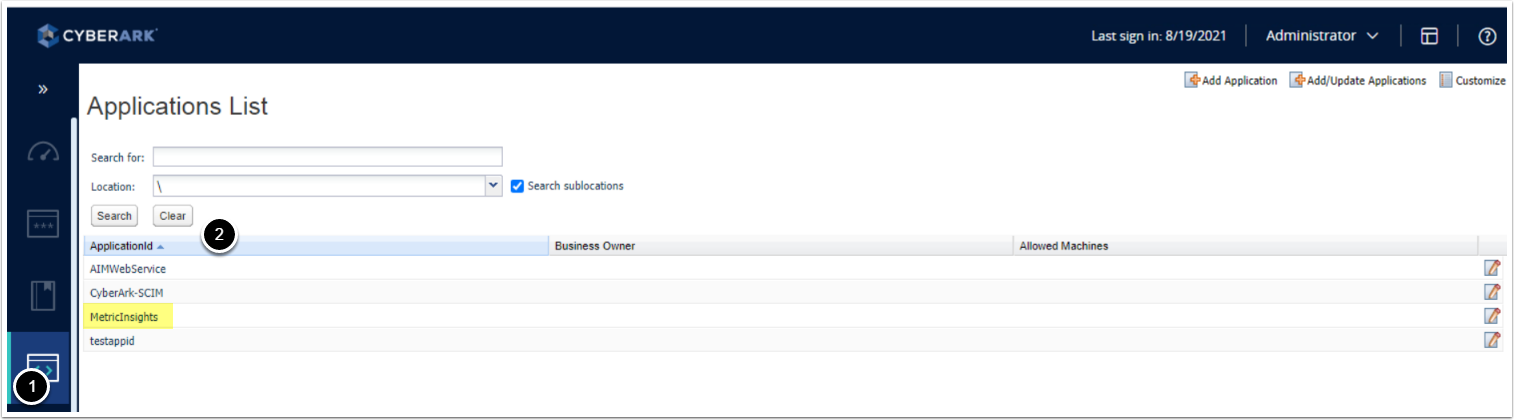
- Access the Accounts tab
- Copy the Application ID from the Applications List
Safe, Folder, Object
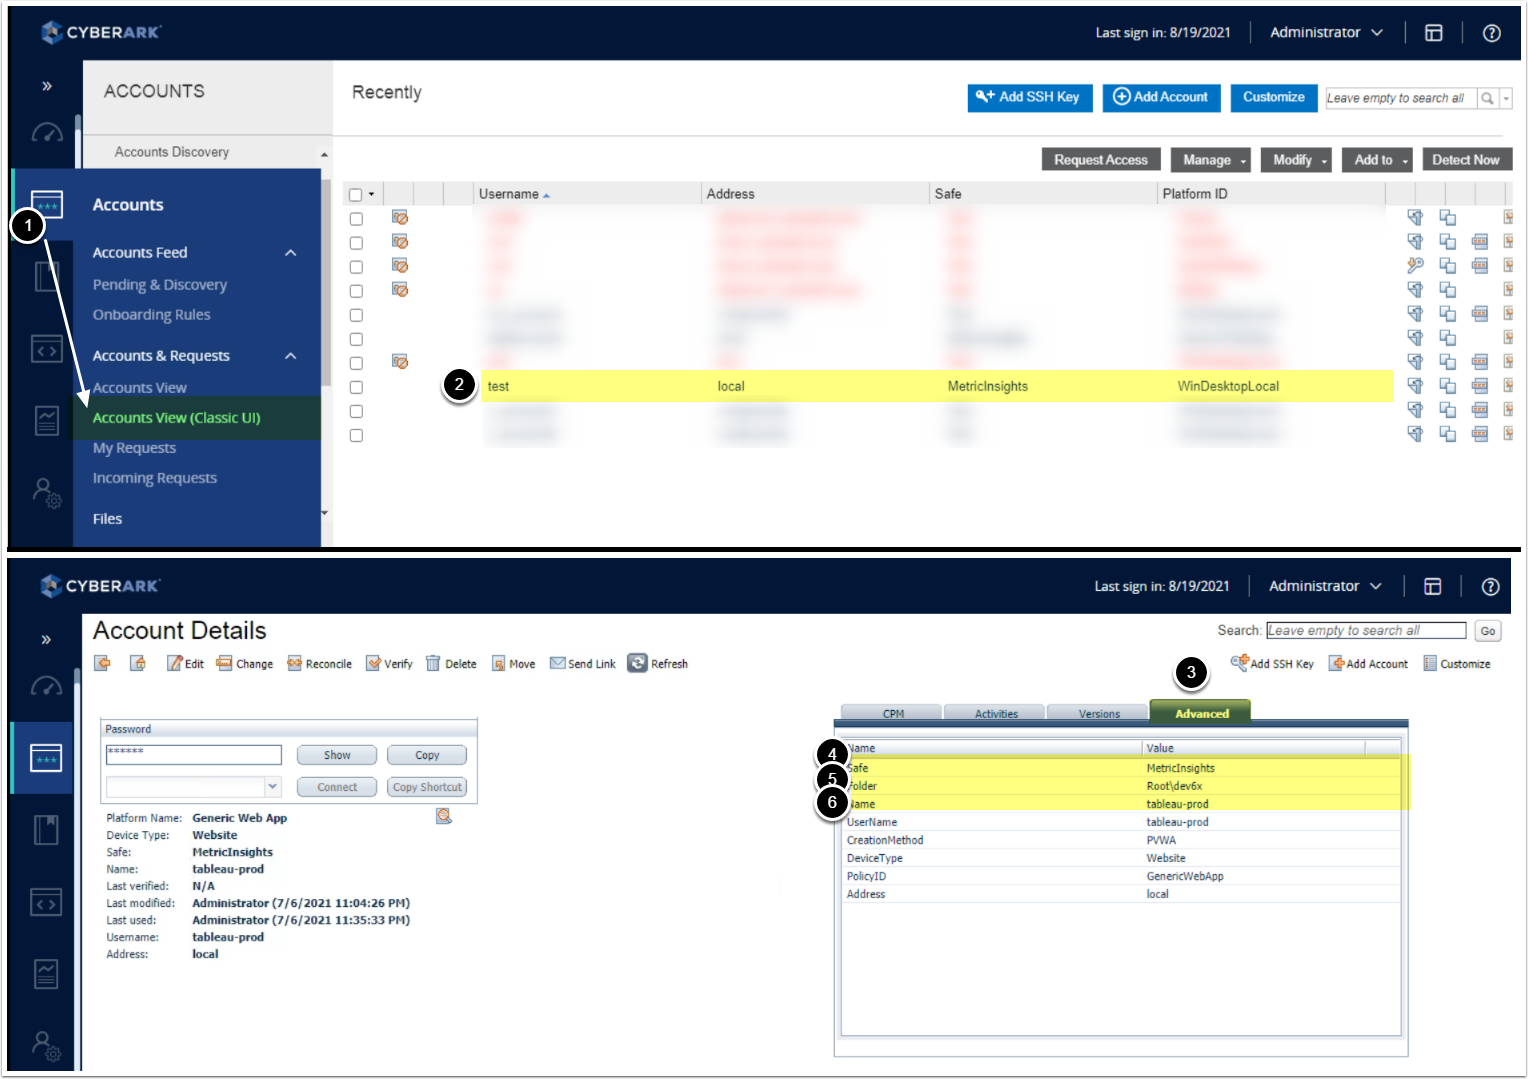
- Access Accounts > Accounts View (Classic UI)
- Click on the Account
- Access the Advanced tab of Account Details
- Safe = Safe
- Folder = Folder
- Name = Object
3. Add the Identity Profile to a Data Source
Access the Info tab of the Data Source
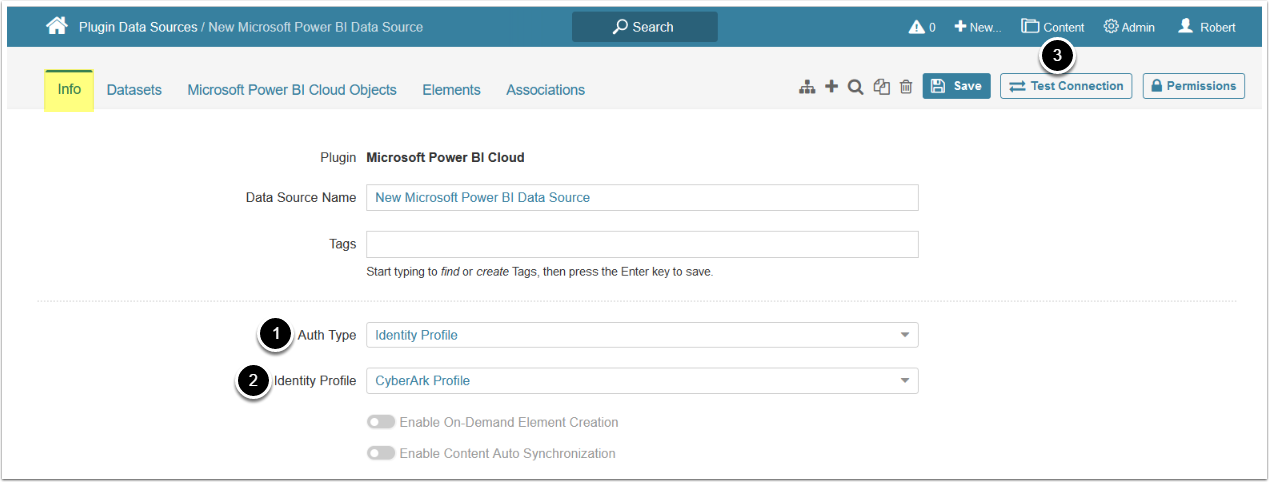
- Auth Type: Identity Profile
- Select the created Identity Profile
- Click [Test Connection], this will also save your entries