Drill-paths are used in Metrics to guide a User to either a Report that provides more details on a specific data point or to some other related Element needed for the further data analysis. This article describes how to create a Drill-path from the Metric to other Element.
For information on creating a new Aggregate, see Create Multiple Aggregates from a Single Metric.
Drill-Paths Types
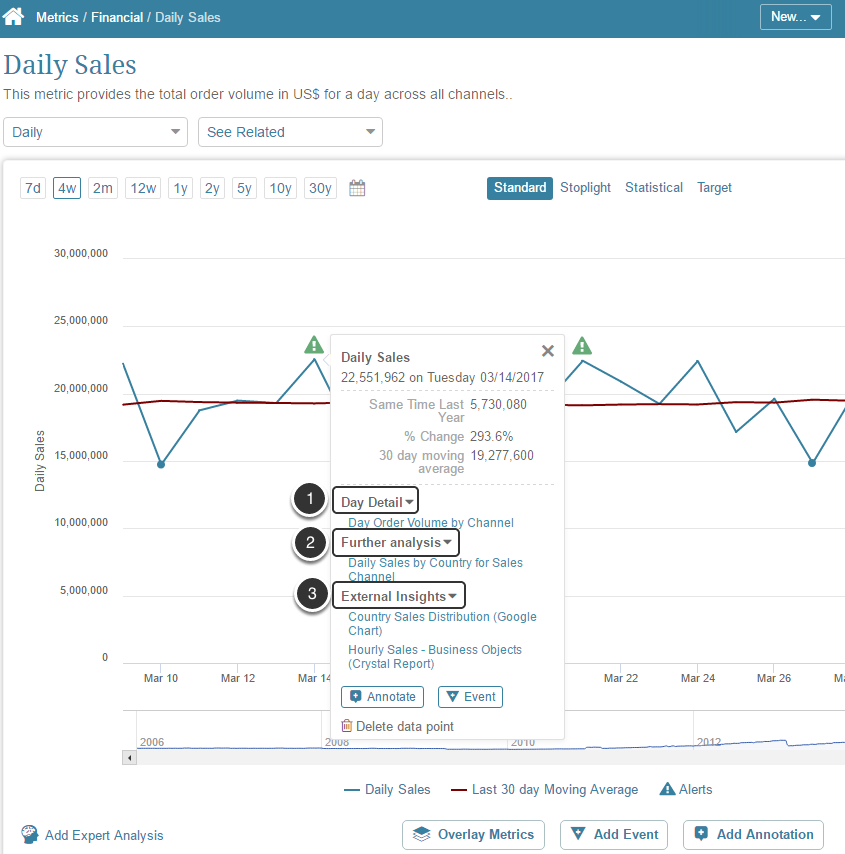
There are three types of Drill-paths in Metric Insights:
- Detail: Is used to provide a shortcut to Report that shows additional details for a specific data point in a Metric
- Further analysis: Is used to provide a shortcut to Element that shows additional details for a specific data point in a Metric
- External Insights: Is used to add path to External Reports that may have insights on data in a Metric
1. Accessing the Associations Tab
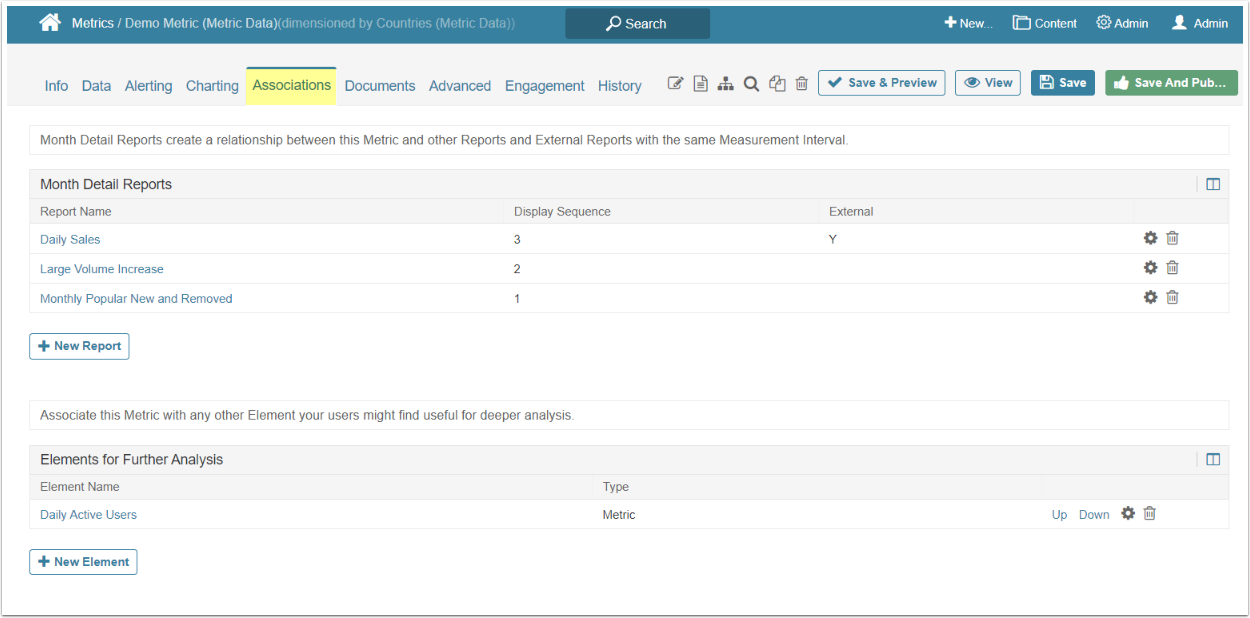
To create a Drill-path, access Metric Editor and open the Associations tab
NOTE: To see any of the added drill-path's on the chart, click [Update] on the top of the page before proceeding to the Viewer.
2. Adding Detail Reports
The title of the Day Reports grid is set based on the Measurement Interval of the Metric. For instance, it will be titled 'Week Detail Reports' for weekly Metrics or 'Month Detail Report' for monthly Metrics.
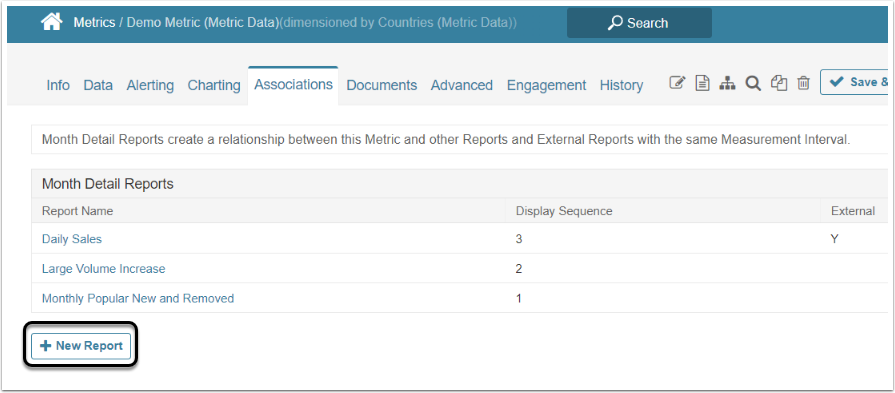
To add a new Report to the drill-path, click [+ New Report].
2.1. Select the Report for Detail drop-down list
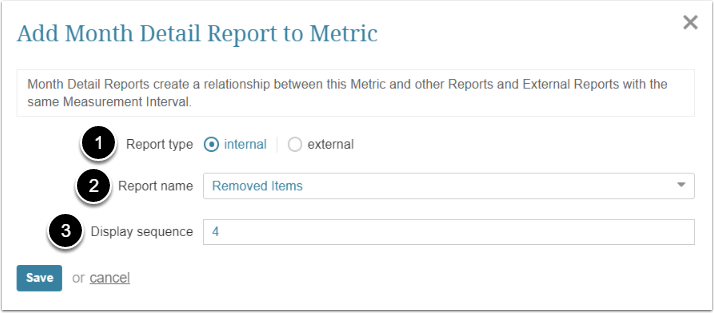
- Report type: Select "internal" option
- Report name: Select a Report to be added to a drill-path from the drop-down list. Reports will only appear in the drop-down if they match the measurement interval of the associated metric AND they keep history
- Display Sequence: Optionally, modify the sequence in which Reports are listed in the Data Point Mouse-over Display
[Save] your entry.
2.2. Select Element for External Insights
External Insights Reports are added in the same Detail Report table as the Detail Reports.
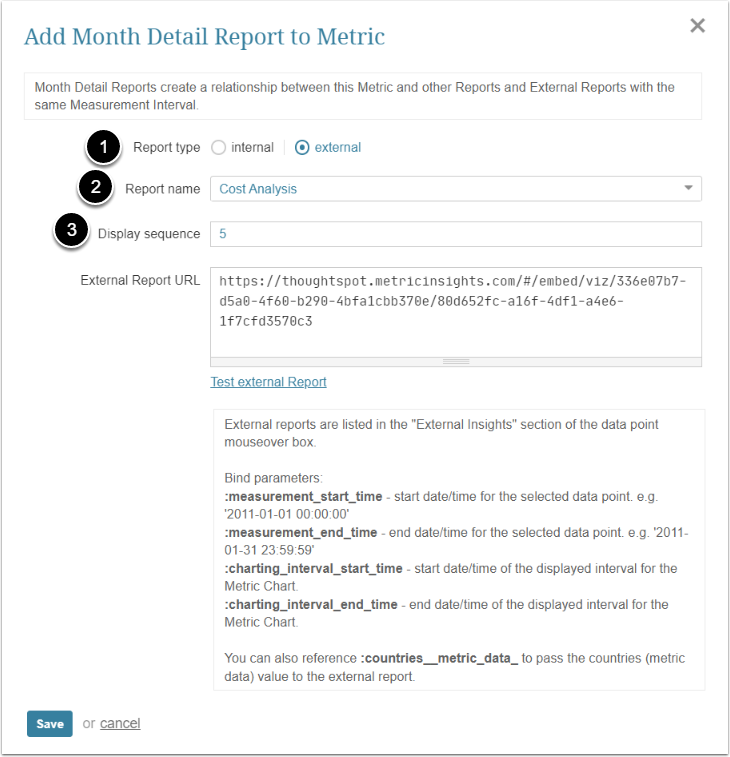
- Report type: Select "external" option
- Report name: Select an External Report to be added to a drill-path from the drop-down list
- If you scroll down to the bottom of the drop-down list, you can create a new External Report on the fly.
- Display Sequence: Optionally, modify the sequence in which Reports are listed in the Data Point Mouse-over Display
[Save] your entry.
3. Adding Elements for Further Analysis
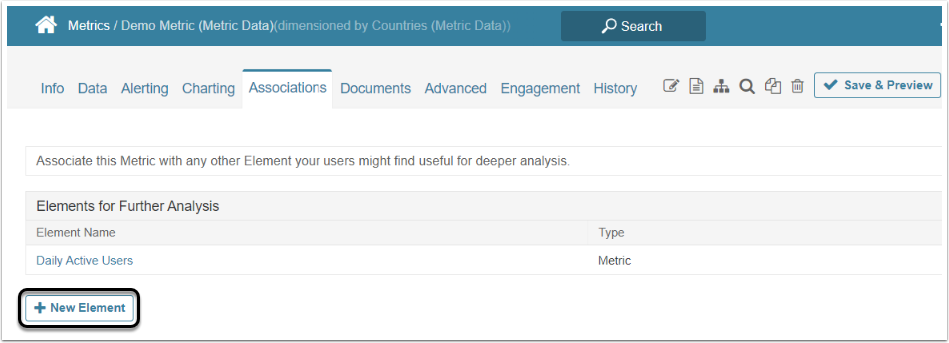
To add a new Element suggested for the Further Analysis, click [+New element] below the Elements for Further Analysis table.
3.1. Select Element for Further Analysis
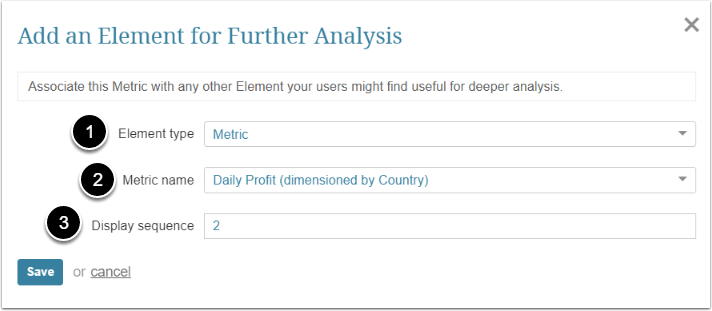
- Element type: Select the type of the Element from the drop-down menu
- Element name: Select the element from the drop-down lists
- Display Sequence: Optionally, modify the sequence in which elements for Further Analysis are listed in the Data Point Mouse-over Display
[Save] your entry.
4. Creating a New External Report for Drill-down on the Fly
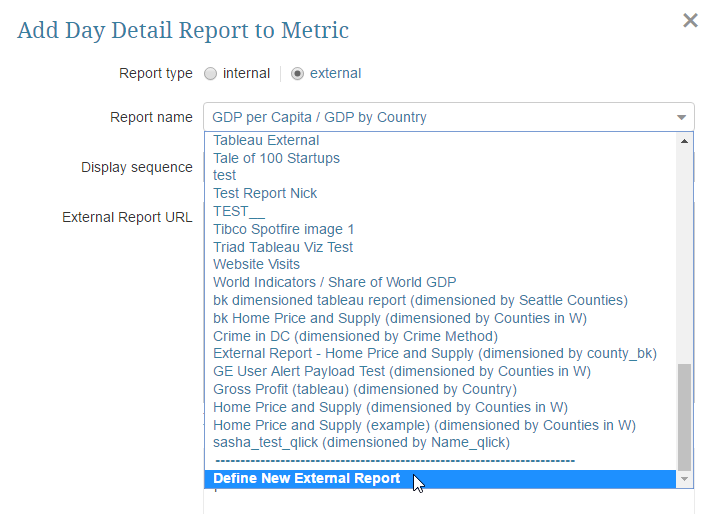
To add a new link to some external resource to the Drill-down path, scroll down to the bottom of the drop-down list, and click "Define New External Report".
4.1. Defining External Report
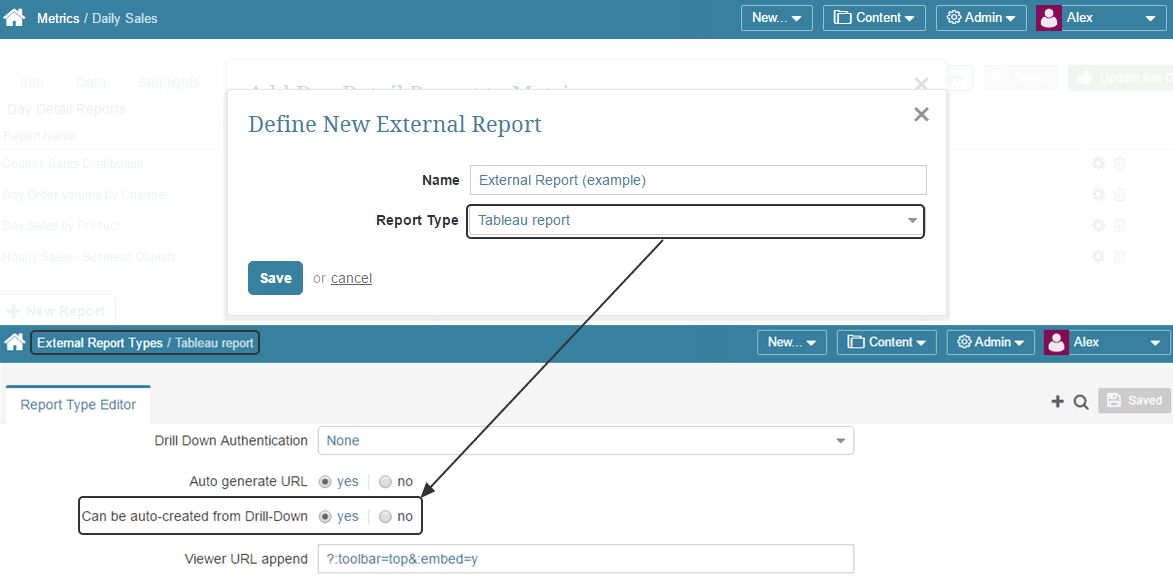
When creating a new External Report on the fly, you are choosing its Report Type from the drop-down list.
NOTE: If the required Report Type is not in the list, go to Admin > Advanced > External Report Types > choose the required Report Type from the list and in the Report Type Editor make sure that Can be auto-created from Drill-Down field is set to 'yes'.
4.2. Add a Link to a Report
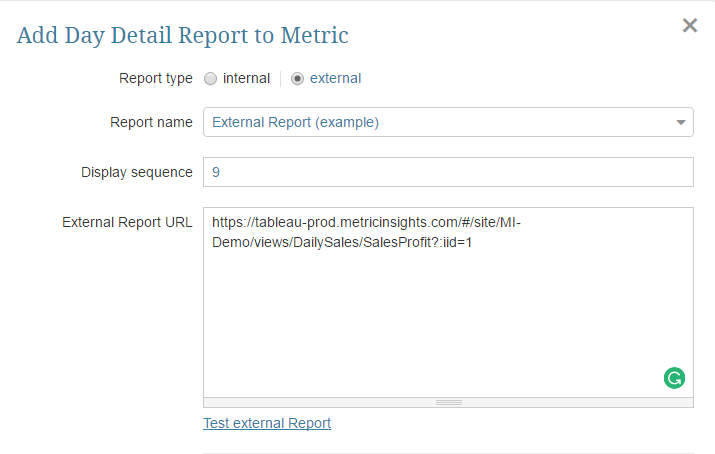
The link to this External Report is going to be shown in the Data Point Mouse-over Display > External Insights.
