RDP has been renamed to Remote Agent in 7.1.2.
This article describes how to update a Remote Agent that has already been installed on a Windows server.
- For details on installing an Remote Agent, see Installing a Remote Agent on Windows Servers (v7.1.2+).
NOTES:
- Beginning in v7.1.0, port 32550 no longer needs to open on the Local Data Processor;
- It is required to upgrade Remote Agent after an upgrade to MI v7.1.0+
- If you are using an SSL certificate from an internal authority, add the certificate to JDK keystore after the Remote Agent upgrade.
1. Download Remote Agent Installer
Access Admin > Collection & Storage > Remote Agents
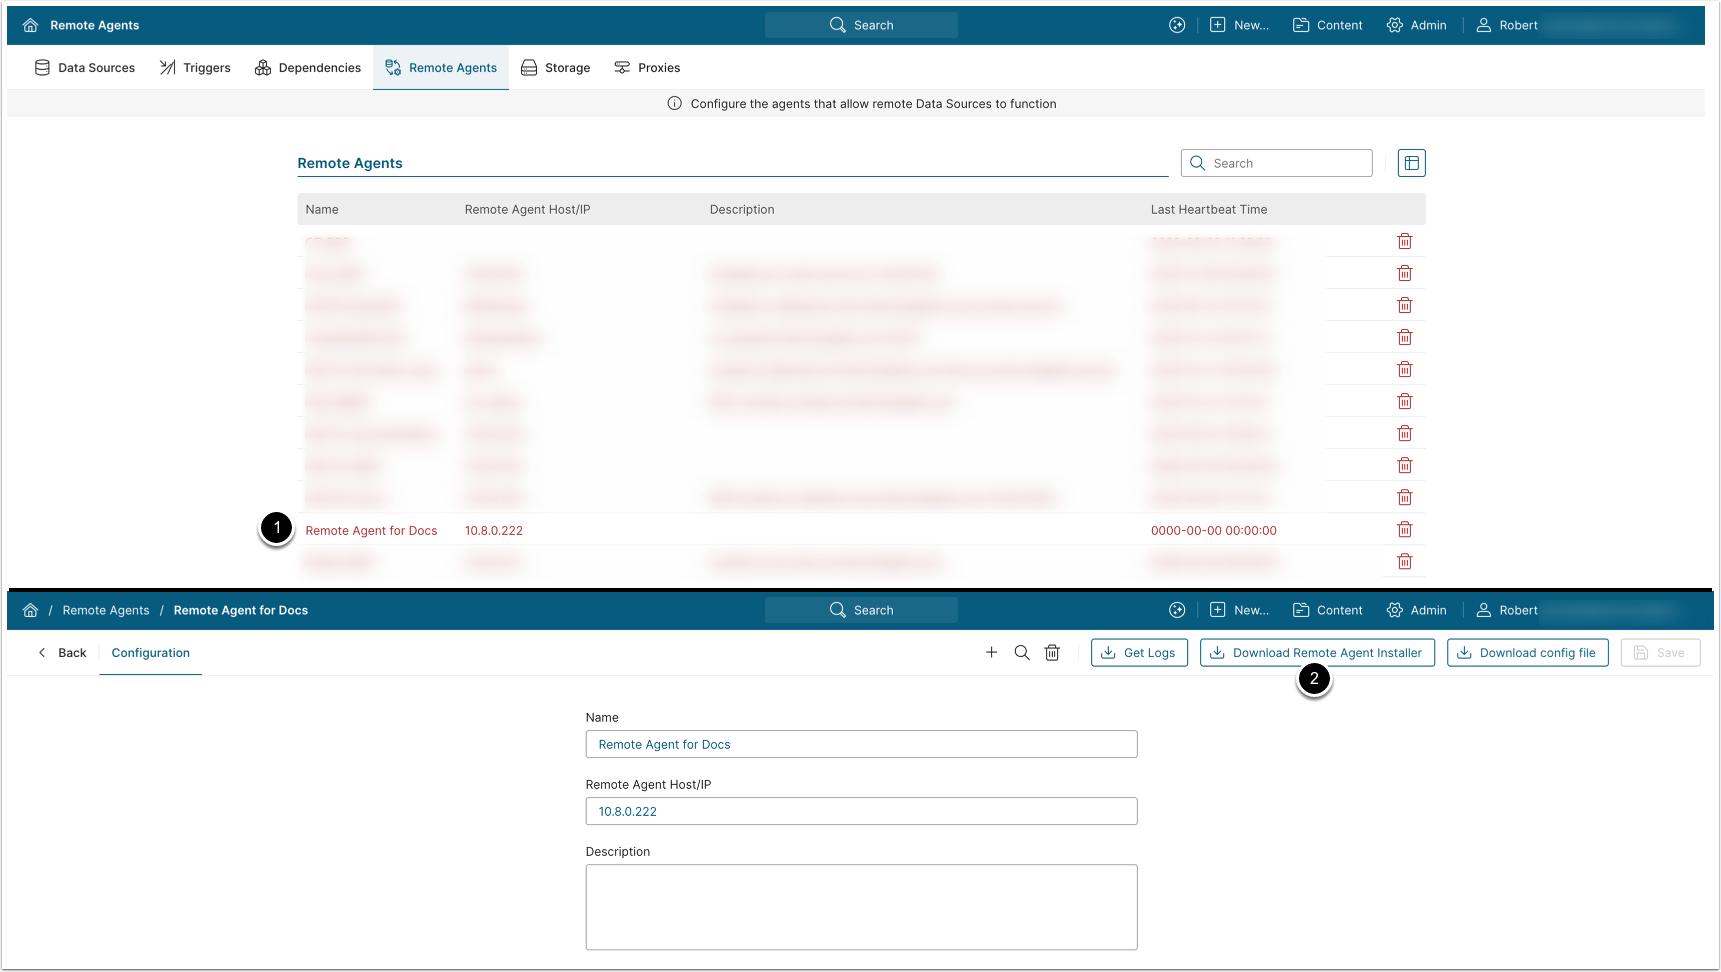
The Remote Agents section lists all Remote Agent profiles along with the Last Heartbeat Time (displays the last successful connection time of the Remote Agent to the Metric Insights application).
- Access the previously created Remote Agent profile
- [Download Remote Agent Installer]
2. Extract ZIP File Contents and Launch Remote Agent Installer
Access the directory where the ZIP file content was extracted > \remote_agent directory

- Run
installer.batscript as administrator
To perform this action you need to work as an Admin User on the Windows Machine where Remote Agent is to be installed or contact your System Administrator to proceed with the installation.
- Select installation directory or leave the default, then [Install]
- NOTE: If you select a directory other than the one where the Remote Agent has been initially installed, the old Remote Agent data will persist in the initial directory and will not be deleted.
- [Yes]
- [Next]
- [Finish]
NOTE: If you encounter any problems with Remote Agent after an upgrade, see Troubleshooting Remote Agent (v7.1.2+).