Sometimes, in addition to receiving Notifications about significant data changes, Users may find it necessary to record all their editing actions.
With Managed Alerting, it is possible to track how data changes are acted upon. First, a Workflow is added to an existing Alerting process. Then Users receive Notifications and act, based on their assigned Roles. The progress towards resolution is recorded as it occurs.
Power Users can create and maintain Managed Alert Workflows if they have the related Privileges. See Alert Workflow Security article for details.
Below is a general overview of the core functionality and the description of the basic steps needed to create Managed Alerts.
1. Create a New Alert Rule
Access Metric Viewer and click the Alert icon
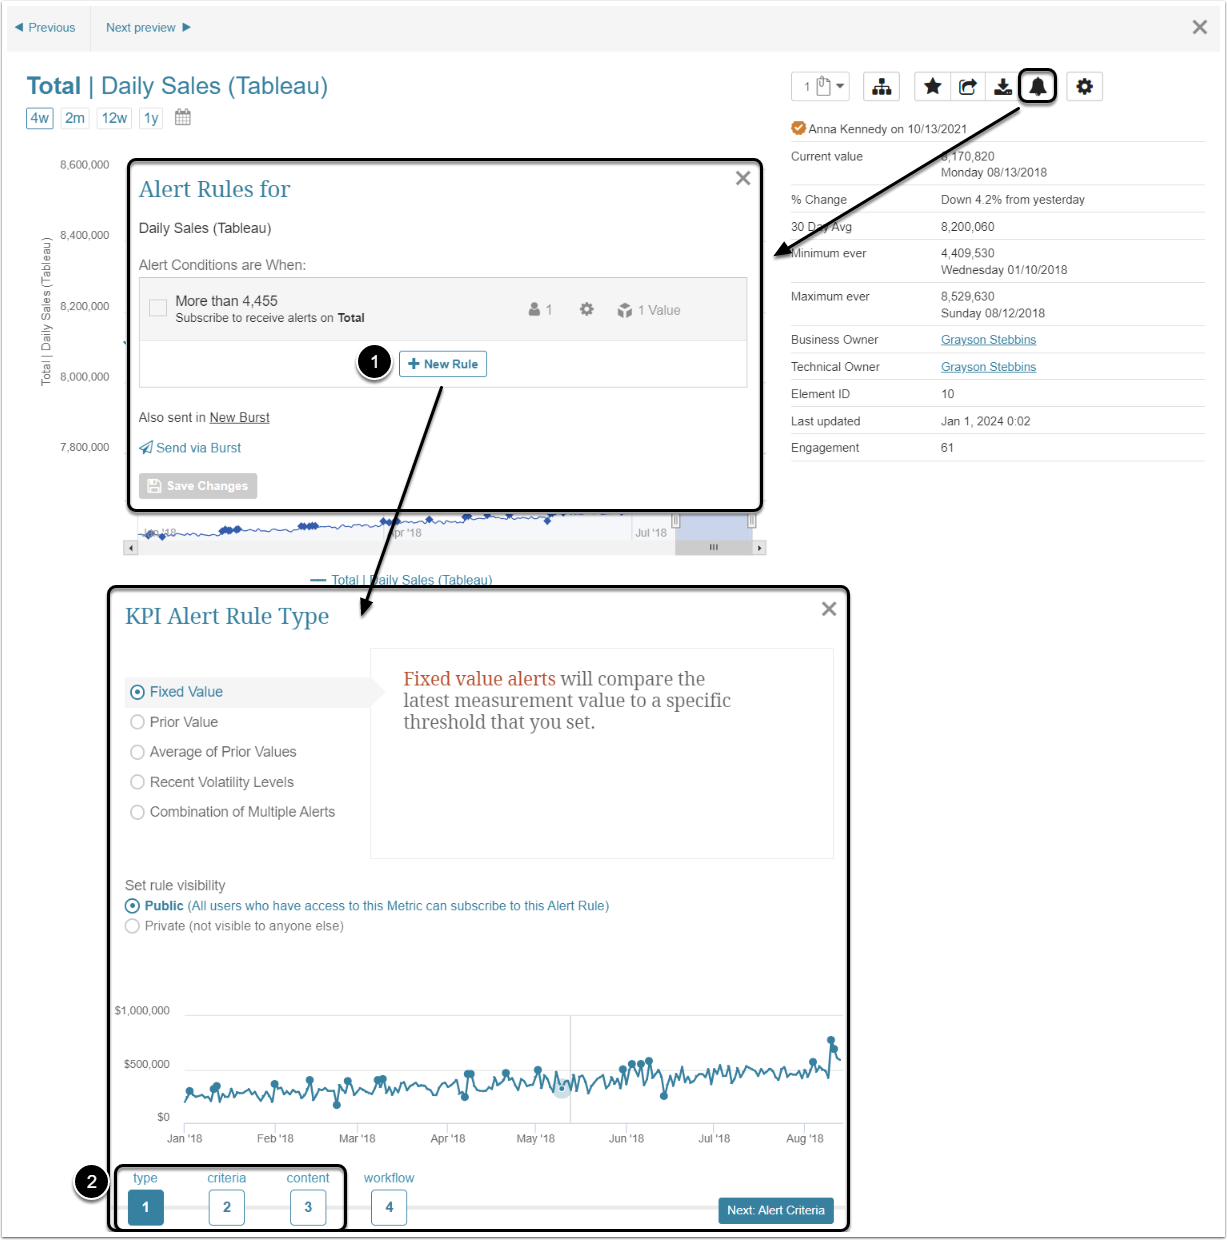
- [New Rule]
- Follow the steps 1-3 in the Alert Wizard to define type, criteria and content for your Alert.
Alternatively, Users can apply a new Workflow to an existing Alert Rule. See Apply a Workflow to a KPI Alert Rule article for details.
2. Create or Assign an Alert Workflow
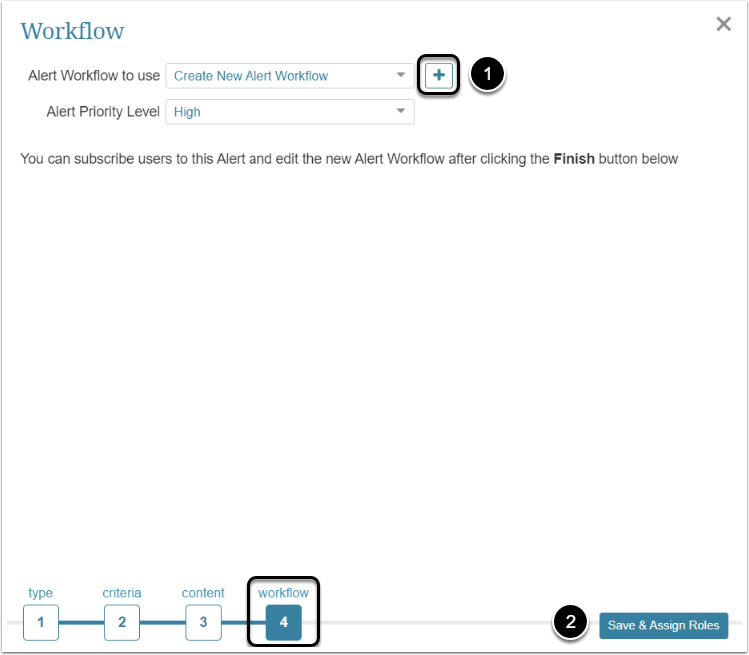
On Step 4 (Notification) in Alert Wizard, you have an option to create or assign an Alert Workflow:
- Click the [+] icon to create a new Workflow.
- Optionally, you could use the drop-down to select an existing Workflow.
- [Save Assign Roles] to proceed.
Open the Subscriptions & Alert Workflows tab
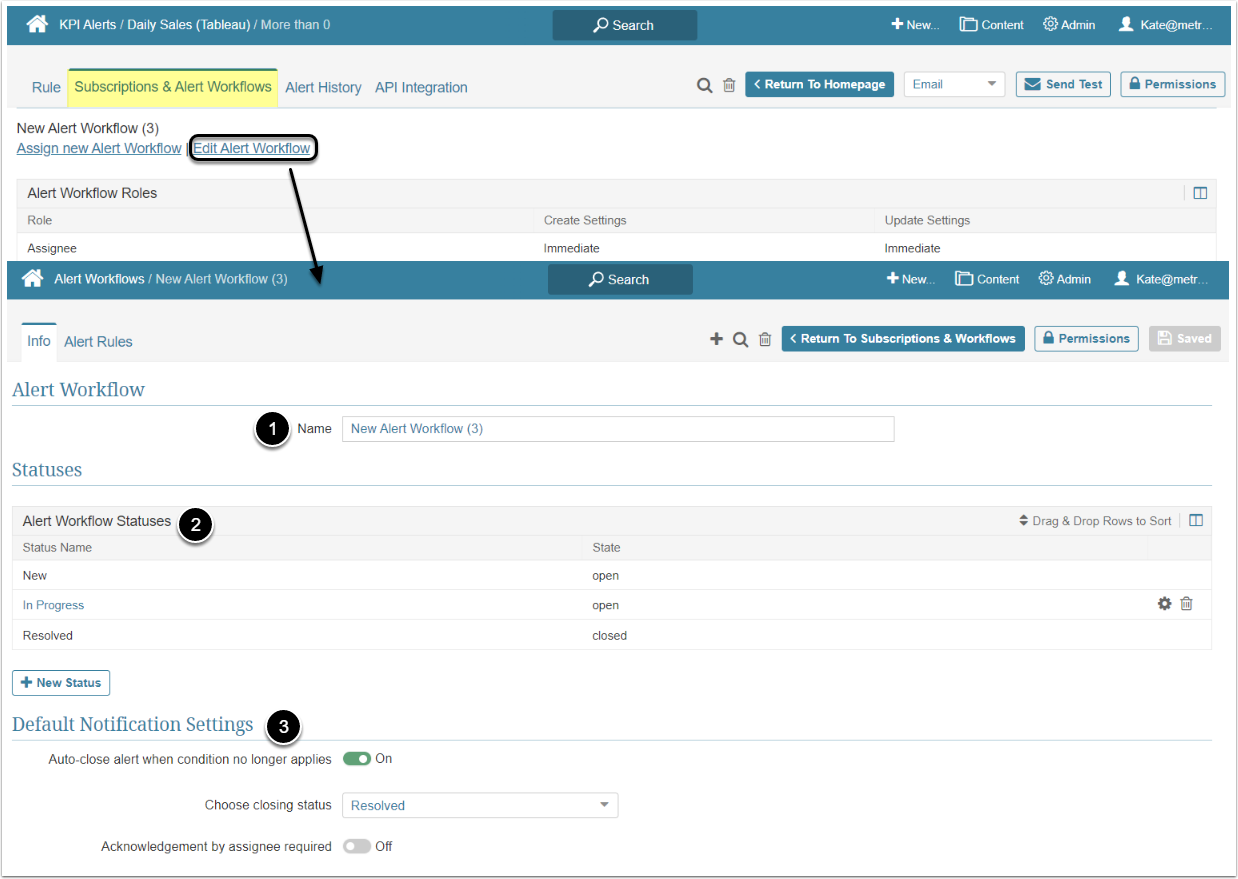
- Name: Give the Workflow a descriptive name.
- Note the default Statuses of your Workflow and the States they indicate.
- Note the default Settings and Workflow Roles.
For more information on these changes refer toCreate an Alert Workflow article.
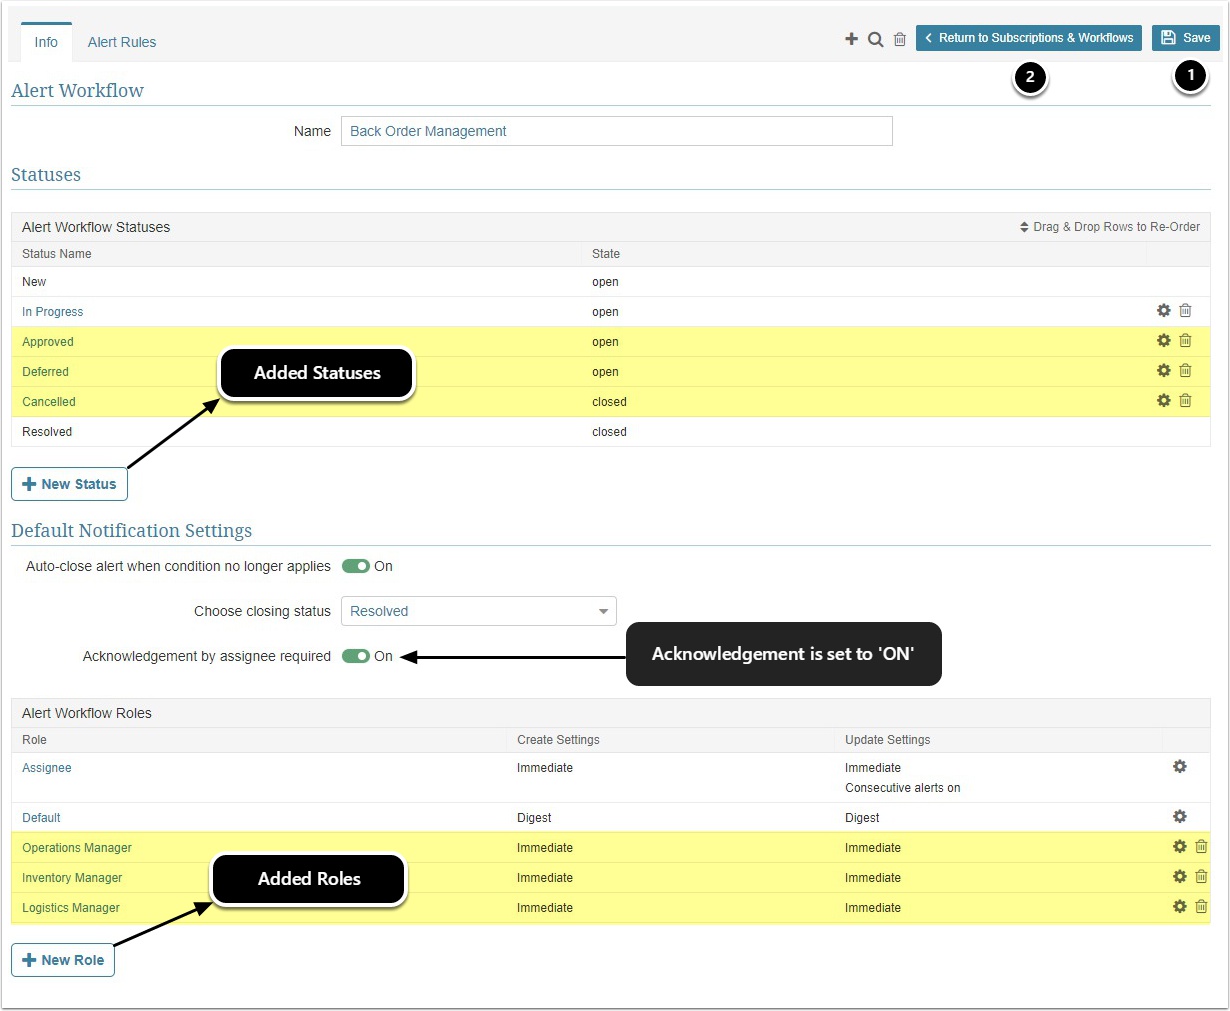
After making the changes to reflect your manual Workflow:
- Be sure to [Save].
- [Return to Subscriptions Workflows]
3. Assign Workflow Roles to Users
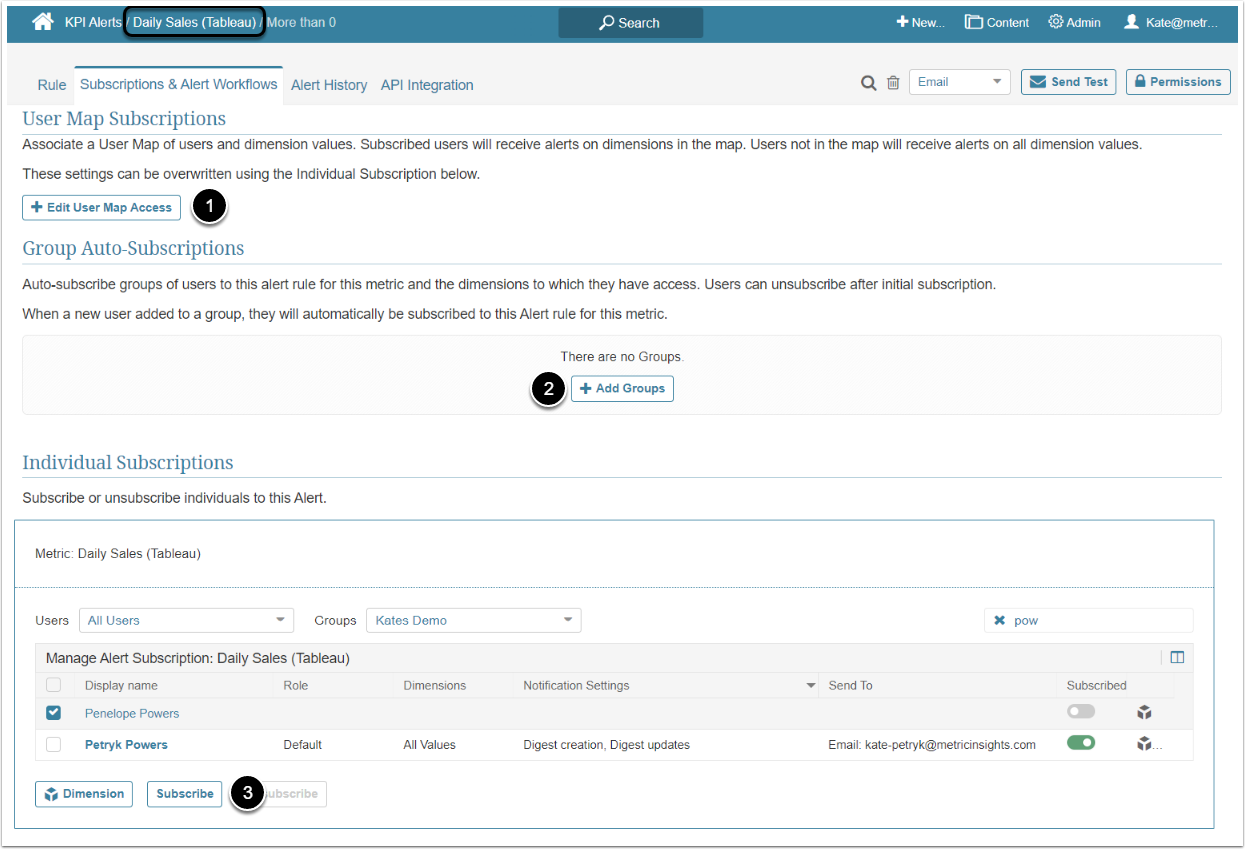
You can assign Subscriptions via:
- User Map. For more details refer to Create a User Map article.
- Groups. Refer to Create/Maintain Groups and Assign Privileges article.
- Individually, by checking Users from the list.
NOTE: To return to Metric Viewer, click the Metric's name next to the Homepage icon.