This article describes how to connect to Databricks in order to load data into Datasets and Reports in Metric Insights.
1. Create a New Data Source
Access Admin > Collection & Storage > Data Sources
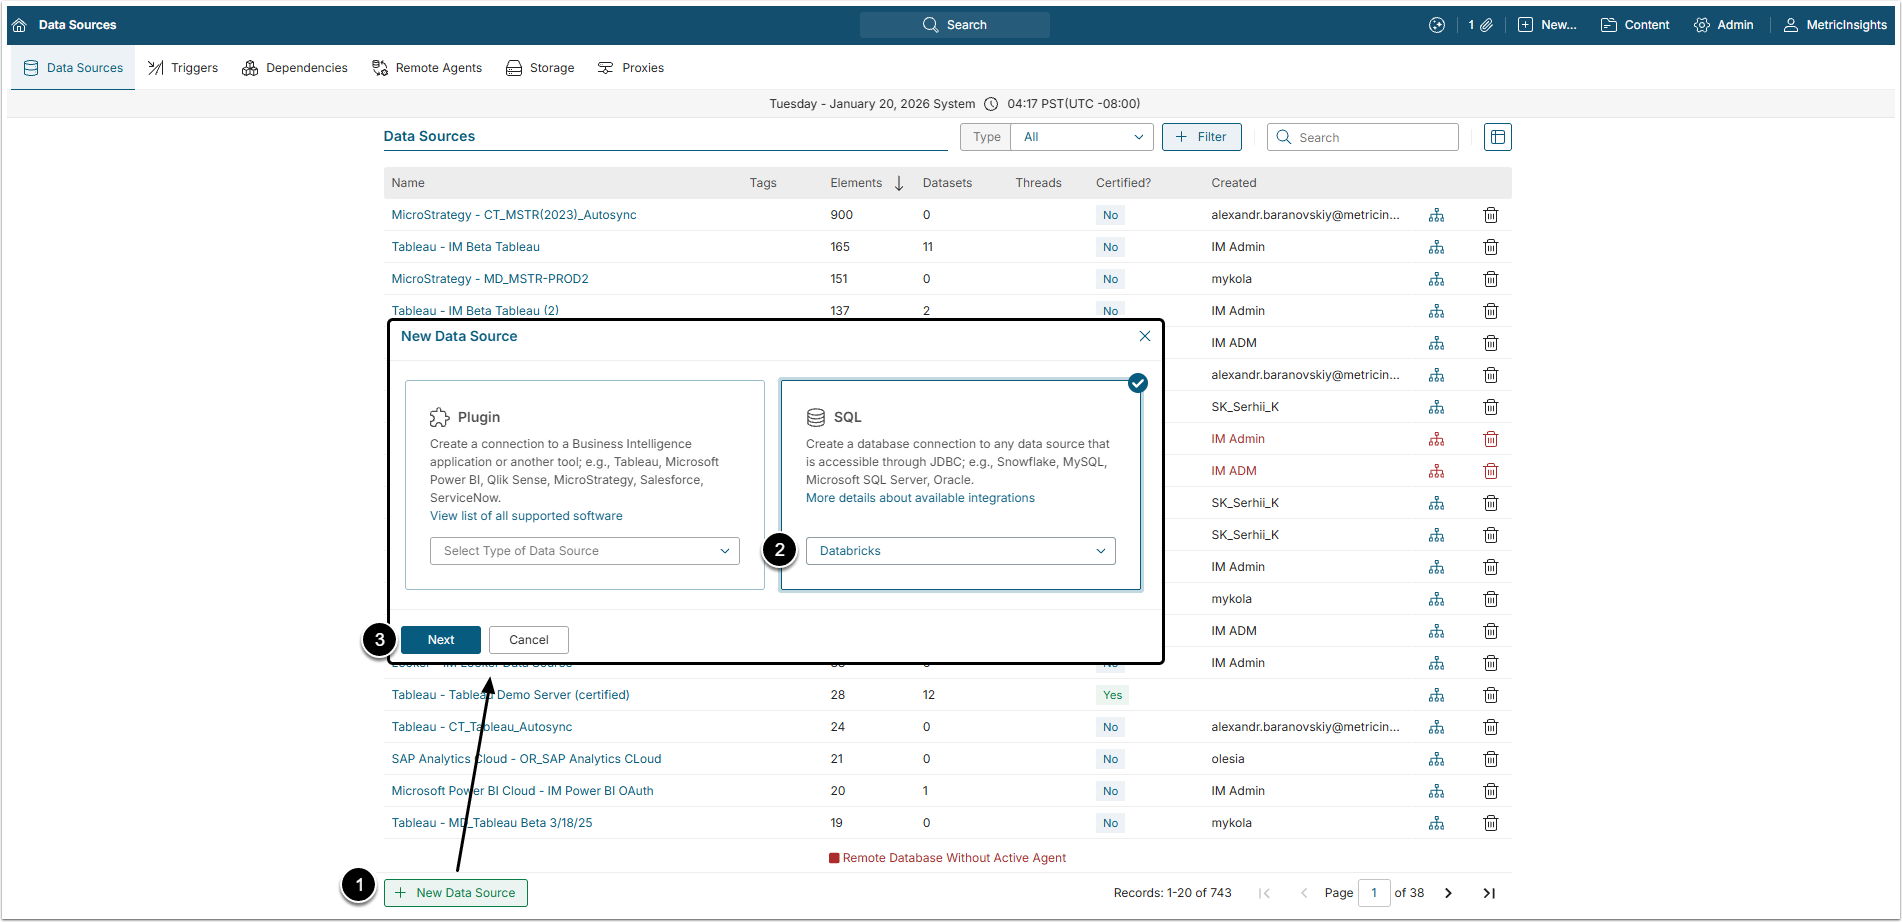
- [+ New Data Source]
- Select "Databricks" in the SQL section.
- [Next]
2. Complete Data Source Creation
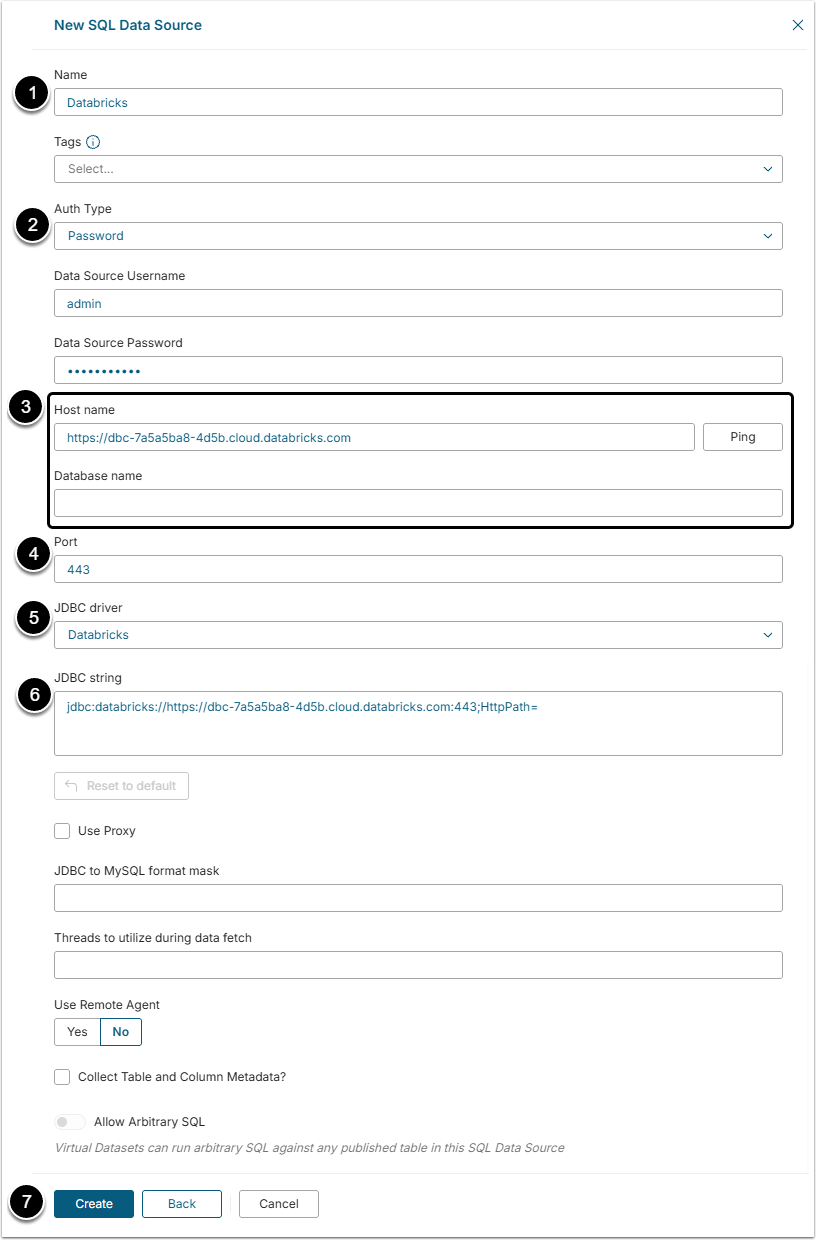
- Name: Give the Data Source a descriptive name.
- Auth Type: Select the authorization type:
- Service Principal: This authorization type is used if there is a Service Principal set in the Databricks account. Insert Client ID and Client Secret after selecting this Auth Type.
- PAT: Authentication is performed via the Private Access Token generated in the Databricks Unity Catalog account.
- Host name and Database name: Provide the database host name and the title of the database. By clicking [Ping] the user can check connection to the mentioned host.
- Port: The "443" value is auto-filled by default.
- JDBC driver: The "Databricks" value is chosen in this field by default.
- JDBC string: This string is auto-generated by default, but the User can change it according to specific needs. Insert the JDBC URL from the page of created SQL Warehouse in the Databricks account.
- "ConnCatalog"and "ConnSchema" parameters can be fount in the data Explorer of the Databricks account.
- [Create]
NOTE: Be aware, that Databricks driver doesn't have full compatibility with Java 21. To use Arrow serialization with the Databricks JDBC driver, disable Arrow by setting EnableArrow=0 in the connection string. Disabling Arrow will not affect the functionality of the JDBC driver, but it may affect performance and memory usage.
3. Check the Connection
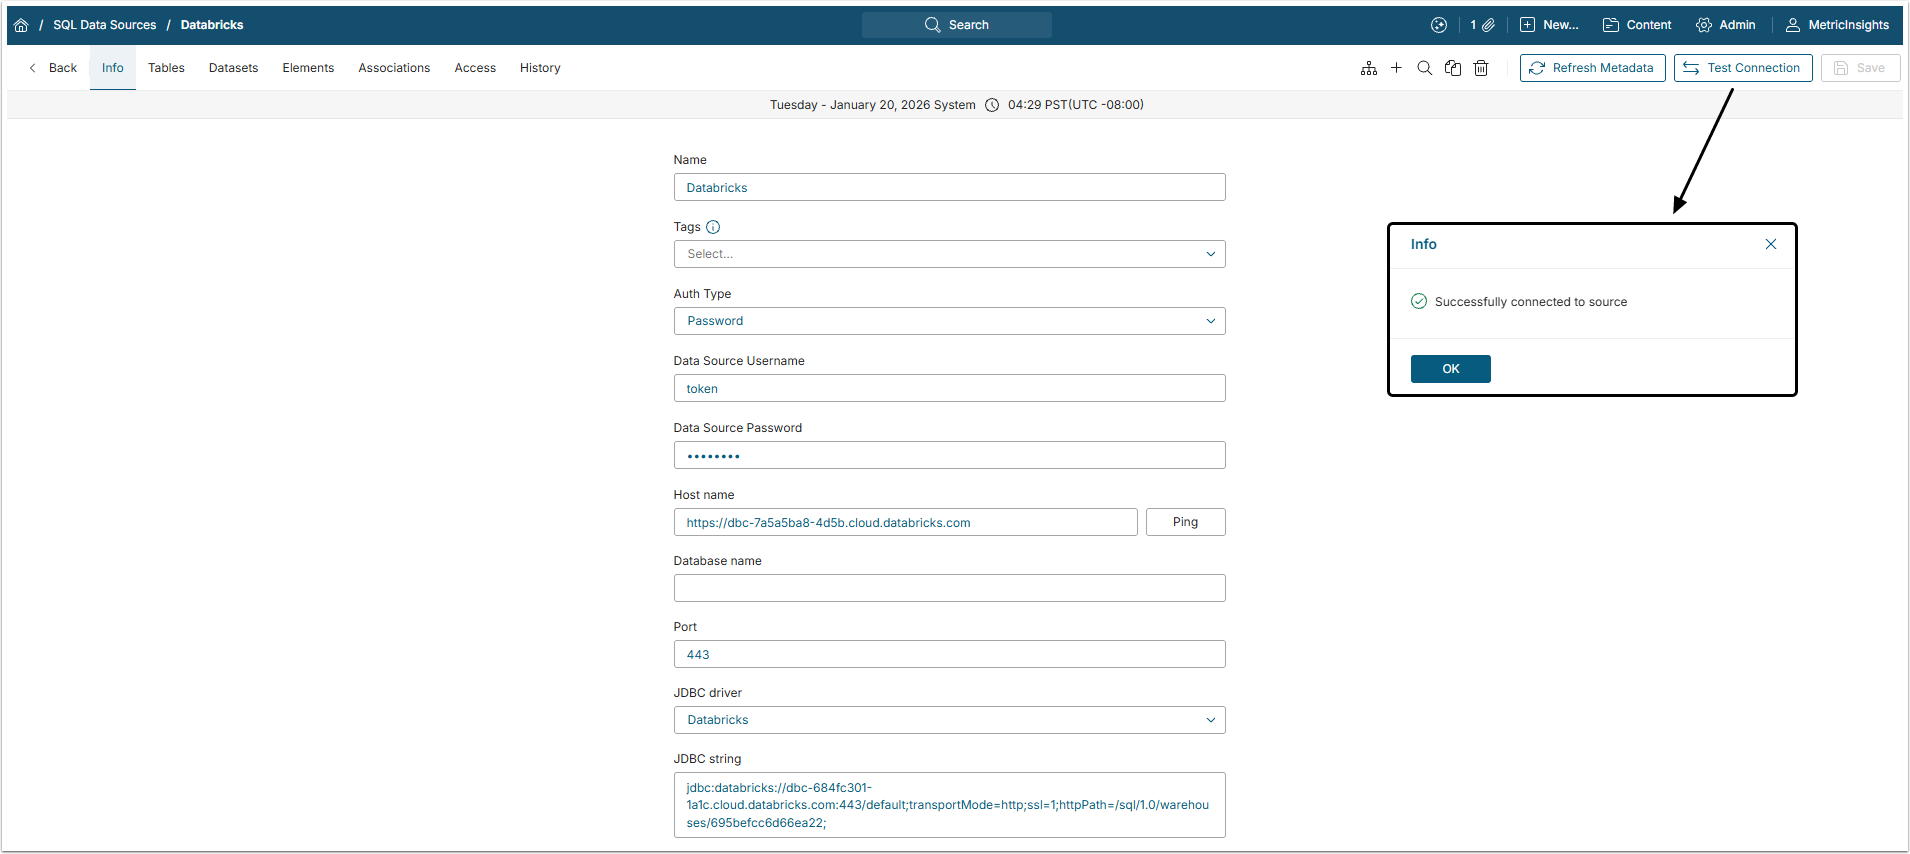
[Test Connection] to check if the system connects to the database successfully.
The next step would be creating a Dataset from Databricks Data Source. For more information on that, check the Create Dataset from Plugin or SQL Data Source article.