The Group as a functionality allows assigning Privileges and Permissions to all Users who are members of that Group. This article describes how to create a new Group and assign Users to it.
1. Create a New Group
Access Admin > Users & Groups and open the Groups tab (for Power Users that have the Privilege to create Groups it will be Admin > Groups)
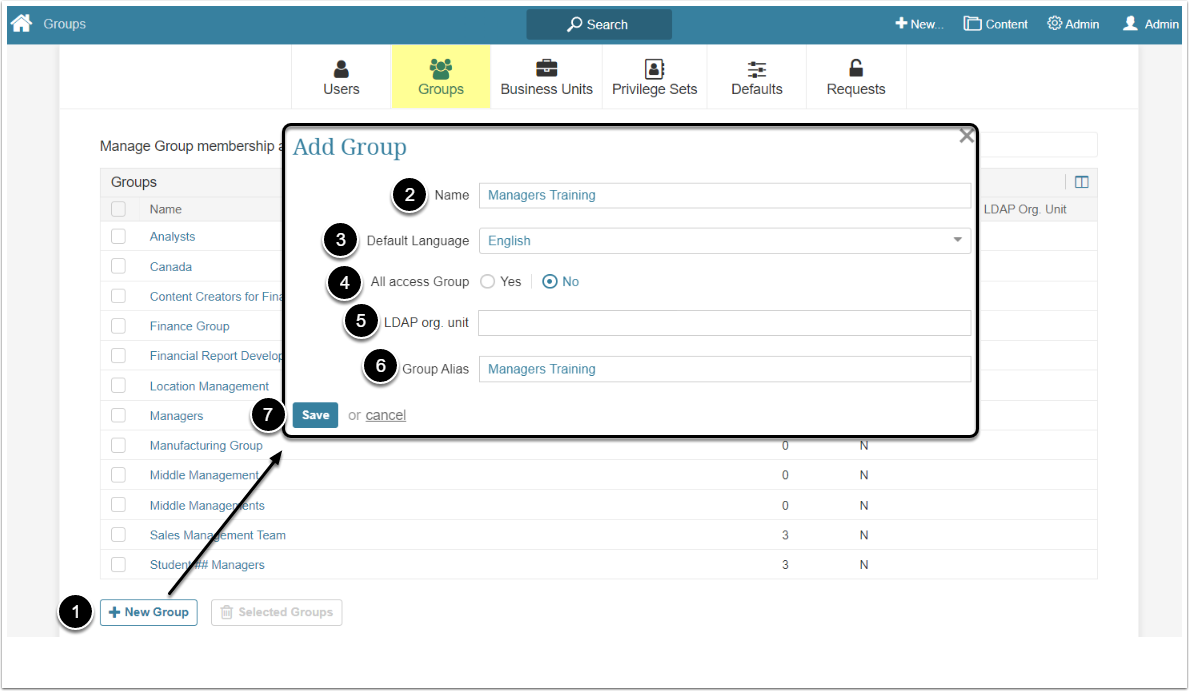
- [+New Group]
- Name: Give the Group a descriptive name
- Default Language: Optionally, select the default language of the group from the dropdown menu
- All access Group (this option is available to Admins only): Select "Yes" option to grant this Group a View Access to all available Elements and Dimensions
-
LDAP Org. Unit: In most cases this field will be filled automatically
- To learn more about managing Users/Groups via LDAP, refer to Script for synchronizing/creating users with LDAP
- Group Alias: Optionally, add the displayed name of the Group
- [Save] to access the Group Editor
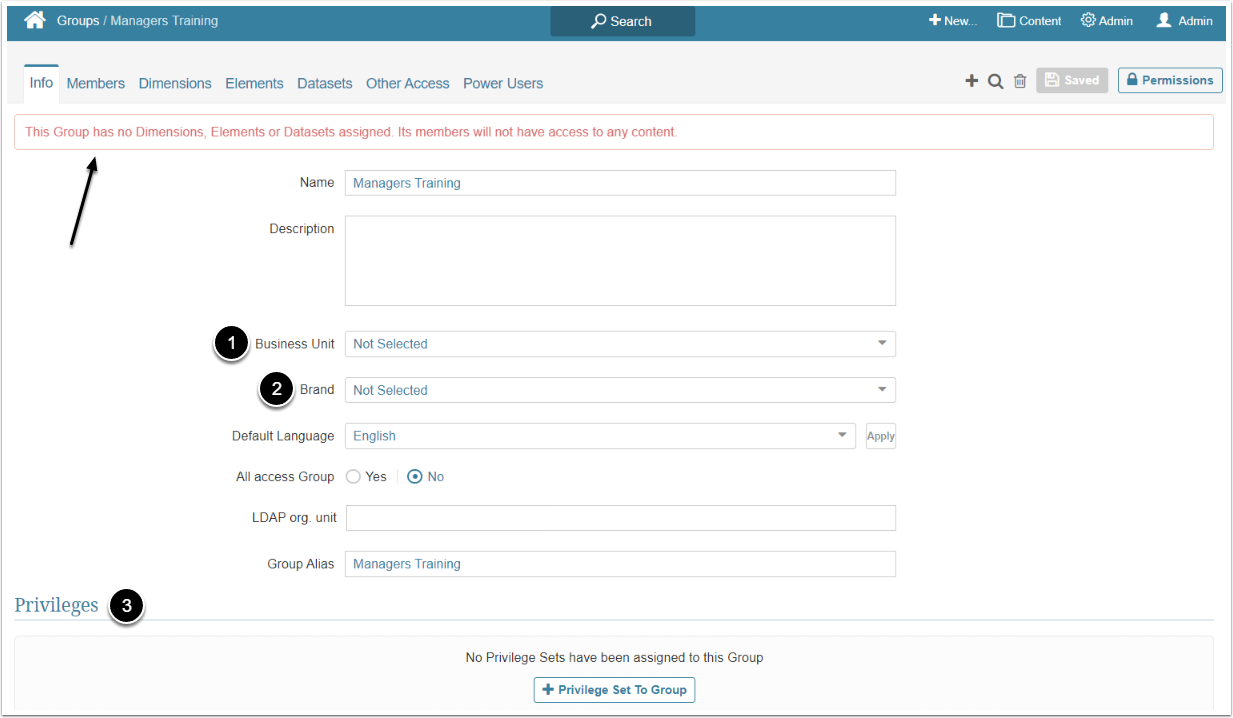
2. Complete the Info Tab
A Group does not have to be granted any Privileges and/or Permissions at the time it is created. The initial ability of the Group's members to access content and perform system functions will be extremely constrained until some Privileges and Permissions will be assigned to it. However, be aware, that Users can be members of several Groups and will inherit Privileges and Permissions from them.
-
Business Unit: Select the Business Unit for the Group
- For more details about Business Units, refer to the Create a Business Unit article
-
Brand: Select a Brand that defines the appearance of the Metric Insights instance for the Group members
- To learn more about Brands, check the Multiple Branded Experiences on the Same Instance article
- Here you can set Privileges and Privilege Sets to the Group
- For more details about how to assign Privileges, check Assigning Privileges and Permissions to the Group article.
3. Add Members to the Group
Open Members tab
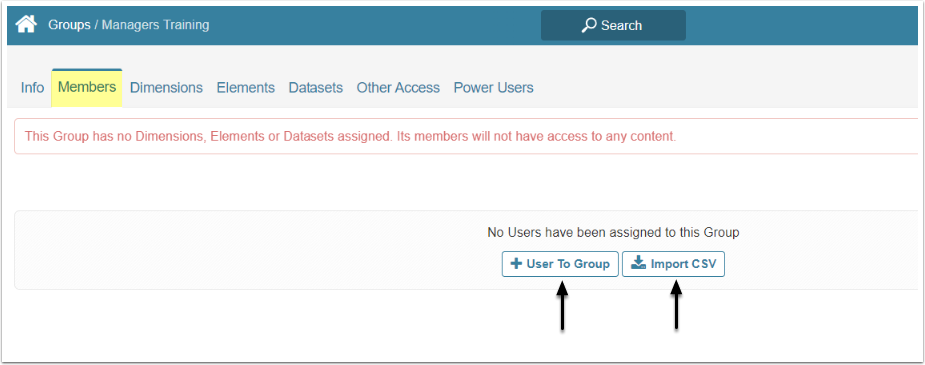
There are three ways of adding Users to the Group:
- Syncing from LDAP/AD. To learn more about this method, check the Syncing Groups and Users from LDAP/AD using 'mi-ldap-usersync' script article
- Manually
- Via the CSV file
3.1. Manually Add Users
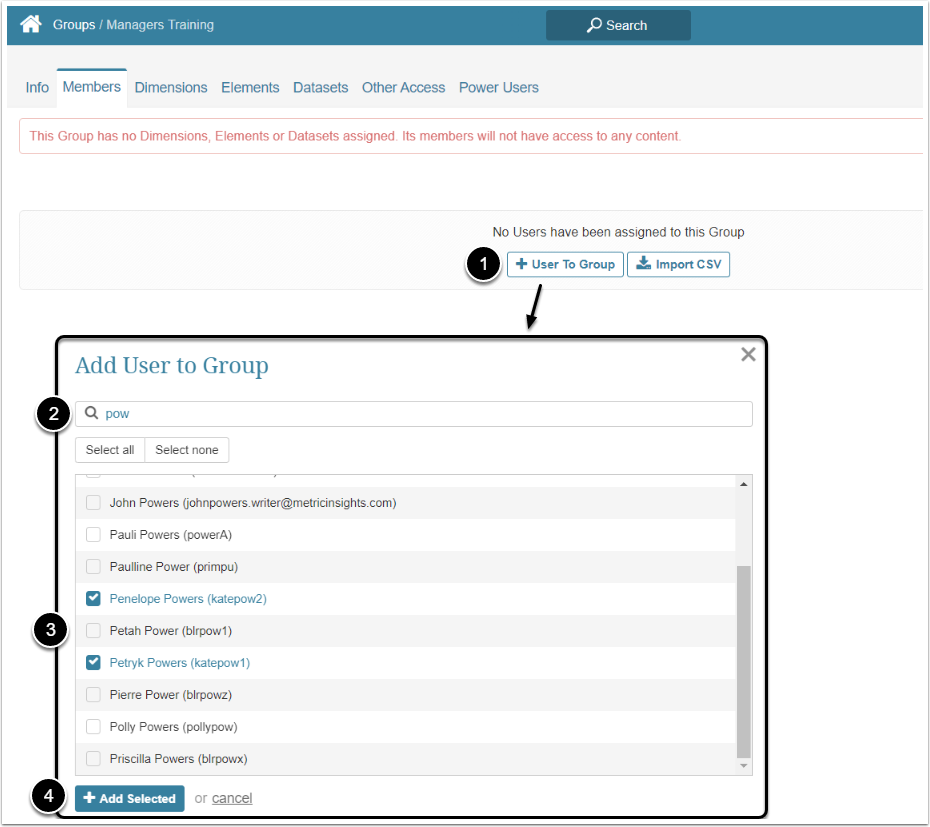
- [+User To Group]
- Use Search bar to shorten the list of Users
- Choose the Users by selecting checkboxes
- [+Add Selected]
For more details about User creation refer to Create a New User Account and Assign to Group article.
NOTE: Be aware, that the User who was manually added to the Group auto-synced with a LDAP org. unit will be removed from the Group after the next sync.
3.2. Add Members Via a CSV File
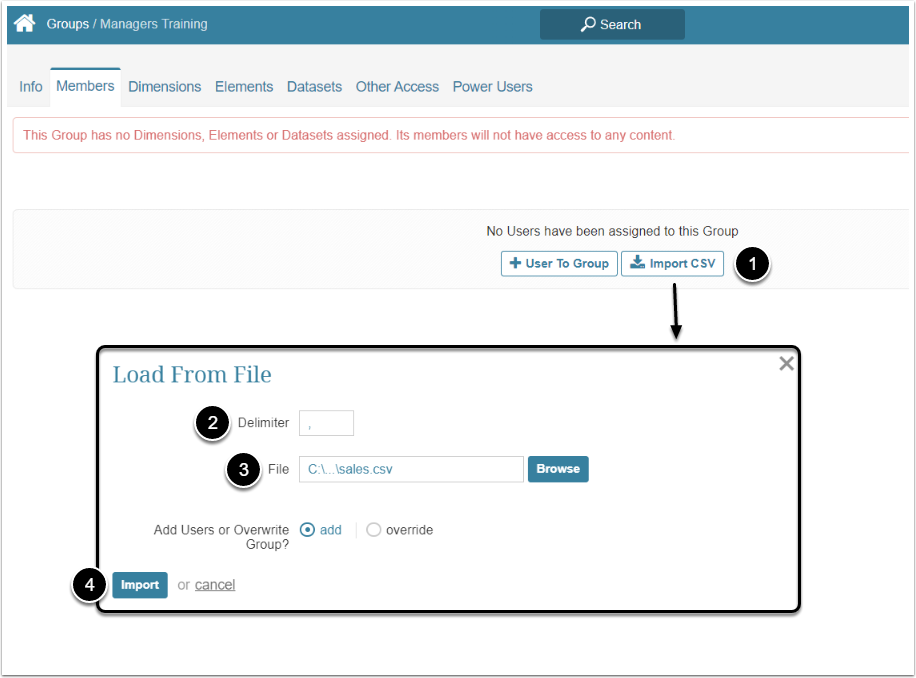
- [Import CSV]
- Delimiter: Indicate the Delimiter your input file uses
- [Browse] and select the CSV file from the local PC
- [Import]
All other tabs of the Group Editor are described in the Assigning Privileges and Permissions to the Group article.