If the data for the Metric is to be collected manually, it is possible to upload it as a CSV file (delimited by a comma or other character). This article describes how to populate the Metric using a CSV file as a Data Source.
This feature is available for Windows OS and Mac OS (save your Excel file as a CSV file to use this method).
CSV File Requirements
- If you are uploading data for Undimensioned Metric or only one Dimension Value of the Dimensioned Metric, confirm that the CSV file that you plan to use contains only two columns: Measurement Date/Time and Measurement Value
- If you are uploading data for multiple Dimension Values, make sure that the CSV file that you plan to use contains three columns: Dimension Value, Measurement Date/Time and Measurement Value
If you are uploading data for Compound Dimension Values, see Creating Compound Dimensions using Selected Values for details.
1. Start Creating a New Metric
Access +New > Metric > Create New

- Measured:Select the measurement interval that applies to the level of aggregation that you want in your result set
- Name:Give the Metric a descriptive name
- Category:Select theCategoryto place the Metric
- [Next: Define Details]to open the Editor
2. Complete Data Tab
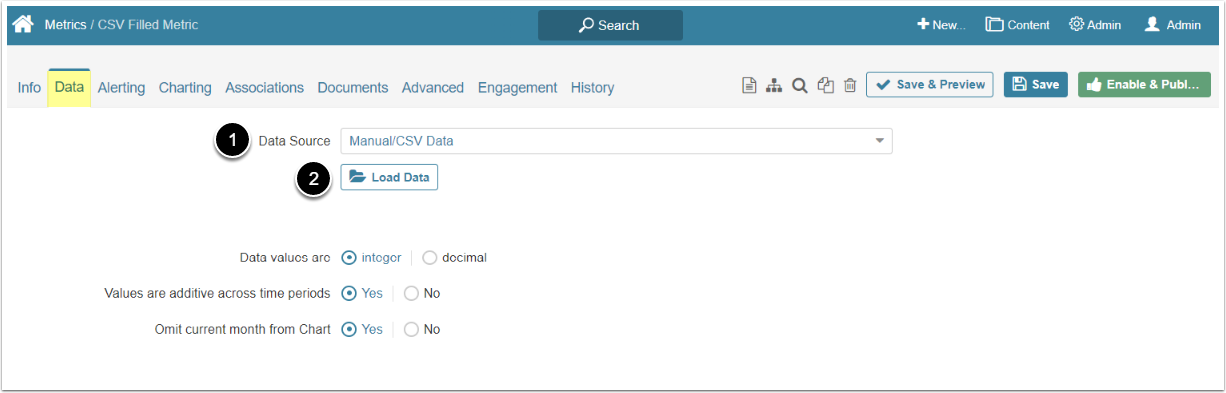
- Data Source: Choose "Manual/CSV Data" option from the dropdown menu
- [Load data]
3. Load the Data
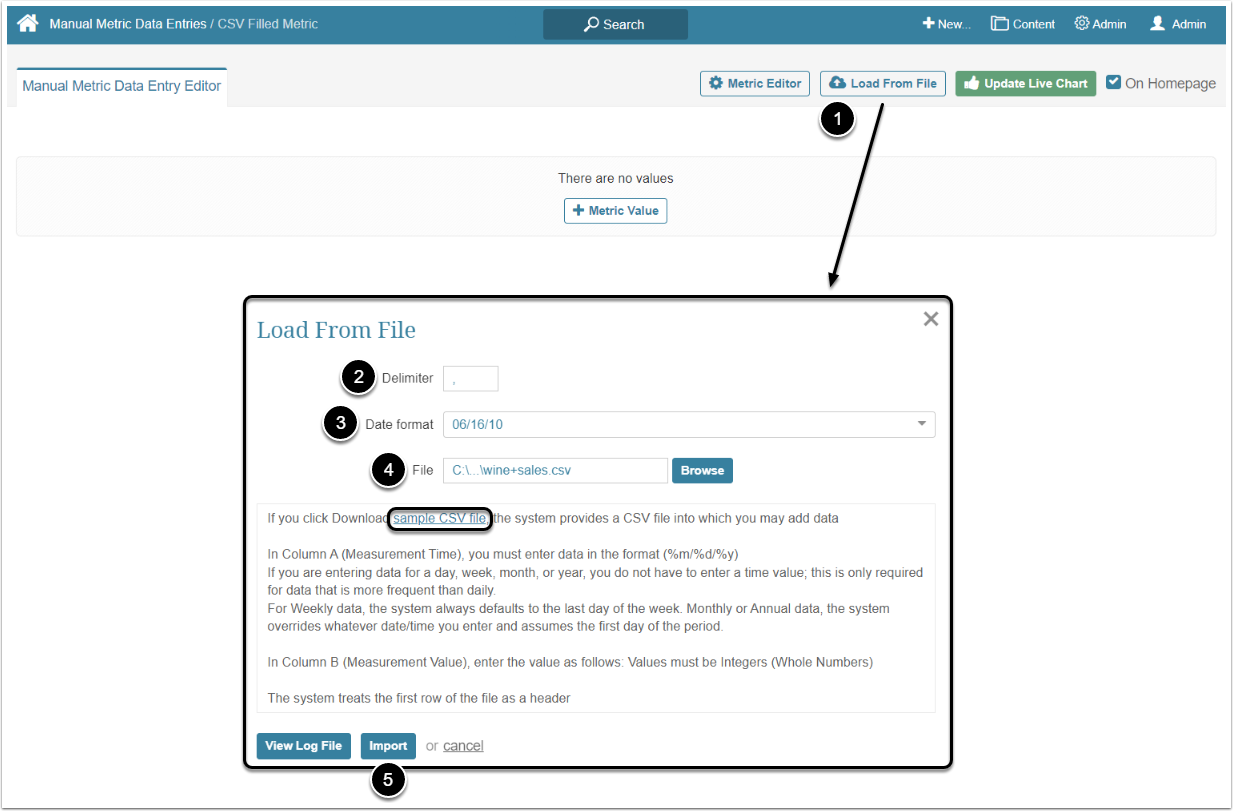
- [Load From File]
- Delimiter: Enter the character that is the same as in your CSV file
- Date format: Choose the format in which the date/time is represented in your CSV file
- File: [Browse] and select the CSV file containing data from PC
- [Import]
Uploaded data will be shown in the Metric Data table.
If you want to enter the Manual Metric value into a CSV file and you are unsure about its format, click Sample CSV file link to obtain a file into which you can enter data after saving it.