In 7.3.1, creating new Metrics will no longer be supported. All Metric use-cases will be supported via Report Metrics.
In Metric Insights it is possible to enter data to a Metric manually, one value at a time. This article describes how to manually add data to the Metric to populate it completely or just to correct the data uploaded via CSV file.
For more details on uploading CSV files, see Upload Metric Data via CSV file.
1. Start Creating a New Metric
Access +New > Metric > Create New
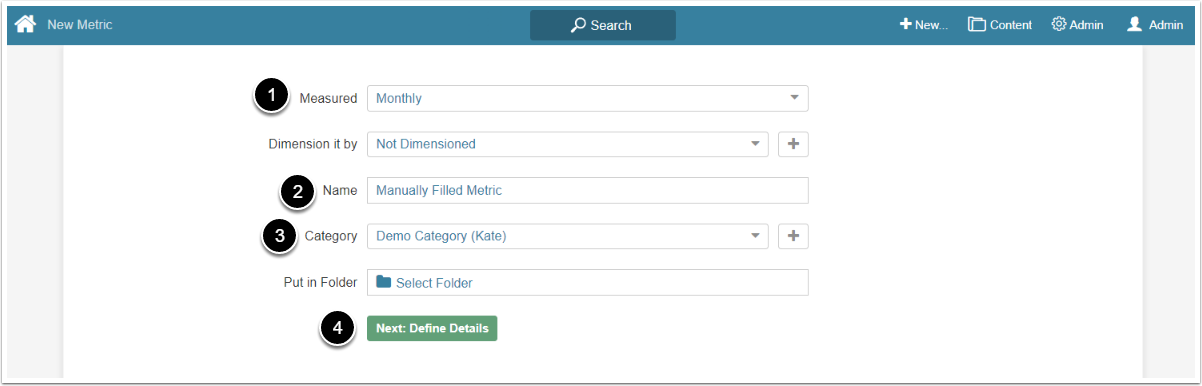
- Measured: Select the measurement interval that applies to the level of aggregation needed
- Name: Give the Metric a descriptive name
- Category: Choose the Category to put in the Metric
- [Next: Define Details]
2. Choose a Data Source
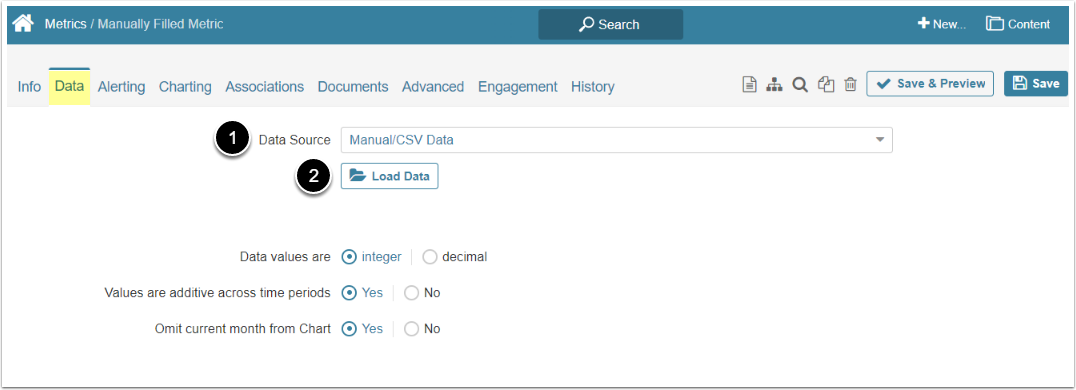
- Data Source: Select "Manual/CSV Data" option
- [Load Data]
3. Add Metric Value
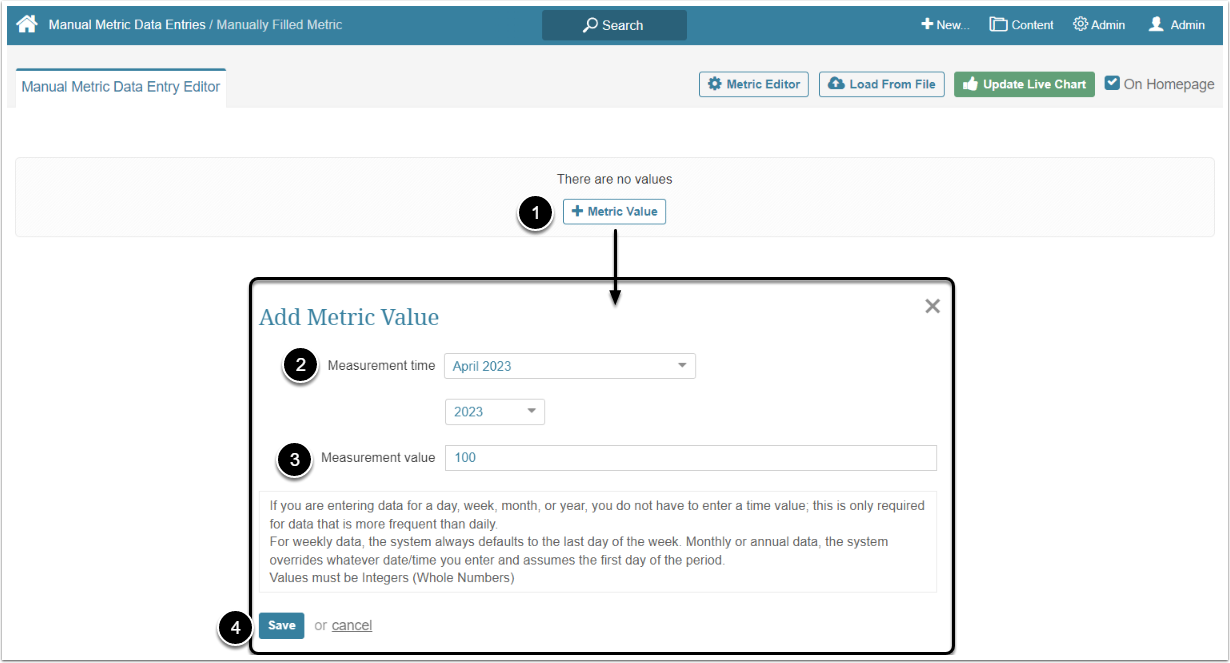
- [+Metric Value]
- Measurement Time: Select the measurement month from the dropdown menu. Year can be changed in the dropdown below
- Measurement Value: Enter the value
- [Save]
NOTE: It is possible to add values only for the completed time periods. If the month isn't over yet, it won't be possible to add a value for it.
4. Check the Result
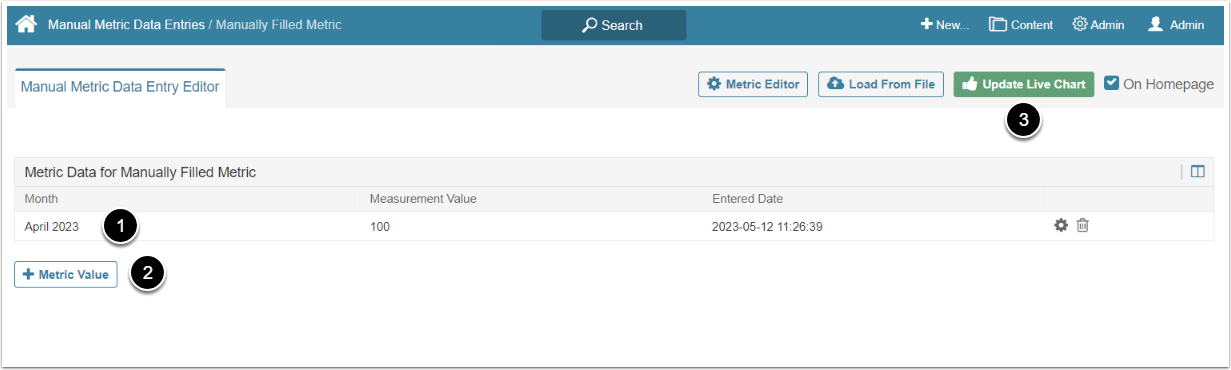
- Once saved, your entry is automatically added to the Metric Data table
- [+Metric Value] to enter more data
- [Update Live Chart] to generate the Metric Сhart