The general look of the Concierge Sidebar can be customized to fit a company's needs and style. This article describes where the different aspects of the Concierge Sidebar can be changed.
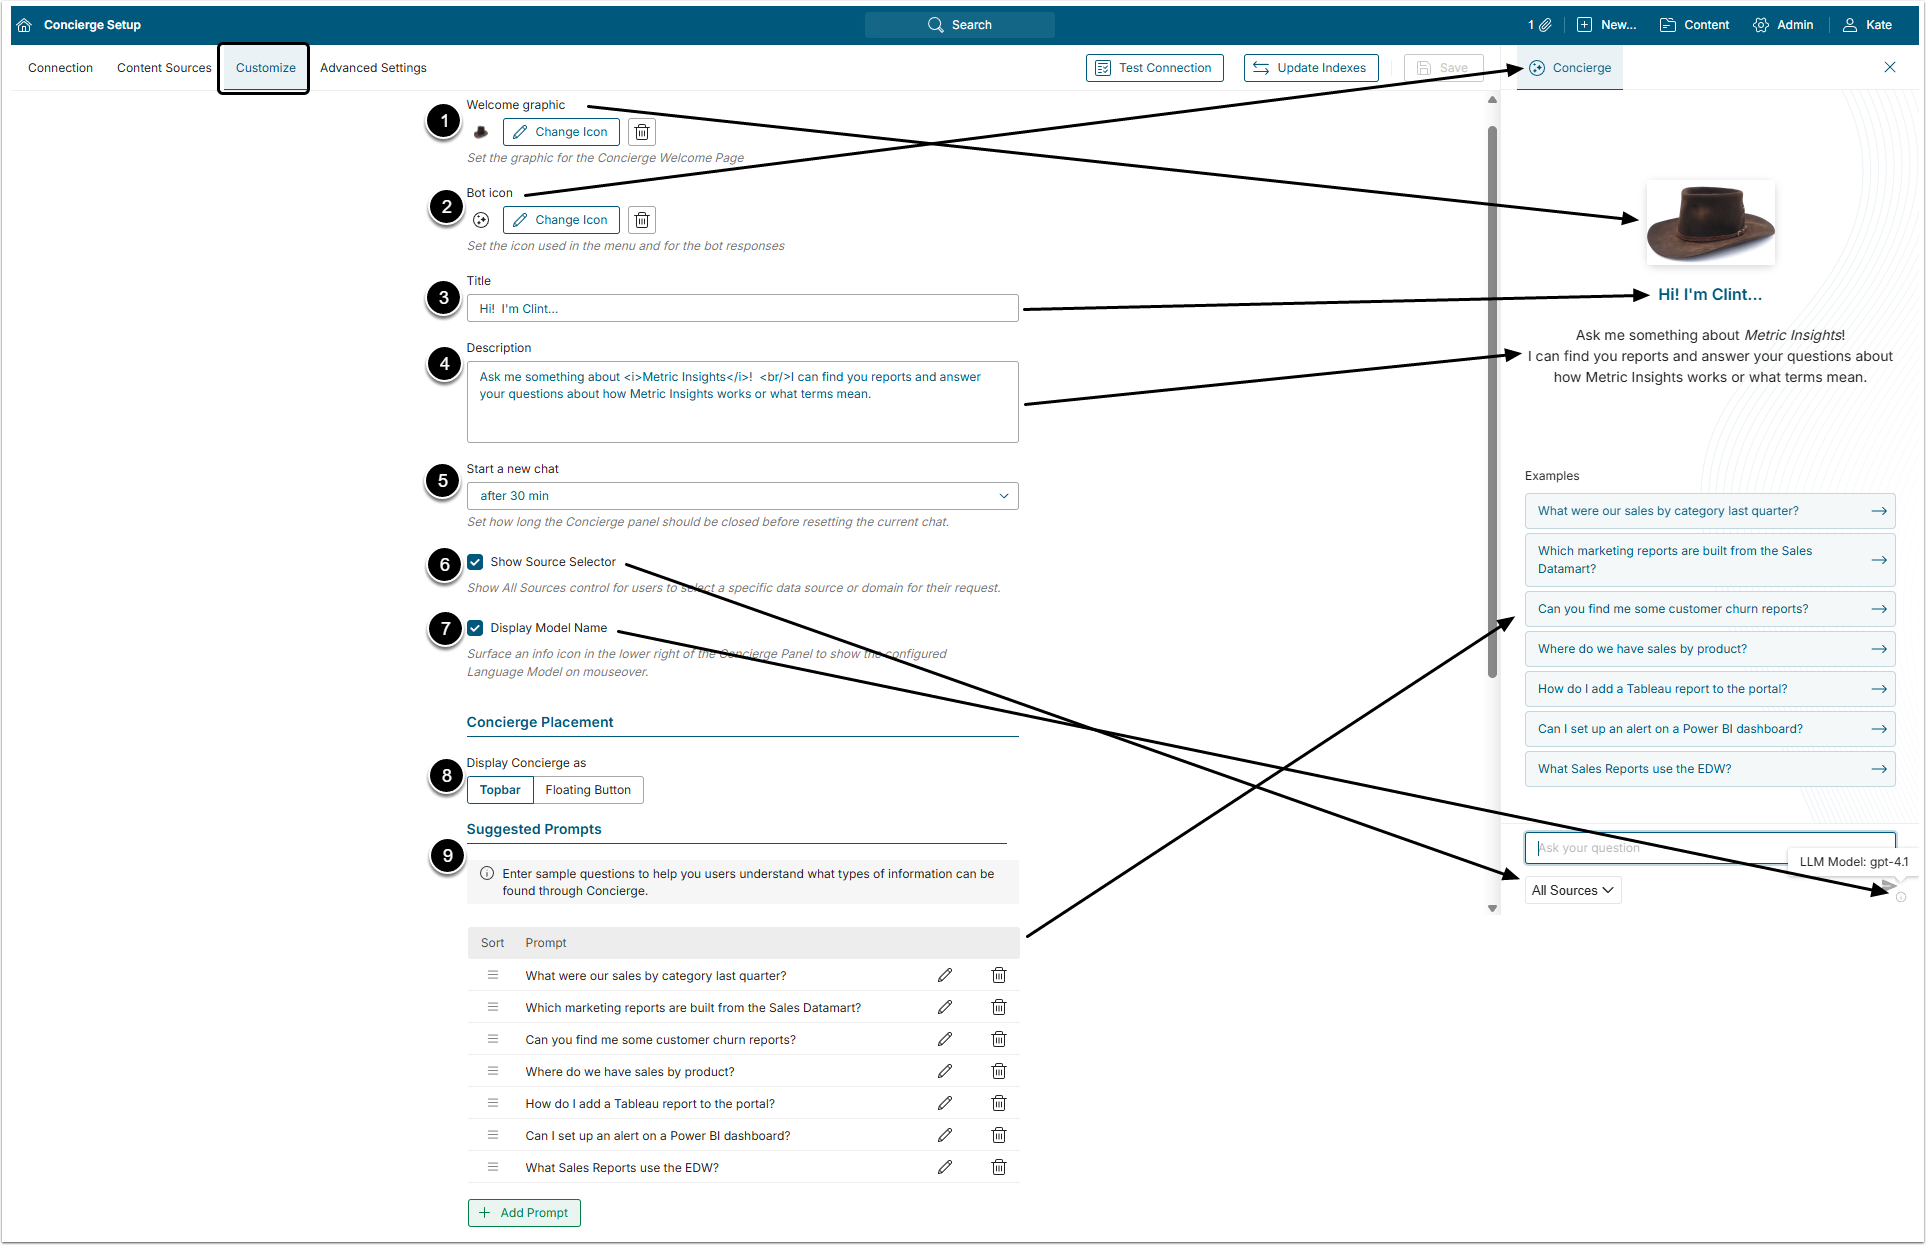
Access Admin > System > Concierge Setup and open the Customize tab
-
Welcome graphic: Select a picture that will be shown on the Sidebar above the greeting.
- Clicking the [Change Icon] button opens a Select Icon window where the Admin can select an icon from the list or upload a picture from the PC. The image has to be a PNG or GIF file with transparent background.
-
Bot icon: Select the icon that will represent Concierge on the button (either on the Title Bar or as a Floating Button in the lower right corner of the page) and in chat.
- Clicking the [Change Icon] button opens a Select Icon window where the Admin can select an icon from the list or upload a picture from the PC. The image has to be a PNG or GIF file with transparent background.
- Title: The title you provide in this field will be shown on the Sidebar under the welcome image.
-
Description: Provide description of the Concierge service that Users will see on the Sidebar.
- Use HTML elements for text formatting.
- Start a new chat: Define how long will Concierge save the previous queries the User made and answers to them.
- Show Source Selector: This checkbox is selected by default. Deselect it to hide [+ All Sources] button.
- Display Model Name: Select this checkbox to show an icon in the right bottom corner of the panel that displays the name of the LLM used by Concierge.
- Display Concierge as: Select where the Concierge Sidebar button will be shown, on the Title Bar or as a Floating Button in the lower right corner of the page.
- Suggested Prompts: Add relevant question examples by clicking [+ Add Prompt]. They are shown on the Sidebar above the query text field.
After customizing the Concierge Sidebar appearance, don't forget to [Save] the changes.