Metric Insights Concierge Service supports integration with Databricks Genie via the Model Context Protocol (MCP) Server. Establishing this connection allows Users to interact with Databricks resources directly from the Concierge interface.
This article outlines the configuration steps required to set up Databricks Genie and connect it to Concierge via MCP Server.
1. Enable MCP Server Usage
NOTE: Steps 1 through 6 should be performed by a Databricks admin user.
Access the Databricks account, open the user menu by clicking username icon in the upper right corner of the page and select Previews.
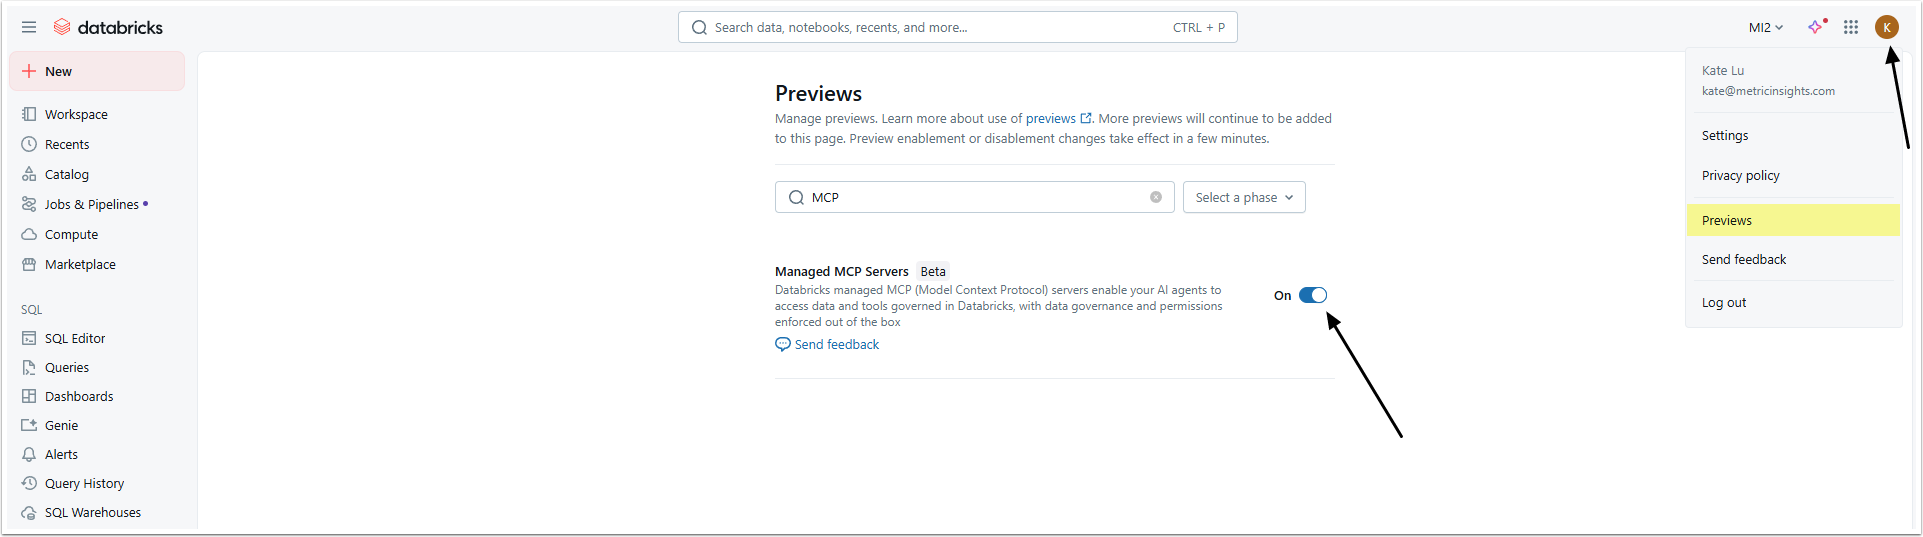
Find the Managed MCP Servers option and activate it.
2. Open Token Management Page
Open the user menu and select Settings.

- Open the Developer settings page.
- Click [Manage] in the Access tokens section.
3. Generate Token
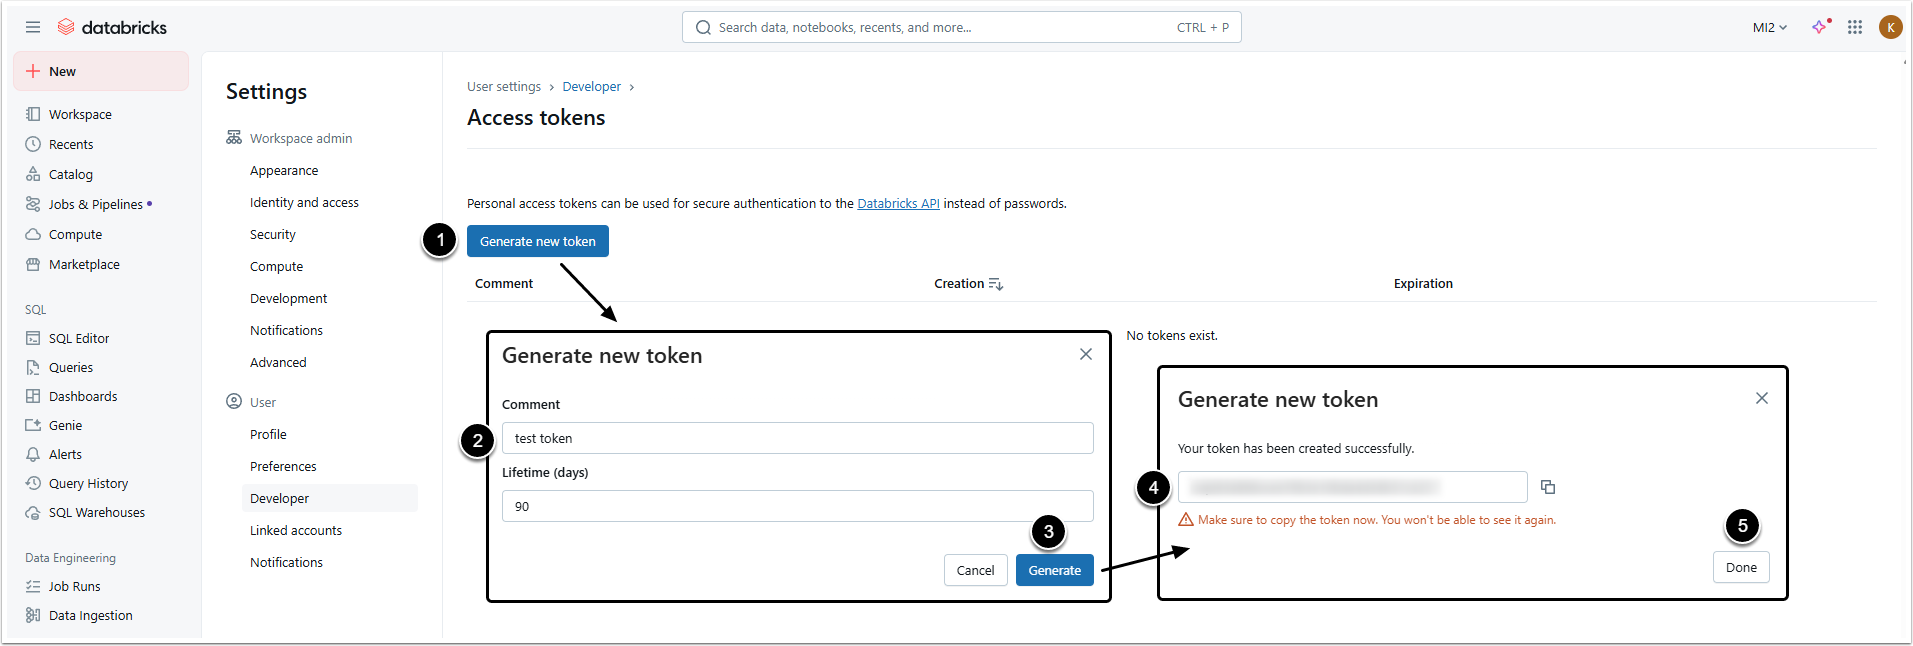
- [Generate new token]
- Comment: Give the token a description.
- [Generate]
- Copy the token, you won't be able to check it again later.
- [Done]
4. Create New Genie Space
Go to the left-side menu and access the Genie settings page.

- [+ New]
- Select necessary data sources (tables).
- [Create]
5. Create Joins (Optional)
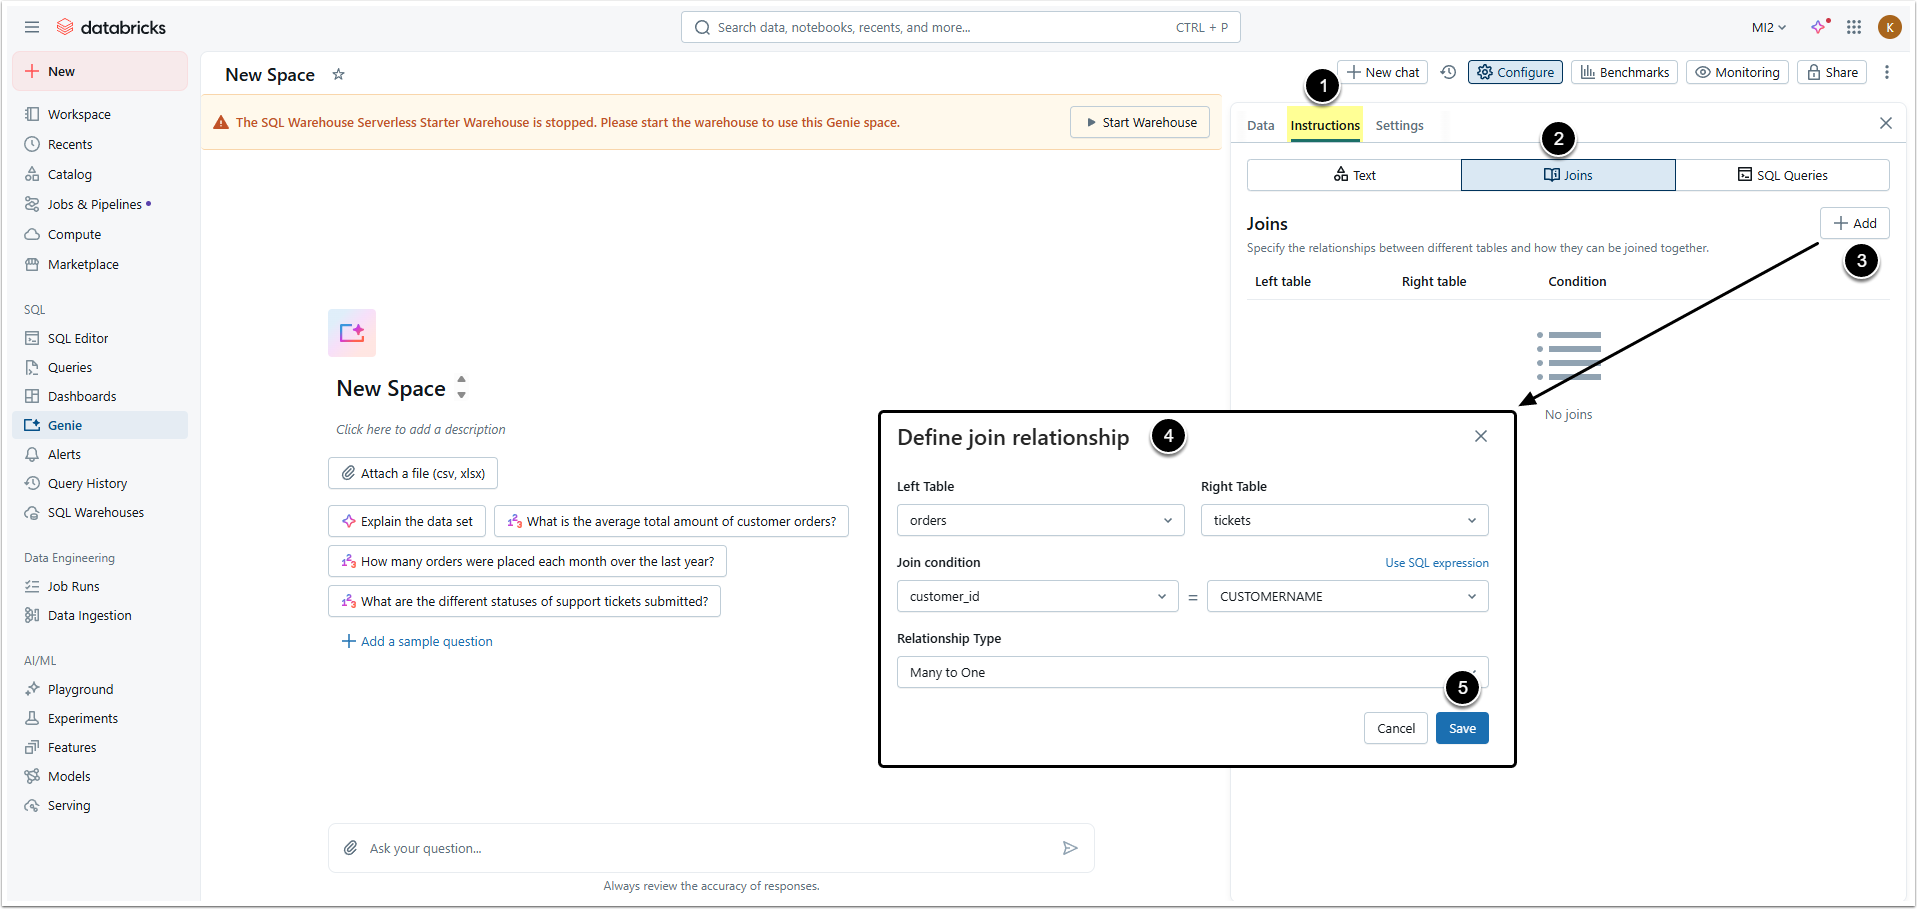
- Open Instructions tab.
- Go to Joins tab.
- [+Add]
- Define the relationship between tables.
- [Save]
6. Copy Important Data
Open Settings tab.
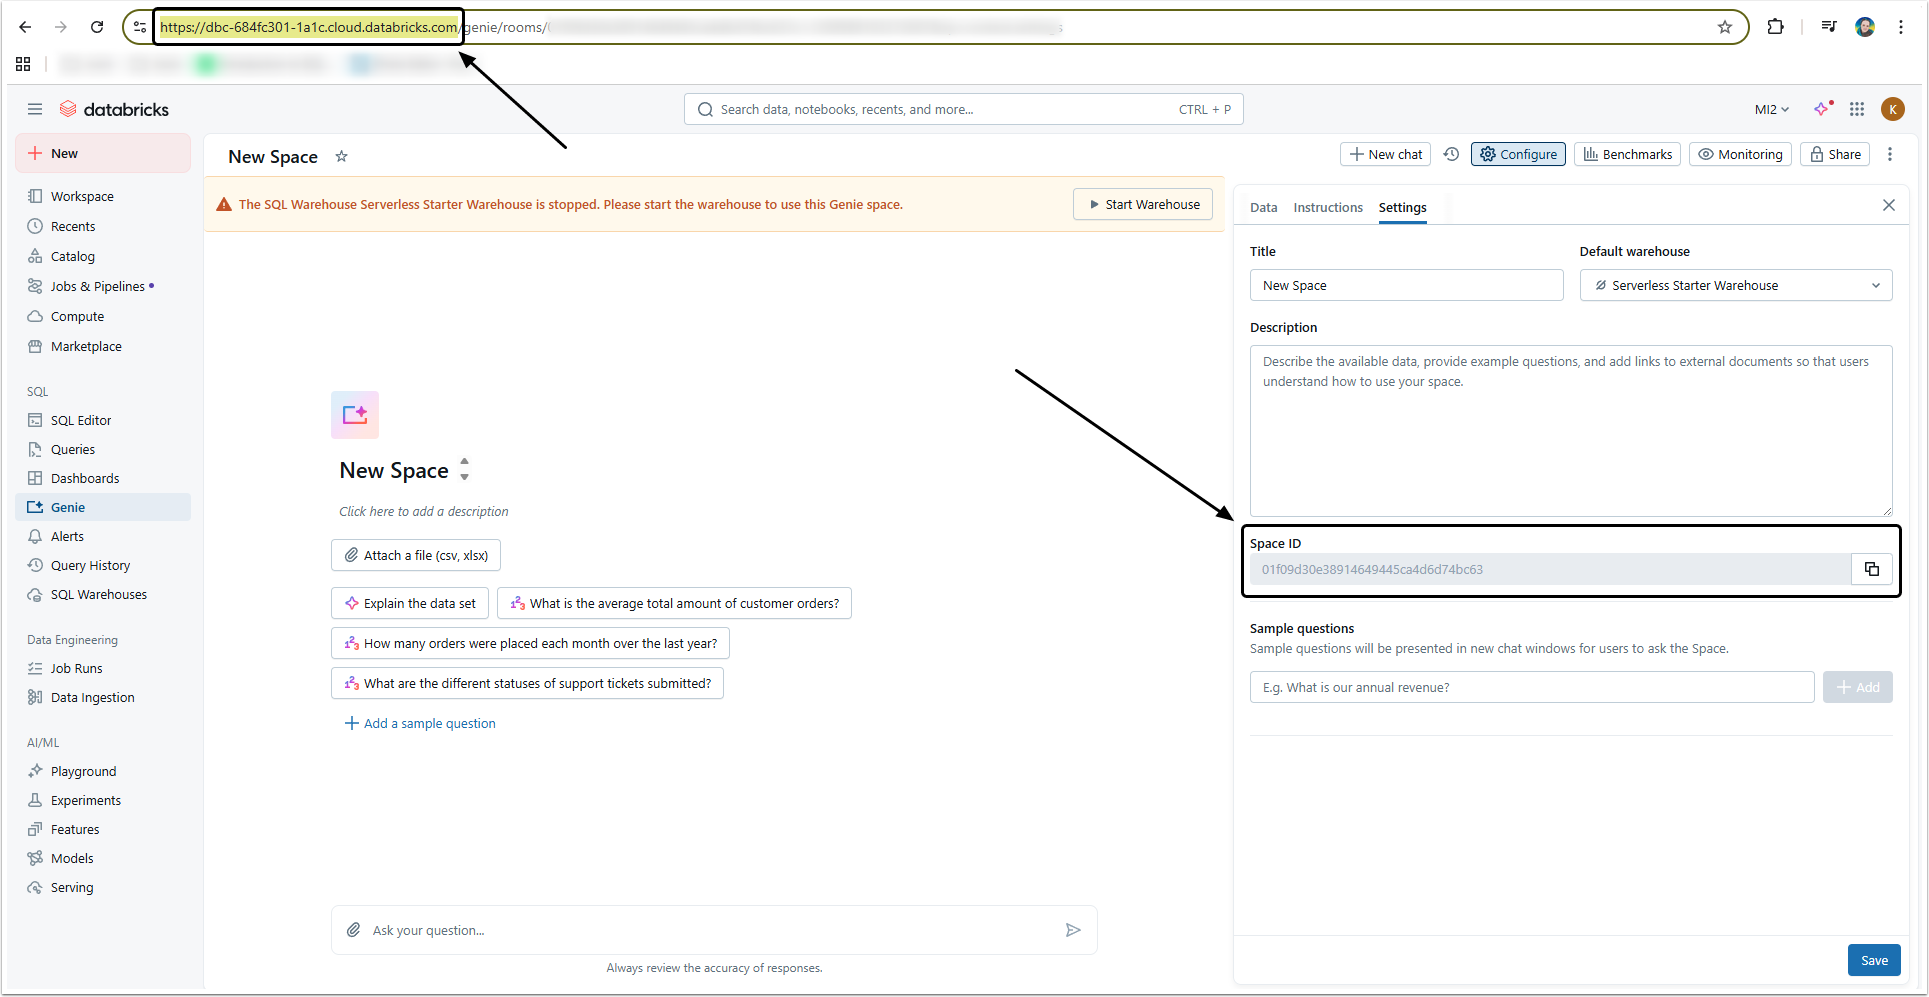
Copy the Space ID and the server URL.
7. Configure External Resource
NOTE: Be aware, that each Databricks Space will need to be configured as a separate External Resource.
Go to Metric Insights, access Admin > Concierge Setup and open the Content Sources tab
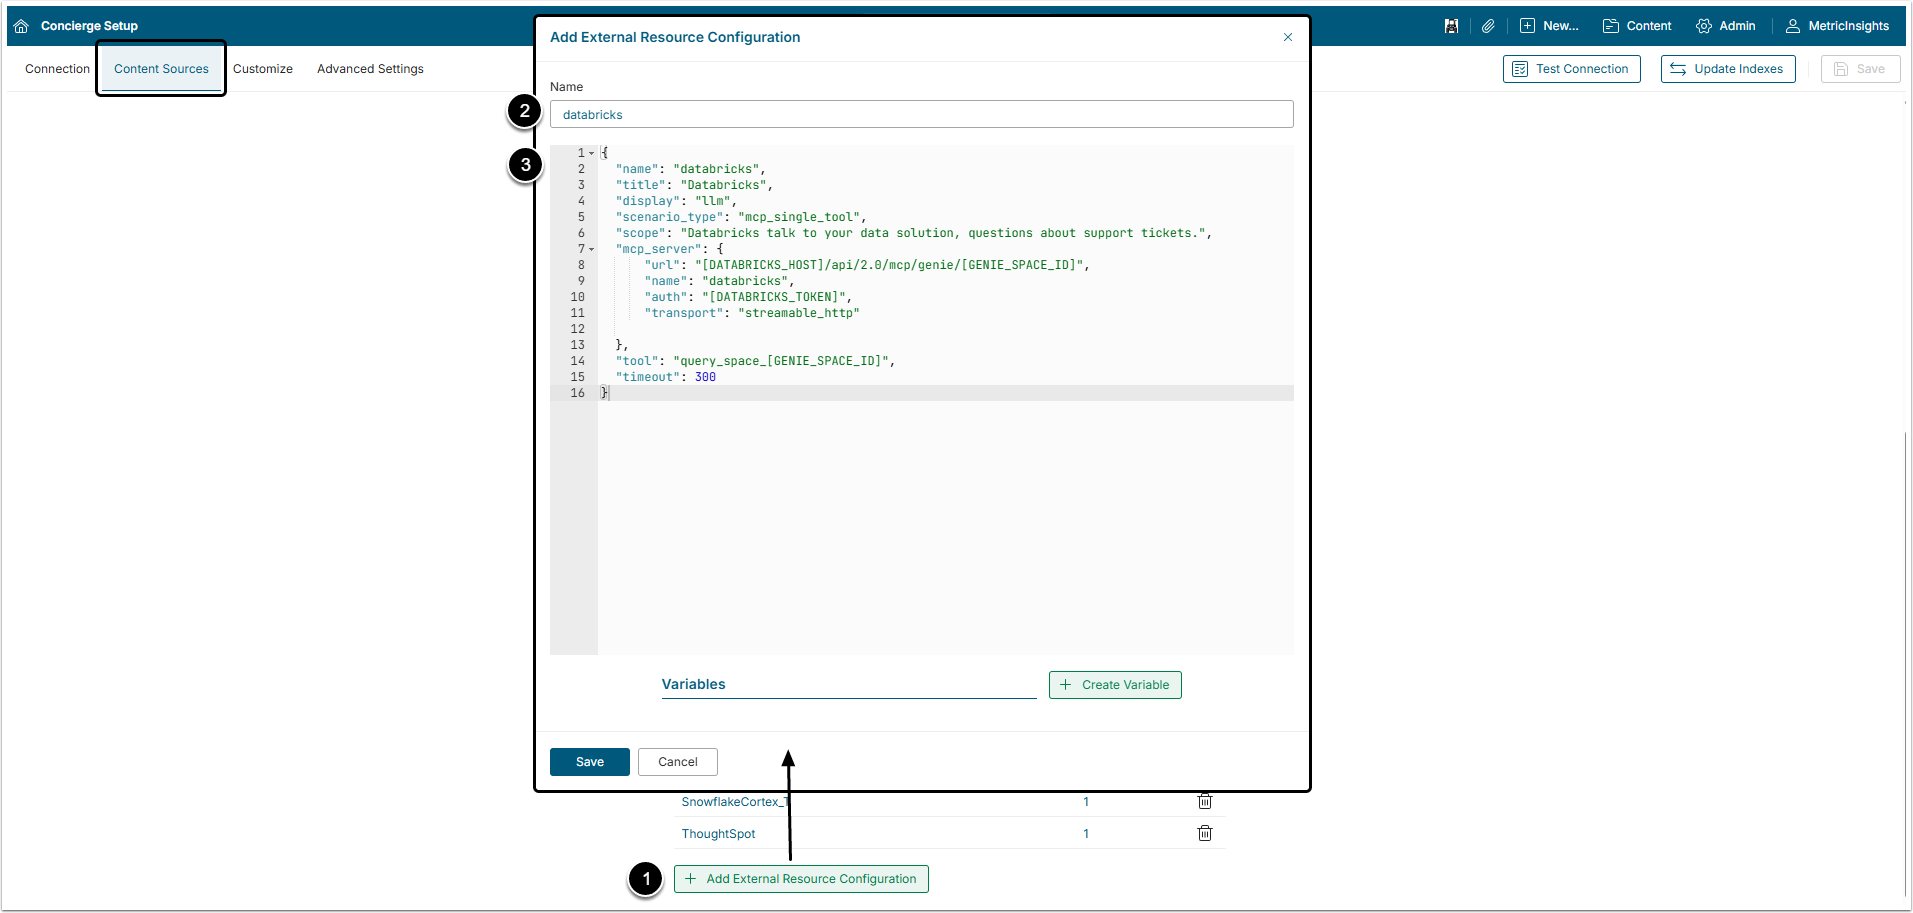
- [+ Add External Resource Configuration]
- Name: Give the external resource a descriptive name.
- Add a block of JSON code.
- For more details about how to build the configuration, check the Connecting External Agents to Concierge via MCP Server article.
It is recommended to use the following JSON code for Databricks External Resource configuration.
Code Example
NOTE: Pay attention to the info in the {blue curly braces}. Those pieces of data are obtained in Steps 3 and 6. For more details, check the table below.
{
  "name": "databricks",
  "title": "Databricks",
  "display": "llm",
  "scenario_type": "mcp_single_tool",
  "scope": "Databricks talk to your data solution, questions about support tickets.",
  "mcp_server": {
      "url": "{DATABRICKS_HOST}/api/2.0/mcp/genie/{GENIE_SPACE_ID}",
      "name": "databricks",
      "auth": "{DATABRICKS_TOKEN}",
      "transport": "streamable_http"

  },
  "tool": "query_space_{GENIE_SPACE_ID}",
  "timeout": 300
}Databricks Code Specifics
| Field | Description | |
|---|---|---|
name | The value of this variable should be unique and exactly match the Name field in the UI above the editor. It is allowed to use A-Z/a-z alphabetic symbols, digits, and underscore (_) when setting a name. | |
title | The display name. This name is shown in the All Sources button and in Concierge responses. | |
display | Defines how data from the external agent is shown. The llm is the required option for this variable. It means that MCP tool execution results will be processed by LLM on the Concierge side. | |
scenario_type | The mcp_single_tool option is mandatory for this variable. | |
scope | A prompt that instructs the LLM when to use this external resource. | |
mcp_server | url | URL of the MCP Server is a required value. The URL to use is DATABRICKS_HOST/api/2.0/mcp/genie/GENIE_SPACE_ID where DATABRICKS_HOST is the server URL and GENIE_SPACE_ID is the Space ID value that were copied in the Step 6. They can be copied directly or via Variables in the Add External Resource Configuration window. |
name | Name of MCP Server. It should be unique, but is an optional variable. | |
auth | This field contains the | |
transport | This variable is required. Databricks MCP server supports only the streamable_http transport mode. | |
tool | scenario_type variable is set to mcp_single_tool, so this field is required. The value to use is query_space_GENIE_SPACE_ID where GENIE_SPACE_ID is the Space ID value that were copied in the Step 6 or you can use the encrypted Variable. | |
timeout | Recommended value is 300 seconds. | |
7.1. Add Variables
It is possible to use Variables instead of sensitive information in the code. Add the data copied from the Databricks account as Variables.

Click [+ Create Variable] and add Databricks token, Space ID and server URL as Variables. After that you can use the Variable Name in the square brackets (for example, [DATABRICKS_TOKEN]) instead of the actual Token itself.
Don't forget to [Save] the External Resource.
Databricks will appear in the All Sources menu after adding a Domain to its external resource.