This article describes the first step of Connecting to Databricks MCP Server. Enable the MCP Server usage, generate Token and copy all the important data from the Databricks account for authentication in Concierge.
Prerequisites:
- Databricks Admin user account;
- Ability to grant the Service Principal the SELECT and USE SCHEMA privileges.
In this article:
1. Enable MCP Server Usage
Access the Databricks account: open the user menu by clicking username icon in the upper right corner of the page and select Previews.
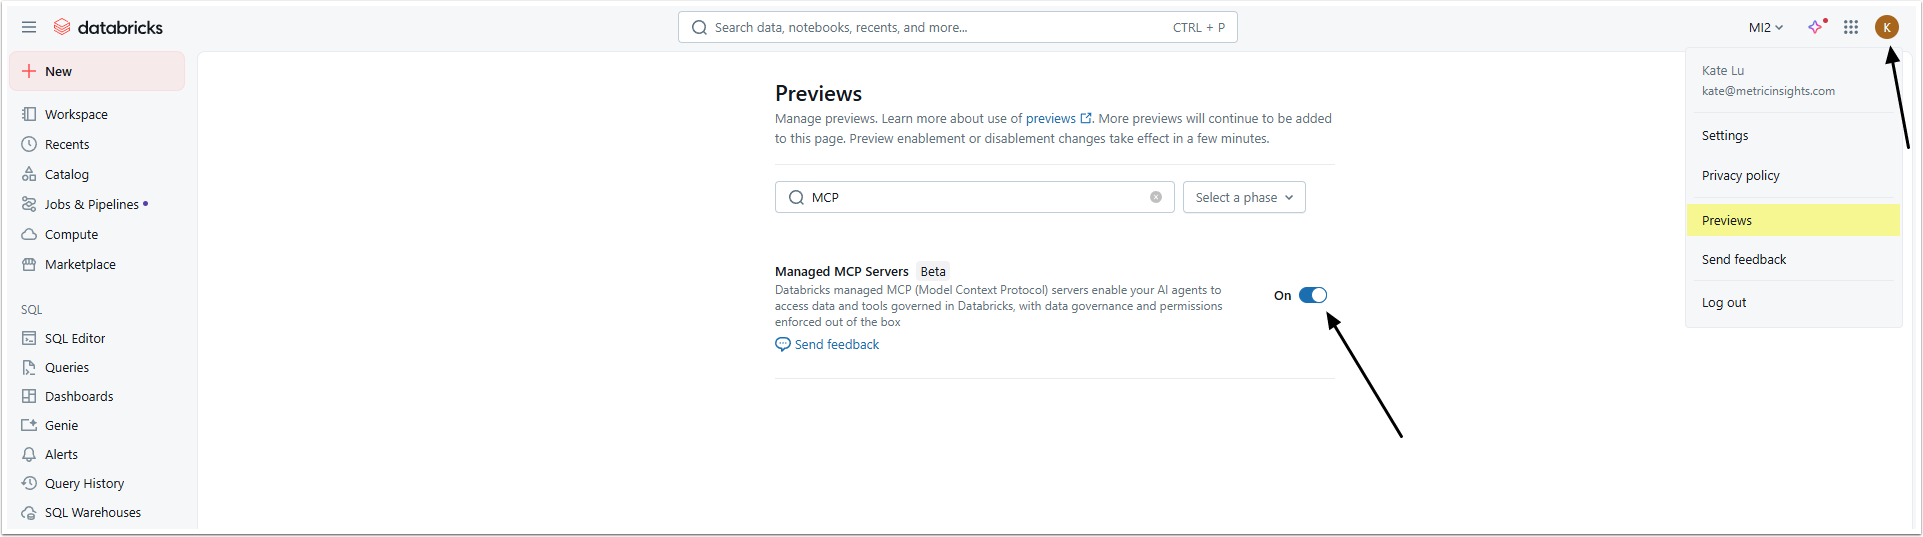
Find the Managed MCP Servers option and activate it.
2. Create New Genie Space
If you already have the Genie Space to use with Concierge, proceed to Step 4.
If not, go to the left-side menu and access the Genie settings page.
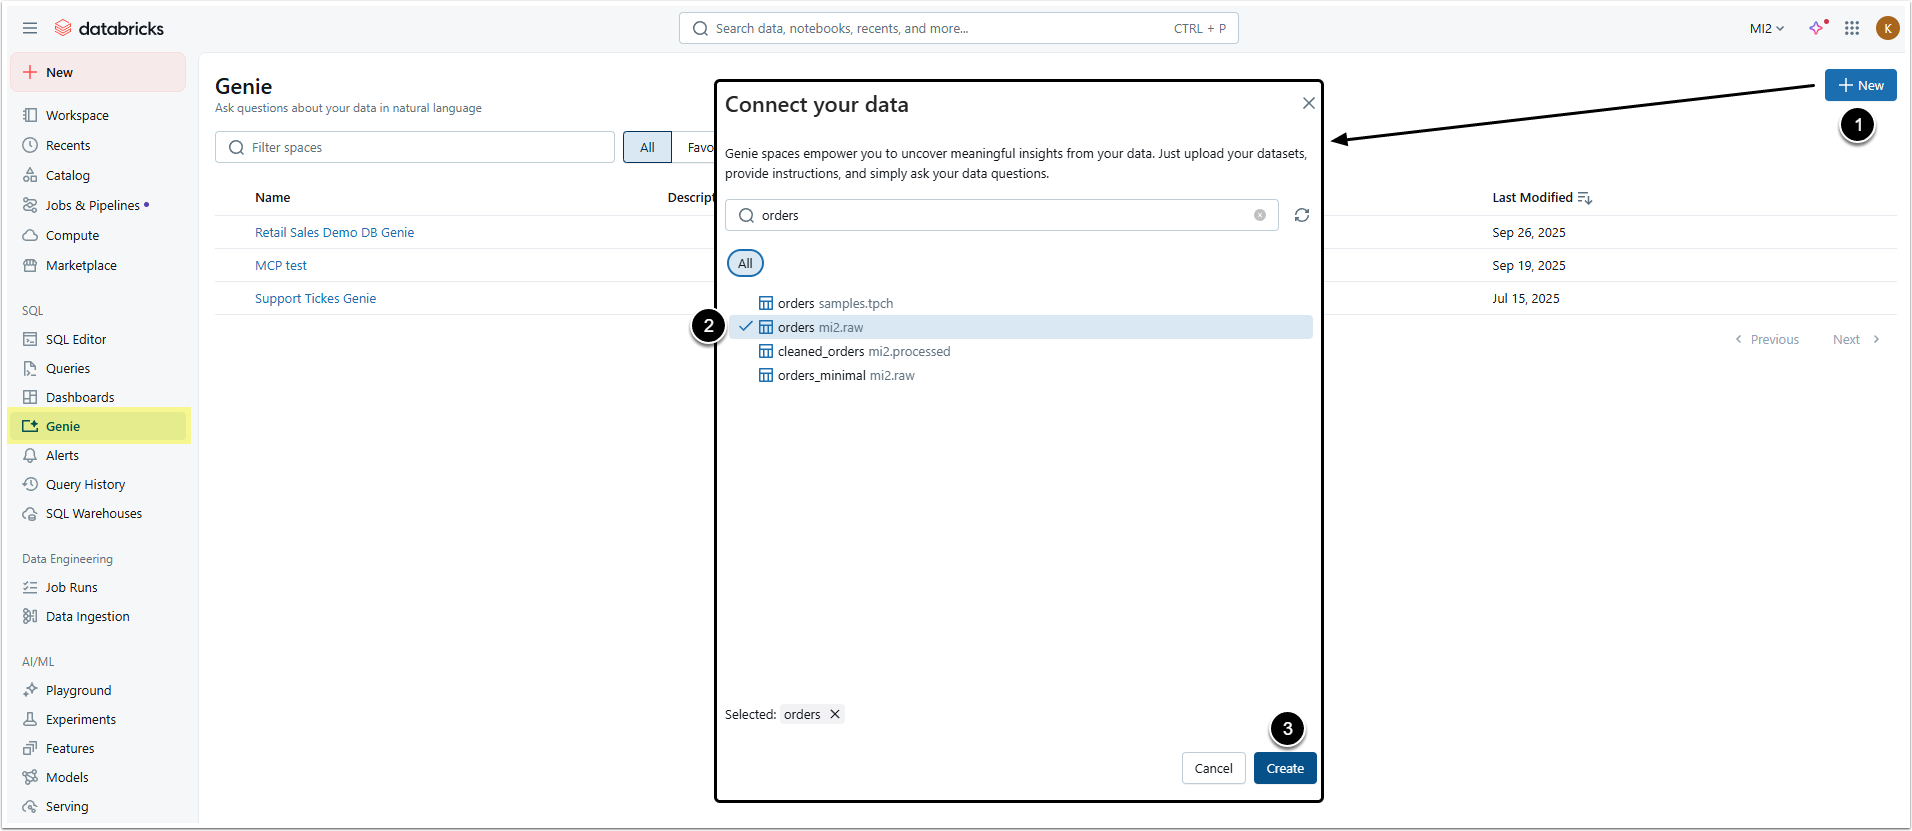
- [+ New]
- Select necessary data sources (tables).
- [Create]
3. Create Joins (Optional)
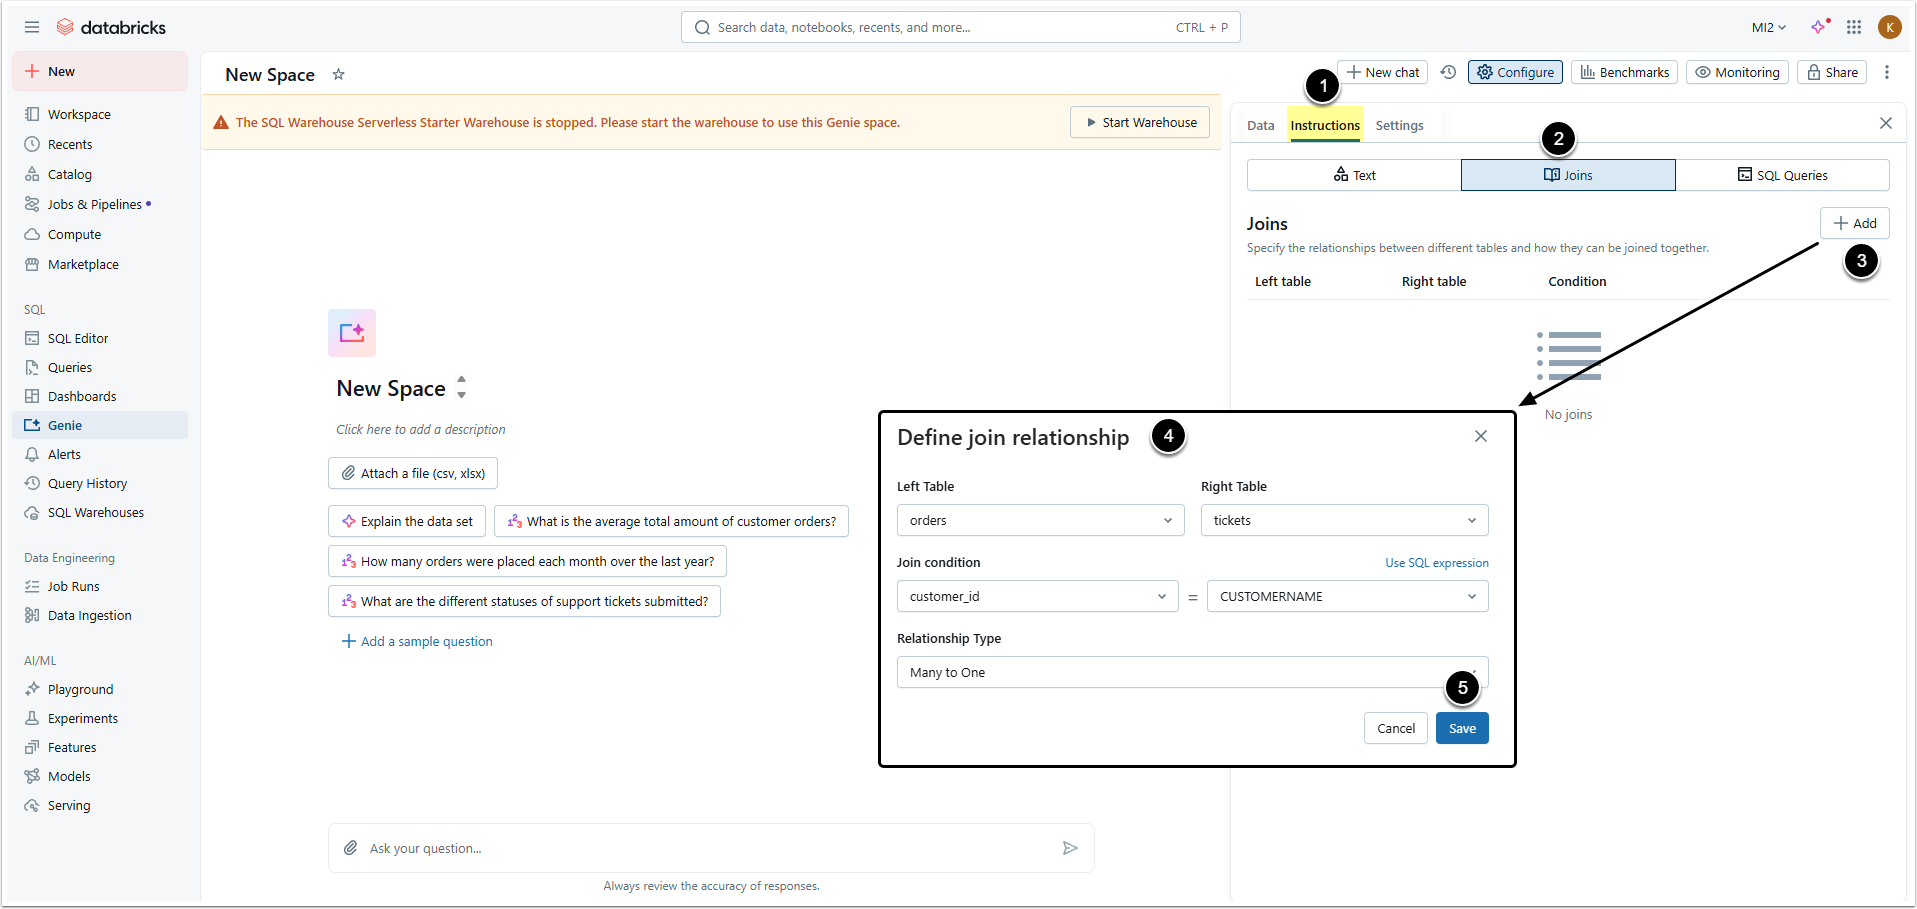
- Open Instructions tab.
- Go to Joins tab.
- [+Add]
- Define the relationship between tables.
- [Save]
4. Copy Important Data
In the Genie Space you created, open the Settings tab.
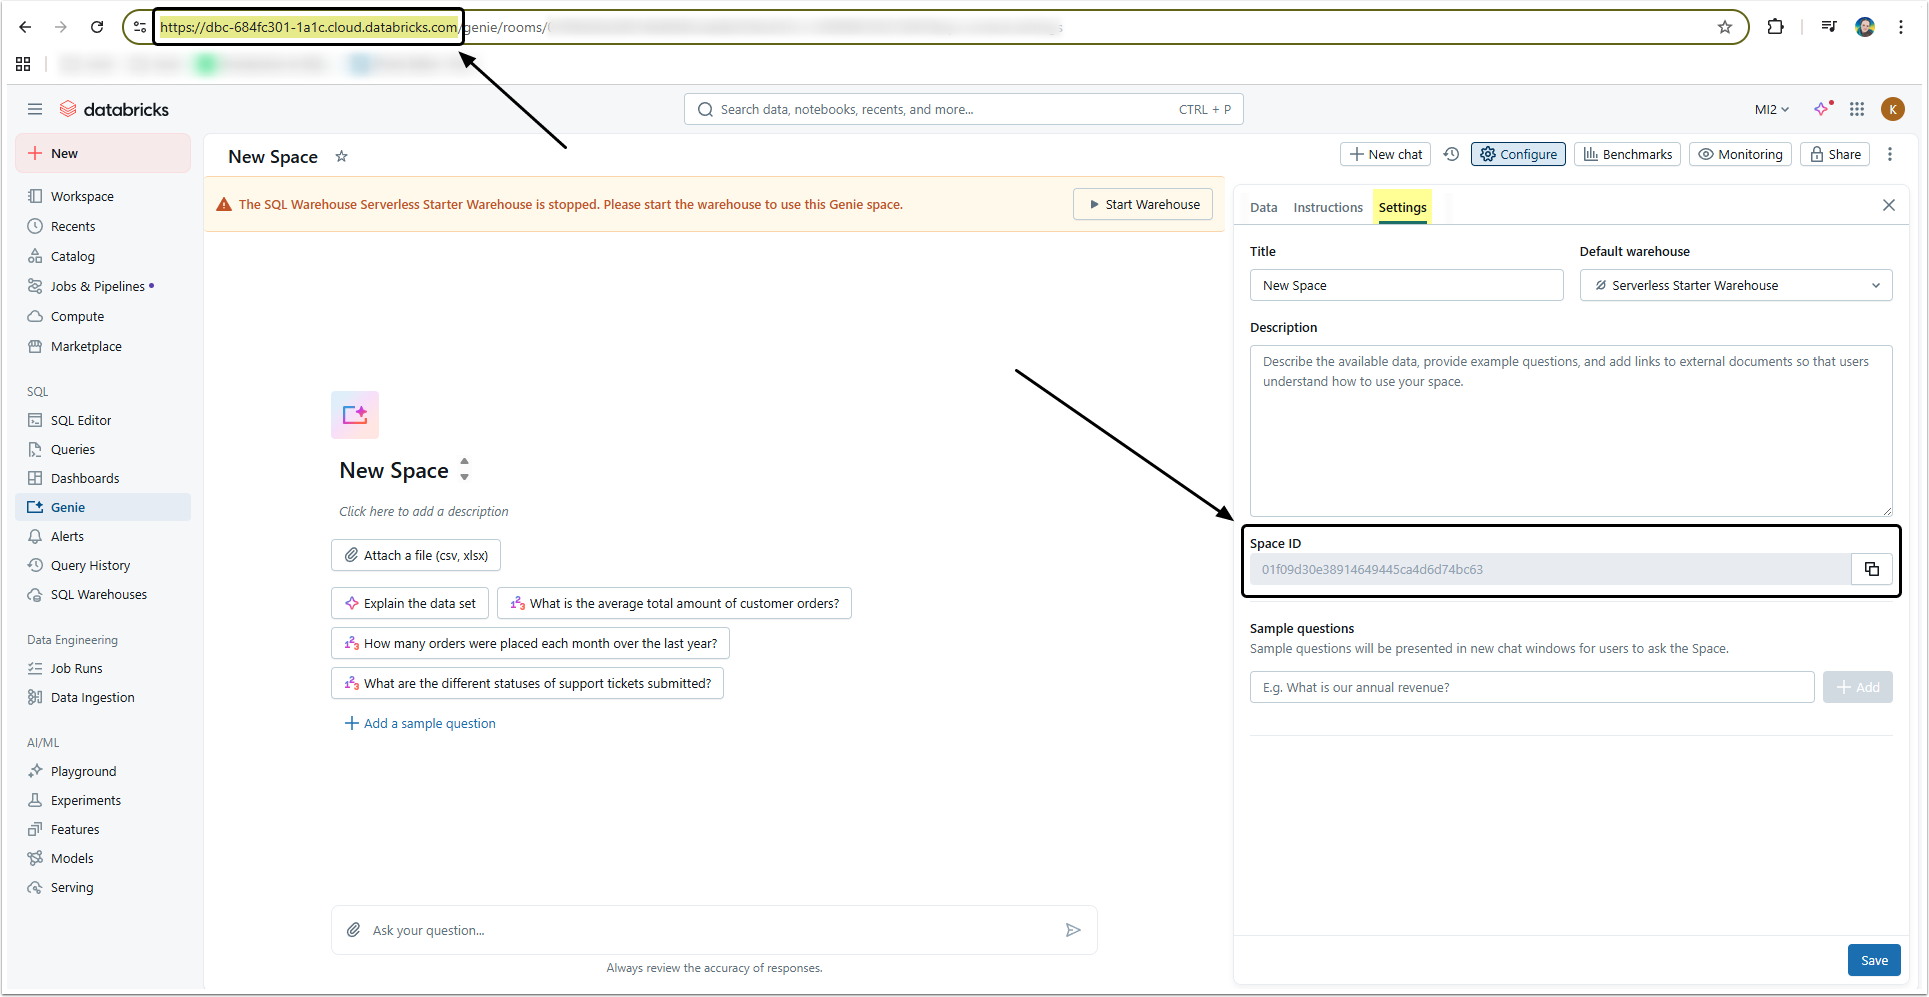
Copy:
- The Space ID from the settings information.
- The Server URL from your browsers navigation bar.
5. Collect Data for Auth Type: Defined in Configuration
If you have chosen "Defined in configuration" Auth Type, collect the Token.
5.1. Open the Token Management Page
Open the user menu and select Settings.
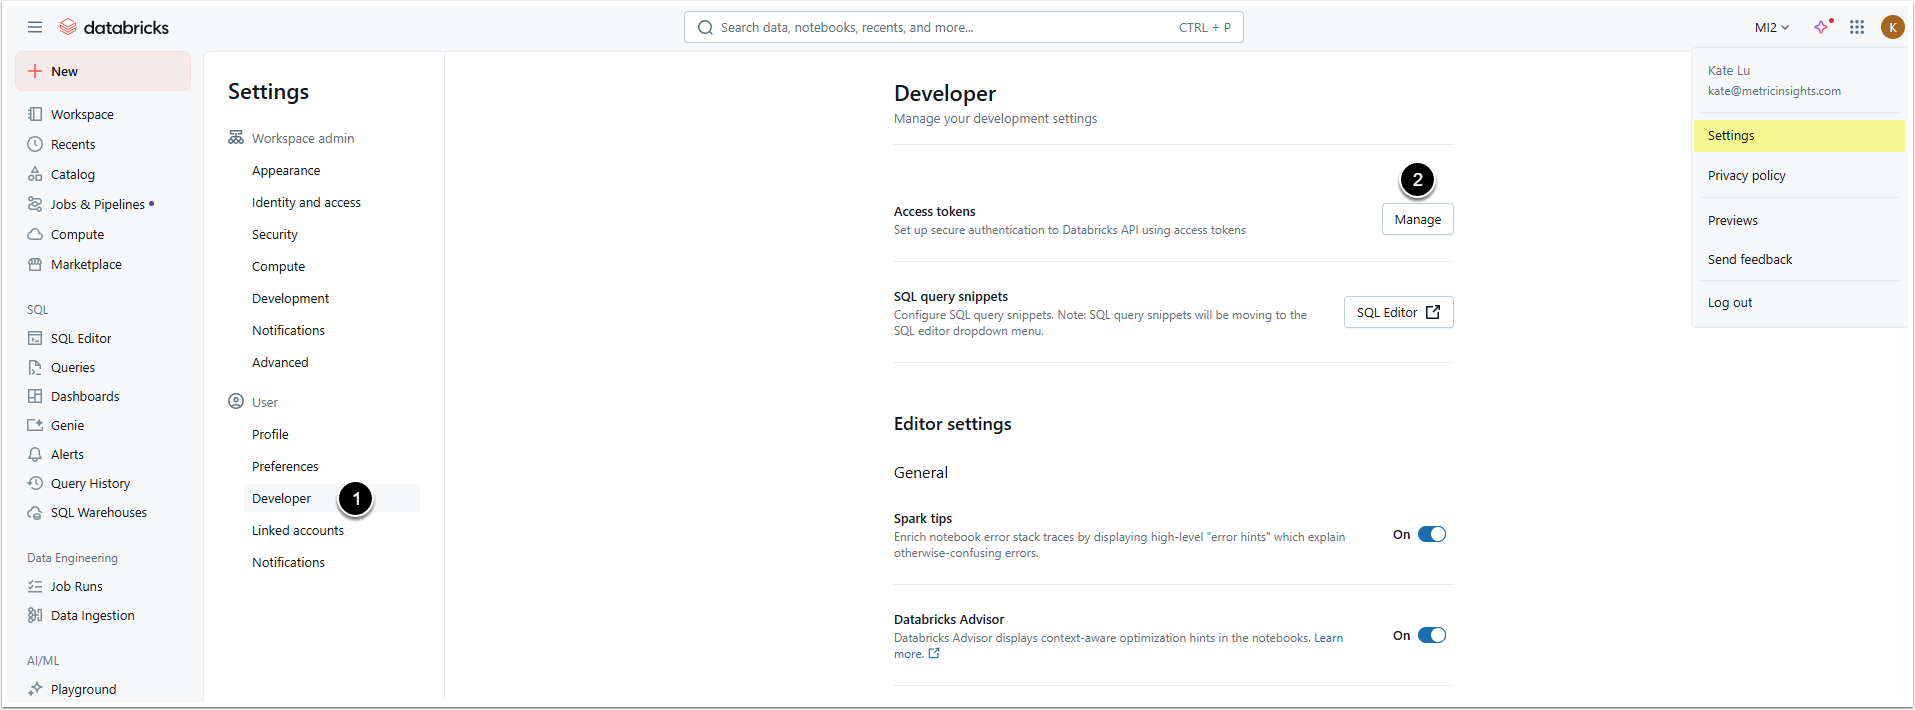
- Open the Developer settings page.
- Click [Manage] in the Access tokens section.
5.2. Generate Token
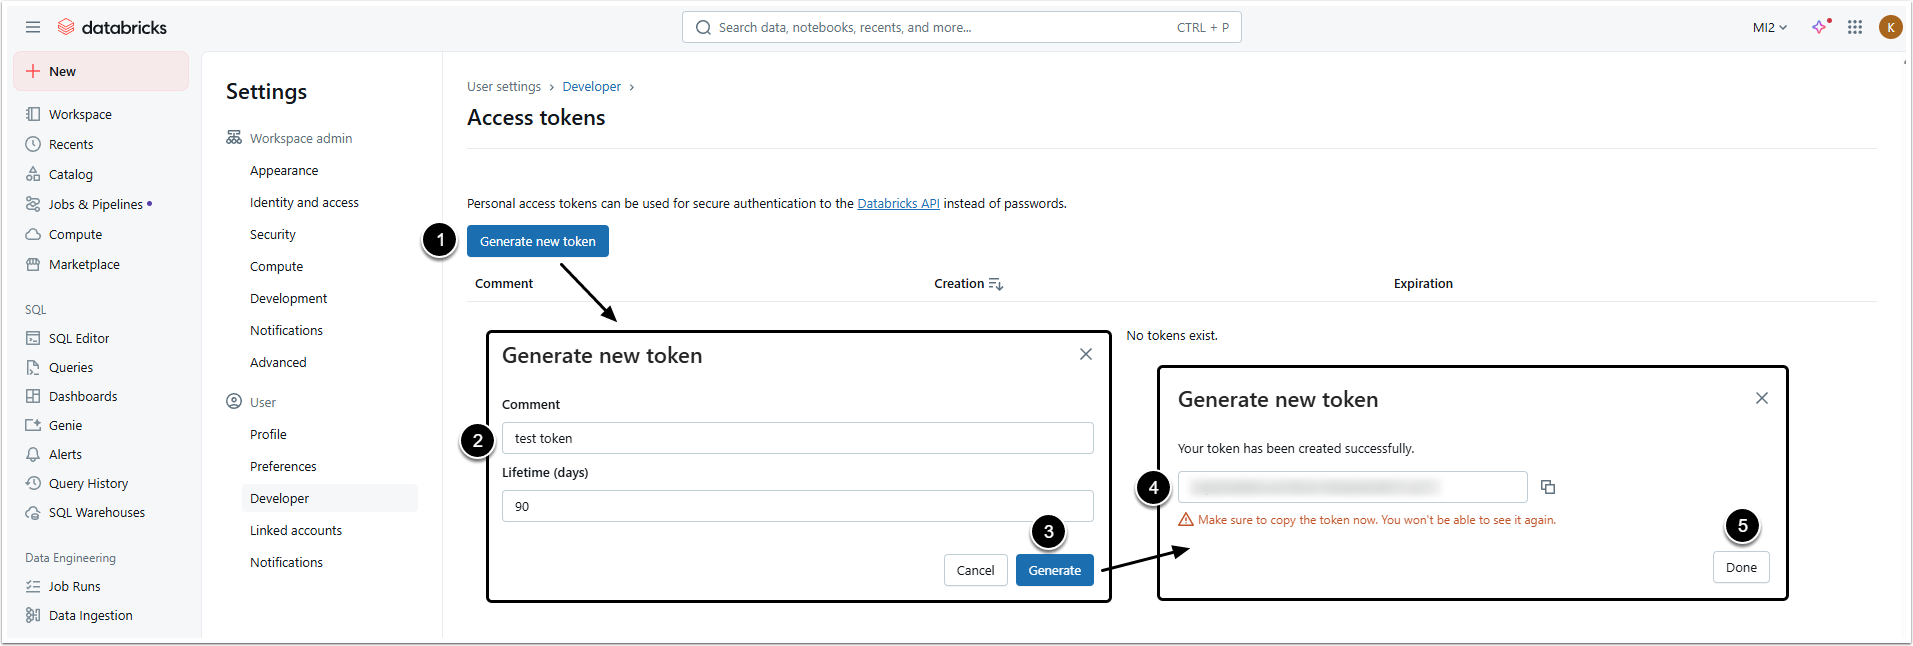
- [Generate new token]
- Comment: Give the token a description.
- [Generate]
- Copy the token, you won't be able to check it again later.
- [Done]
- Proceed to Configuring Databricks External Resource (v7.2.0)
6. Collect Data for Auth Type: Service Account Token
If you have chosen "Service Account Token" Auth Type, add a Service Principal, collect Application ID, Client Secret Value and Server URL. After that, give the newly created Service Principal the necessary Permissions and share it with your Genie Space(s).
6.1. Collect Application ID
Open the Databricks account and access User menu > Settings > Identity and access
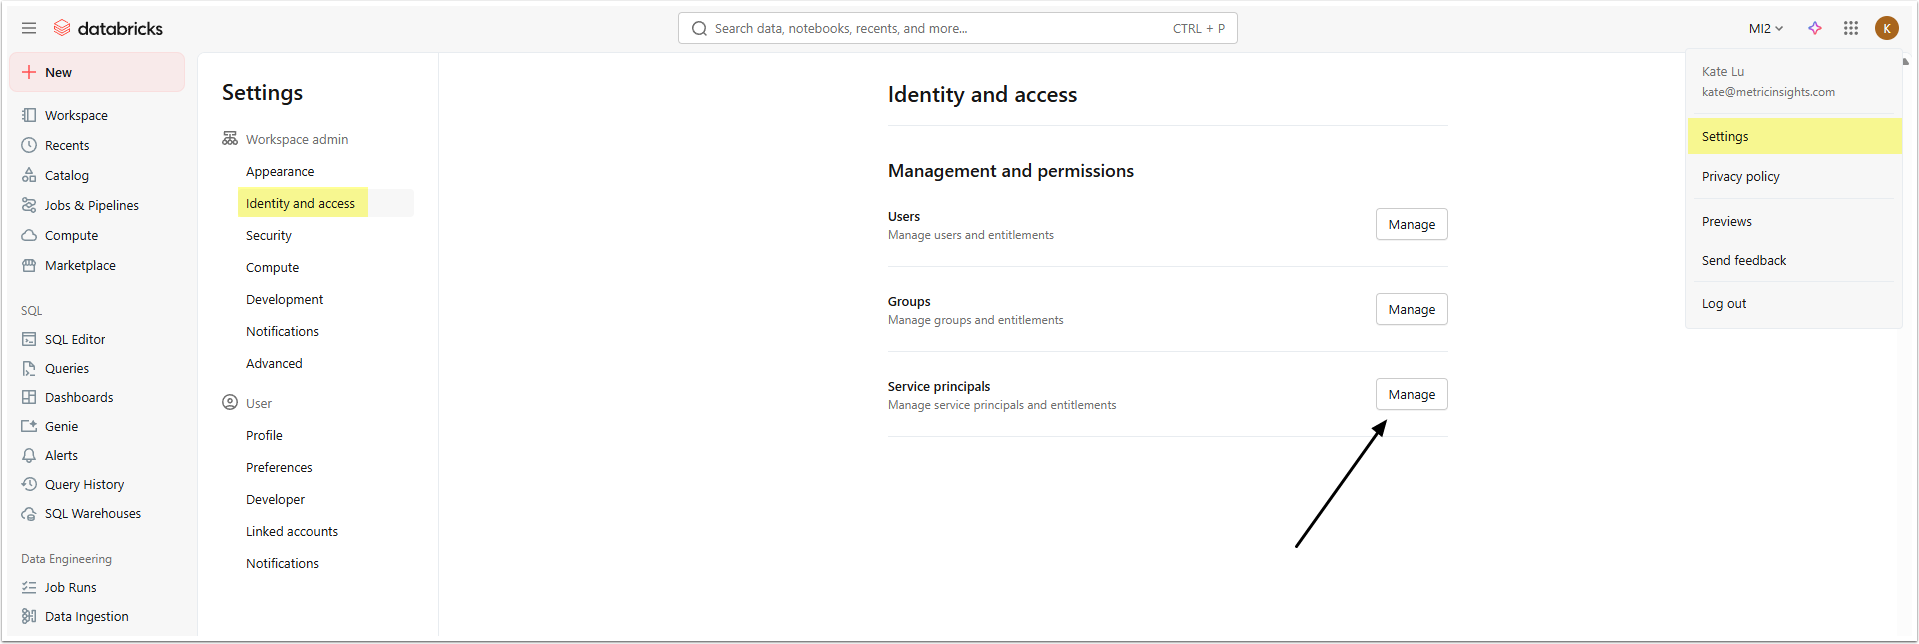
Click [Manage] in Service principals section and create a new Service principal.
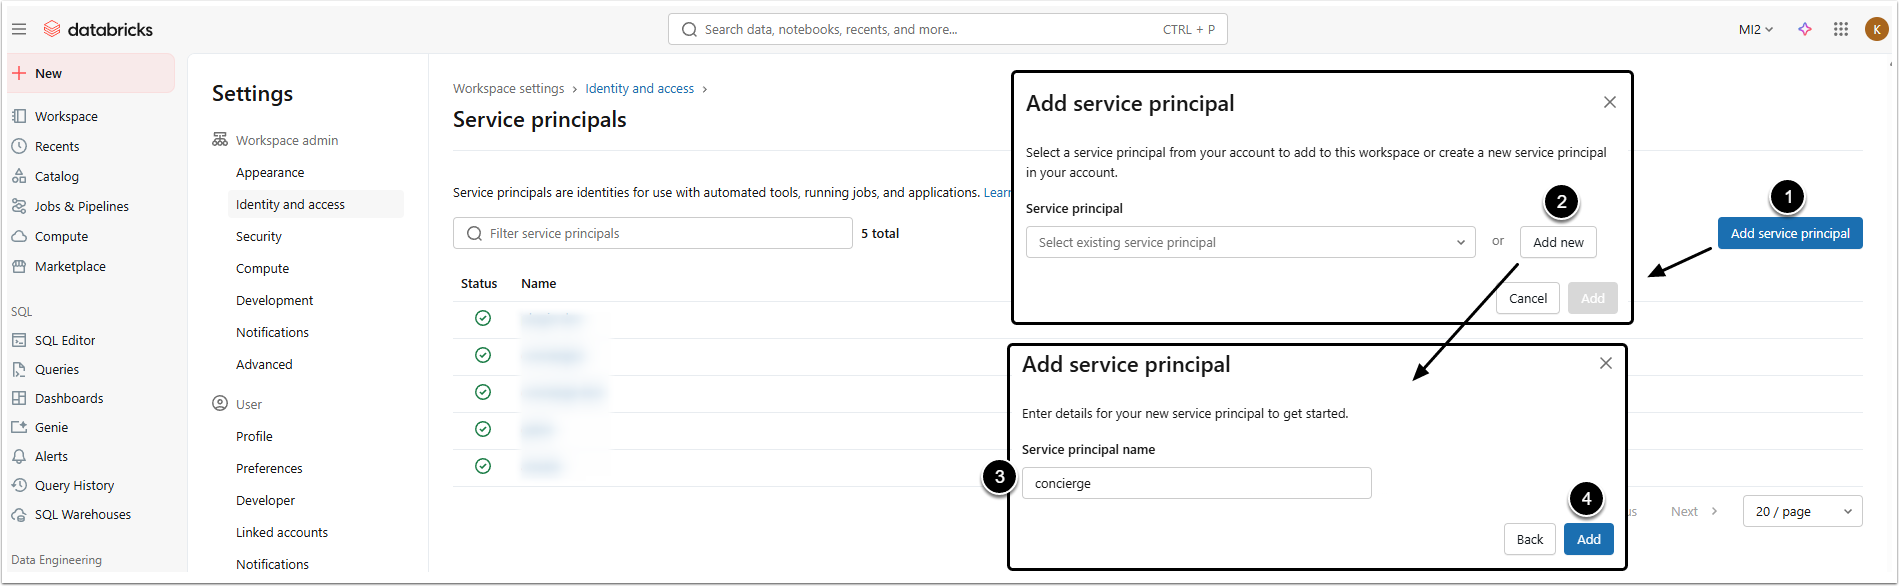
- [Add service principal]
- [Add new]
- Provide a Service principal name.
- [Add]
The new service principal will appear in the list. Copy the Application ID.

6.2. Collect Client Secret Value
Click the name of the created service principal to open its editor and go to Secrets tab.

- [Generate secret]
- Set the lifespan of the Secret.
- [Generate]
- Copy the Secret. You won't be able to see it again!
- [Done]
6.3. Collect the Server URL
It is the same that was collected in Step 4.
6.4. Give the Service Principal the required Permissions
Go to Catalog and open the specific data sources used by the Genie Spaces that will be used with Concierge. Open the Permissions tab.

- [Grant]
- Principals: Select the created service principal.
- Grant that principal the SELECT and USE SCHEMA privileges.
- [Confirm]
6.5. Share Genie Space with the Service Principal
Access Genie and click the Space name to be shared to open the editor.
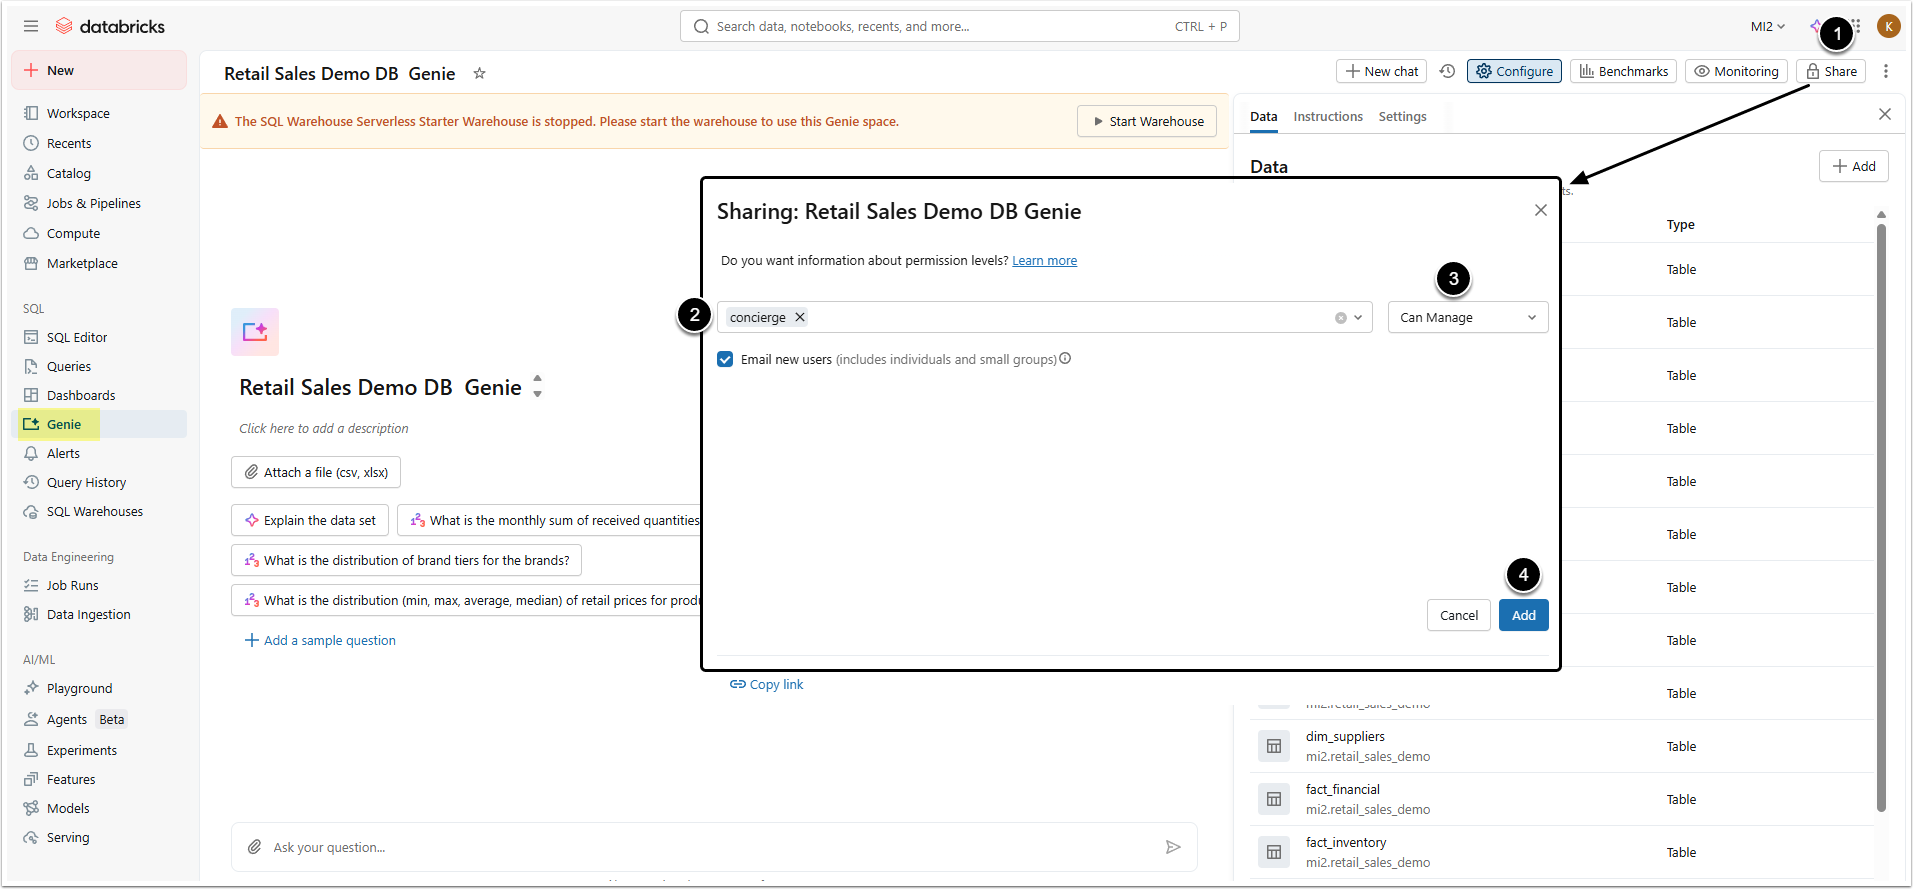
- [Share]
- Select the created service principal.
- Select "Can Manage" option.
- [Add]
- Repeat for any other Spaces to be used in Concierge.
- Proceed to Configuring Databricks External Resource (v7.2.0)