This article describes one of the steps of Connecting to Snowflake MCP Server (v7.2.0, v7.2.0a, v7.2.1). Log into the Snowflake account and gather the necessary data.
Prerequisites:
- Snowflake account with ACCOUNTADMIN privileges.
In this article:
- Gather Custom MCP Server Setup Information
- Create and Assign a Role
- Credentials for Auth Type
Gather Custom MCP Server Setup Information
During the MI Custom MCP Server setup the following information is required. To get this info, login into the Snowflake account.
1. "account" Value
Go to Admin > Accounts

- In the row of the account that has ACCOUNTADMIN privileges hover over the link icon to show the account's locator.
- Copy the
xxxxxxx.us-east-2.awspart, this is theaccountvalue.
2. "database" and "schema" Values
Access Catalog

Copy the titles of database and schema where the Snowflake Intelligence Agents are saved.
3. "token" Value
Access User menu > Settings > Authentication

- [Generate new token]
- Name: Give the token a descriptive name.
- Expires in: Select the expiration period.
- Grant access: Select the account to which the access is given.
- [Generate]
- Copy the
tokenand save it somewhere. Its impossible to see it ever again after you close this window.
4. Check Credentials
As a result, for MCP Server setup you need to have the following credentials copied:
account;database;schema;token.
Create and Assign a Role
If you select "User OAuth" as the Auth Type, it is recommended to create a Role that will give Snowflake users the set of permissions needed to access the Snowflake Agents. This will make managing the various permissions needed to use the Agents through the MCP Server much easier than trying to assign each permission to each individual user that will be using the Agent.
1. Grant Permissions
The permission to access an agent are not enough to use the Agent. You will have to give the Role permissions to all of the Objects connected to the agent. All permissions can be granted either through the UI on the various objects or via an SQL workspace. For each agent, note names of all of the following objects used by the agent:
- database;
- schema;
- warehouse;
- all the tables;
- semantic views (if used);
- stages (if used).
Then, grant the following permissions to the Role:
- USAGE to each agent, database, schema and warehouse;
- SELECT on all tables and semantic views;
- READ on stages.
If you are using Managed Snowflake MCP Server, additionally give:
- USAGE on MCP server and database, schema and all the tables connected to it.
USAGE Access to the Role
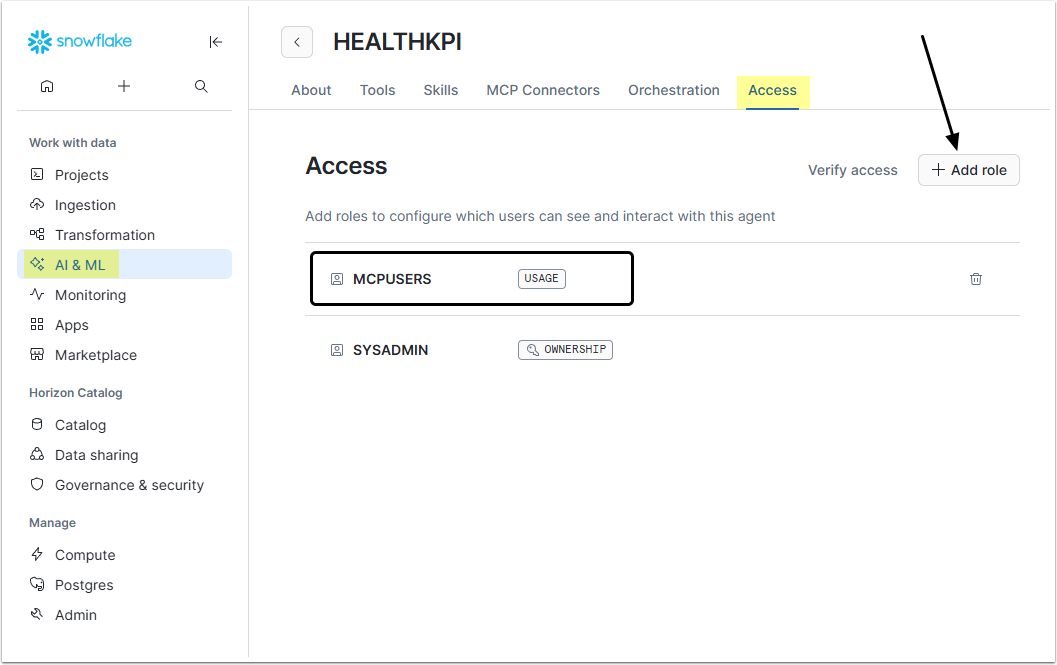
On each Cortex Agent, Grant USAGE access to the role. Repeat this for all Agents you want to use in Metric Insight.
Sample code:
GRANT USAGE ON AGENT <database>.<schema>.<agent_name> TO ROLE <role_name>;To do this from UI, access AI & ML > Cortex Agents, click the Agent's name, click [Edit] and open Access tab
USAGE or SELECT Permissions to Objects
Grant access to Database(s) used by the Agent:
-- Grant database usage
GRANT USAGE ON DATABASE <database> TO ROLE <role_name>
Grant access to Cortex Database:
-- Grant Cortex database role
GRANT DATABASE ROLE SNOWFLAKE.CORTEX_USER TO ROLE <role_name>
Grant access to Schema(s) used by Agent:
-- Grant schema usage for the Agent
GRANT USAGE ON SCHEMA <database>.<schema> TO ROLE <role_name>
Grant access to Semantic View used by Agents:
-- Grant SELECT on semantic view
GRANT SELECT ON VIEW <database>.<schema>.<semantic_view> TO ROLE <role_name>
-- All tables in the semantic view
GRANT SELECT ON TABLE <database>.<schema>.<table_name> TO ROLE <role_name>
Grant access to any stages used by the Agent:
-- For internal stages:
GRANT READ ON STAGE <database>.<schema>.<stage_name> TO ROLE <role_name>;
-- For external stages:
GRANT USAGE ON STAGE <database>.<schema>.<stage_name> TO ROLE <role_name>;USAGE on the Warehouse
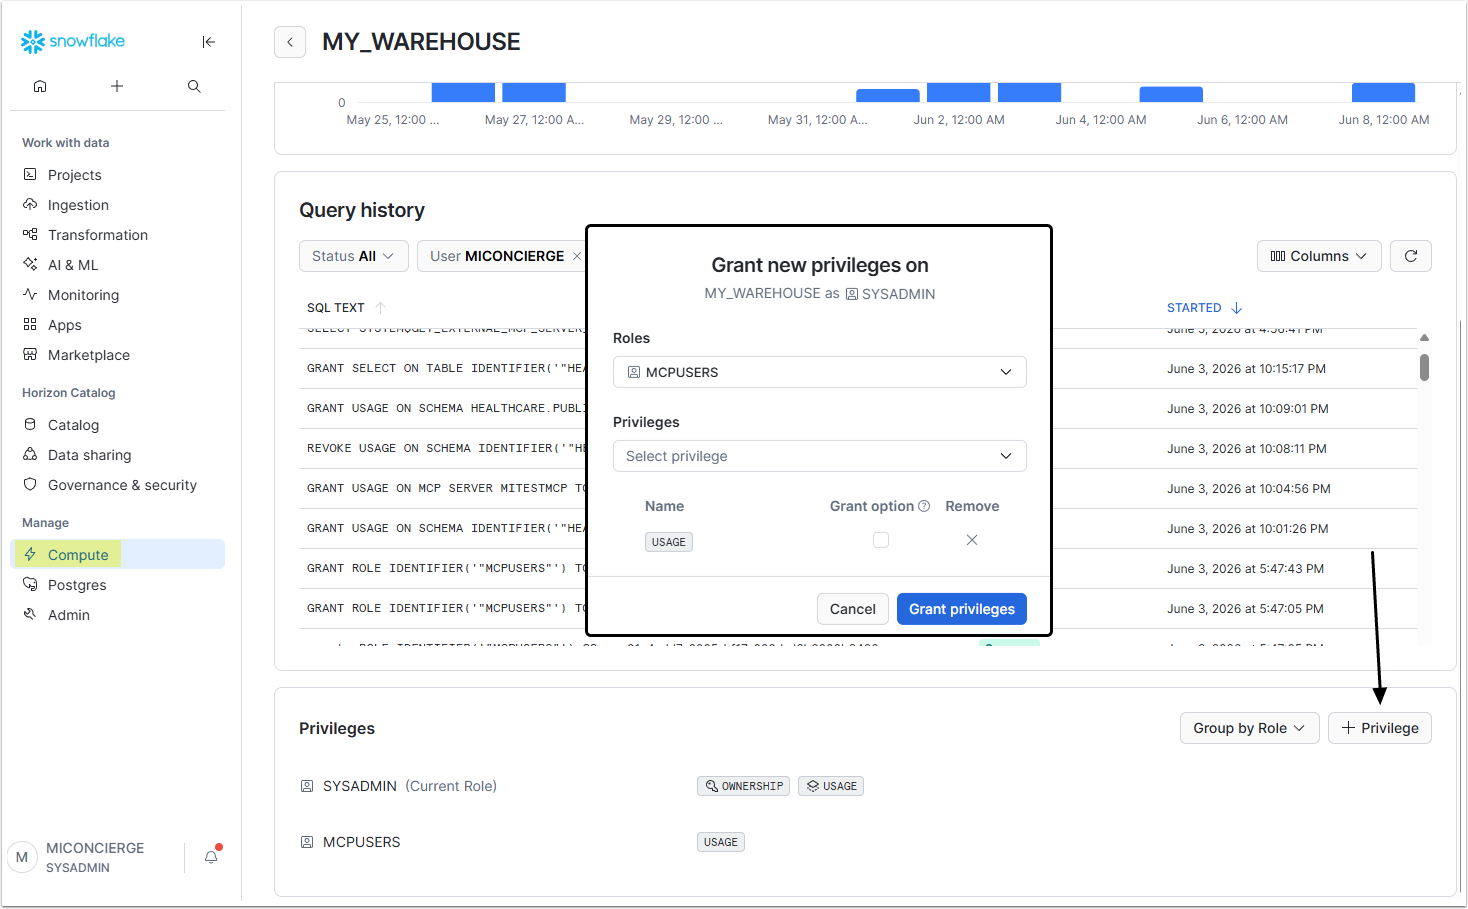
Be sure to grant USAGE permission on the Warehouse assigned to the role:
GRANT USAGE ON WAREHOUSE <warehouse_name> TO ROLE <role_name>To do this from UI, access Compute, click the Warehouse name, scroll to the Privileges section and click [+ Privilege].
USAGE Access to MCP Server
The role needs to have permissions to use the MCP Server:
-- Grant usage for MCP server
GRANT USAGE ON MCP SERVER <mcp_server_name> TO ROLE <role_name>
And usage of the database and schema where the MCP Server was created:
-- Grant database usage for the MCP Server
GRANT USAGE ON DATABASE <database> TO ROLE <role_name>;
-- Grant schema usage for the MCP Server
GRANT USAGE ON SCHEMA <database>.<schema> TO ROLE <role_name>;2. Assign the Role
The Role you created must be assigned to all the users who will be using these Agent(s) in Concierge. It also needs to be set as a Default Role. If a user already has a Default Role, assign the role you created to that user’s existing Default Role.
Credentials for Auth Type
To create a Snowflake External Resource Configuration with "Service Account Token" or "User OAuth" Auth Type, you will have to perform these additional configurations in the Snowflake account.
1. Access My Workspace
Return to Snowflake account and access Projects

Click [+ Add New] in My Workspace section and select "SQL File" from the dropdown menu to add a Security Integration.
2. Configure Security Integration
Add the following query into the text field:
CREATE SECURITY INTEGRATION [integration_name]_oauth
TYPE = OAUTH
ENABLED = TRUE
OAUTH_CLIENT = CUSTOM
OAUTH_CLIENT_TYPE = 'CONFIDENTIAL'
OAUTH_REDIRECT_URI = 'https://[instance].metricinsights.com/data/editor/service/validate-data-source-oauth'
OAUTH_ISSUE_REFRESH_TOKENS = TRUE
OAUTH_REFRESH_TOKEN_VALIDITY = 7776000;
Replace [integration_name] with the name of Security Inegration and the [instance] with the name of Metric Insights instance where the Concierge you are connecting Snowflake with is configured.

3. Get OAUTH Client and Secret
Add the following query to the code:
SELECT SYSTEM$SHOW_OAUTH_CLIENT_SECRETS('[INTEGRATION_NAME]_OAUTH');NOTE: The Security Integration name must be all caps.

After adding the query, click the run button.
In the Results tab, you’ll see the JSON with OAUTH_CLIENT_SECRET_2, OAUTH_CLIENT_ID and OAUTH_CLIENT_SECRET. Download the results file and copy OAUTH_CLIENT_ID and OAUTH_CLIENT_SECRET values from the table.

4. Get Server Value
Go to Admin > Accounts

- In the row of the account that has ACCOUNTADMIN privileges hover over the link icon to show the account's locator.
- Copy the
xxxxxxx.us-east-2.aws.snowflakecomputing.compart, this is the Server address.
5. Check Credentials
As a result, you need to have the following credentials copied:
- OAUTH_CLIENT_ID;
- OAUTH_CLIENT_SECRET;
- Server address.
- NOTE: Server value must be inserted without "https://" at the beginning and without ‘/’ at the end.