This is part one of the fifth use case in the Training by Example series. Review it after finishing the Training by Example: Use Case — Catalog, Training by Example: Use Case — Bursting, Training by Example: Use Case — Exceptions Report and Training by Example: Use Case — Changes Report.
In this example, a business unit that oversees the company's Wine Sales requests a series of metrics for employees that demonstrate a high-level perspective of sales, costs, and profits by sales channel. Those metrics have to be included in weekly Bursts. Additionally, a Daily Alert should be distributed if:
- Sales are higher/lower by 10% over the same day of week last week
- Cost is higher/lower by 2 Std (standard deviations) of 30-day average
- Profit is higher/lower by 15% for the same day of the week over the last 12 weeks
Use the example workflow outlined below to:
- Learn how to build a Metric from Dataset
- Discover how to create an aggregated Metric
- Understand how to create and customize a KPI Alert Rule and add it to the Daily Alert distribution
Make sure you have completed all the following steps before beginning this Use Case:
- Created an SQL Data Source
- Created a Category
- Built an SQL Dataset
- Added a User Map
- Created a Dimension
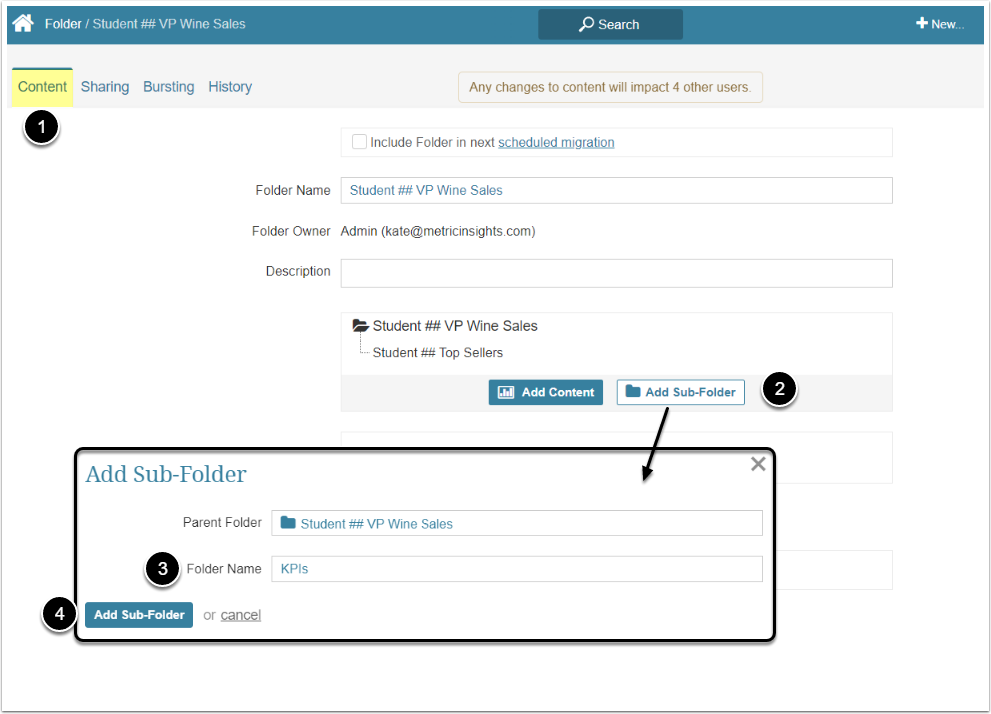
- Created a Folder
- Built a Burst
Content Creation
A Metric is an Element that charts a key measure across time. A Metric may include up to 2 Dimensions and each defined Metric is limited to a single measure showing trends over time.
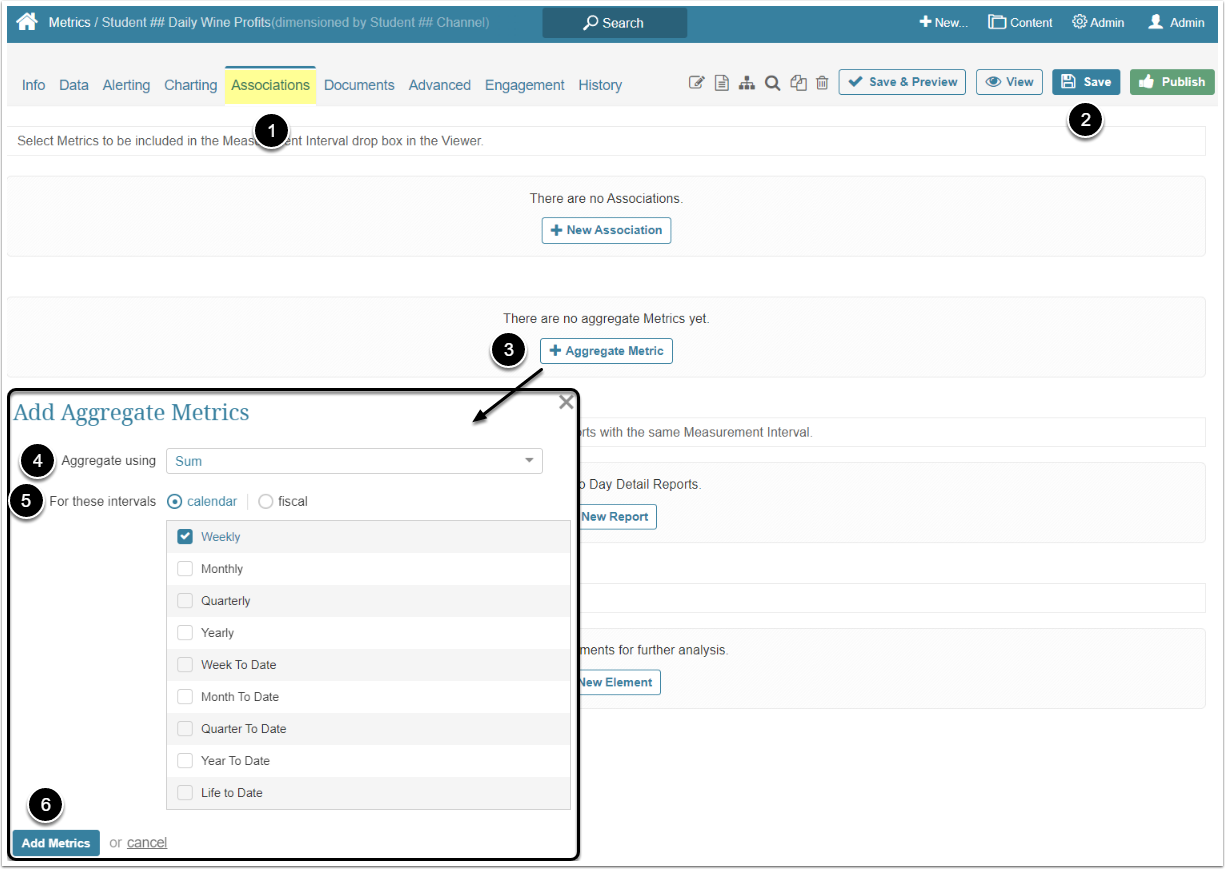
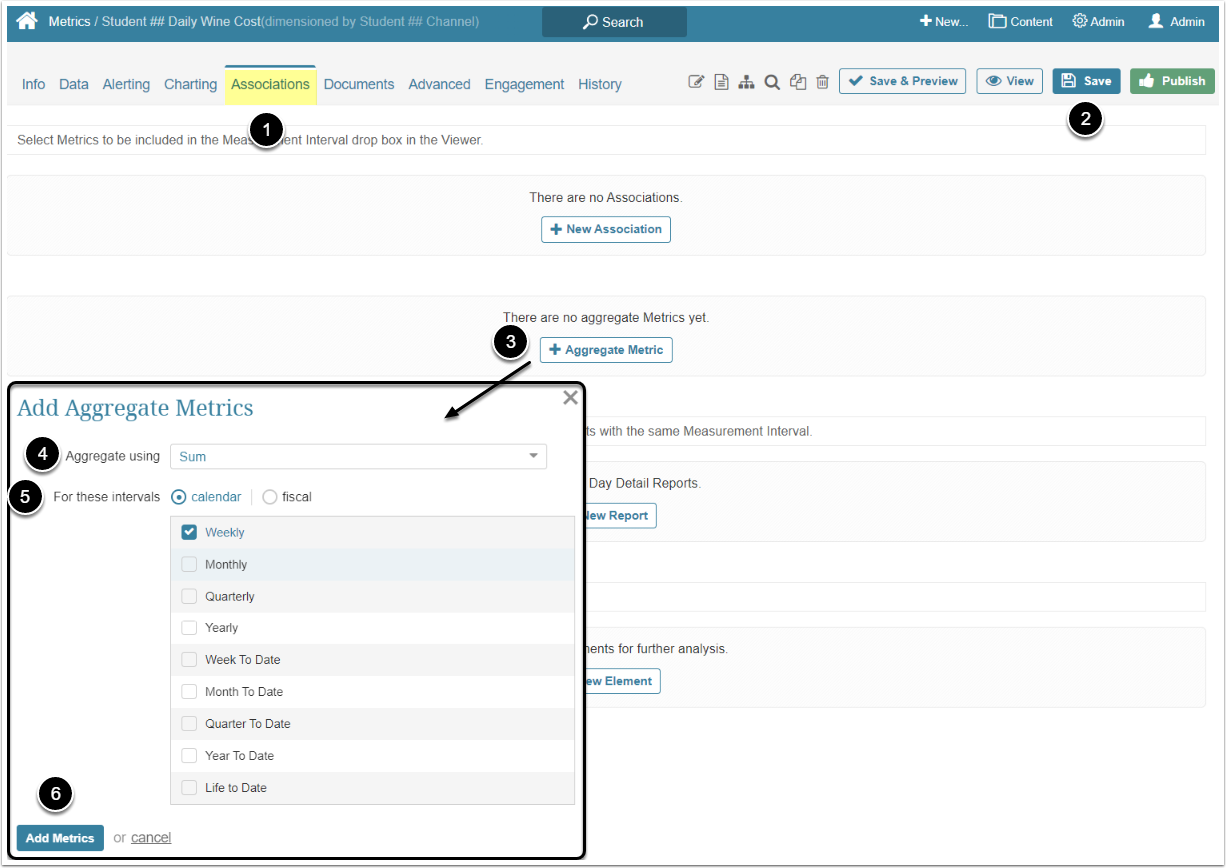
In this section, you will learn to create a Metric from the Dataset. Besides that, you will create an Aggregated Metric. Aggregate Metrics are not bound to any particular Data Collection Trigger. The Metric's data is updated automatically each time its Source Metric's data is updated or changed.
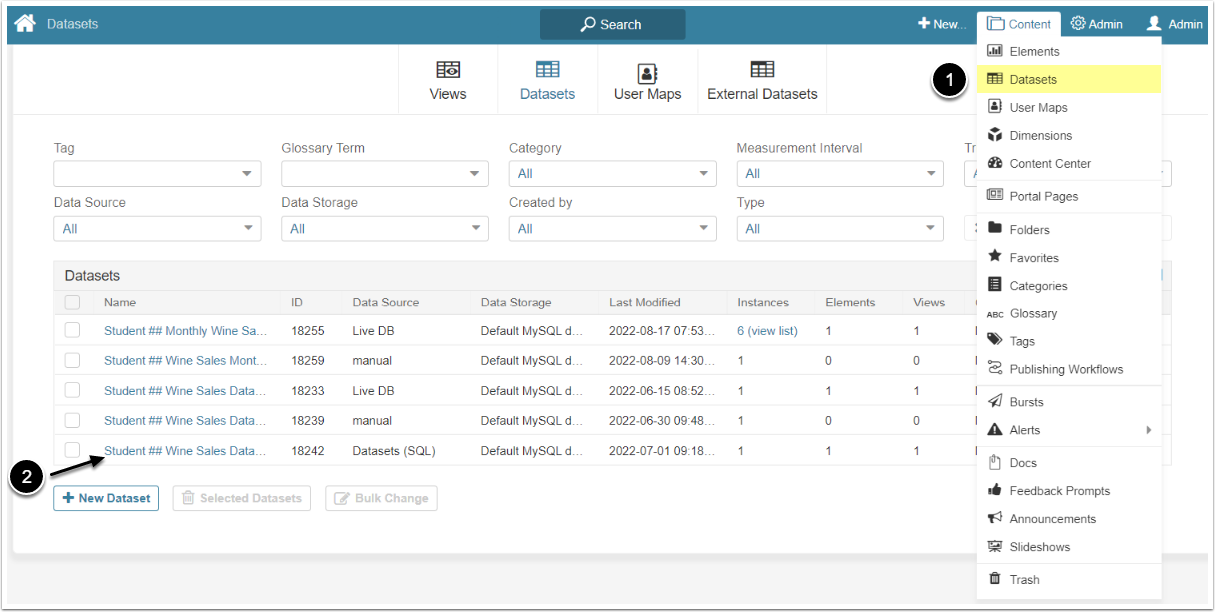
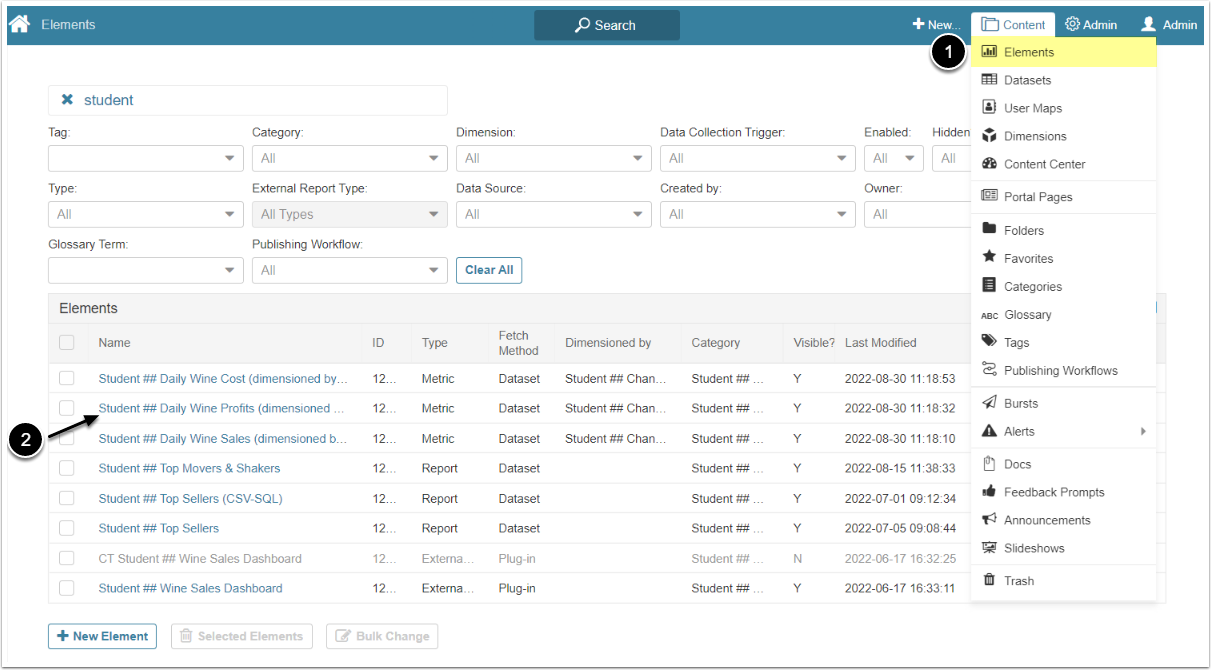
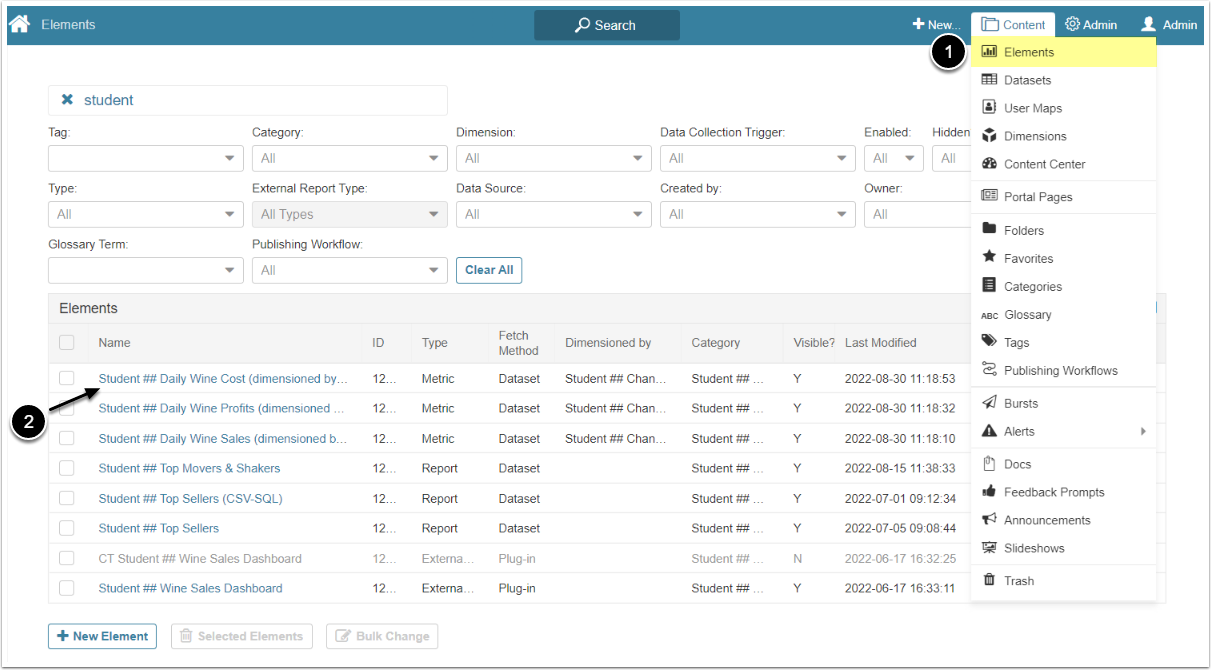
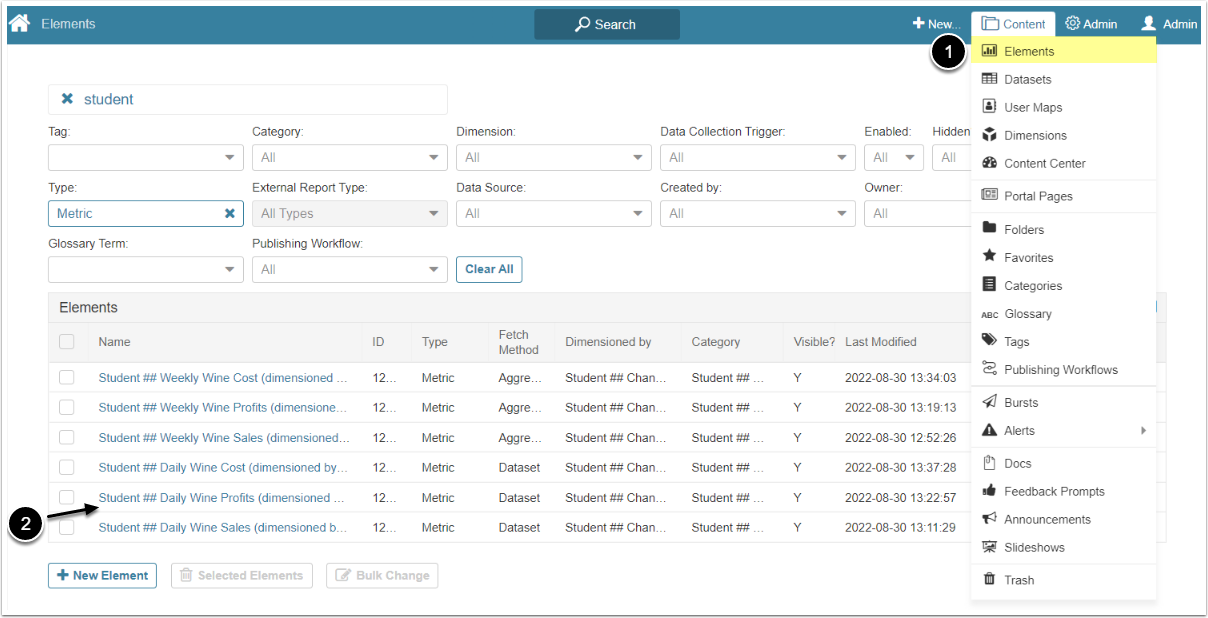
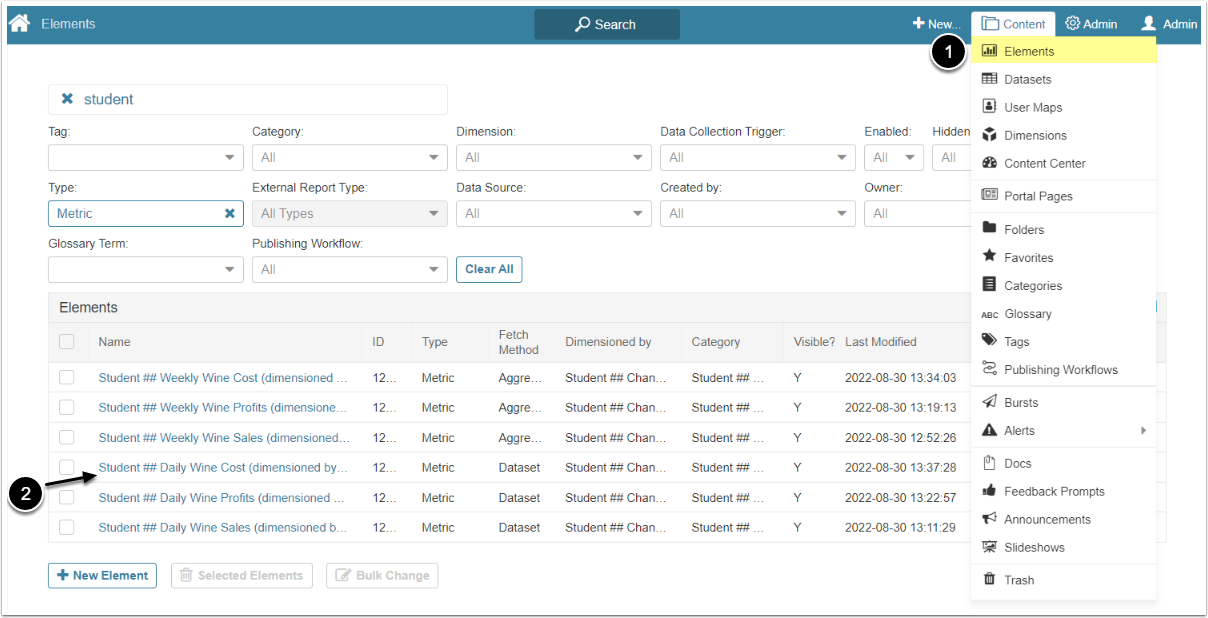
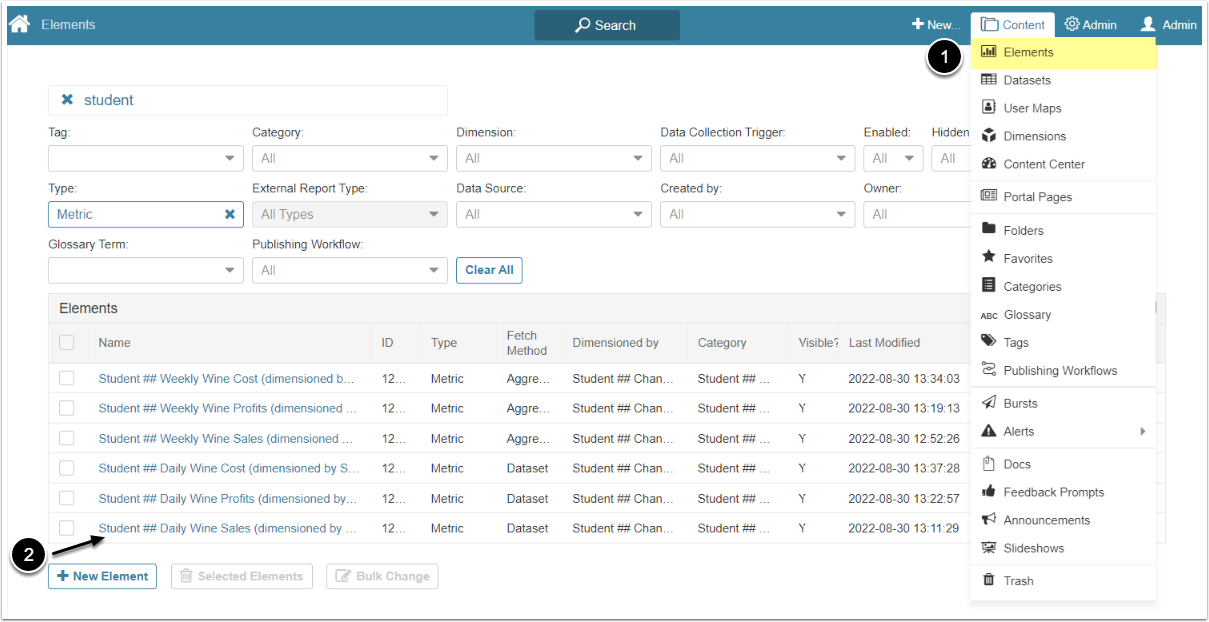
- Access Content > Datasets
- Find the "<your name> Wine Sales Dataset" Dataset you created in Training by Example: Use Case — Exceptions Report and click its Active Name Link
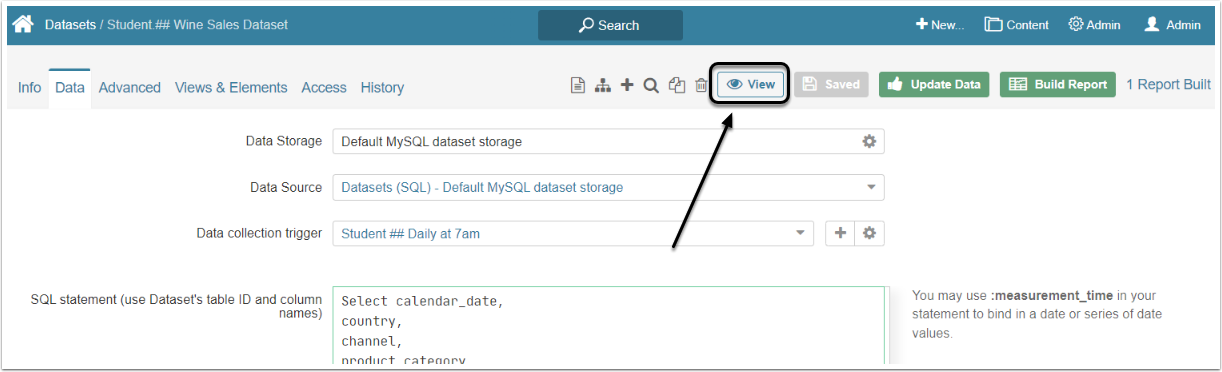
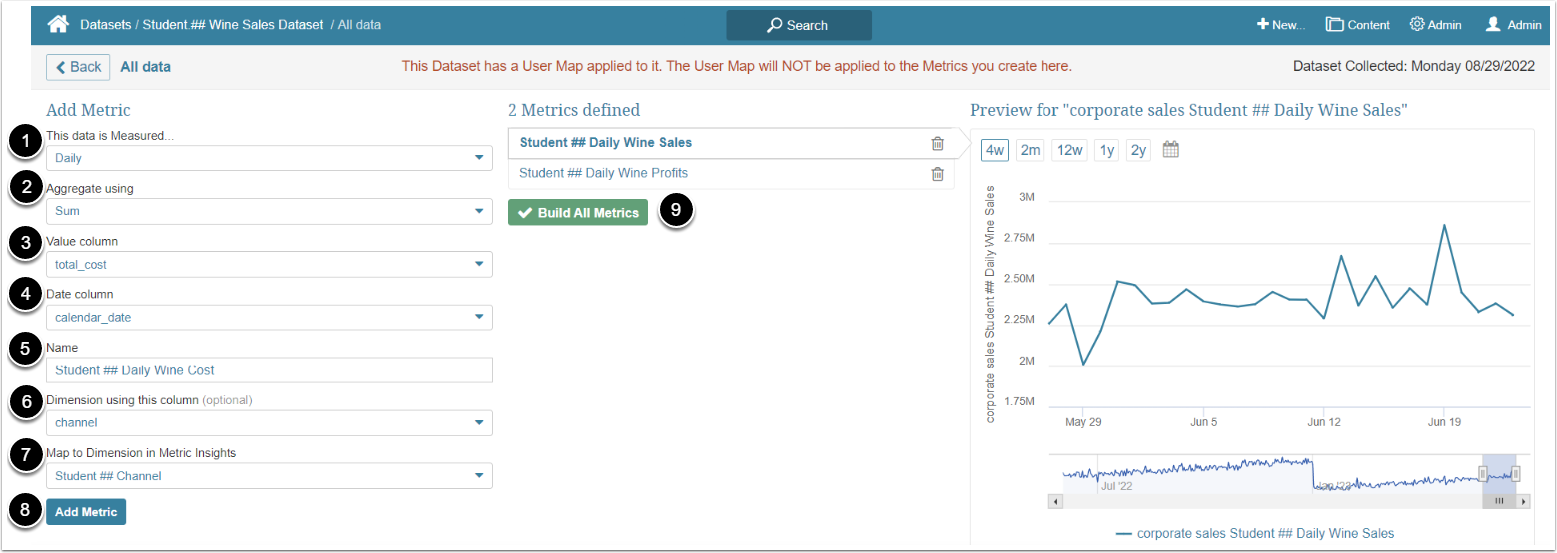
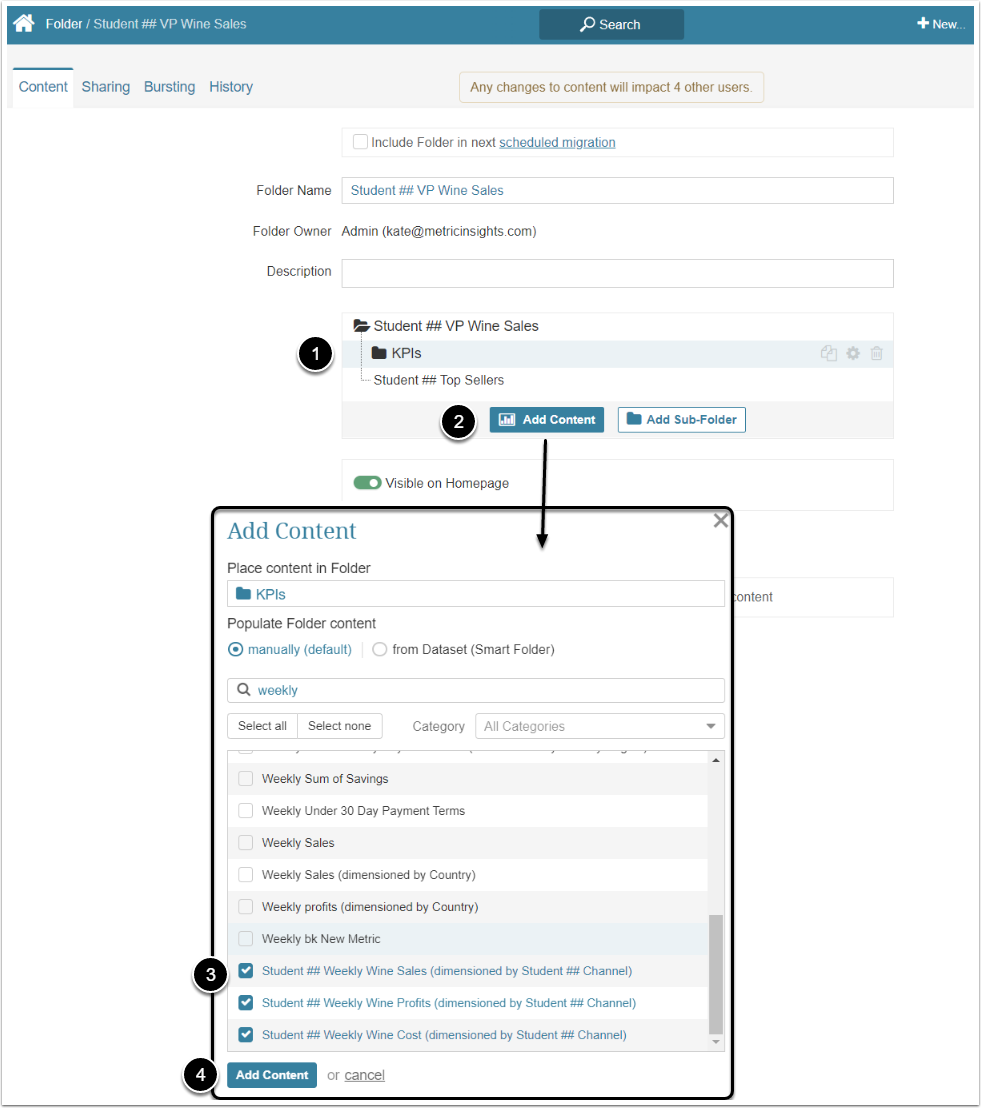
You are now going to build three KPI Metrics: one for sales, one for profits, and one for costs.

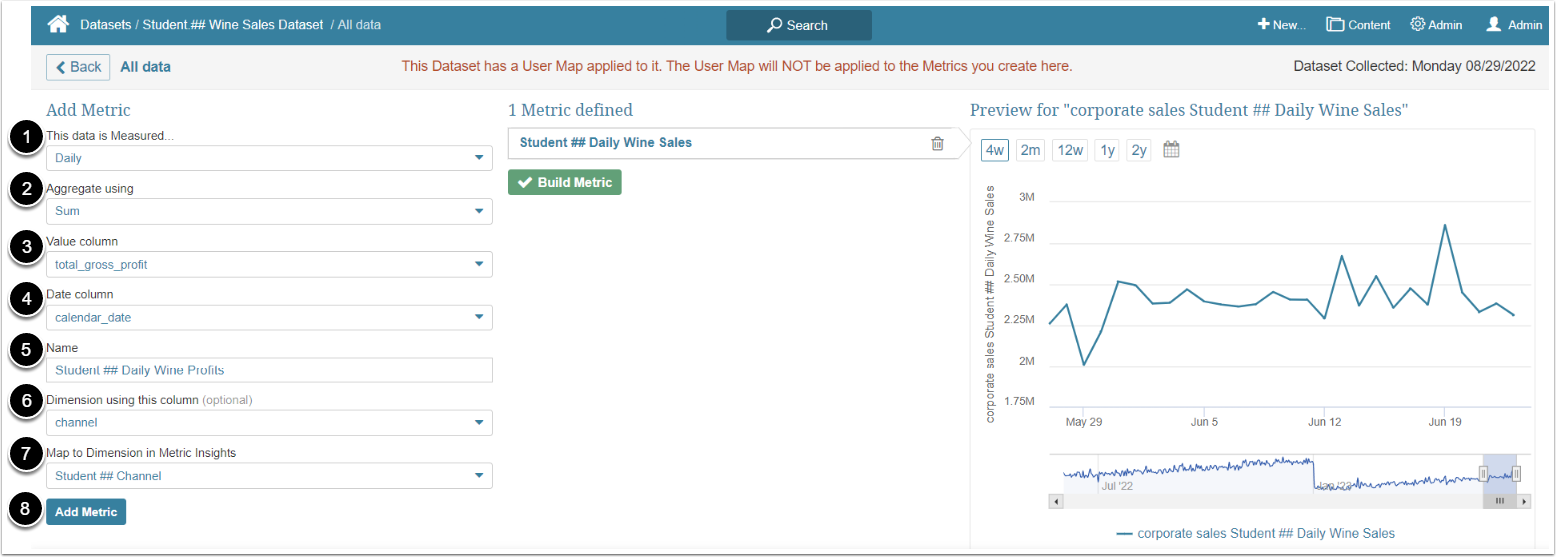
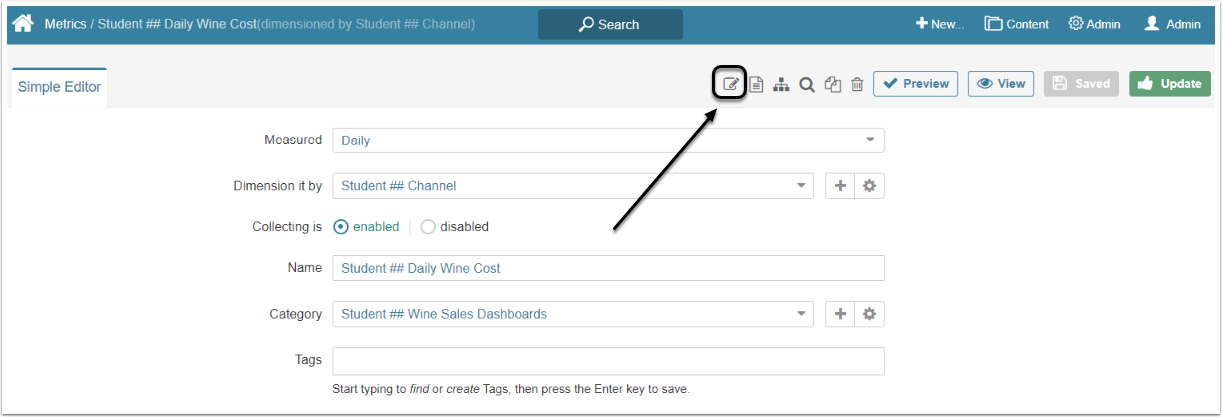
- This data is Measured: Select "Daily"
- Aggregate using: Choose "Sum"
- Value column: Select "total_sales_ammount"
- Date column: Choose "calendar_date"
- Name: Name the Metric "<your name> Daily Wine Sales". In this use case "Student ##" is used instead of a name
- Dimension using this column: Select "channel"
- Map to Dimension in Metric Insights: Choose "<your name> Channel"
- [Add Metric]
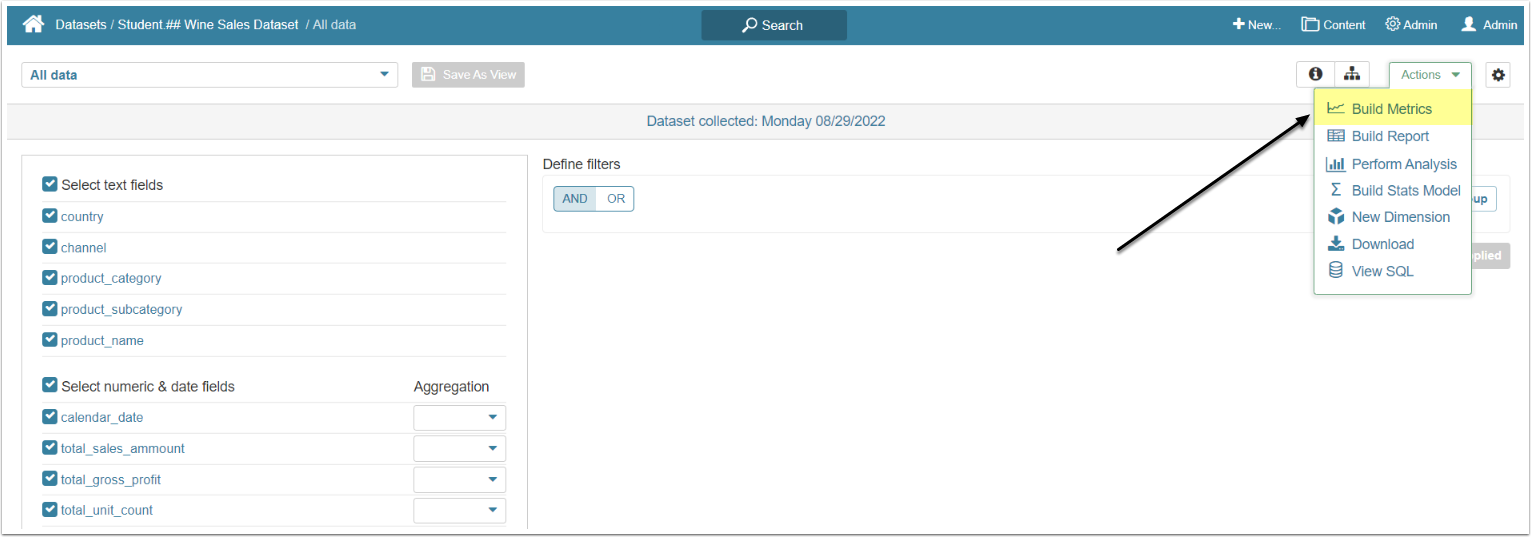
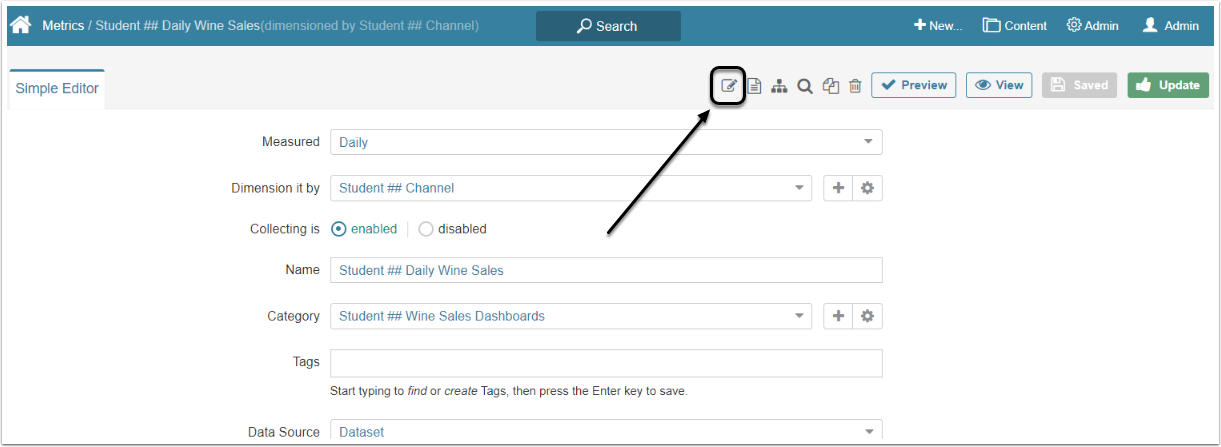
In the Viewer access Actions > Build Metrics
- This data is Measured: Select "Daily"
- Aggregate using: Choose "Sum"
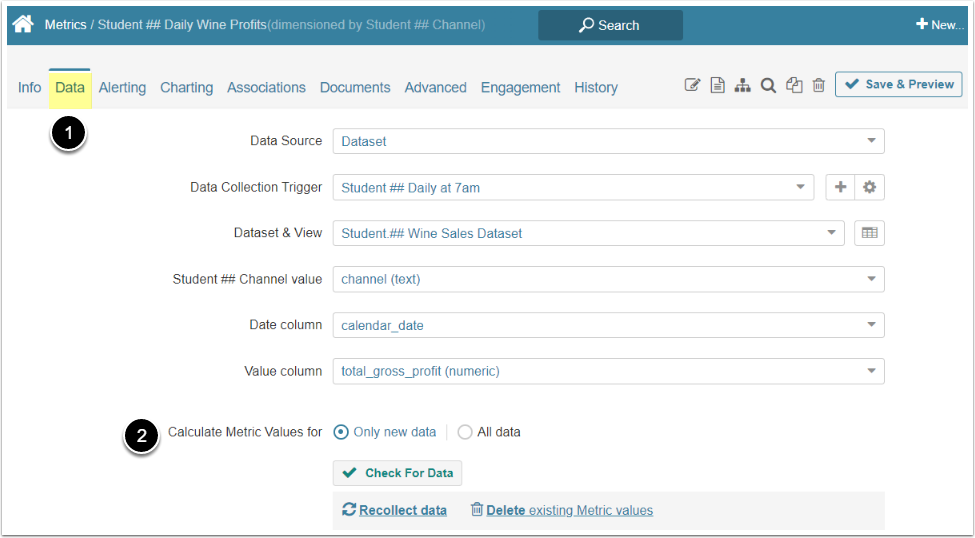
- Value column: Select "total_gross_profit"
- Date column: Choose "calendar_date"
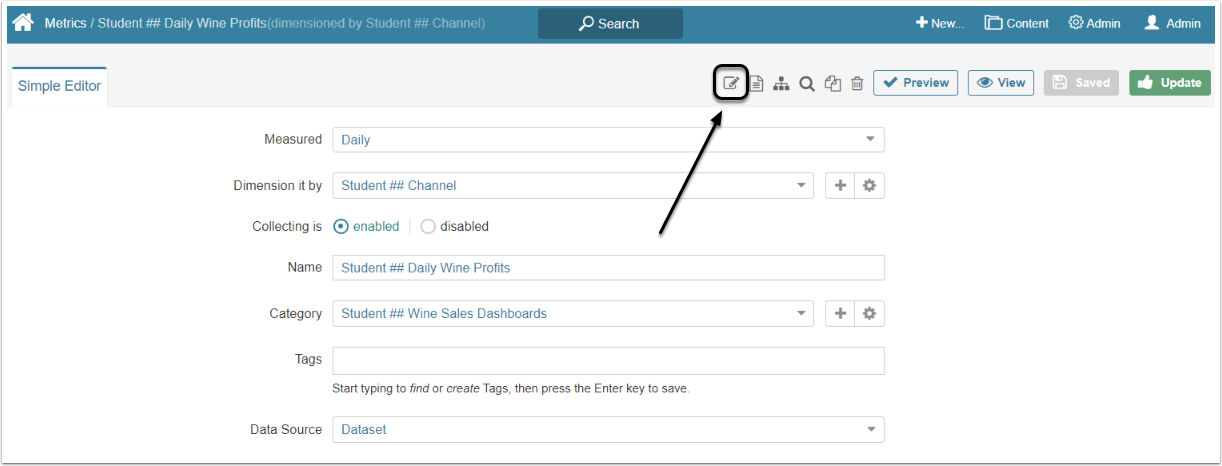
- Name: Name the Metric "<your name> Daily Wine Profits". In this use case "Student ##" is used instead of a name
- Dimension using this column: Select "channel"
- Map to Dimension in Metric Insights: Choose "<your name> Channel"
- [Add Metric]
- This data is Measured: Select "Daily"
- Aggregate using: Choose "Sum"
- Value column: Select "total_cost"
- Date column: Choose "calendar_date"
- Name: Name the Metric "<your name> Daily Wine Cost". In this use case "Student ##" is used instead of a name
- Dimension using this column: Select "channel"
- Map to Dimension in Metric Insights: Choose "<your name> Channel"
- [Add Metric]
- [Build All Metrics]


Distribution of Content
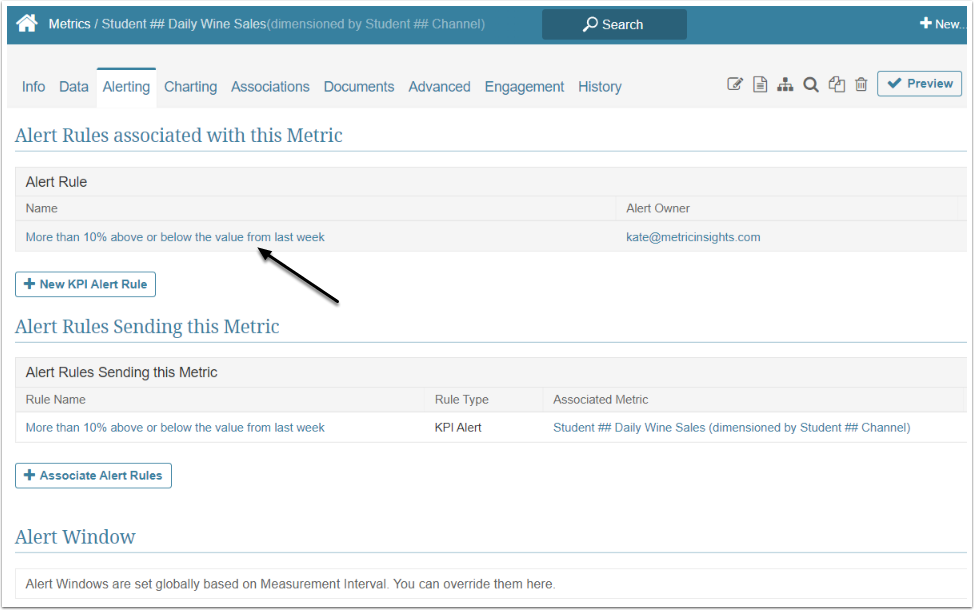
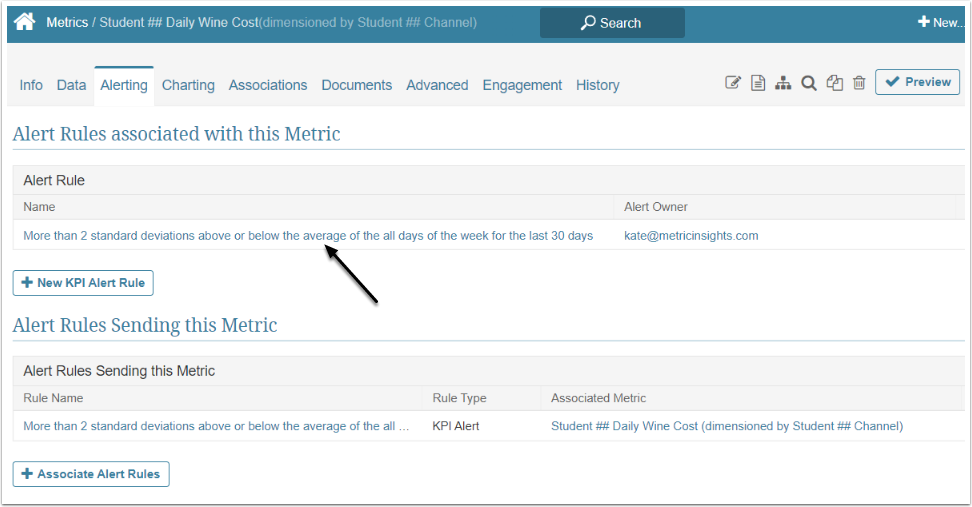
KPI Alert Rules are created to notify Users about changes occurring in Metrics. With the help of KPI Alert Rules, you can define in what circumstances Metric Insights will alert you about the changes.
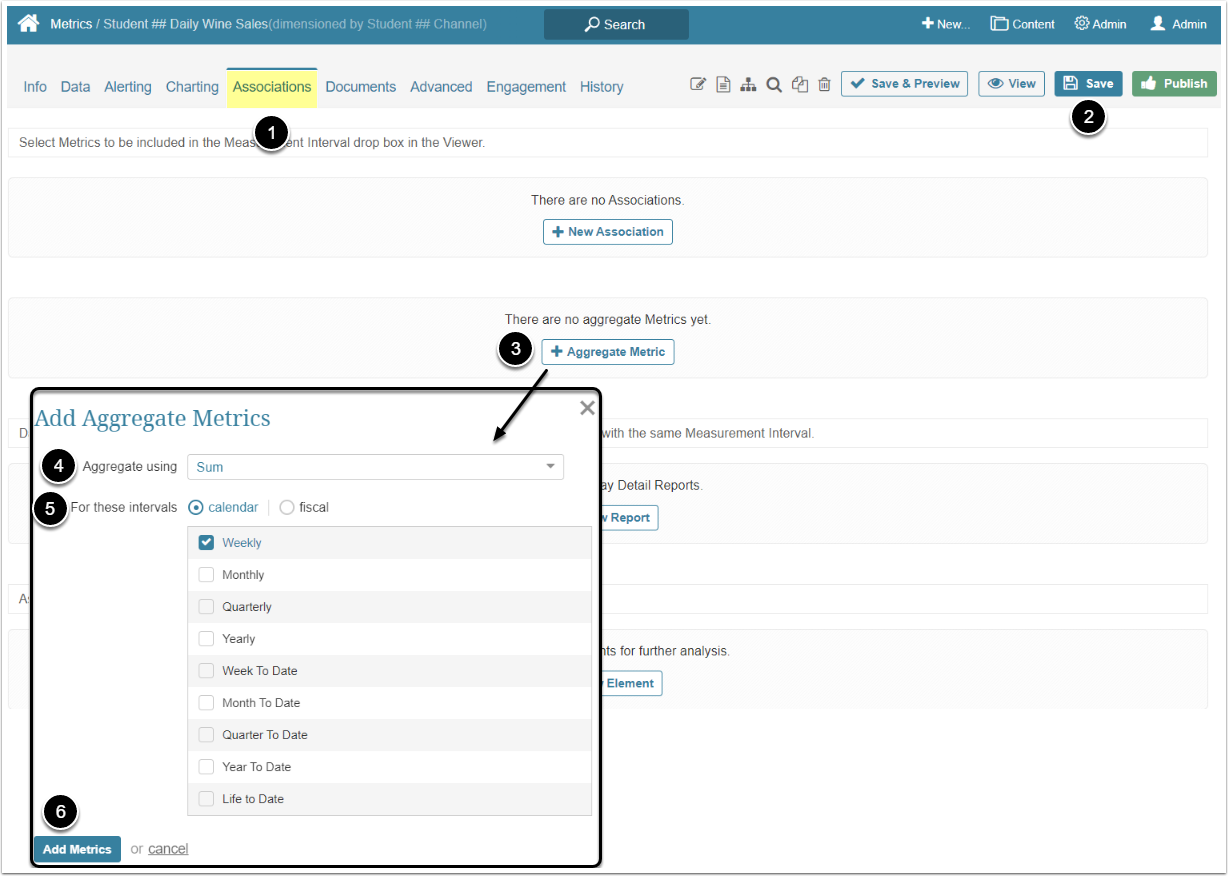
In this section you will create several KPI Alert Rules via the Alert Rules Wizard and subscribe them to a specific User Group. For more information about the Wizard refer to [KPI Alert Rules] Wizard, types, criteria, user subscriptions.

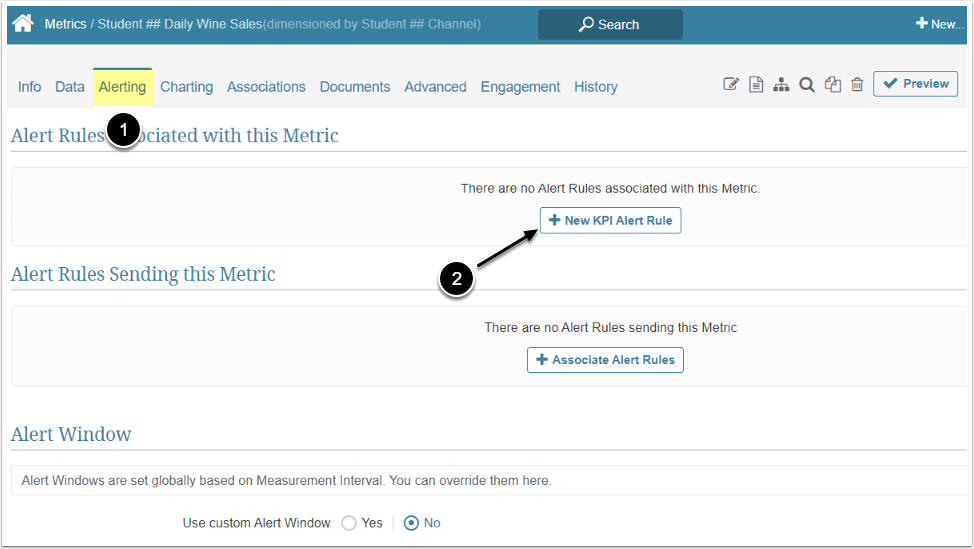
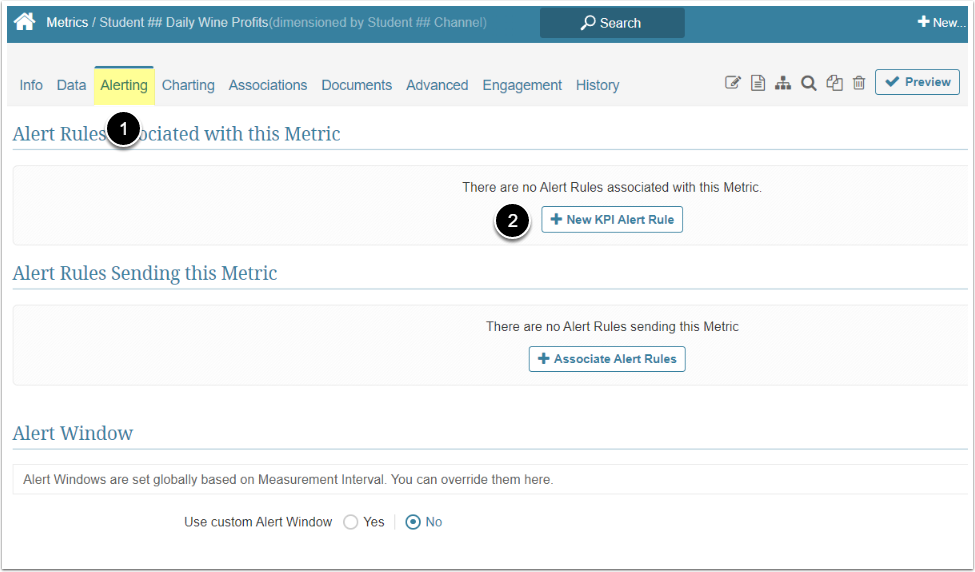
KPI Alert Rule Type

- Select "Prior Value"
- [Next:Alert Criteria]
KPI Alert Rule Criteria
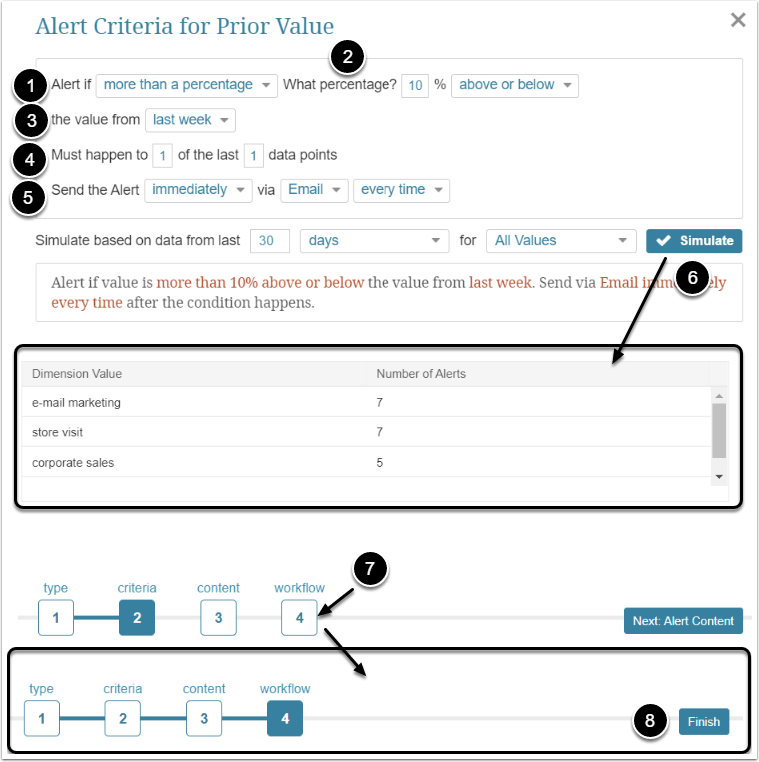
- Alert if: Select "more than a percentage"
- What percentage: Choose "10" and "above and below"
- The value from: Select "last week"
- Must happen to: Insert "1" and "1"
- Send the Alert: Select "immediately", "Email", and "every time"
- Optionally [Simulate]. It will show the number of alerts for every Dimensional Value
- Click workflow
- [Finish]
KPI Alert Rule Type
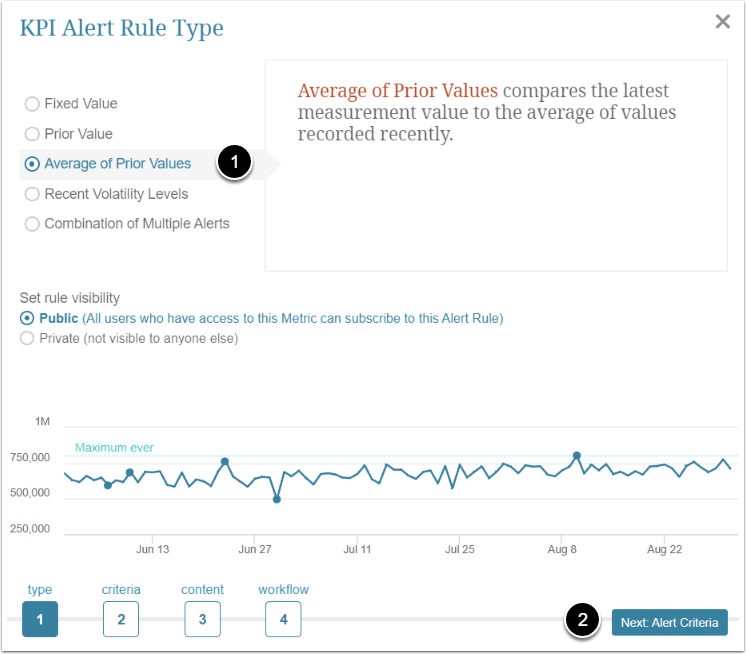
- Select "Average of Prior Values"
- [Next:Alert Criteria]
KPI Alert Rule Criteria

- Alert if: Select "more than a percentage"
- What percentage: Choose "15" and "above and below"
- For avg of: Select "the same day", "week", "12", and "weeks"
- Must happen to: Insert "1" and "1"
- Send the Alert: Select "immediately", "Email", and "every time"
- Optionally [Simulate]. It will show the number of alerts for every Dimensional Value
- Click workflow
- [Finish]


KPI Alert Rule Type
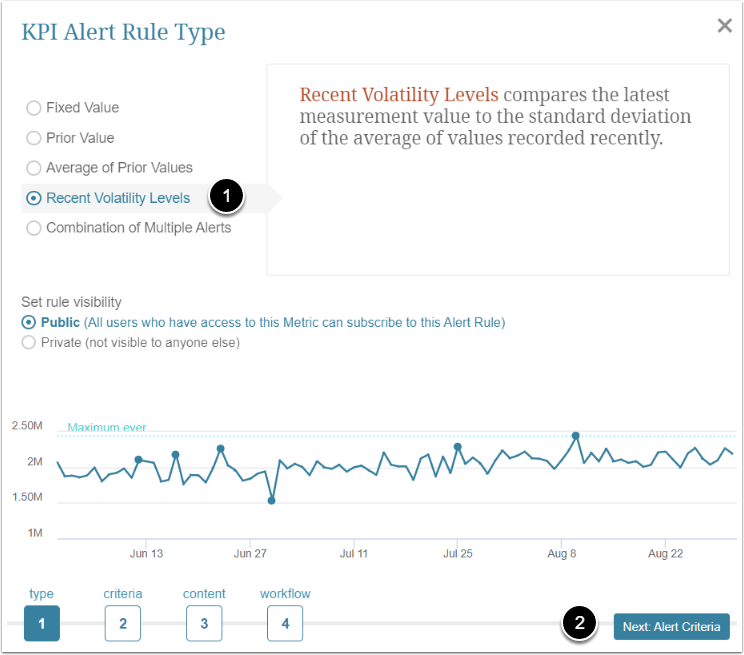
- Select "Recent Volatility Levels"
- [Next:Alert Criteria]
KPI Alert Rule Criteria
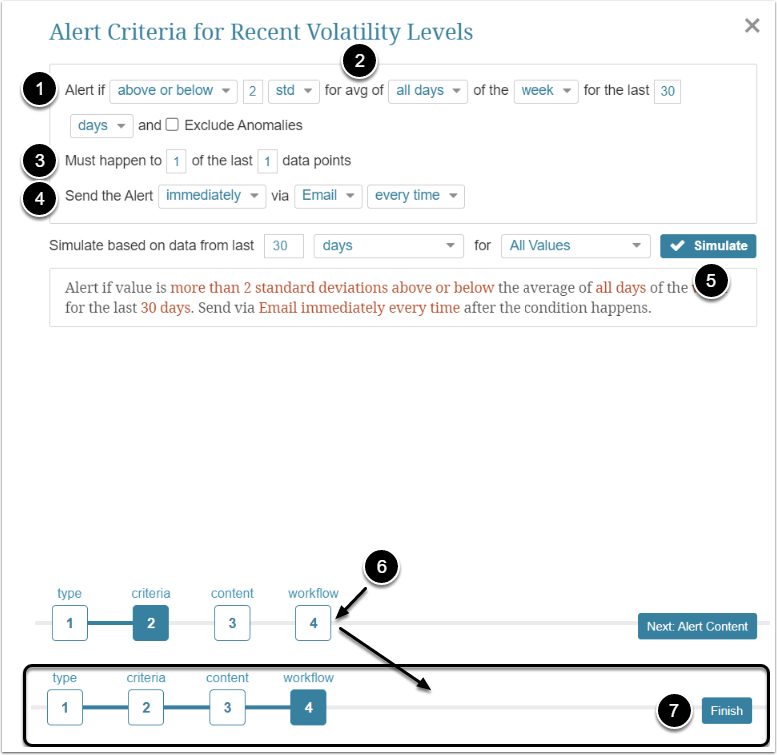
- Alert if: Select "above or below", "2", and "std"
- For avg of: Select "all days", "week", "30", and "days"
- Must happen to: Insert "1" and "1"
- Send the Alert: Select "immediately", "Email", and "every time"
- Optionally [Simulate]. It will show the number of alerts for every Dimensional Value
- Click workflow
- [Finish]
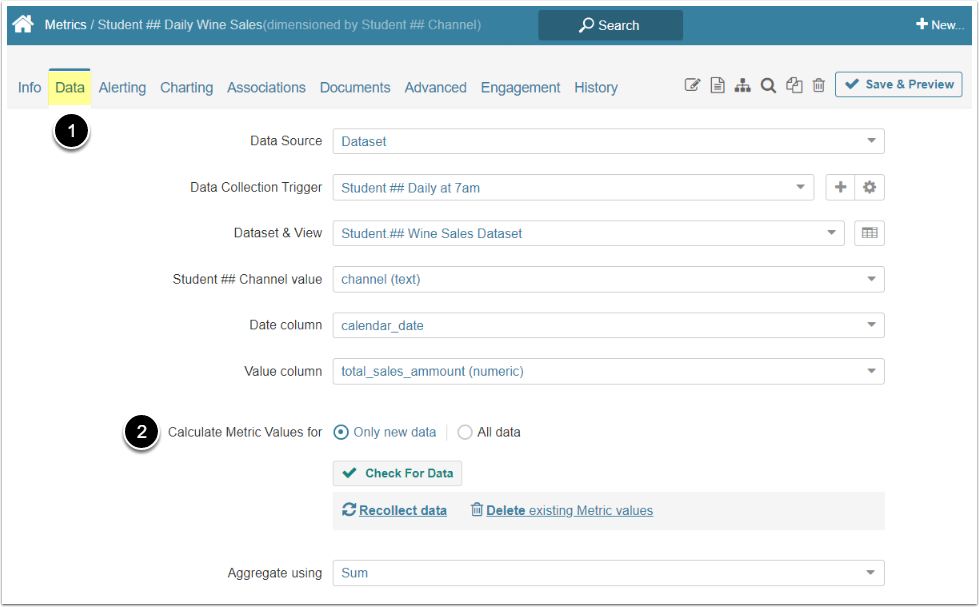
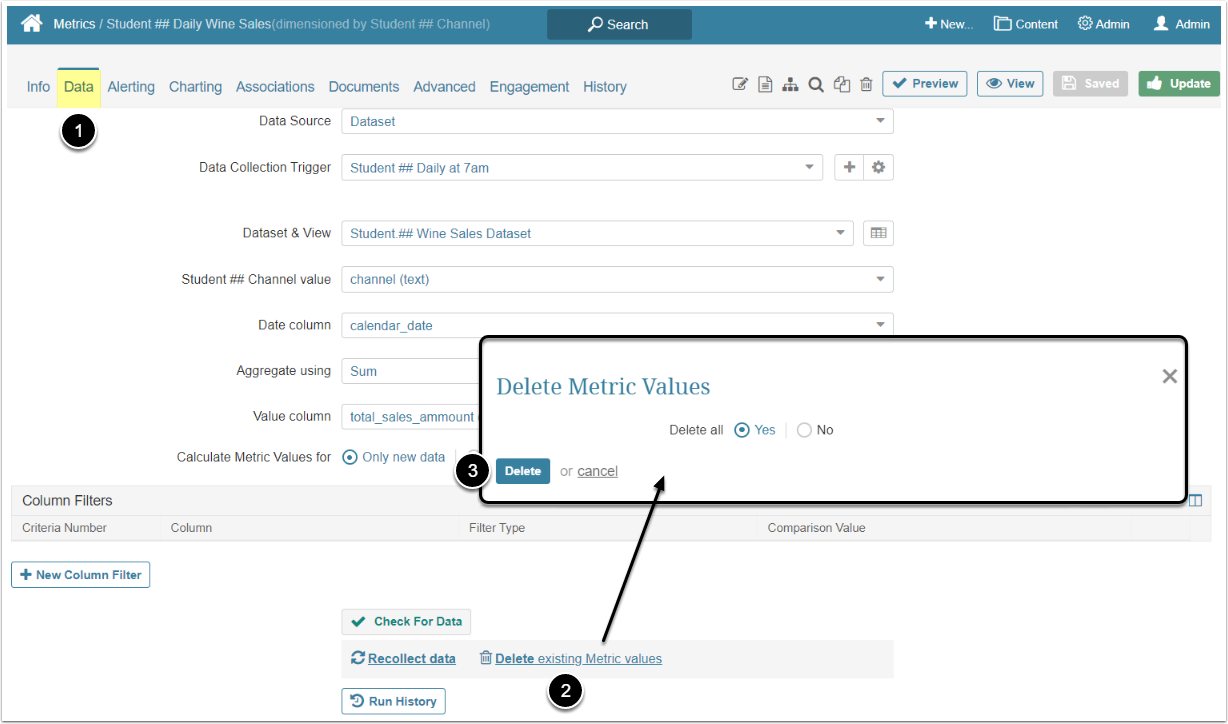
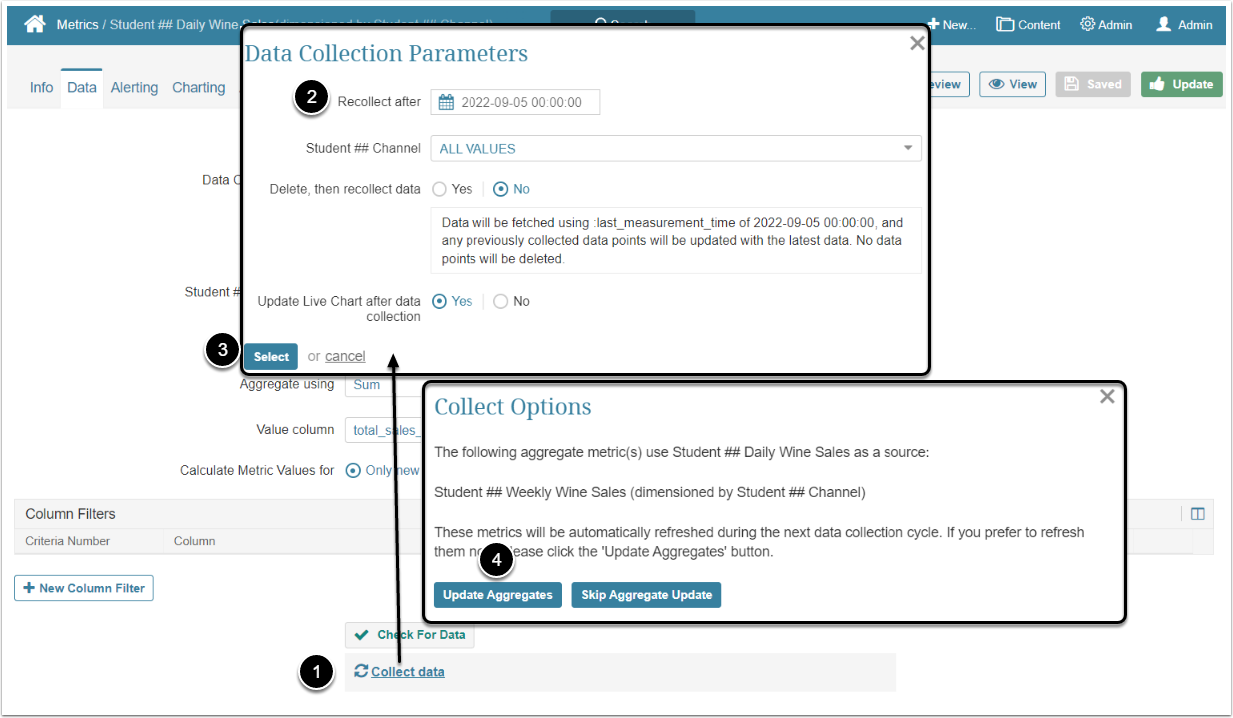
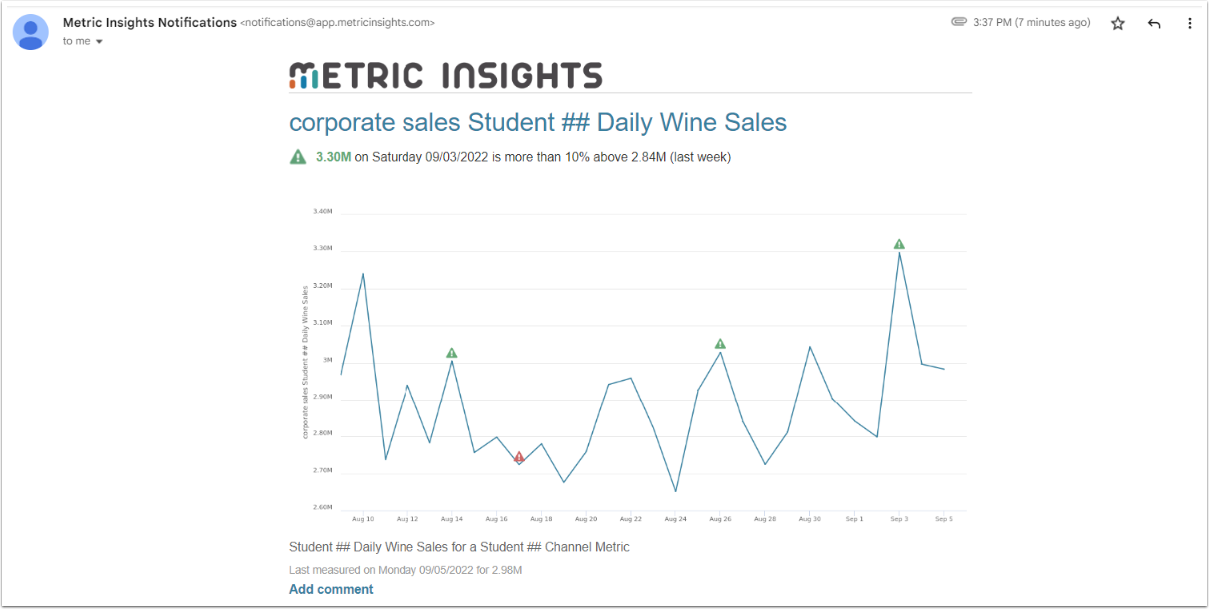
Alerts are sent only when they occur. However, they will also be sent to the Users if the data is recollected. So, in this step you will delete all the Metric data and recollect it. You will do it only for the "<your name> Daily Wine Sales" Metric, just to check the Alert notification.
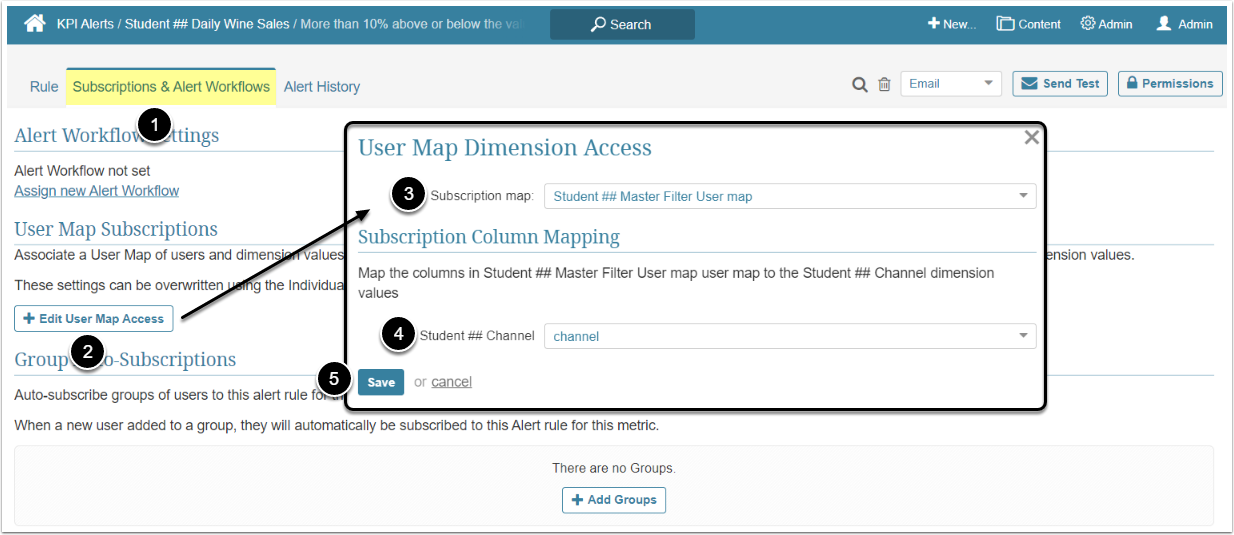
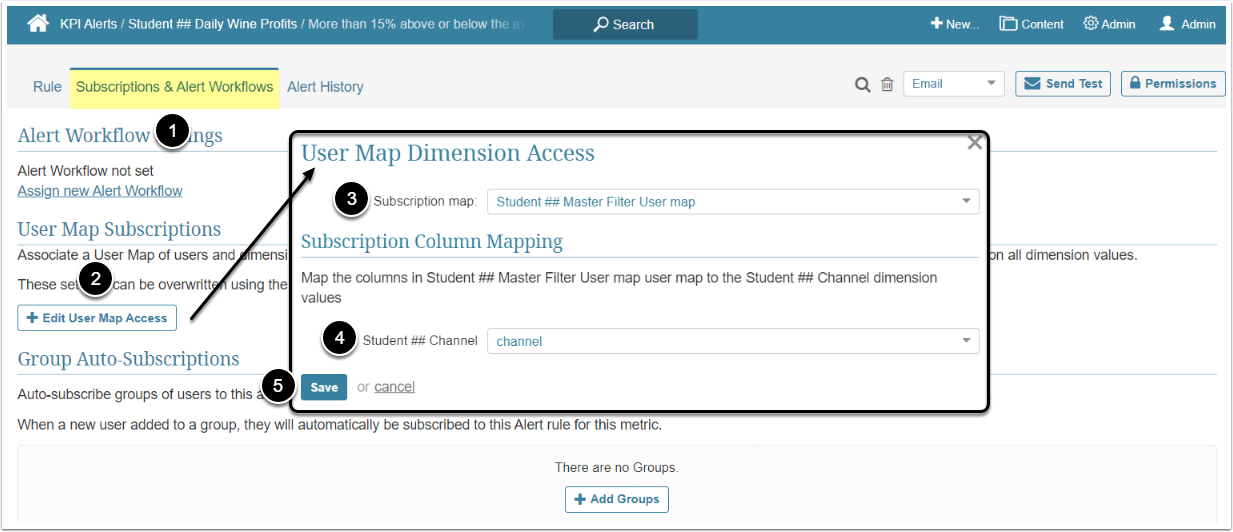
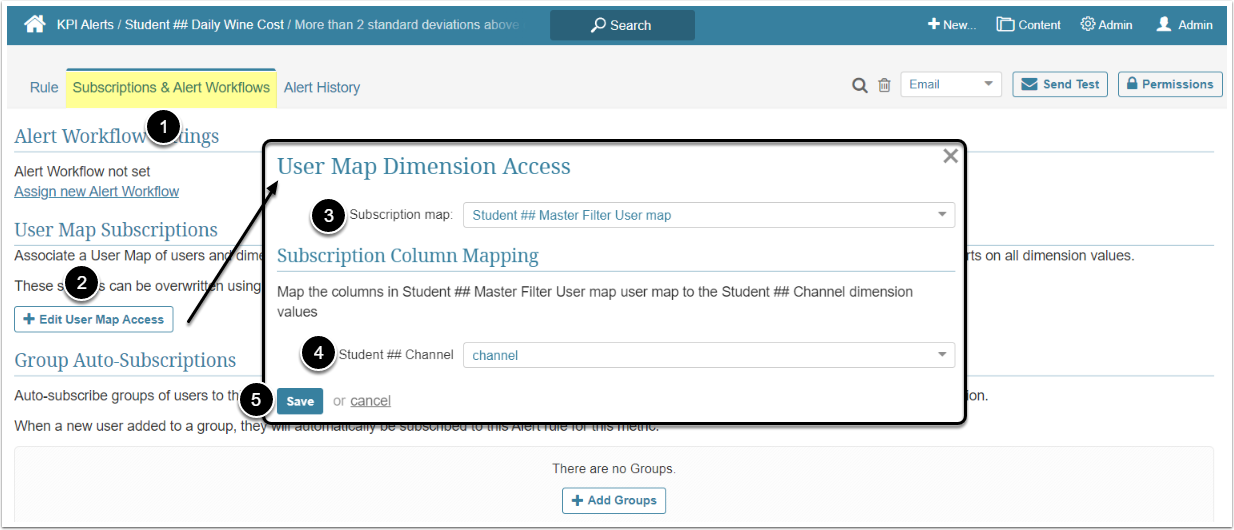
You will receive an Alert Notification only if you, as a User, are added to the User Map that you assigned to the KPI Alert.
Congratulations! You finished the workflow!