This is the sixth use case in the Training by Example series. Review it after finishing the Training by Example: Use Case — Catalog, Training by Example: Use Case — Bursting, Training by Example: Use Case — Exceptions Report, Training by Example: Use Case — Changes Report and Training by Example: Use Case — Metrics and Alerting.
In this example, a Center of Excellence (COE) requests placing content through a review process using a Publishing Workflow for certification. Content creators added lots of various tags and there is confusion around which terms carry what meanings. So, new content needs verification before it will be marked as "certified" after a review process. Additionally, tags have to be replaced by Glossary Terms allowing better governance and understanding of Element metadata.
Use the example workflow outlined below to:
- Learn how to create a Glossary Section and fill it with Terms
- Find out how to add Custom Field Metadata
- Discover the algorithm for Publishing Workflow creation
Make sure you have completed all the following steps before beginning this Use Case:
- Created a Category
- Added a User Group
Note: This workflow requires Administrator Access.
Creating Glossary Section and Terms
In this Use Case, you create a Glossary Section that contains one or more of the business Terms which a Power User (from one of the managers Groups) will use during review in the publishing workflow.
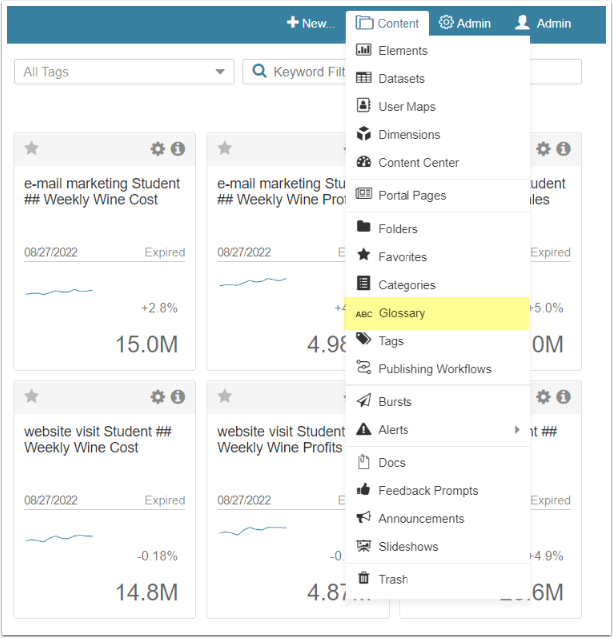
Glossary Terms are added to Glossary Sections and are used to define and describe attributes or data regarding Elements. Terms can be applied to Metric Insights (MI) content; e.g., External Reports, Datasets, Metrics, and Dataset Reports.
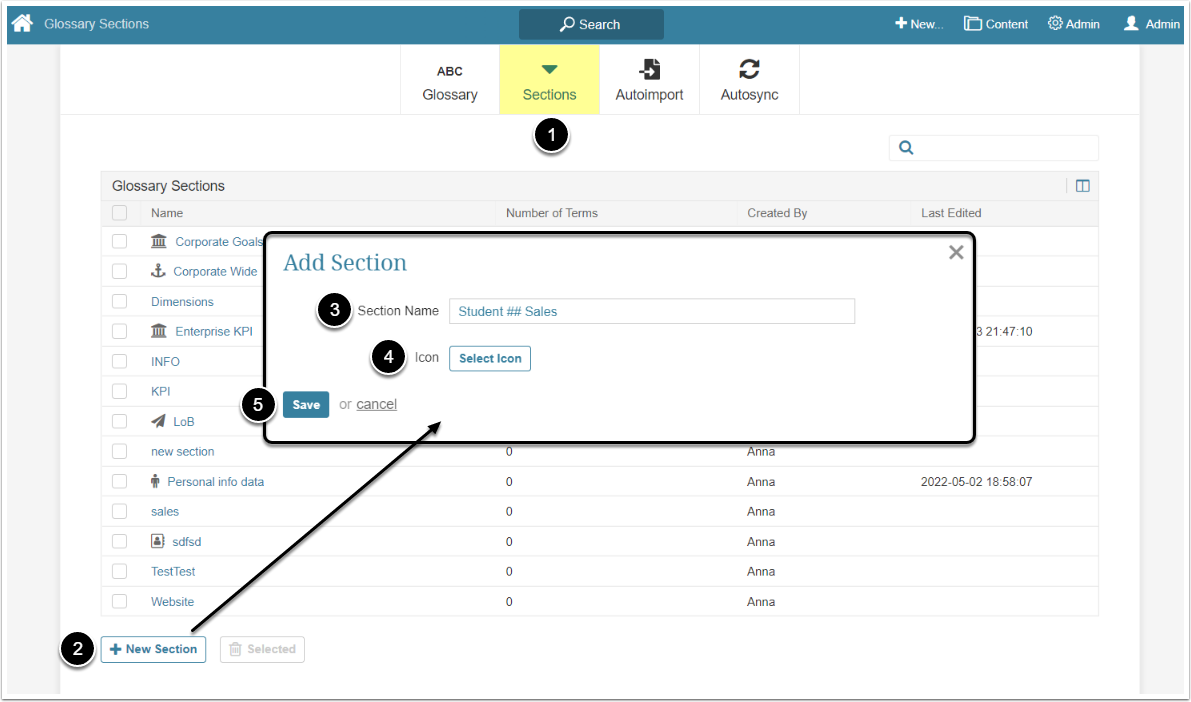
- Open Sections tab
- [+ New Section]
-
Section Name: Name the Section "<your name> Sales". In this use case "Student ##" is used only to avoid naming conflicts.
- Actual Glossary Sections may more likely contain Glossary terms by Business Unit / Line of Business
- Icon: [Select Icon] and make a selection (e.g search for "money" and choose the cash icon)
- [Save]
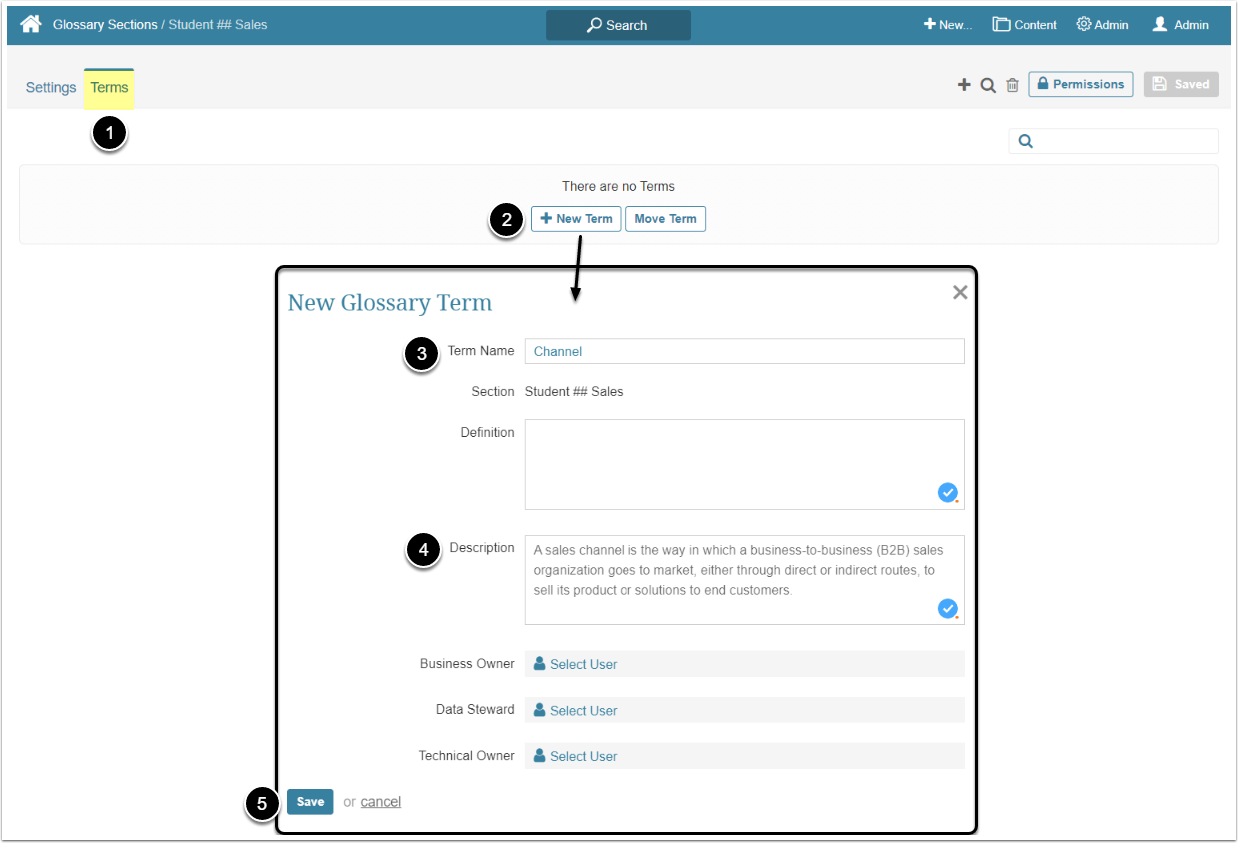
- Open Terms tab
- [+ New Term]
- Term Name: Insert "Channel" into the field
- Description: Type "A sales channel is the way in which a business-to-business (B2B) sales organization goes to market, either through direct or indirect routes, to sell its product or solutions to end customers." into the field
- [Save]
- Repeat steps 2-5 but use Term Name "Product Category" and Description "A product category is a way for a business to group similar items together for customers to find them, whether in a store or on a website."
Creating Custom Field Metadata
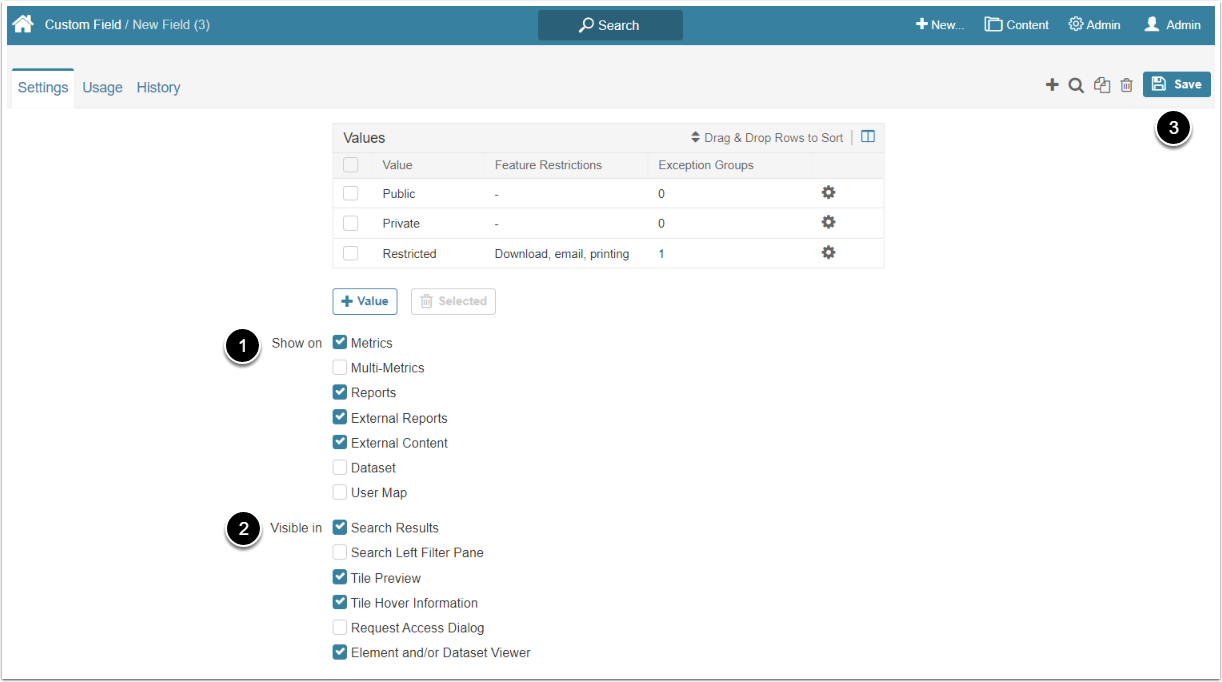
In this Use Case, you add a Custom Field that displays information about data sensitivity.
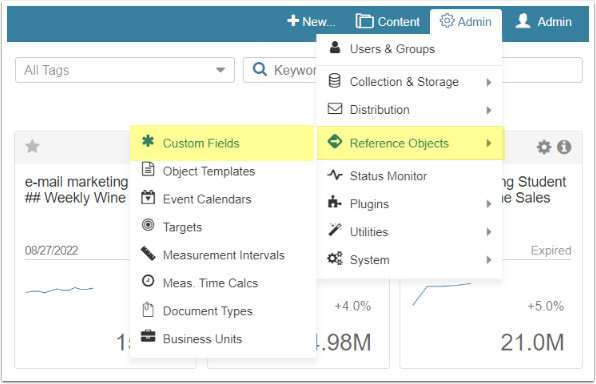
Custom Fields help to enrich Elements with additional relevant information. Administrators can create and populate Custom Fields for various Element Editors and select where to display them.
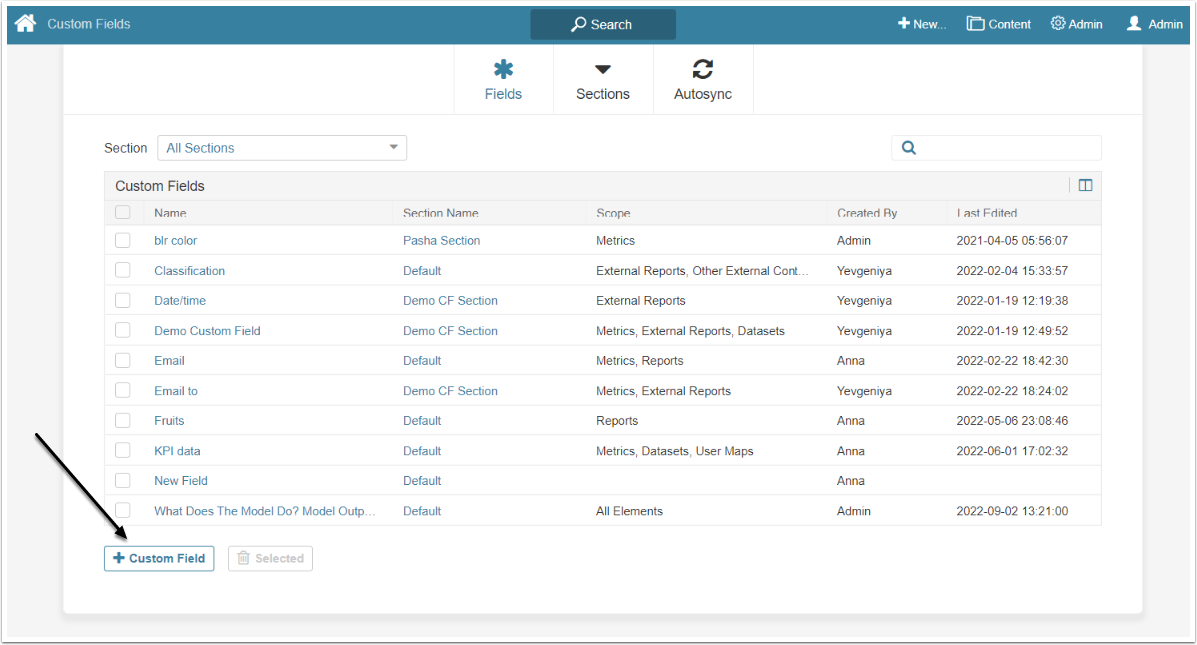
-
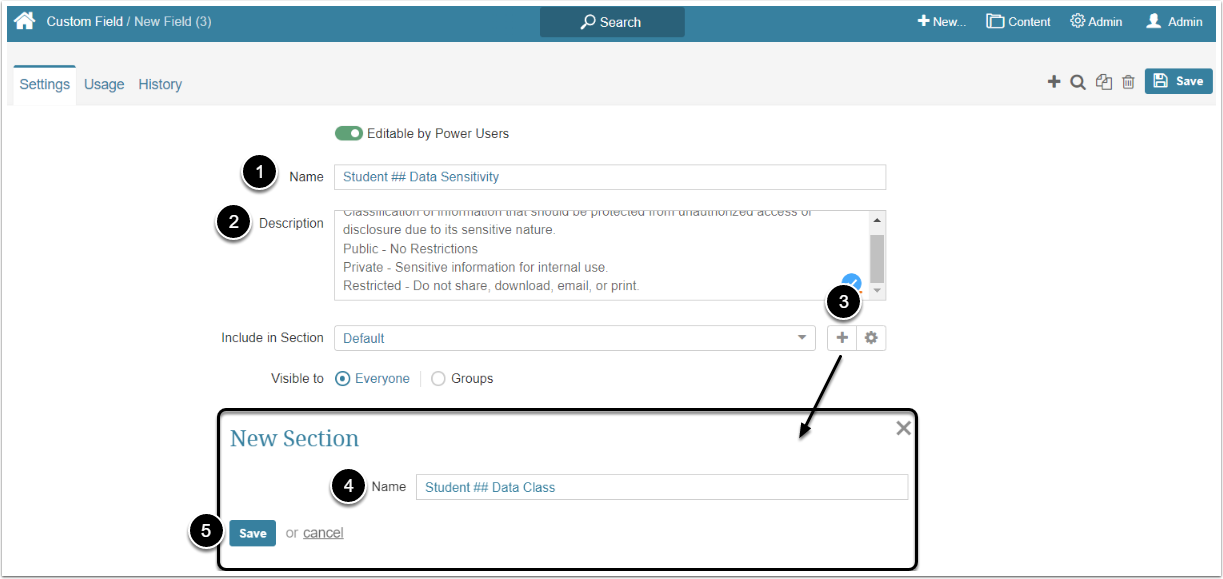
Name: Name the Field "<your name> Data Sensitivity". In this use case "Student ##" is used instead of a name
- Typical Custom Filed Names would contain Business specific terms and descriptions
-
Description: Insert "Classification of information that should be protected from unauthorized access or disclosure due to its sensitive nature.
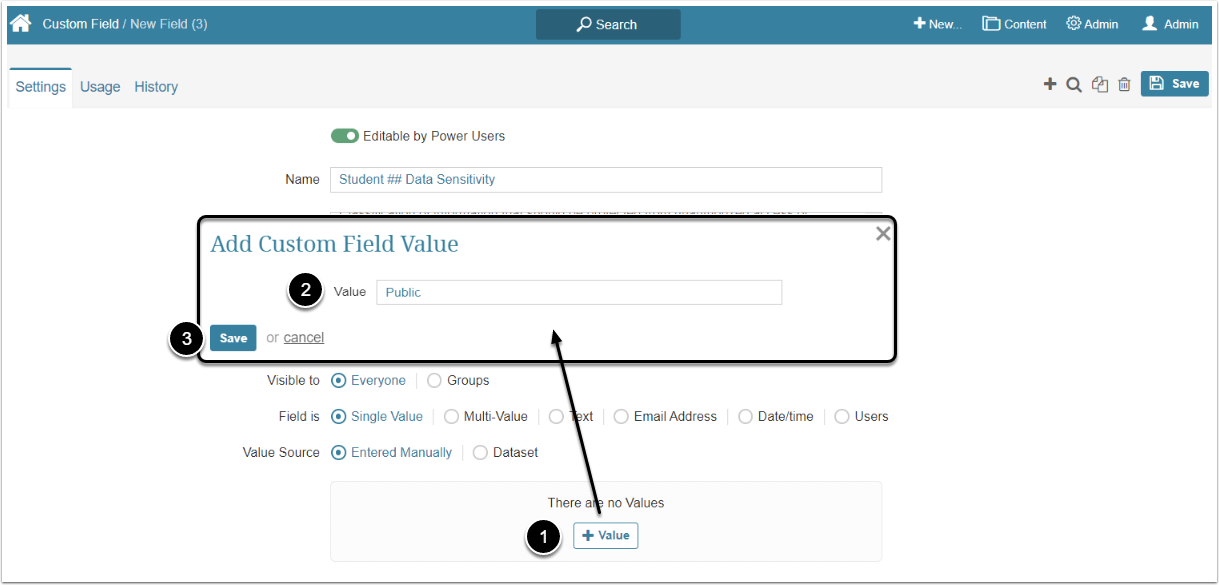
Public - No Restrictions
Private - Sensitive information for internal use
Restricted - Do not share, download, email, or print" - Click "Add new Custom Field Section" button to open the New Section screen
- Name: Name the Section "<your name> Data Class". In this use case "Student ##" is used to avoid naming conflicts
- [Save]
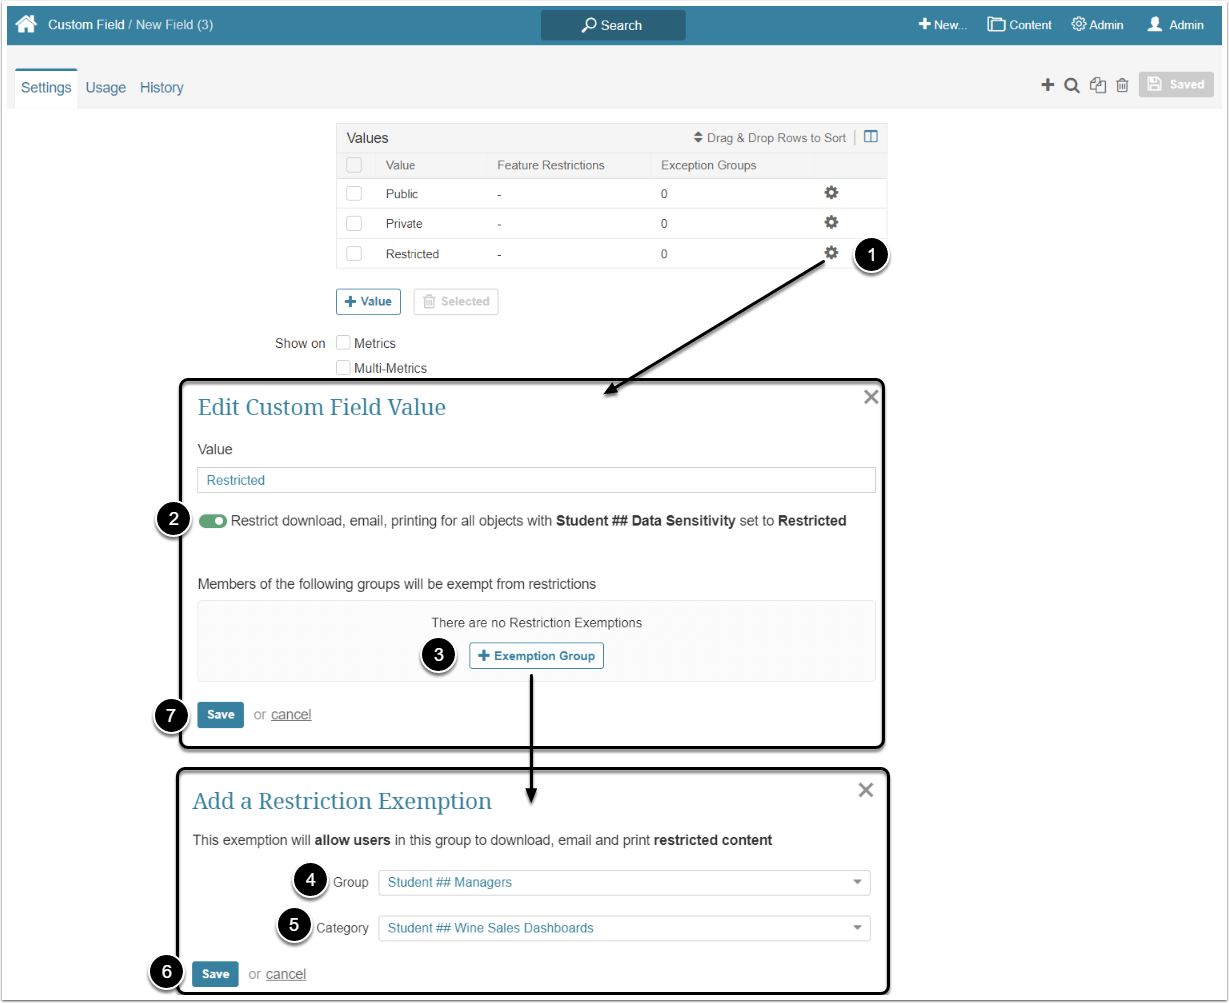
- Click gear icon in the "Restricted" row
- Activate Restrict download, email, printing for all objects with Data Sensitivity set to Restricted toggle
- [+ Exemption Group]
- Group: Select a group to which your user account belongs as a User Group value from the dropdown menu
- Category: Choose the "<your name> Wine Sales Dashboards" Category from the dropdown menu
- [Save]
- [Save]
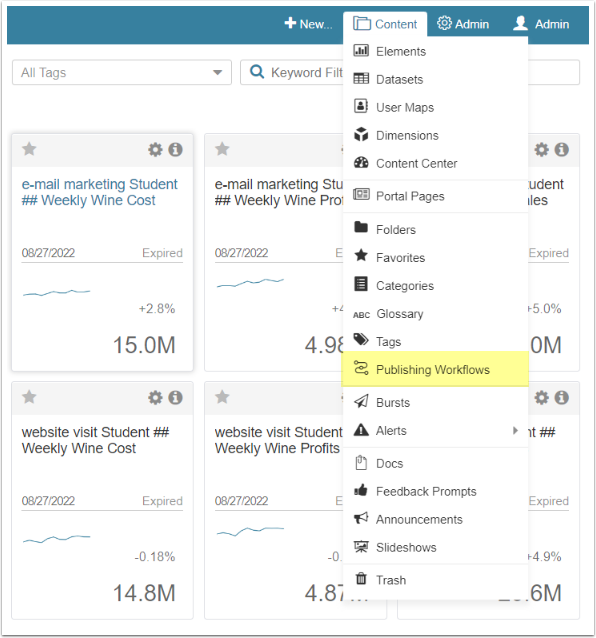
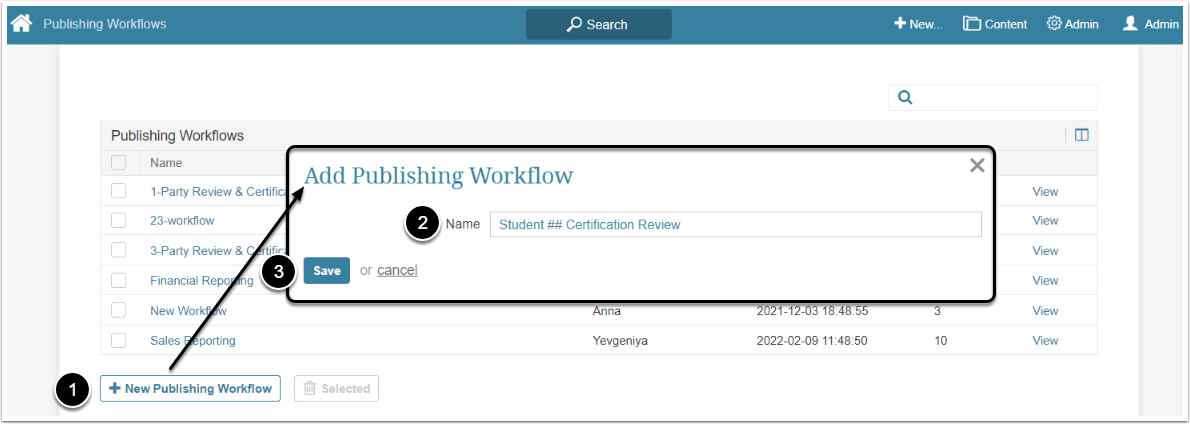
Creating Publishing Workflow
In this section you will create a Publishing Workflow. The Publishing Workflows feature is a way for Administrators to delegate management and supervision of content publishing to Power Users without granting complete edit and delete access to a category content. The functionality helps ensure that new content has been validated by multiple stakeholders and is therefore trustworthy, including accurate metadata and information.
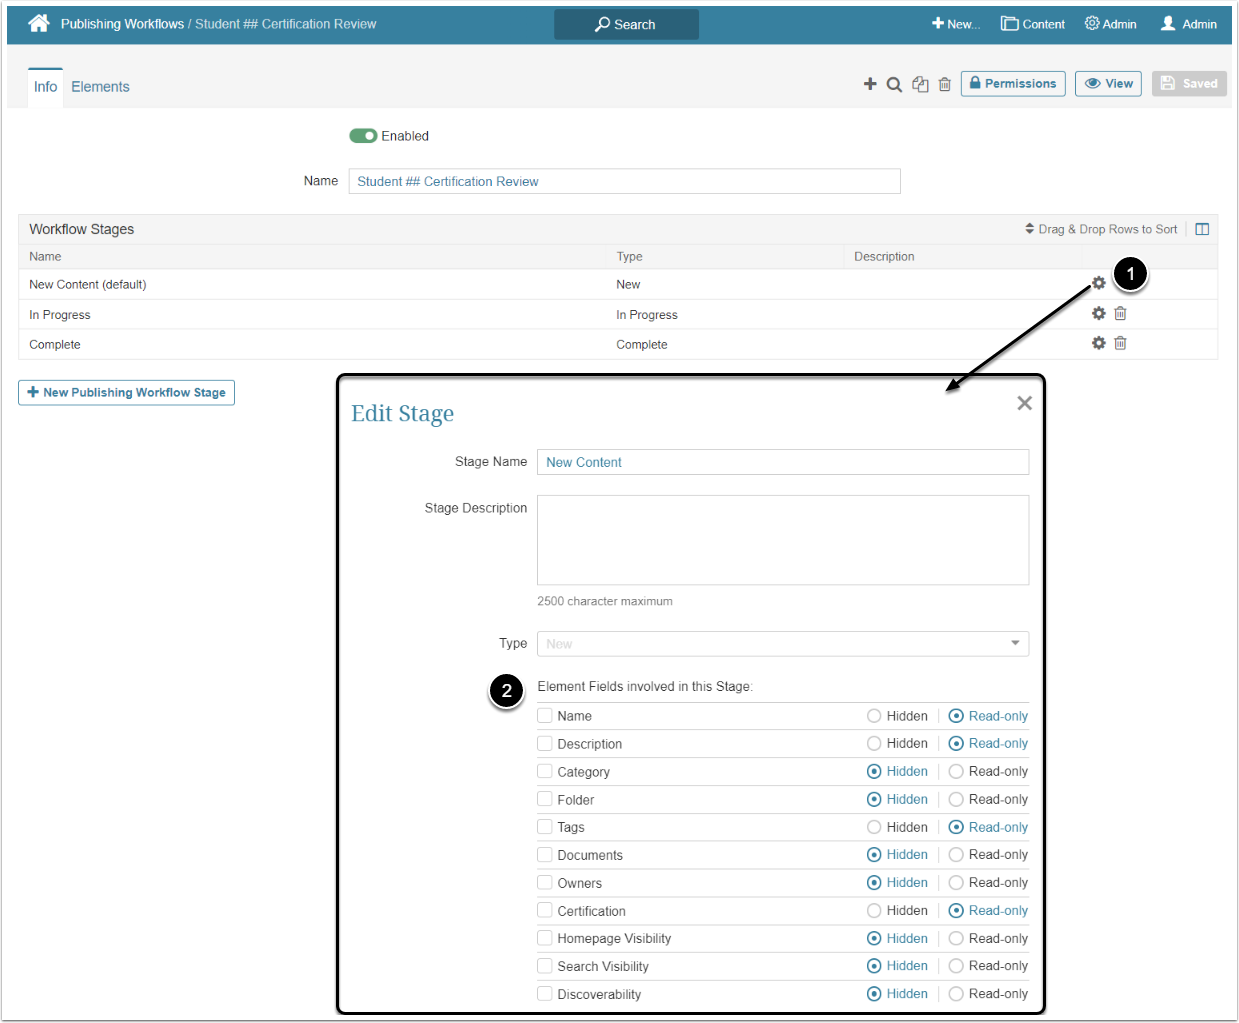
Define the Involved Fields
- Click the gear icon in the New Content (default) row
-
Elements involved in this stage: Switch radio buttons to "Read-only" for the following rows:
- Name
- Description
- Tags
- Certification
NOTE: The content becomes new in this stage and the reviewers don't edit it but only check the status of the rows marked as "Read-only".
Add Glossary Section
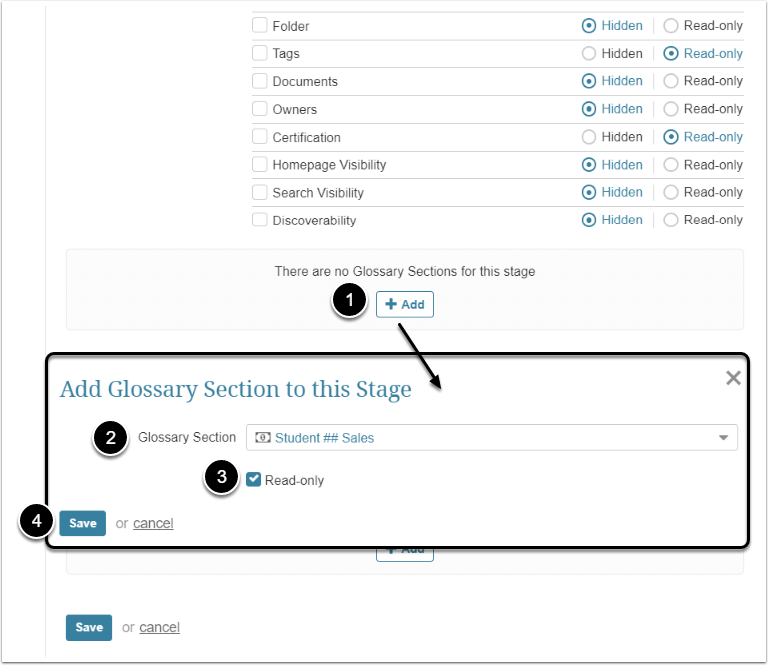
- [+ Add]
- Glossary Section: Select the "<your name> Sales" Glossary Section from the dropdown menu
- Activate the checkbox near the Read-only option
- [Save]
Add Custom Field Section
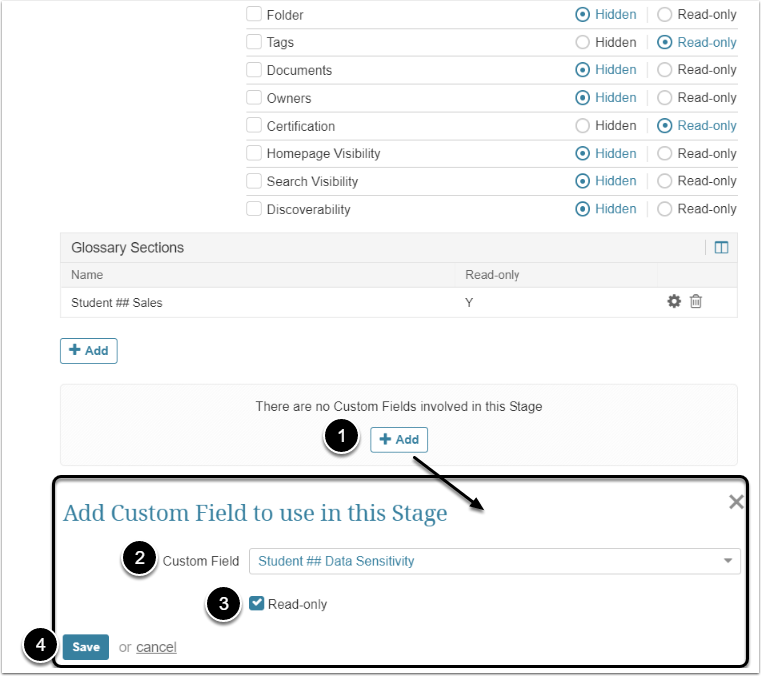
- [+ Add]
- Custom Field: Select the "<your name> Data Sensitivity" Field from the dropdown menu
- Activate the checkbox near the Read-only option
- [Save]
Assign Groups to Manage This Stage
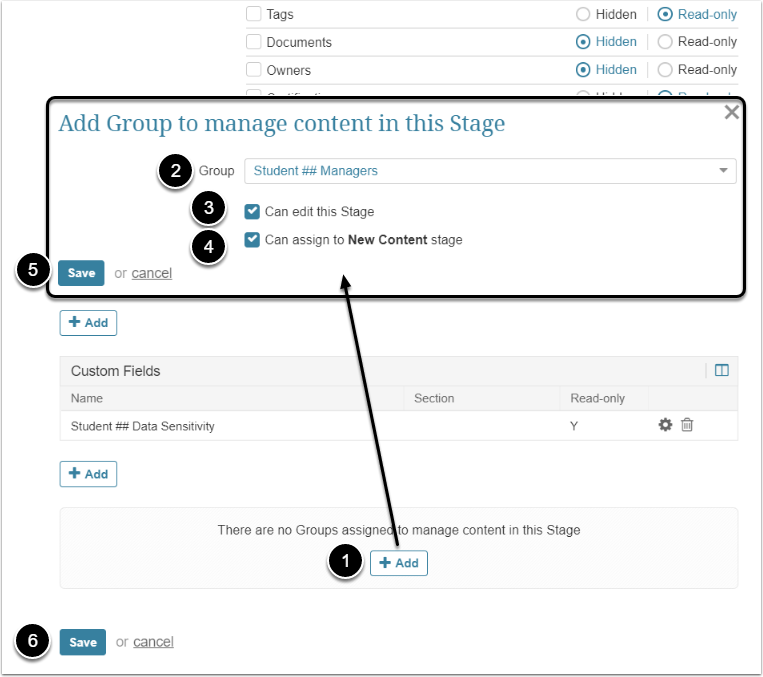
- [+ Add]
- Group: Select the "<your name> Managers" Group from the dropdown menu
- Activate the checkbox near the Can edit this Stage option
- Activate the checkbox near the Can assign to New Content stage option
- [Save]
- [Save]
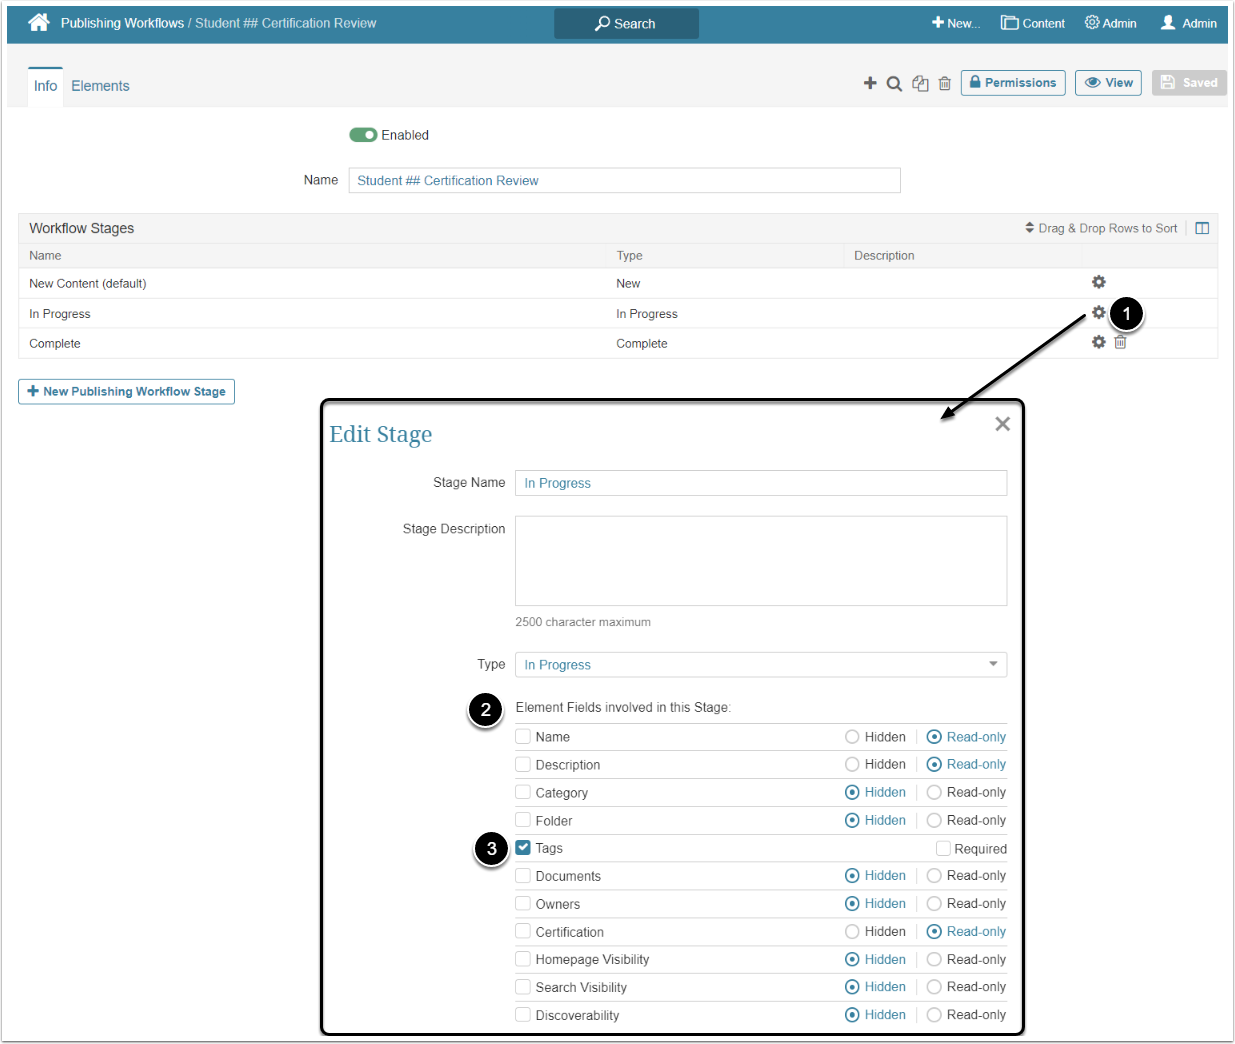
This is the stage, where the reviewer can make some changes, so some of the fields that were marked "Read-only" in the New Content stage will now become editable.
Define the Involved Fields
- Click the gear icon in the In Progress row
- Elements involved in this stage: Switch radio buttons to "Read-only" for the following rows:
- Name
- Description
- Certification
- Activate the checkbox in the Tags row
Add Glossary Section
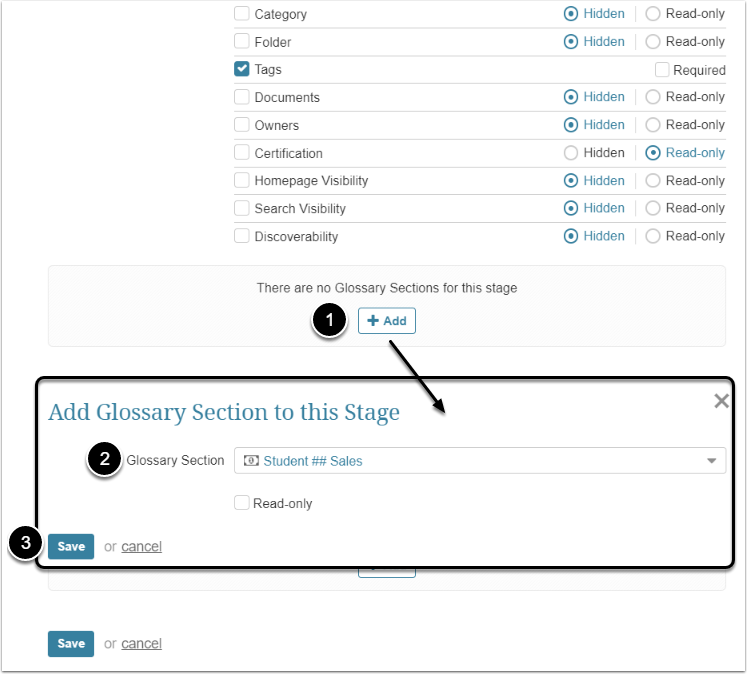
- [+ Add]
- Glossary Section: Select the "<your name> Sales" Glossary Section from the dropdown menu
- [Save]
Add Custom Field Section
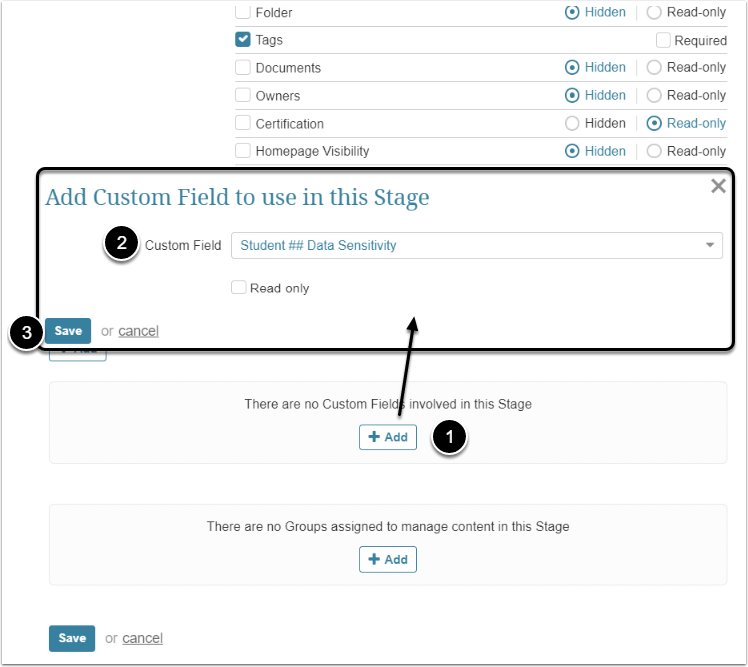
- [+ Add]
- Custom Field: Select the "<your name> Data Sensitivity" Field from the dropdown menu
- [Save]
Assign Groups to Manage This Stage
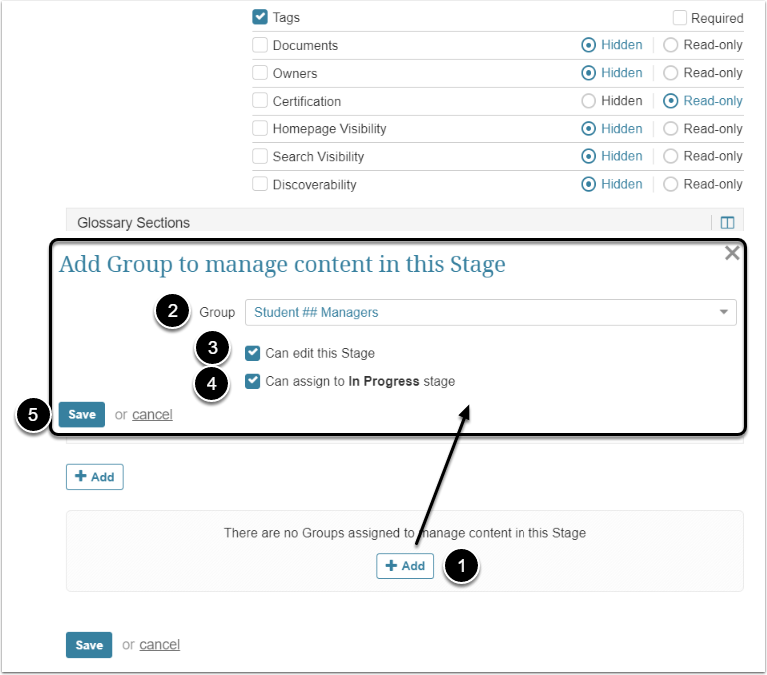
- [+ Add]
- Group: Select the "<your name> Managers" Group from the dropdown menu
- Activate the checkbox near the Can edit this Stage option
- Activate the checkbox near the Can assign to In Progress stage option
- [Save]
- [Save]
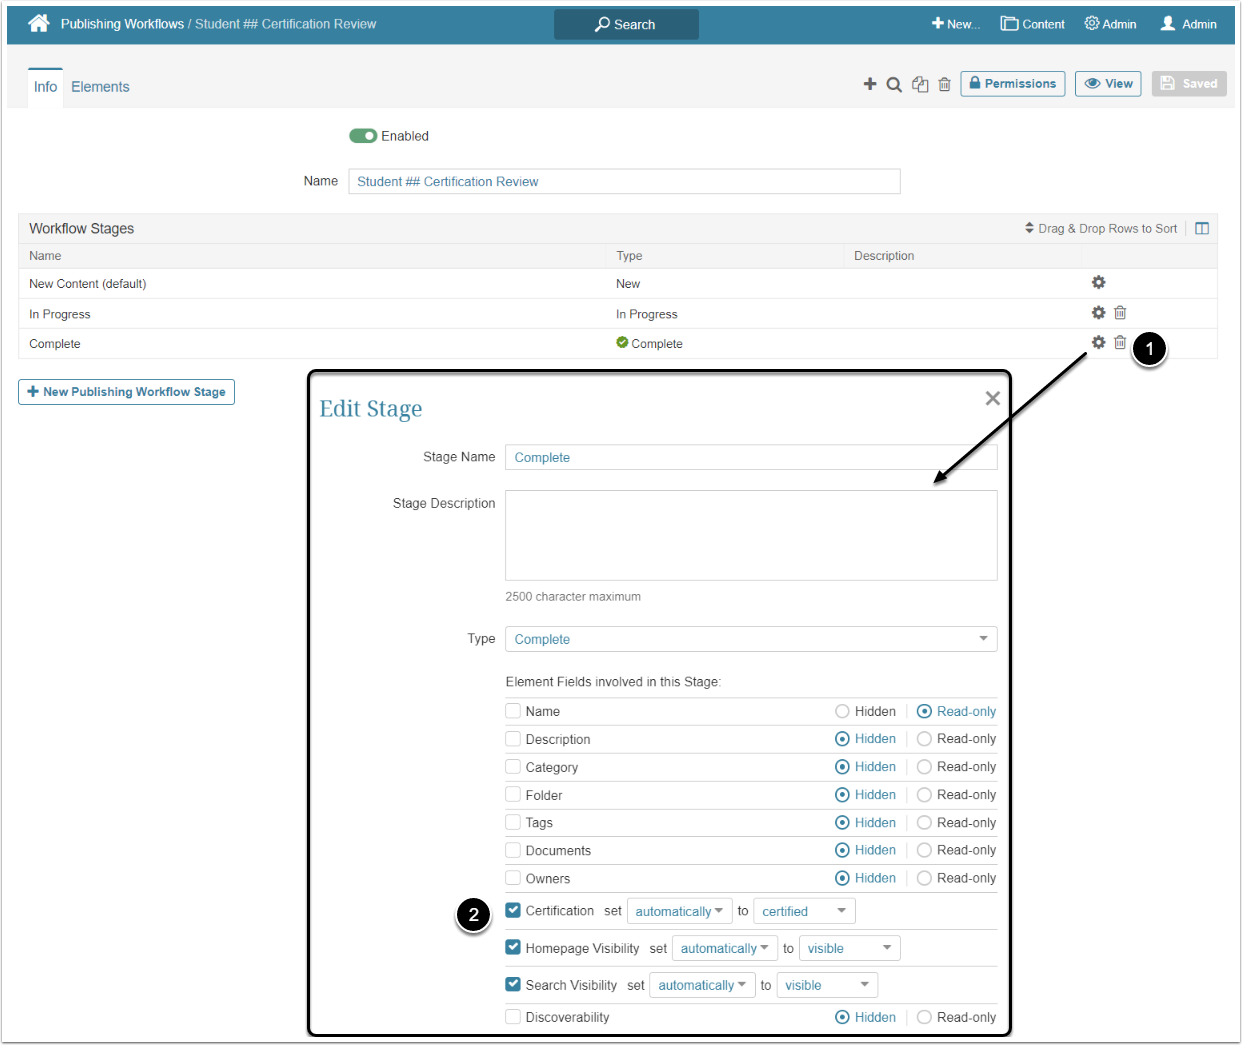
- Click the gear icon in the Complete row
- Elements involved in this stage: Activate checkboxes and perform additional settings to the following rows:
- Certification: set "automatically" to "certified"
- Homepage Visibility: set "automatically" to "visible"
- Search Visibility: set "automatically" to "visible"
Add Glossary Section
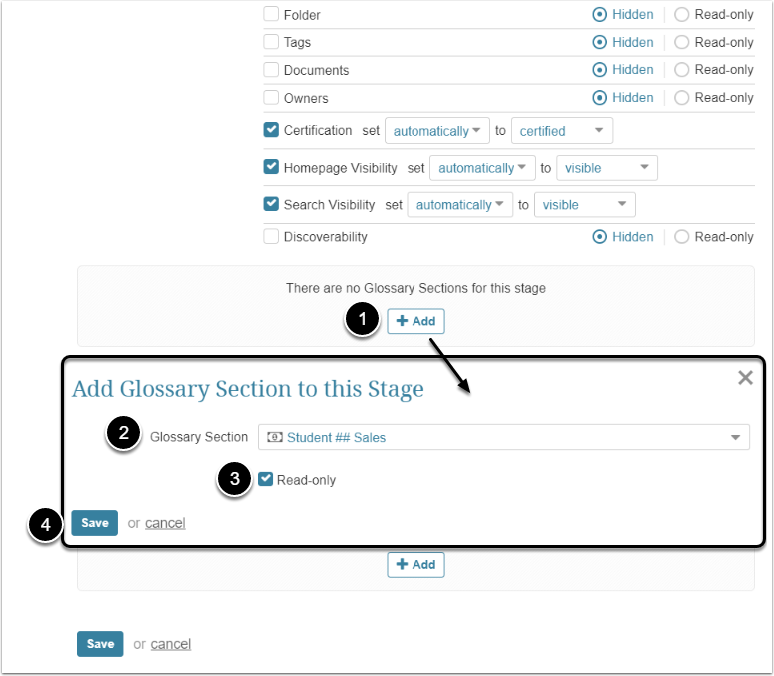
- [+ Add]
- Glossary Section: Select the "<your name> Sales" Glossary Section from the dropdown menu
- Activate the checkbox near the Read-only option
- [Save]
Add Custom Field Section
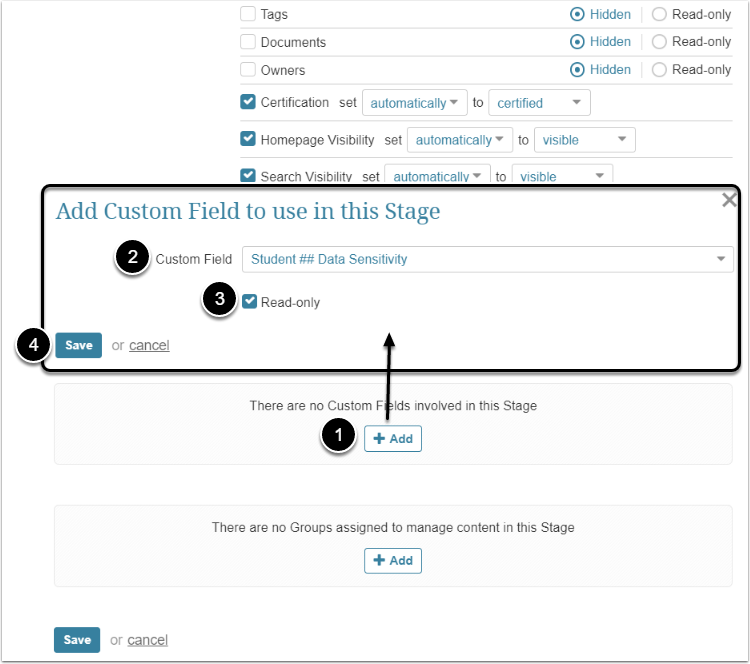
- [+ Add]
- Custom Field: Select the "<your name> Data Sensitivity" Field from the dropdown menu
- Activate the checkbox near the Read-only option
- [Save]
Assign Groups to Manage This Stage
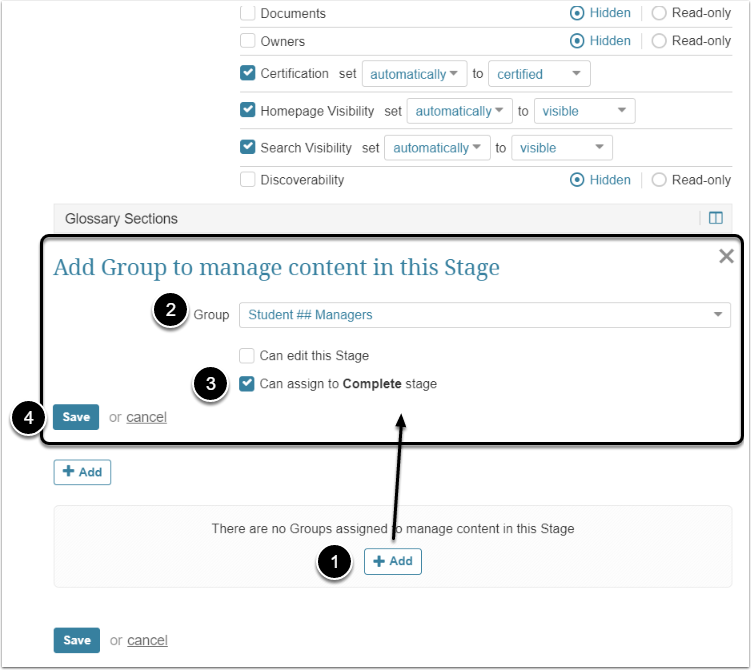
- [+ Add]
- Group: Select the "<your name> Managers" Group from the dropdown menu
- Activate the checkbox near the Can assign to In Progress stage option
- [Save]
- [Save]
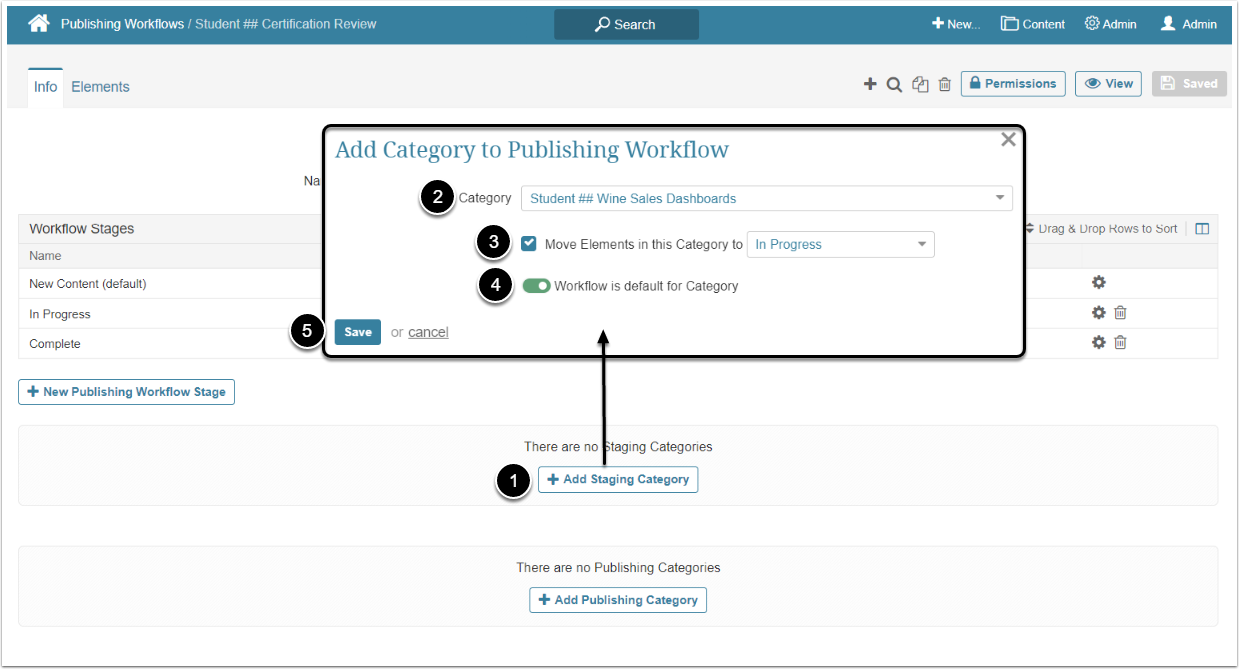
- [+ Add Staging Category]
- Category: Select the "<your name> Wine Sales Dashboards" Category from dropdown menu
- Activate the checkbox near the Move Elements in this Category to In Progress option
- Enable the Workflow is default for Category toggle switch
- [Save]
If you want to tune the Publishing Workflow in a more sophisticated way you can add Automation Rules. For more information about them, refer to Configure Publishing Workflow Automation Rules.
Checking the Workflow
- Open the Members tab
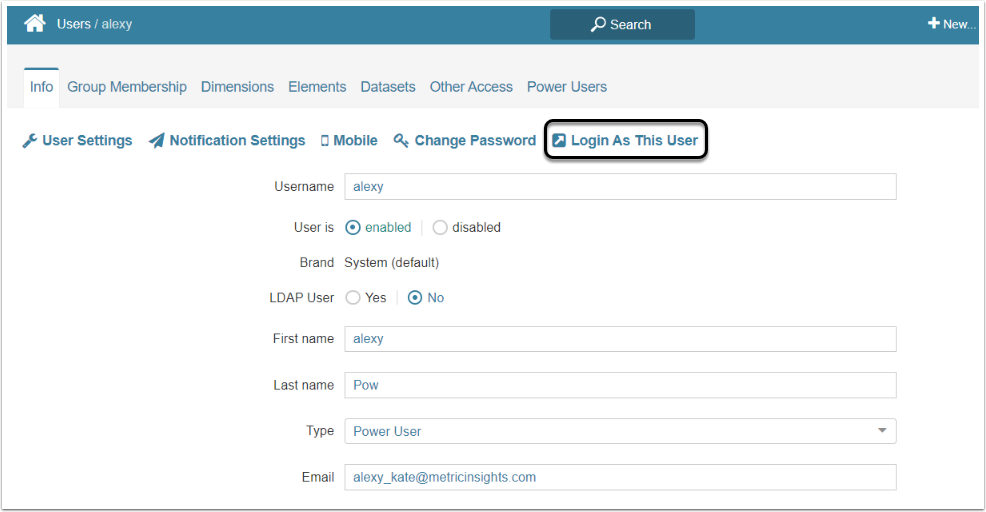
- Click the Power User's Active Name link
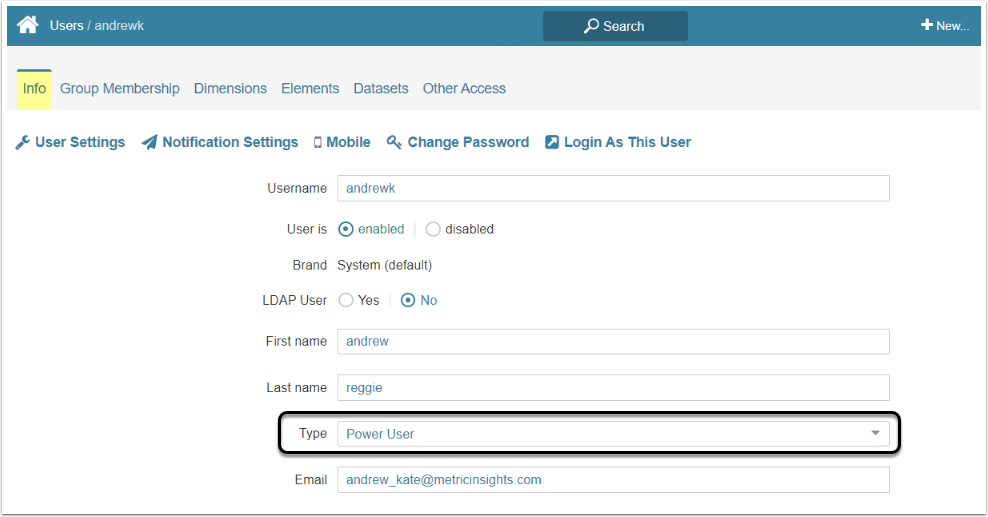
If all the Users in your Users Group are Regular, you need to promote one of them to become Power User. Otherwise, proceed with the Power User that is already added to your Goup.
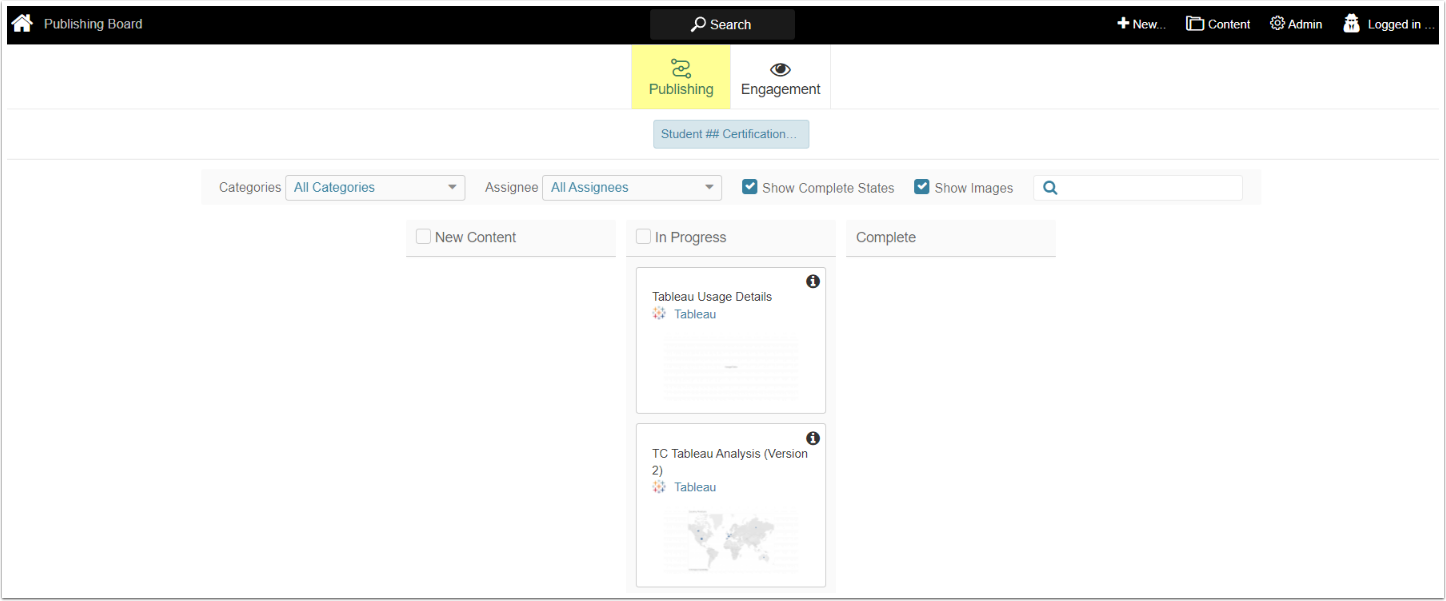
Here on the Publishing tab you can see how the Publishing Workflow is executed. For more information, refer to Execute Publishing Workflow in Content Center.
Congratulations! You've completed the use case!
