This article provides an example of how users can follow Publishing Workflow that involves two Groups. For the purpose of this article, these Groups are Report Developers and Sales, each carrying out their own responsibilities in Sales Reporting Workflow:
- Report developers are building reports in an external application and recreating them in Metric Insights.
- Sales team verifies that the data in the report is correct and that the report is ready for wider business visibility.
For instructions on how to configure a 2-Party Workflow, refer to this article.
PREREQUISITES:
- Use Content Center privilege must be granted to PUs involved in Publishing Workflow.
- Groups involved in content review within a Workflow must have at least View Access to this Workflow (in versions prior to 6.3.4).
- NOTE: [6.3.4] Power Users will be able to access a Publishing Workflow from the Board if their Group is assigned to the Publishing Workflow Stage associated with this Workflow.
- Groups involved in content review within a Workflow must have at least View Access to the Categories that are involved in a Workflow.
- NOTE: For the purpose of this article, two Categories have been created: Demo Sales Category and Demo Sales Category_Staging.
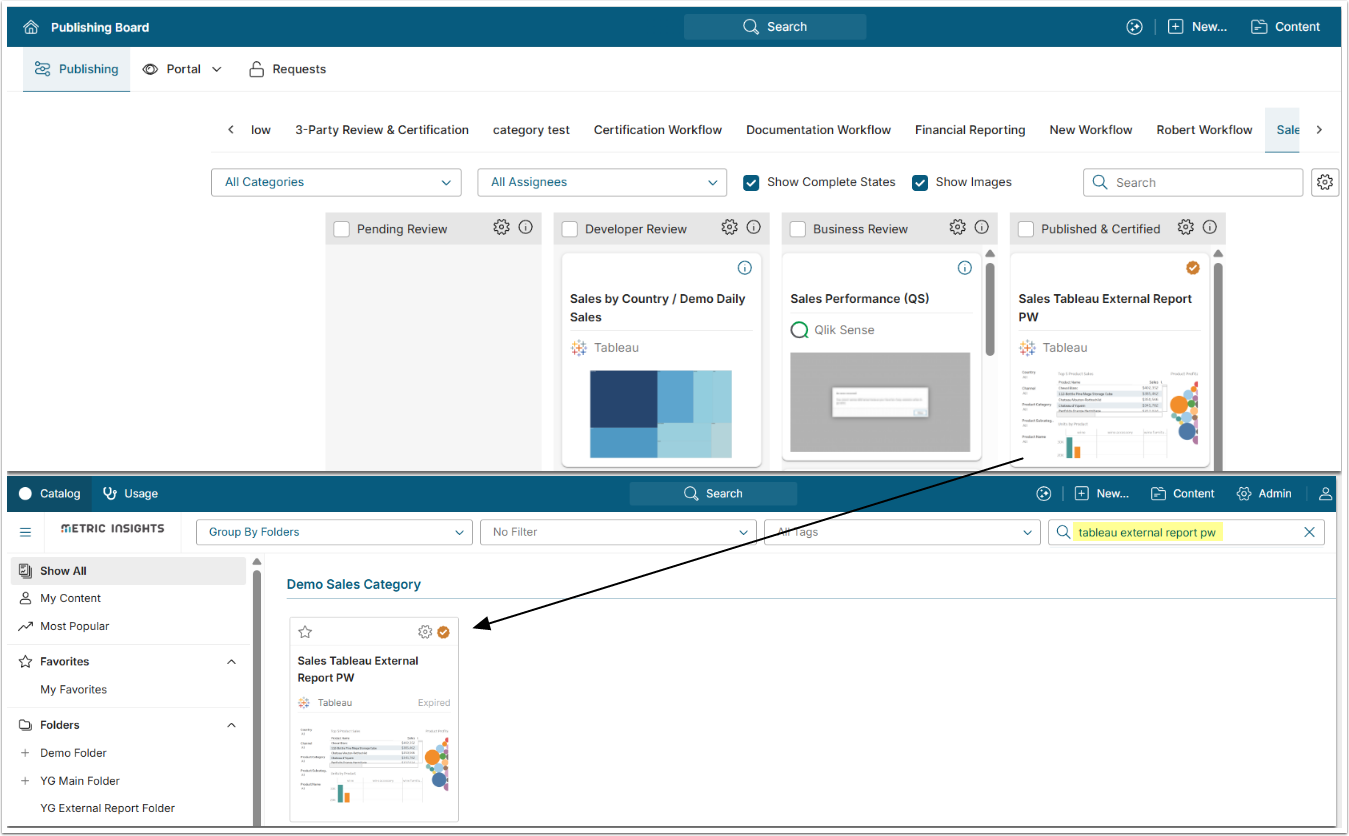
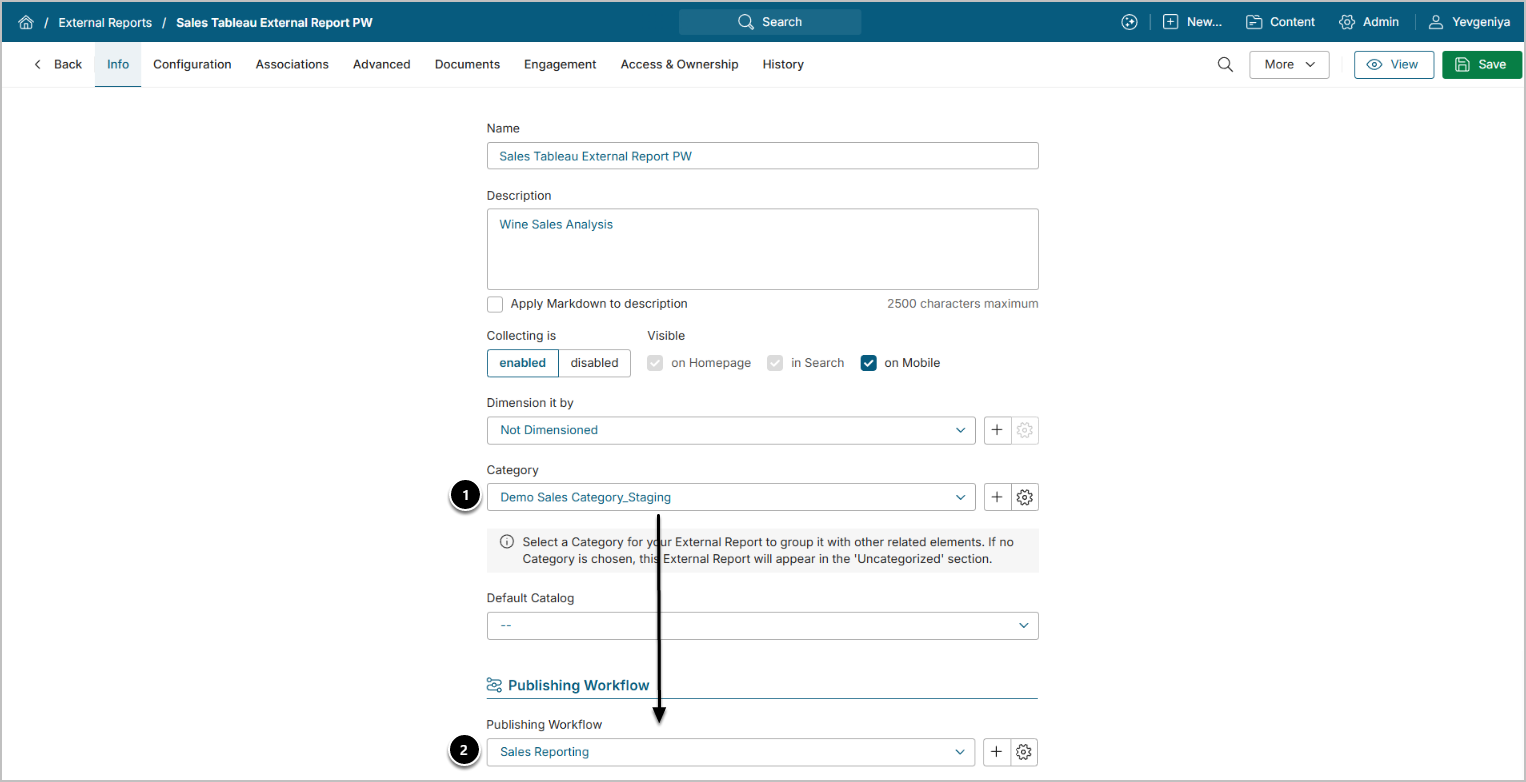
1. Assign the Right Category for the New Content
When Report Developers build the Report in Metric Insights, placing the Report in Sales Category_Staging automatically puts it in Pending Review Stage of Sales Reporting Workflow. This makes the Report available for moving to the next Stage, Developers Review.
2. Move the Report from Pending Review
Access Content > Content Center > Publishing Tab
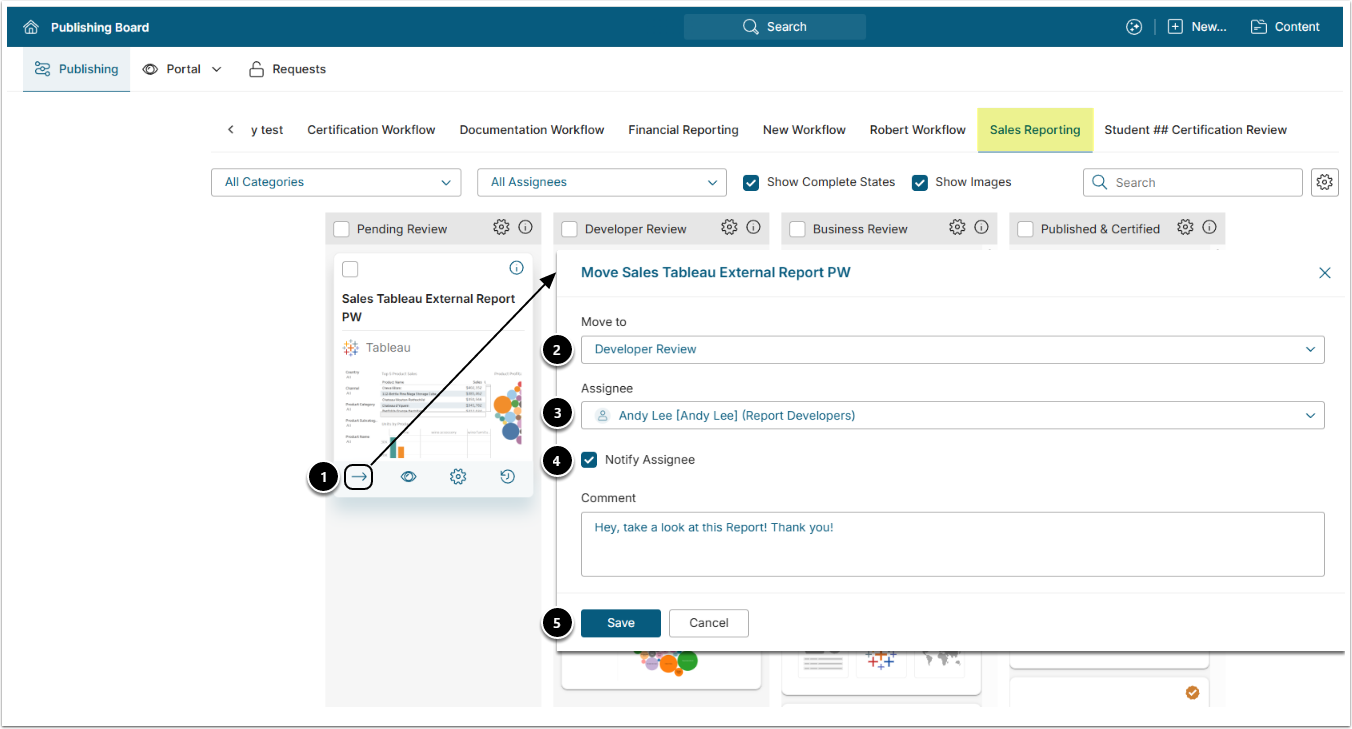
- Move/Reassign: Click the arrow icon.
- Move to: Choose the Stage to move the Report to.
- Assignee: Specify the Assignee responsible for review.
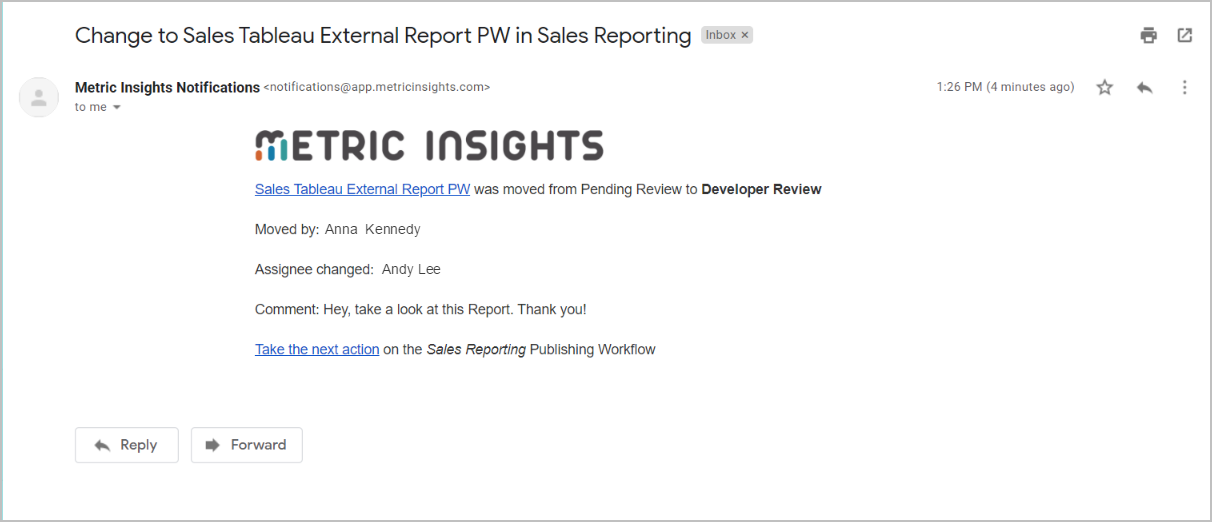
- Notify Assignee/Comment: Optional. Choose if you want to notify the Assignee and send them a message via email.
- See the example message on the screen below.
- [Save]
NOTE: The Move Report procedure includes the same popup and steps across all Stages.
3. Conduct Developer Review
After reviewing, the Report Developer edits available fields and moves it to Business Review.
NOTE: Regardless of the Stage, editability of fields is configured during the Workflow setup based on Group membership. Edits are optional, not mandatory, and depend on the needs of your review process.
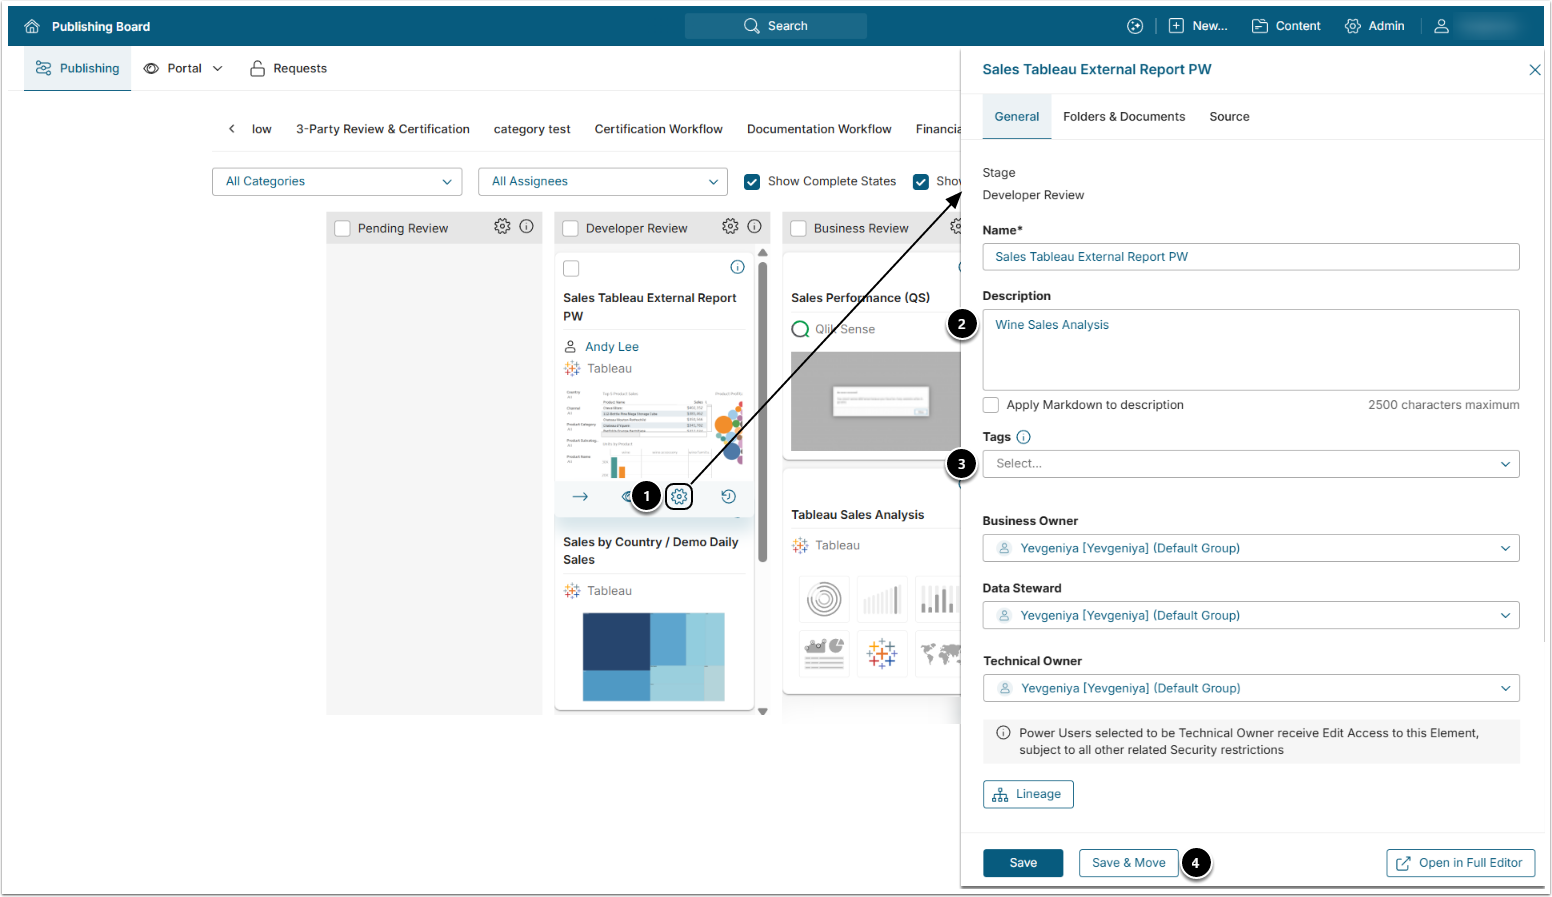
- Move: Click the gear icon.
- Description: Edit Description.
- Tags: Add Tags.
- [Save & Move]
- Next, move the Report to Business Review via the Move Report popup. The procedure is the same as in Step 2.
4. Conduct Business Review
At this Stage, Sales Group conducts final review of the Report, changes the available fields, if needed, and moves to Published & Certified.
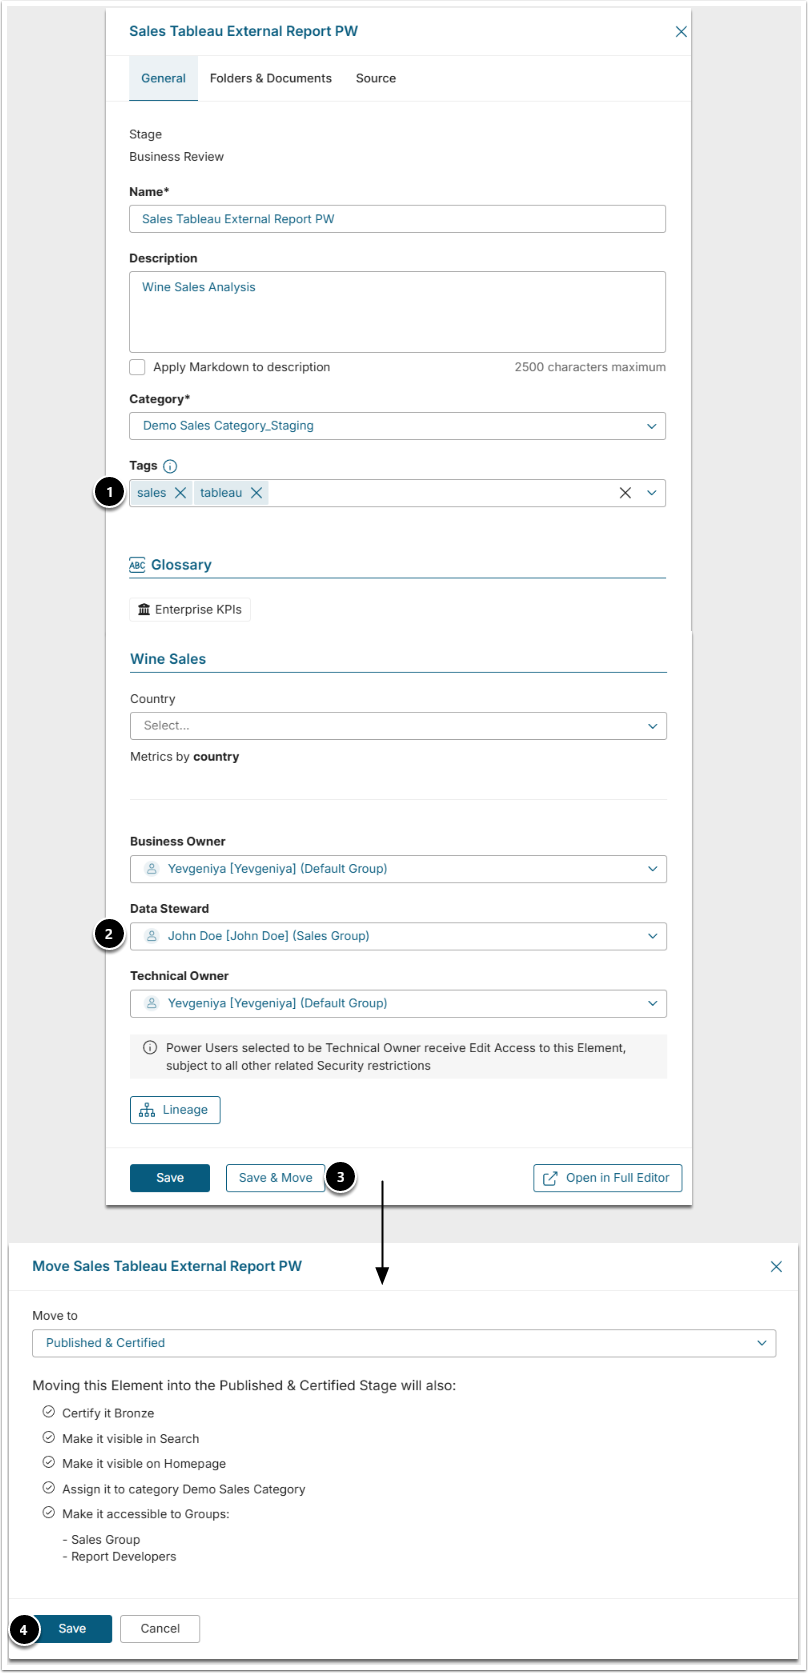
- Tags: Add/Edit Tags.
- Owners/Stewards: Change ownership.
- [Save & Move]
- [Save]
5. Published & Certified
Once the Report is in Published & Certified, it appears on the Homepage, can be searched, and is certified.