This article outlines how to create a new Data Collection Trigger to run based on a pre-specified schedule. The same process can be used when defining existing Triggers.
1. Open Data Collection Trigger List
Access Admin > Collection & Storage > Triggers
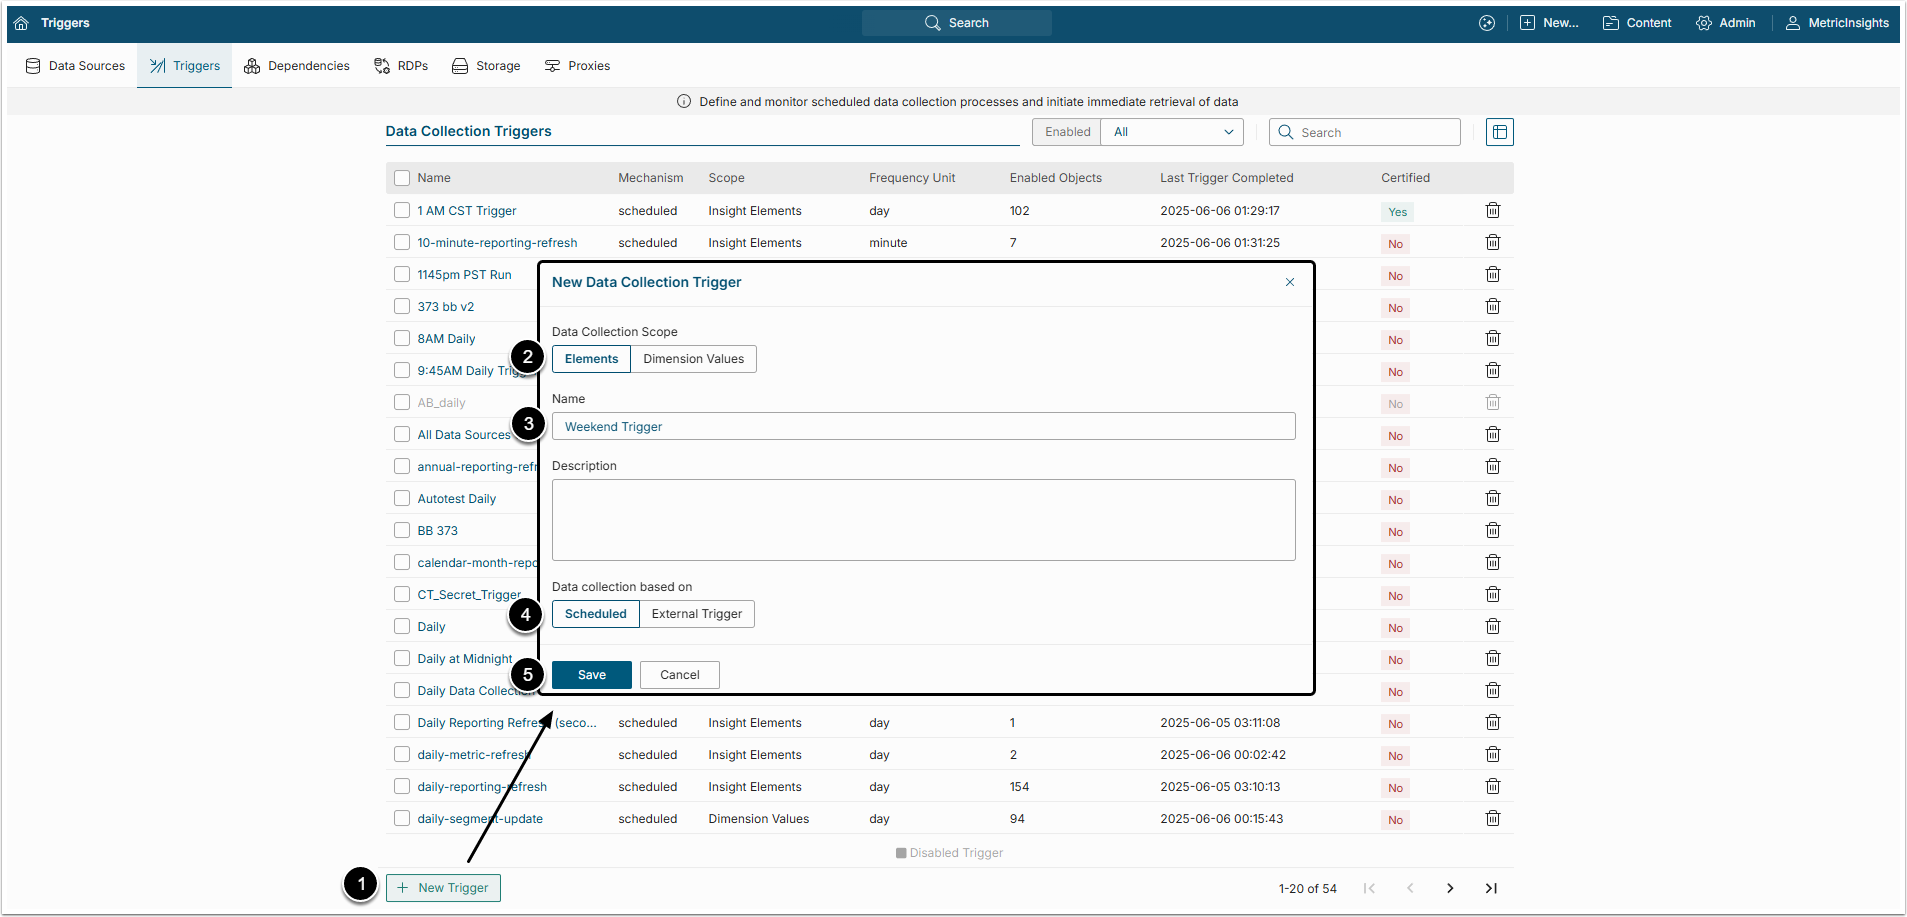
- [+ New Trigger]
-
Data Collection Scope: The Trigger can be applied either to Elements (Reports, Metrics, etc.) or Dimension Values.
- NOTE: This choice can be made at this step only and once saved cannot be altered.
- Name: Provide a unique and descriptive name for the Trigger.
- Data collection based on: Select the type of Trigger:
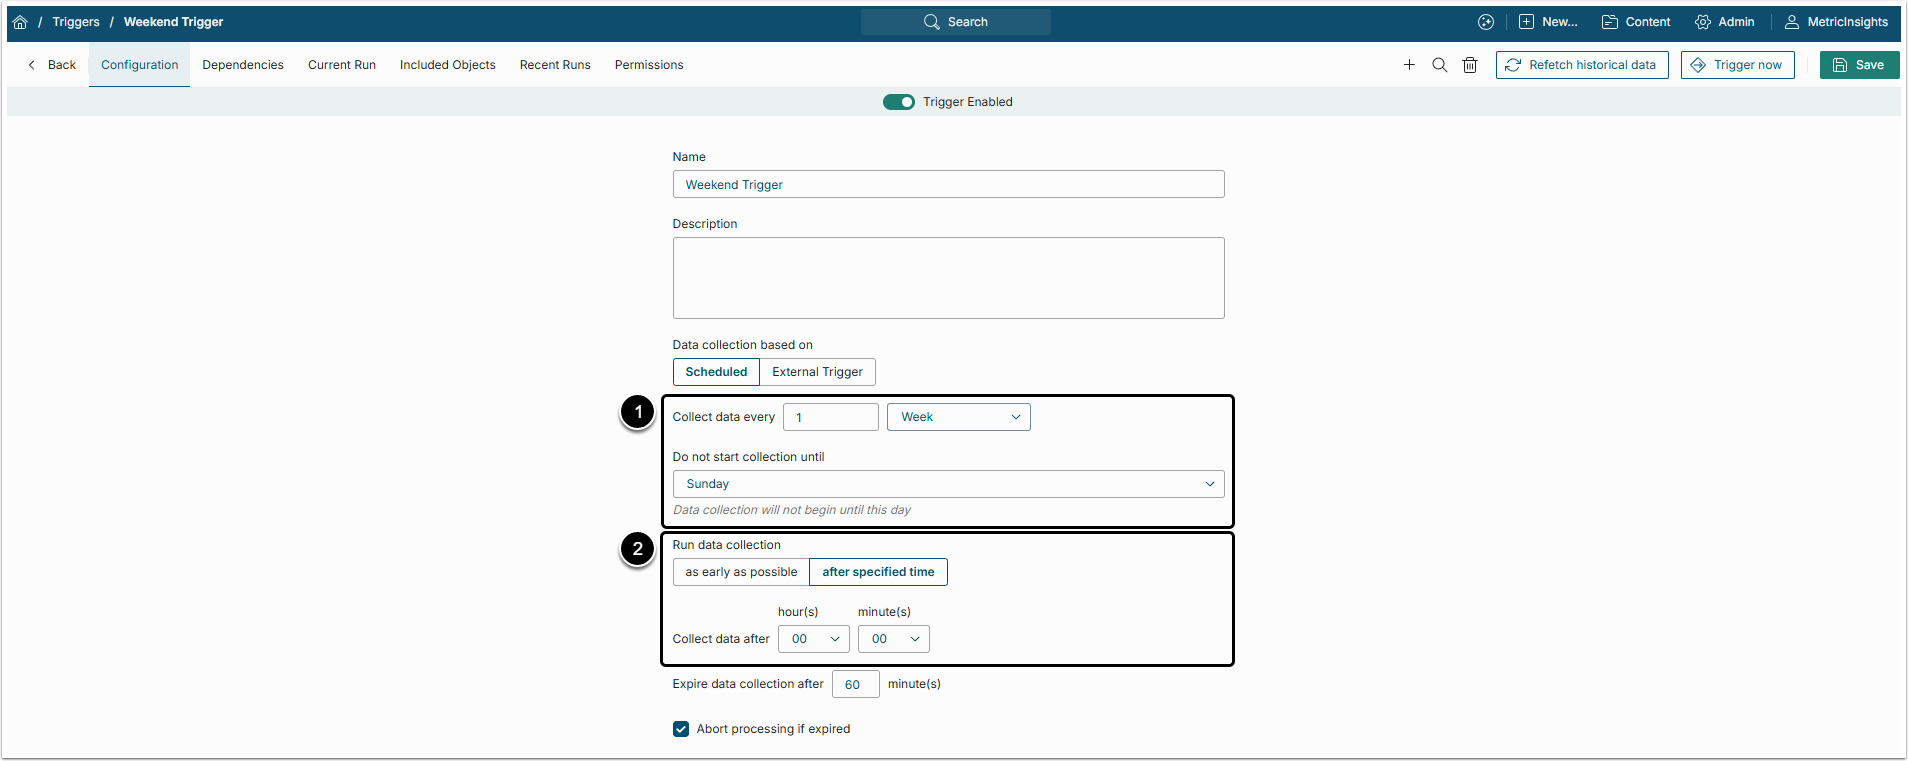
1.1. Scheduled Data Collection
As its name implies, this type of Trigger is set to start data collection once a specified period of time passes, in other words – according to schedule.
-
Collect data every: Provide the interval and unit that will determine how often the trigger is executed.
- If "Week" or "Month" is chosen in the second drop-down menu, the User also has to specify the Do not start collection until field.
-
Run data collection: Specify whether the trigger should run as early as possible in the period (day, week, etc..) or if it should only be run after a specific time.
- If "after specific time" is chosen, also set the Collect data after field.
NOTE: The trigger will not automatically start at the pre-specified schedule if there are Trigger Dependencies or Data Dependencies which have not been satisfied.
A schedule-based trigger will be started after the specified time ONLY once all associated dependencies have been satisfied.
For more information see: Establish dependencies between Data Collection Triggers
1.2. Data Collection Initiated by External Trigger
This is a type of Trigger that start working after it is activated from the external tool.
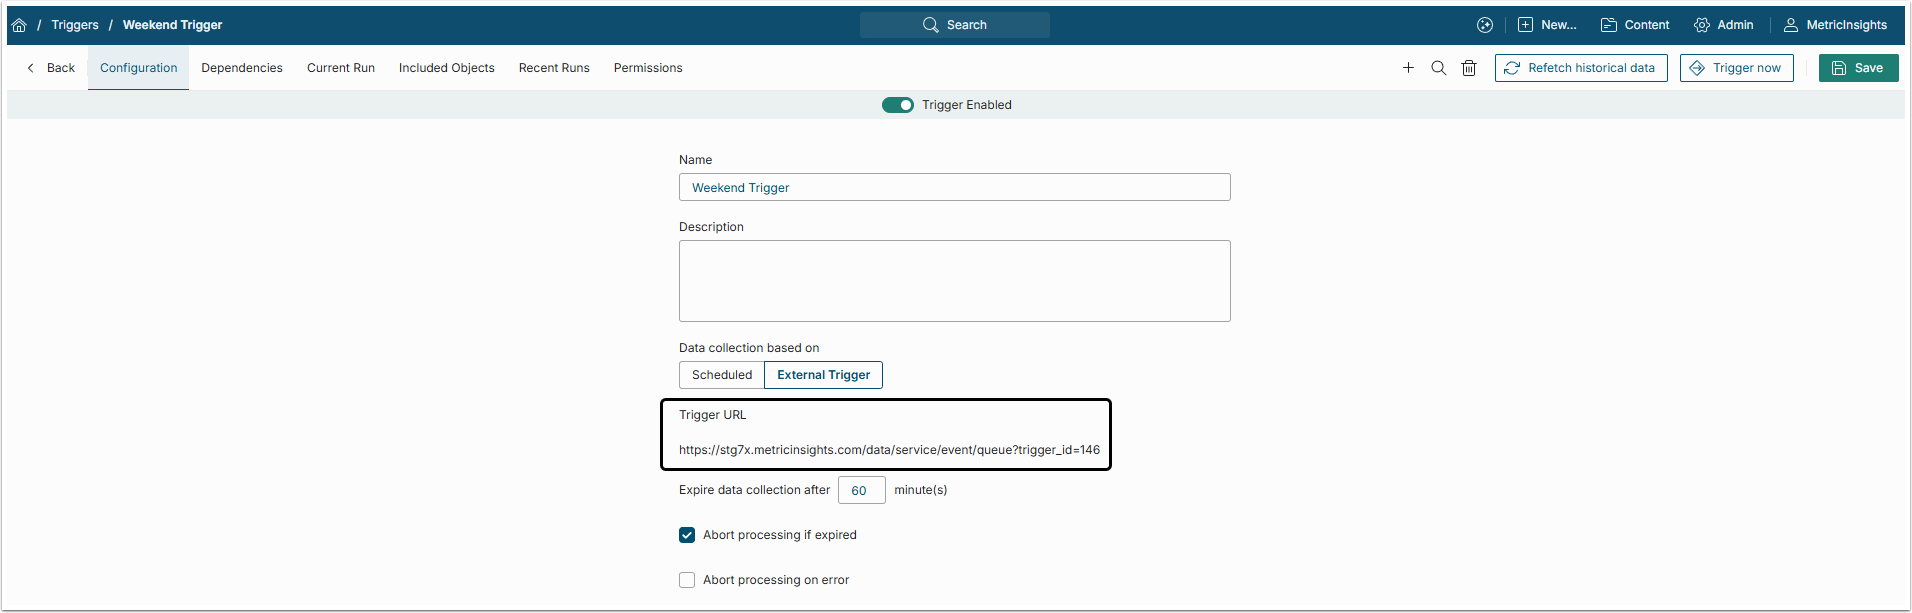
If you choose to perform data collection upon the External Trigger, a URL is to be displayed at the field below. You can use this URL in external tool to activate the Trigger.
2. Other Settings
There are two major terms, used to mark Triggers that failed to complete their work: expired and aborted.
From MI system, the Administrator can make the Trigger start working, but until it finishes, there is no way to know what's happening to it. If it is taking too long to finish, it can be marked as expired. The Administrator can also stop Trigger processing by clicking [Abort Now] in the Current Run tab. However, this doesn't mean that the process will be aborted immediately. The Trigger will finish updating the current Element and stops before starting to process a new one.
-
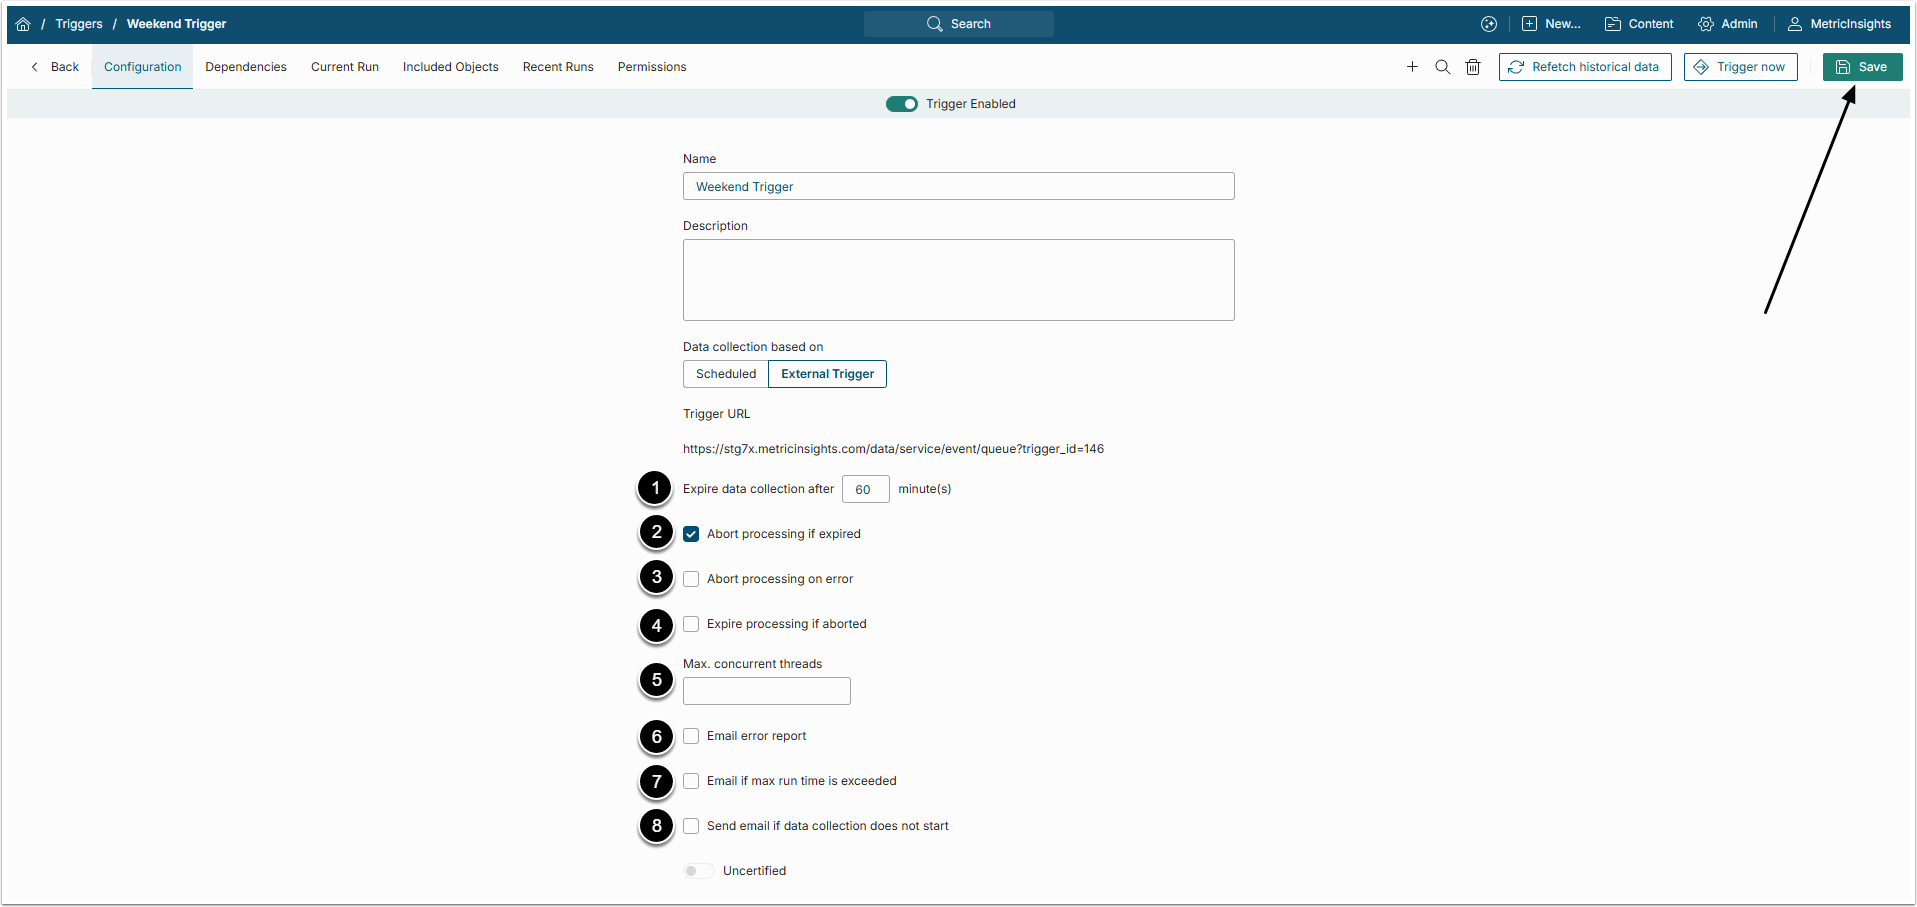
Expire data collection after: If the Trigger won't finish working after a time period set in this field, it will be marked as "expired".
- NOTE: Make sure this time period is reasonable for the number of Elements which uses it.
- Abort processing if expired: In some cases it takes longer for the Trigger to finish working not because of some error, but because of some technical restrictions. This means, that Triggers marked as "expired" can continue working for a long time. By selecting this checkbox, the Admin can make the expired Trigger abort processing.
- Abort processing on error: By default, the Trigger doesn't stop working after experiencing an error. It just marks the error in the Element and goes on. By selecting this checkbox, the Admin can make the Trigger to abort processing after finding an error.
- Expire processing if aborted: Select this checkbox to mark an aborted Trigger as "expired".
- Max. concurrent threads: If the Trigger fails to finish working because of memory insufficiency, here an Admin can limit the maximum number of threads that process update concurrently.
- Email error report: Selecting this checkbox also opens a field where an Admin can enter an email address. If this checkbox is selected, the system will gather all errors that occurred during processing and send them as a report to the chosen email address.
- Email if max run time is exceeded: Selecting this checkbox also opens a field where an Admin can enter an email address. If this checkbox is selected, the system will send a report about Trigger expiration to the chosen email address.
- Send email of data collection does not start: Selecting this checkbox opens a field where an Admin can set a time and enter an email address. If for some reason (for example, due to Dependency conditions not met) this Trigger doesn't start working in set time, the system will send a report to the chosen email address.