For orchestrated environments, we recommend installing MySQL 8 on remote database servers outside of the orchestrated environment (instead of running from inside of docker container in the orchestrated environment). Typically, MySQL will be managed by the Database Administrators (DBAs) on a pre-existing database cluster. In the event there is no DBA team to install, configure, and manage MySQL for us, follow the steps below on how to do this yourself:
NOTE: See Supported MySQL Versions for information on which MySQL versions are supported for your Metric Insights version.
Provision a Database Server
The MySQL database must be running on a separate server, preferably on a database cluster managed by a DBA team or a native cloud solution like Amazon RDS.
- 8-Core CPU
- 32 GB RAM
- 1 TB+ HD total
- If there are different volumes for specific filesystems, please ensure enough space is allocated to the following:
/var
- MySQL data files by default live in
/var/lib/mysql
- If there are different volumes for specific filesystems, please ensure enough space is allocated to the following:
On AWS, this equates to a db.m5.2xlarge RDS instance type.
On Azure, this equates to an 8 core Compute Gen 5server.
- Linux server should have outbound access to pull mysql packages or access to internal repositories containing mysql packages
Install MySQL 8
Steps to install MySQL 8 (with outbound access):
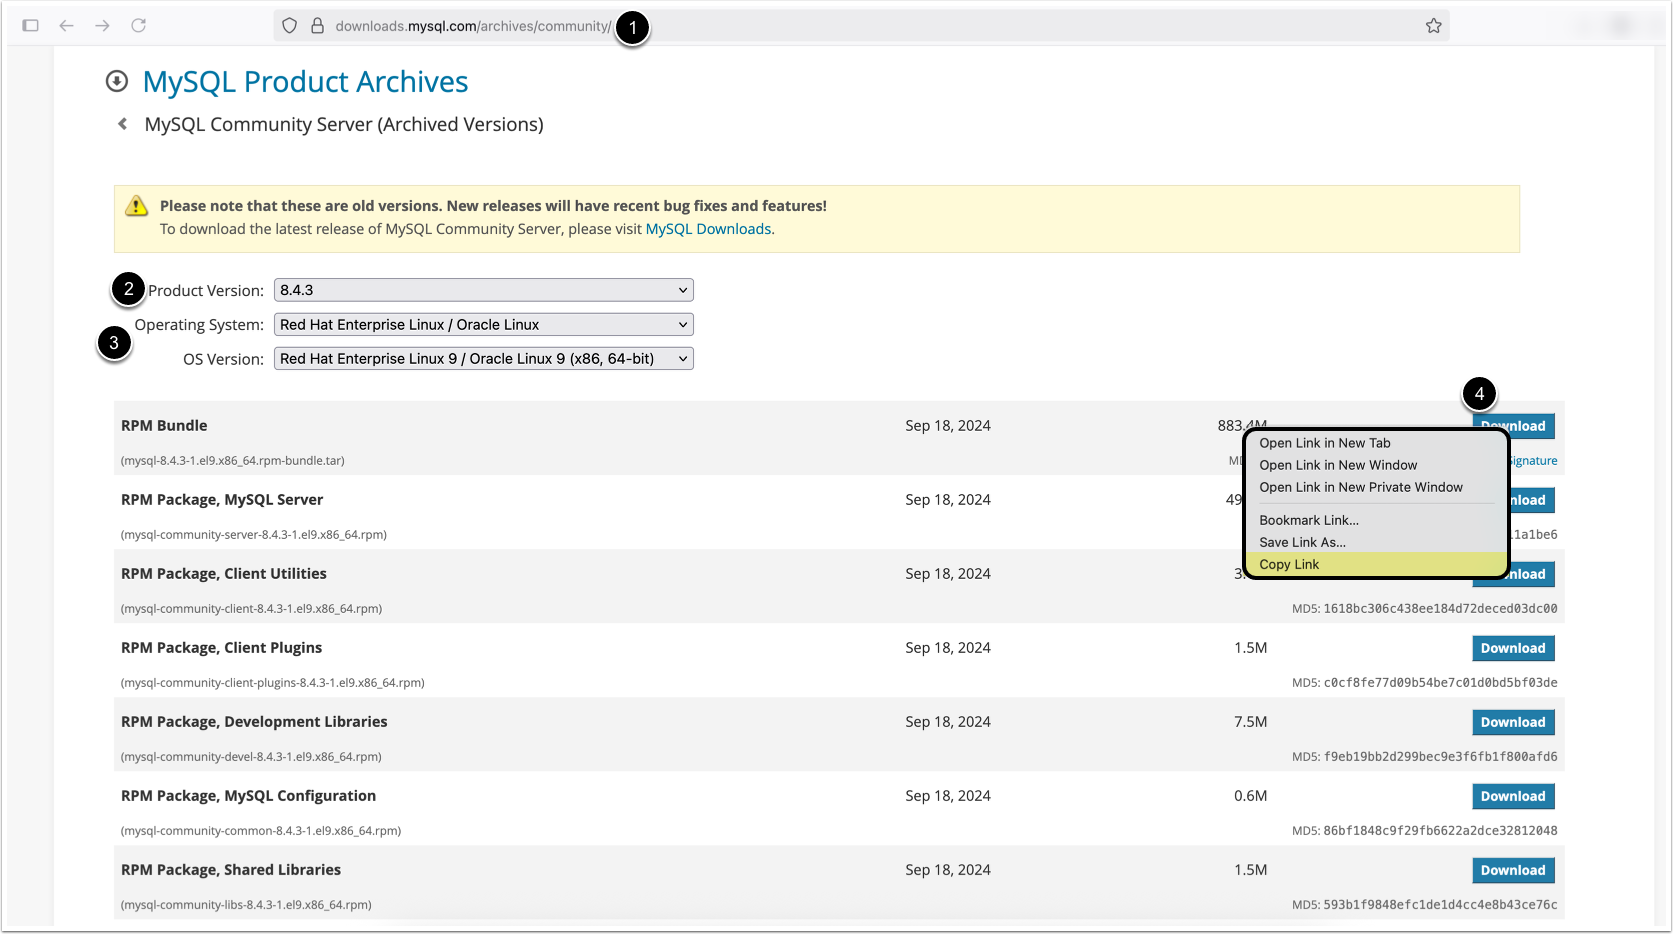
- Visit the MySQL Community Download Archives:
https://downloads.mysql.com/archives/community/ - Select MySQL Product Version 8.4.3 for the appropriate Linux OS
- Choose Operating System and OS Version
- NOTE: Ensure that the correct OS Version is selected; e.g., RHEL 8 vs RHEL 9, etc.
- Choose the RPM Bundle (first result). Right-click the [Download] button and copy the link address
- Use the link copied above in Step 4 to then
wgetthe MySQL RPM package to the database server:wget https://downloads.mysql.com/archives/get/p/23/file/mysql-8.4.3-1.el9.x86_64.rpm-bundle.tar - Untar the MySQL RPM package from Step 5 above once it has been downloaded and saved to the database server/MySQL host:
tar xvf mysql-8.0.28-1.el7.x86_64.rpm-bundle.tar - Switch to root user:
sudo -i - Once the MySQL RPM package is unpacked from Step 6, in the same directory where the MySQL tarball was just unpacked, install all of the MySQL RPMs from the tarball with the command:
dnf localinstall *.rpm - Start the mysqld service:
systemctl start mysqld - Get the temporary root user password to access MySQL:
grep 'temporary password' /var/log/mysqld.log - Initialize MySQL and go through the prompts:
mysql_secure_installation- Set a new root user password
- Yes, remove anonymous users
- No, do not disallow root user login remotely
- Yes, remove the test database
- Yes, reload the privileges table
- Restart MySQL:
systemctl restart mysqld - Set MySQL to auto-start on system startup:
systemctl enable mysqld
Confirm mysql access by opening the mysql prompt: mysql -u root -p
Enter the new root user password when requested.
Configure MySQL 8
- In the MySQL prompt, run the following command to remove a specific component that checks for special characters in generated passwords:
UNINSTALL COMPONENT 'file://component_validate_password';- Still in the MySQL prompt, create a new
root@%user who can access the MySQL DB from any host (this is needed because the machine where Metric Insights is installed needs access to MySQL, so there has to be a user who can access MySQL from somewhere other than the MySQL localhost):
create user 'root'@'%' identified by '<enter a new root@% PW here>'; - Once a new
root@%user is created, now grant the user the necessary privileges with the command:
grant all privileges on *.* to 'root'@'%' with grant option;- Next, flush privileges:
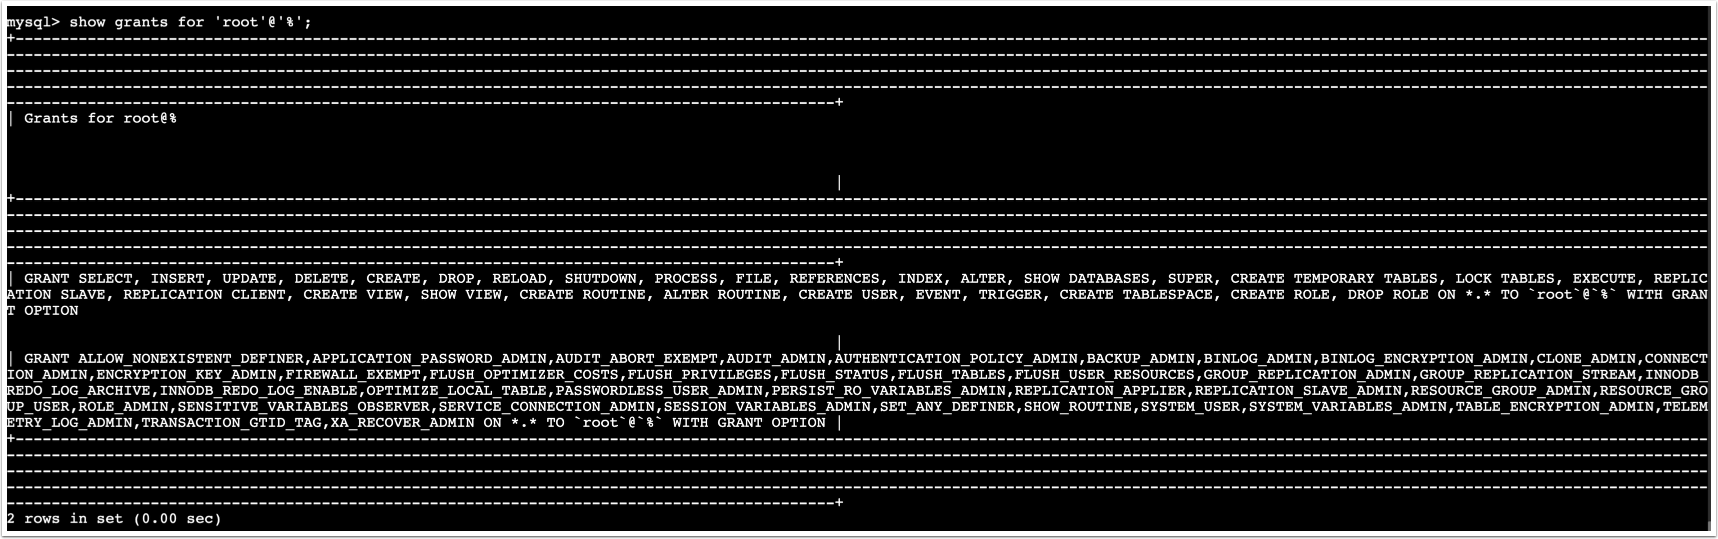
flush privileges;- You can verify the list of grants/privileges with the command:
show grants for 'root'@'%';The output for show grants above should look as follows:
- Exit the MySQL prompt and locate
/etc/my.cnf. Open this file in an editor and add the following at the very end of the file:
!includedir /etc/my.cnf.d/- Set permissions for the
my.cnf.ddirectory to 755 and owned by root:root
Next, we need to create a mysql parameters file with custom values. This is done to optimize the mysql database for Metric Insights. See Fine-Tuning MySQL Parameters (v6.2+) on what parameters to set.