When configuring a Metric Insights instance, the recommended approach is to onboard content prior to onboarding Users, so content onboarding is the first step in the instance configuration process. You'll have to transfer all the necessary content from the BI tools your organization uses, organize that content, and give Users access to it. To help you along the way, Metric Insights has a set of tools to make the whole workflow more efficient.
Please refer to this article for further details on recommended content onboarding features, decisions that'll have to be made, administrator roles that are required for the process, and recommended best practices.
General Instance Configuration Workflow
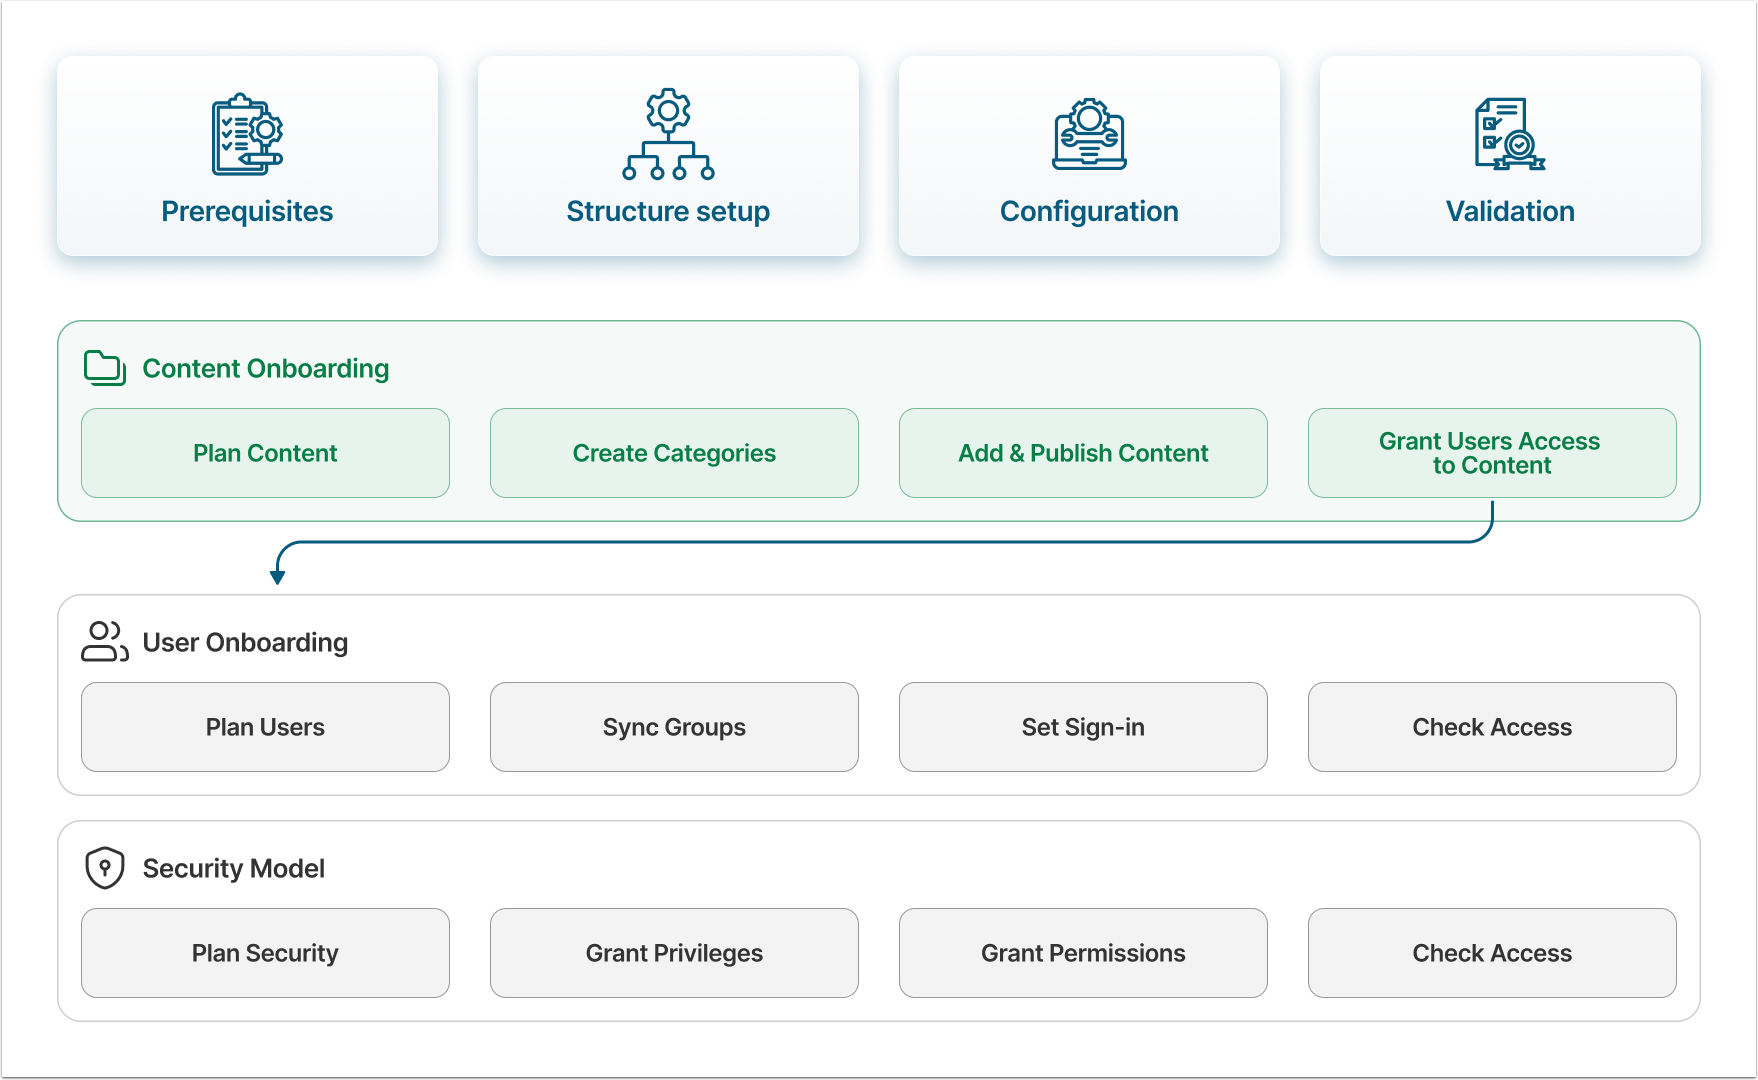
There are three essential steps in the Metric Insights instance configuration process: bringing in content and users, as well as building a security model. The recommended sequence is as follows:
- Onboard the content from external BI tools;
- Bring in Users;
- Give Users access to content.
Quick Content Onboarding Recommendations
Generally, there are three quick recommendations when it comes to bringing content into Metric Insights:
- Organize content pieces into Categories.
- Use the Autosync feature to bring content in automatically, instead of uploading it manually.
- Use Publishing Workflow to sort the content and ensure it's relevant and validated.
Now, let's go through them in detail.
Create Categories and Assign Elements to Them
Categories are used to group content by topic, or by the roles and responsibilities of the users accessing them. An Elements is a separate content piece brought to Metric Insights, like Report or Metric. The Element cannot be created without being assigned to a Category. The best practice for security model is to give Users access to Categories instead of individual Elements, so it is strongly recommended that all Elements are assigned to a relevant Category to prevent unauthorized access to data.
Once an Element has been created, it can be moved between Categories as needed.
Decision 1: Folders vs Categories
While both Folders and Categories are used to organize content on the Catalog page, they still have some differences:
- Category is content management tool, required for Element creation. They are used to organize and group content (e.g., Reports, Metrics, Datasets) across the platform in a structured hierarchy. Elements and Datasets in Metric Insights are always created within a Category.
- Folder is an optional functionality. They provide personalized organization of content on the Homepage for individual Users or Groups. Folders are unique to each User. Refer to the Understanding Folders article for a more in-depth description of Folders' various functionalities.
For a more detailed comparison, refer to the Understanding Folders vs. Categories article.
Unlike Categories, Folders aren't required in every case. In some scenarios, Folders aren't used at all. In other cases involving a complex Category structure, Categories can be hidden from the Catalog page entirely, with only Folders used to simplify Users' access to content. Folder usage should be determined on a case-by-case basis, so you'll have to decide whether or not to use them.
Bring Content Automatically
The Content Auto Synchronization functionality automates the creation of Elements from the BI tool's objects, enabling you to bring all content from an external BI tool into Metric Insights in a single, automated batch.
There are two types of Elements in Metric Insights that can be automatically synchronized with external BI tools: External Reports and External Content.
- External Content is an Element used to display content stored within your external BI tool's database that MI can't apply filters to (like CSV or PDF files). For example, most of the content stored in Microsoft SharePoint displays as External Content in Metric Insights.
- For more details, refer to the Configure External Content Auto Synchronization article.
- External Report is an Element that not only automatically gathers and displays data stored in an external source, but also allows filters to be applied to that data, enabling flexible customization of its display. For example, most of the content stored in Tableau or Microsoft Power BI displays as External Reports in Metric Insights.
- For more details, refer to the External Report Auto Synchronization Overview article.
It's also possible to upload content in bulk, an approach that falls between manually creating each Element and syncing all content automatically. For more details, refer to the Bulk-Add External Reports and Bulk-Add External Content articles.
Decision 2: How to Upload Content
As mentioned previously, best practice is to upload content automatically rather than create every Element manually. The two features below both support this, but differ in a few key ways:
- Content Auto Synchronization allows you to bring in not only Elements, but also the Category structure, mirroring the content structure created in the BI tool during the synchronization process. However, Content Autosync brings in all content from the BI tool to Metric Insights.
- Bulk-Adding content is the better option if you'd prefer not to bring in all content from the external BI tool, but only a selected number of Elements. In this case, however, all uploaded content pieces will be placed into a single Category and will likely require sorting afterward.
Determine which option best suits your needs before starting the upload.
Optionally, Use Publishing Workflow
Whether the content is synced from the external BI tool or added in bulk, best practice is to check all created Elements to ensure they have accurate metadata assigned, and to validate them. The most efficient way to manage this sorting is through the Publishing Workflow.
The Publishing Workflows feature enables Administrators and Power Users to manage and oversee content creation within Metric Insights. It allows Administrators to establish a step-by-step workflow in which every piece of created content must be validated and assigned accurate Tags, Glossary Terms, and other metadata.
Optionally, Sync Metadata
Normally, content stored in BI tools your organization uses has metadata stored with it. Metric Insights has features that can help you bring some of that metadata to the instance automatically by synchronizing it with Elements. It's not supported for all BI tools, but if you're using Atlan, Alation or Collibra, the synchronization process is relatively straightforward.
- Metadata Propagation. This functionality allows an Admin or Power User to propagate metadata changes to Elements in Metric Insights. Metadata associated with either a table-column combination or values such as Element Name (Report Name), External Report Reference (Report ID) (e.g., Tableau URL for the Workbook), or External GUID can be propagated to corresponding Elements.
- The Glossary Auto Synchronization, Custom Field Auto Synchronization, and Certification Level Auto Synchronization features let you quickly pair Glossary Terms, Custom Fields, and Certification Levels created within Metric Insights with Elements using specified Datasets.
Required Administrator Roles
| Role | Responsibilities |
|---|---|
| BI Tool Administrator |
|
| Metric Insights Administrator |
|
Recommendations Before Start
Before technical implementation, it's recommended that you:
- Review the content stored in your organization's BI tool and define what should be transferred to Metric Insights.
- Determine how content should be organized within Metric Insights, and which User Groups will require access to specific Categories.
- Establish a clear understanding of how content will be transferred to, and stored within, the Metric Insights instance.