Custom Field Autosync has been introduced to support synchronization of fields with a Dataset. This functionality allows the updating of Custom Field values based on Dataset information, whenever the Dataset is updated.
This article describes how to:
Prerequisites:
1. Create Dataset to Define Required Fields

- Data Source may created from any Object; example is a CSV file updated manually
- An Element name field must be defined on input to contain the Metric Insights elements needing update
- Remaining Columns must have the exact same name as your Custom Fields (case sensitive)
- Validate all input rows to ensure that the names used for each Column exactly match the Element Name and all Custom Field valid values. For more information: Adding Custom Fields
- [Update]
2. Configure New Autosync
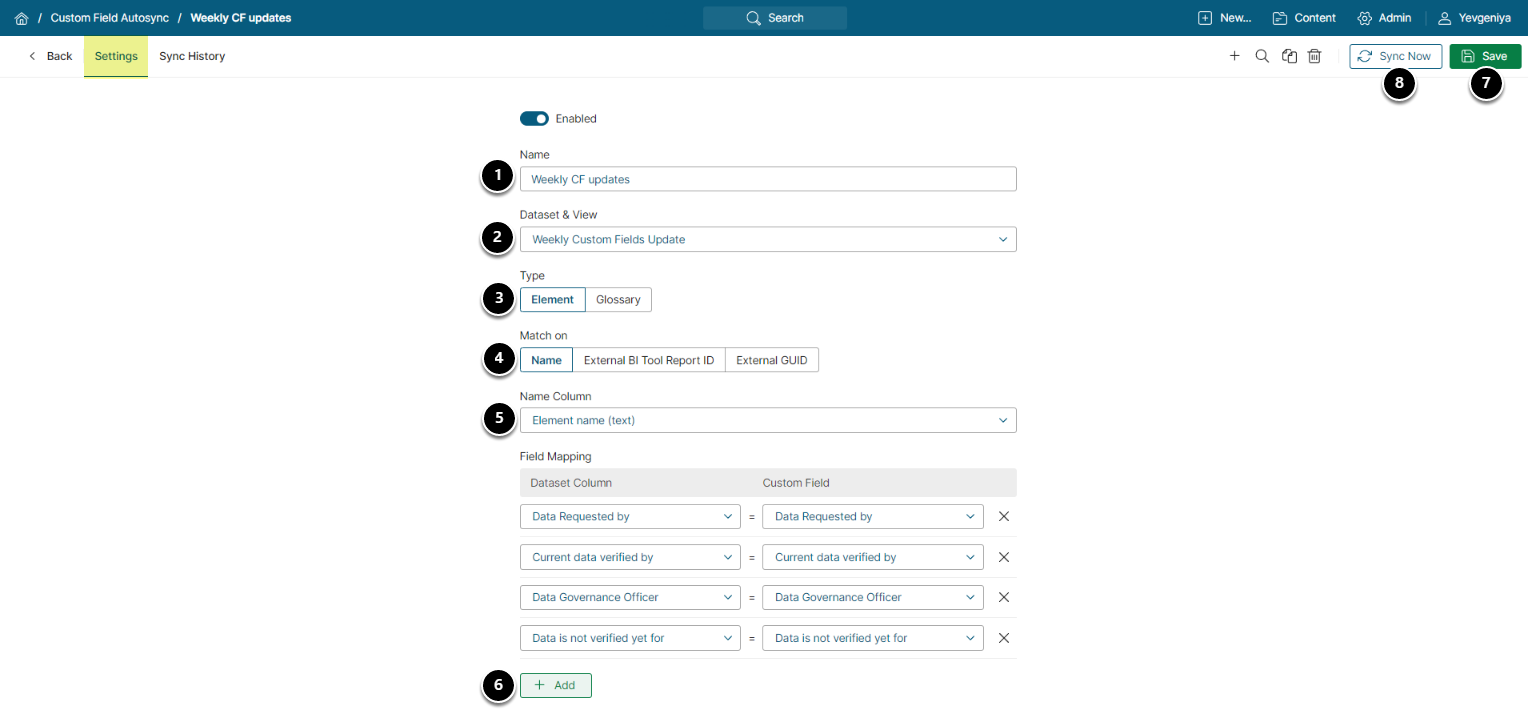
- Name of this Autosync element
- Select the Dataset & View from Step 1
- Set Type to "Element"
- Based on the newly created Dataset, select if your Elements were identified by Name, External BI Tool Report ID, or External GUID
- Choose Element Name/External BI Tool Report ID/External GUID from Dataset columns drop-down
- Using [+Add] match the Dataset Columns values to corresponding Custom Field values as defined in the drop-downs
- [Save]
- [Sync Now]
3. View Results in Sync History
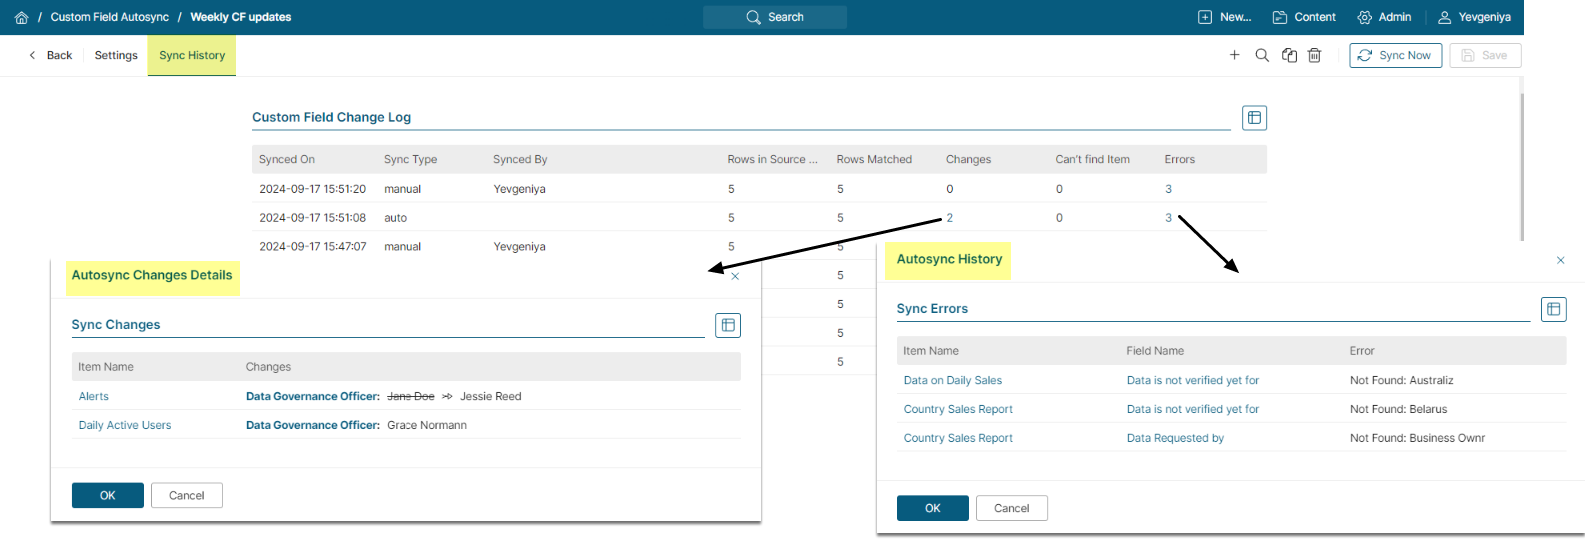
- The two spelling errors to be corrected in the Dataset CSV file;
- One missing Custom Field Value to be corrected in the system or in the CSV file.