This article describes how to create a User Map in Metric Insights.
To understand what a User Map is and how to create a CSV file for it, check the User Map Overview article.
Video Tutorial
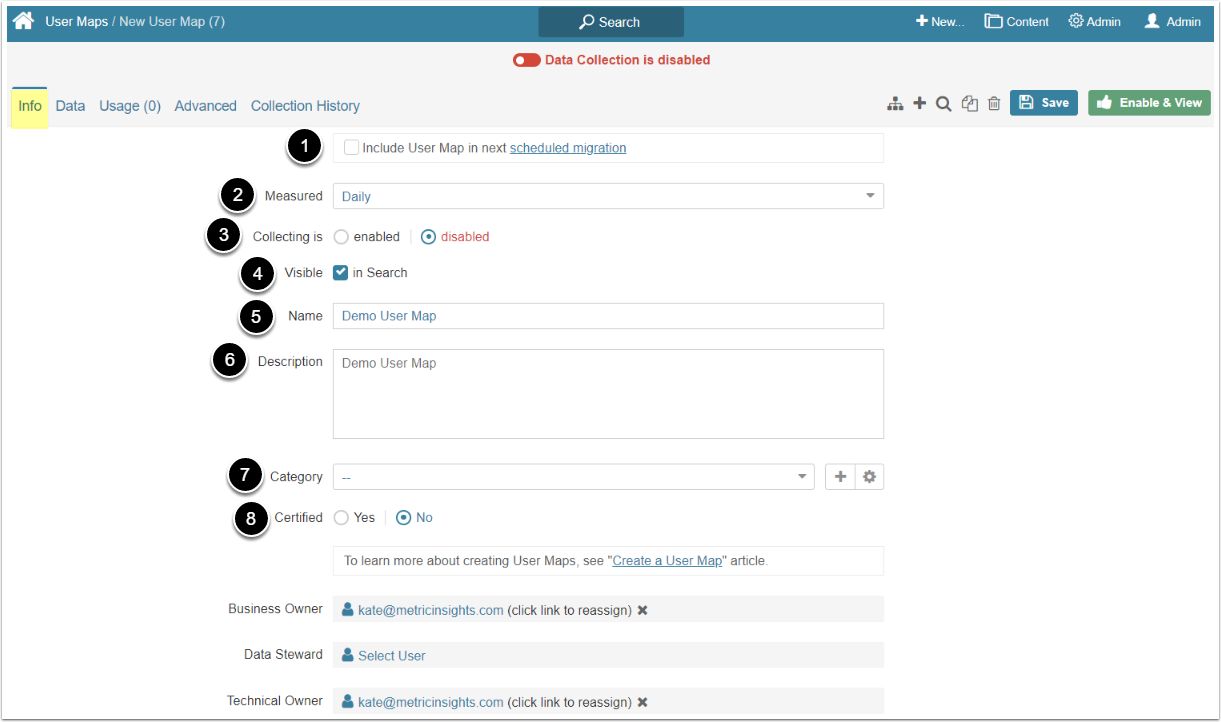
1. Complete the Info Tab
Access Content > User Maps and [+ New User Map]
- Click this check box to include the User map into scheduled migration. For more information on Migration Utility read this article
- Measured: Choose the period for which the data is to be collected
- If "Daily" is chosen, one entry for each date
- Collecting is: New elements are "disabled" until the User Map is published
- Visible: By default, Users can find newly created elements via Search
- Disabling these check-boxes makes the Element visible to the Admin and its creator only
- Name: Enter a unique name
- Description: Optionally, add a short description that is visible in Viewer
- Category: Choose the Category of the User Map
- Certified: Certification allows Admins and Power Users to identify elements that have been validated and deemed accurate. For details, refer to Certification Levels for Elements.
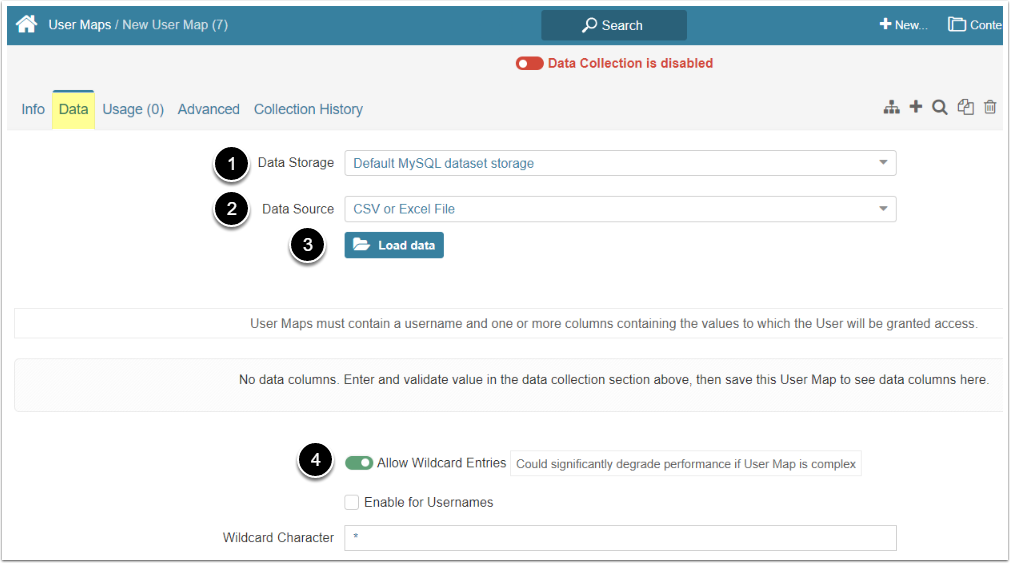
2. Define Settings of the Data Tab
- Data Storage: Select the Data Storage where the User Map will be stored. For more details check the Configure a Data Storage article
- Data Source: Choose the type of Data Source from which the User Map is fetched
- [Load Data] to upload the User Map CSV file
- Allow Wildcard Entries: Activate this toggle switch in order to all selectedUsers to receive all the Filter Values
- Choose a character in the Wildcard Character field
- The selected character entered in the Filter Value column gives the User in the row the right to receive all Filter Values
- Activating the Enable for Usernames checkbox allows to apply the Wildcard Character to the "usernames" column
3. Load the User Map CSV File
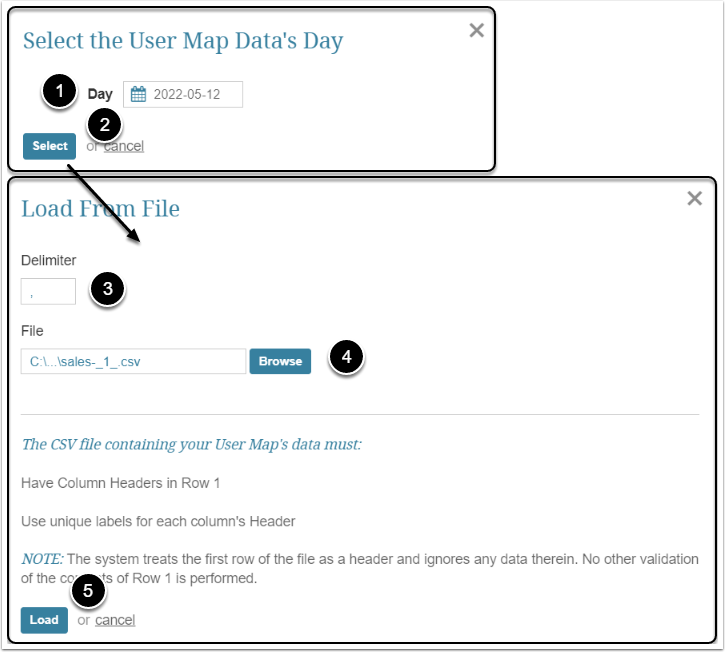
[Load Data] and complete the displayed windows

- Day: Choose the necessary date
- [Select]
- Delimiter: Select the delimiter for data
- File: [Browse] to locate the User Map CSV file
- [Load]
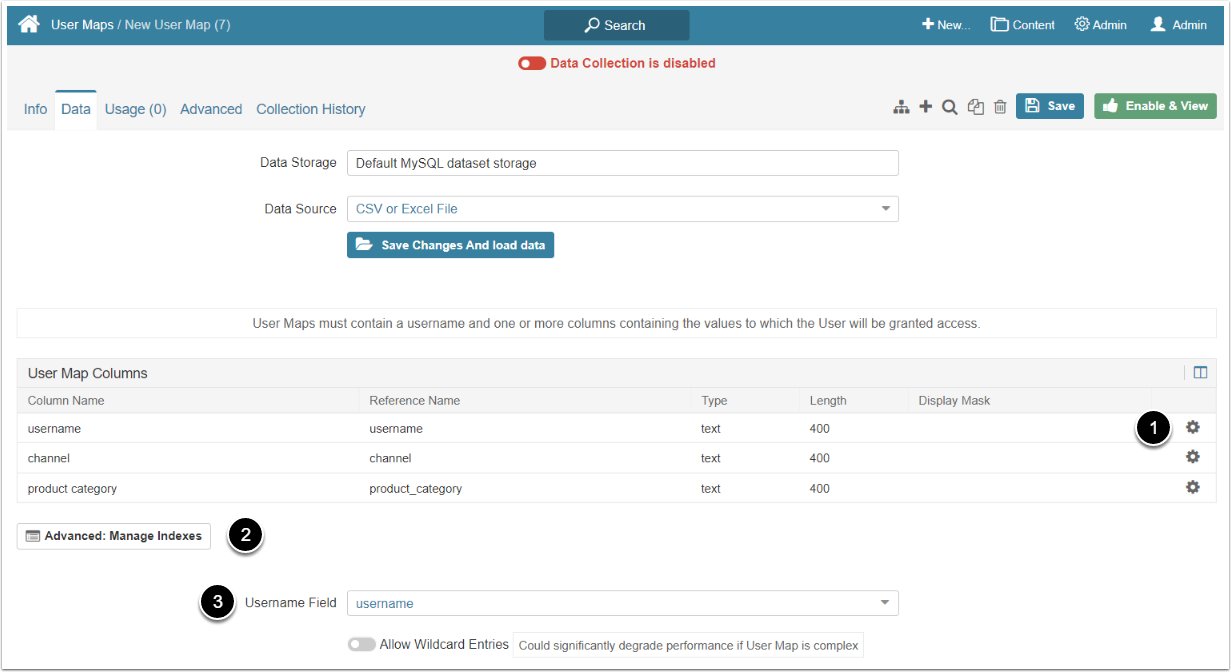
4. Complete Data Tab Settings
- Click the gear icon to change the columns name and length
- [Advanced: Manage Indexes] to open the Indexes window
- Username Field: Choose the name of the column that contains the names of the Users
It is highly recommended not to make any changes in the Indexes for Demo User Map window that is opened by [Advanced: Manage Indexes] unless you have the basic level of knowledge in the SQL and need to index some data.
5. Activate the Required Toolbar Controls

- Lineage: View the Lineage of the User Map For more details check Understanding Object Lineage
- Add: Create a new User Map
- Search: Search for the data in the User Map
- Duplicate: Create a duplicate of this User Map
- Delete: Remove the User Map
[Save] to save the changes.
[Enable & View] to enable the data collection and open the Viewer.


