Bursts can be set up and managed using a single, consolidated editor. Users can select an arbitrary set of Elements; e.g., Reports, Metrics; designate recipients, and schedule delivery based on a user-defined Notification Schedule, all through a single editor.
Bursting functionality also allows for large-scale External Report distribution. Applying a User Map (with the appropriate mapping of Users to Filters) allows a single Burst to be the source for hundreds (or thousands) of User-specific emails. This means that each User (or Group) will receive targeted content based on their needs. See how to apply these new filters in the Setting Filter Defaults on Burst Editor section of Pre-filtering BI tools (External Reports).
Table of contents:
1. Content Tab
Access +New > Burst

1.1. Content Field
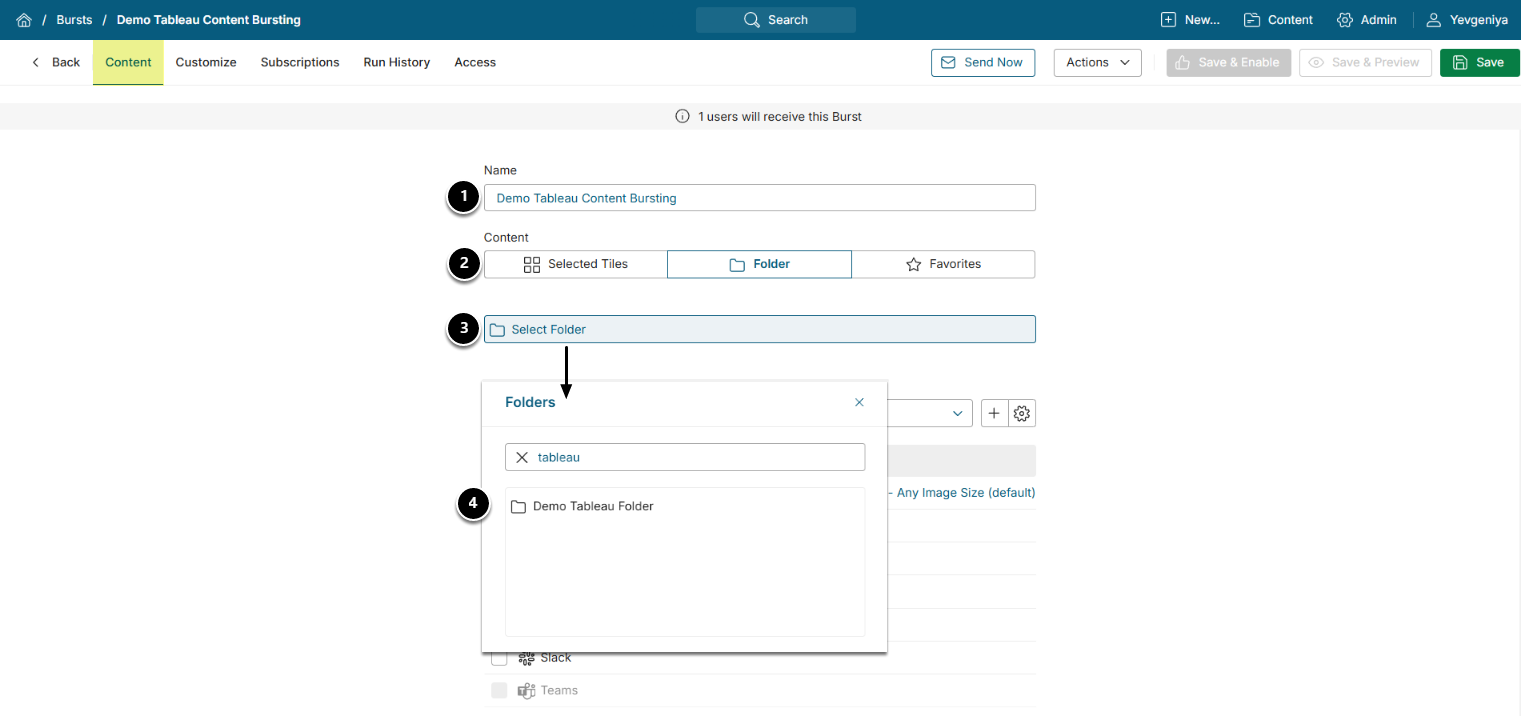
Three options are available for adding content to a Burst:
- Add separate Selected Tiles
- One or more Folders including all elements contained in them
- One or more Favorite Folders including all elements contained in them
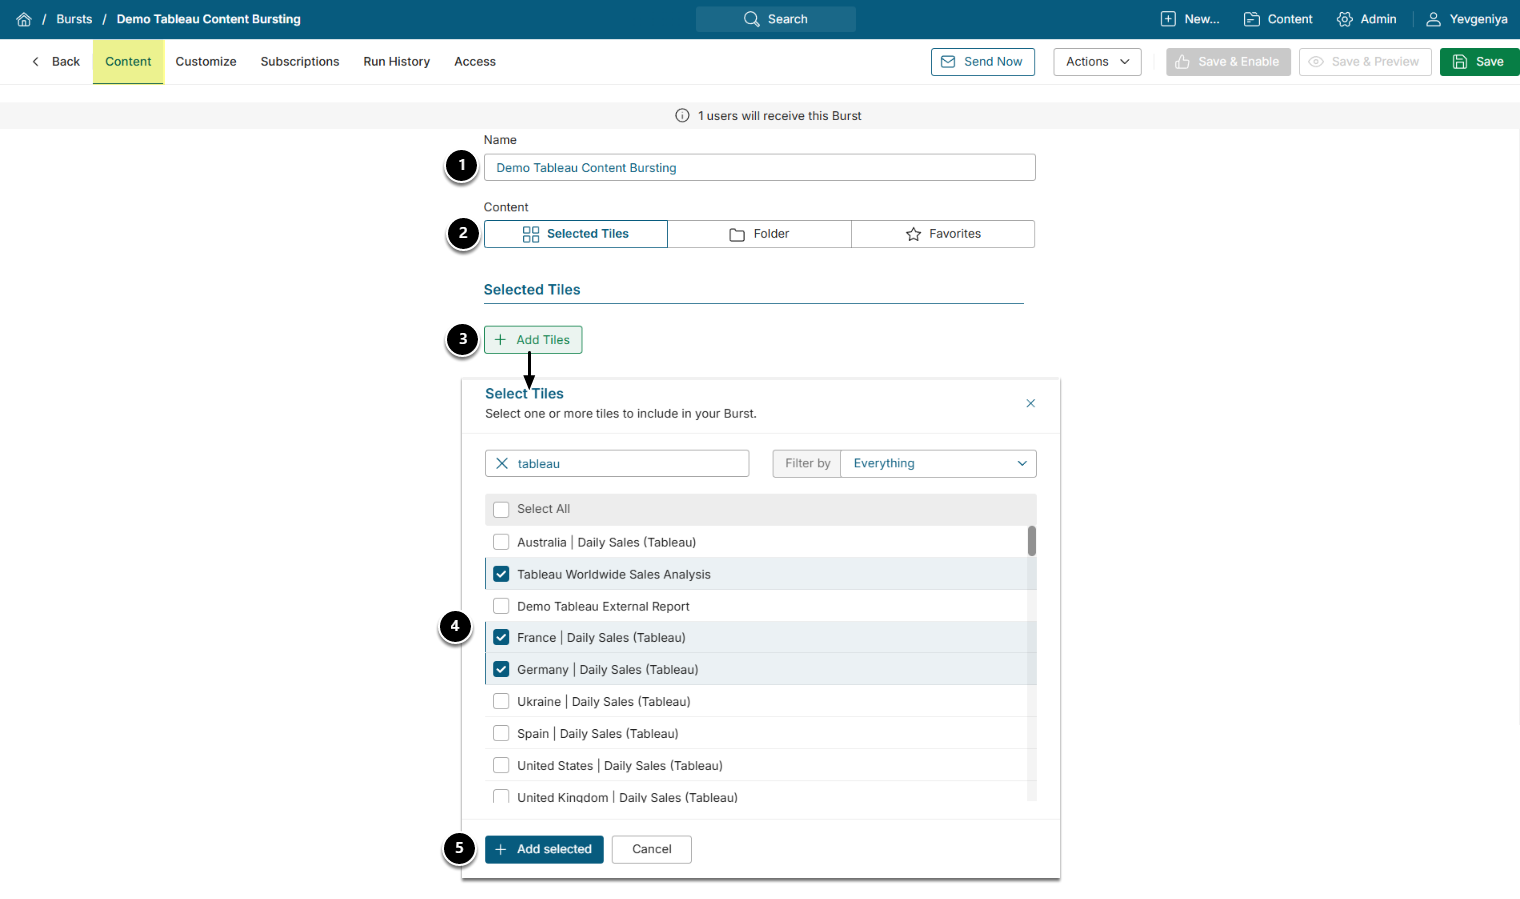
- Name: Provide a descriptive name for your Burst. It is going to be used as an email header once notifications are sent.
- [Selected Tiles]
- [ + Add tiles]
- Choose Elements to be included into the Burst
- [+ Add selected]
NOTE: You can filter the list of tiles by entering keywords into the Filter results field or selecting a specific Folder or Category in the Filter by drop-down menu.
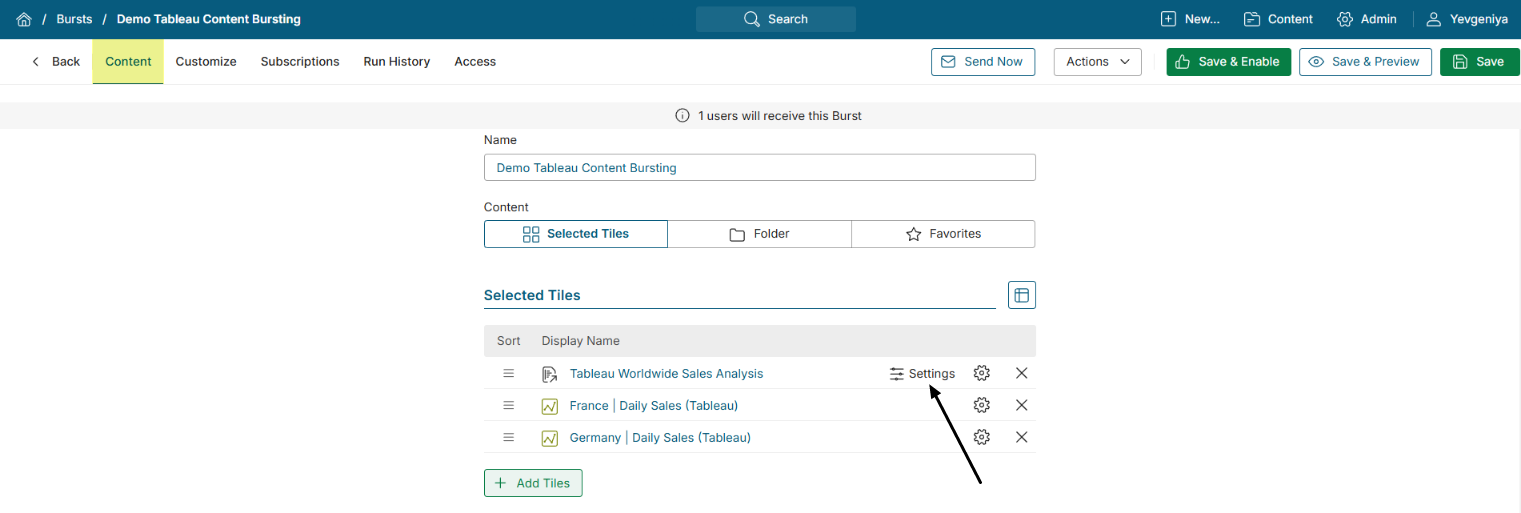
1.1.1.1. Configure Settings for Tiles (if Needed)
1.1.1.1.1. Use Any Existing Filter Defaults

If the included External Report has Filters and Filter defaults configured for it, you can choose to use them for your Burst.
1.1.1.1.2. Set Custom Filters for This Burst
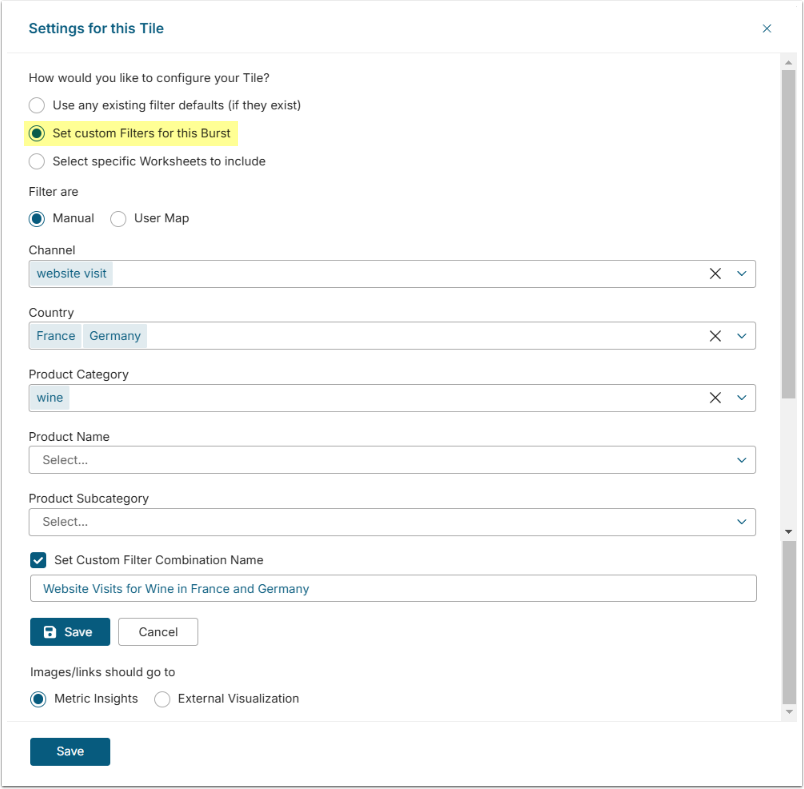
If the included External Report has Filters configured for it, you can choose custom Filters for the Burst:
- Manually: all recipients will receive the External Report visualization with the same set of Filters applied;
- Based on a User Map: recipients will receive the External Report visualization based on the mapping (for example, User A=Germany, User B=France).
1.1.1.1.3. [Tableau Only] Select Specific Worksheets to Include
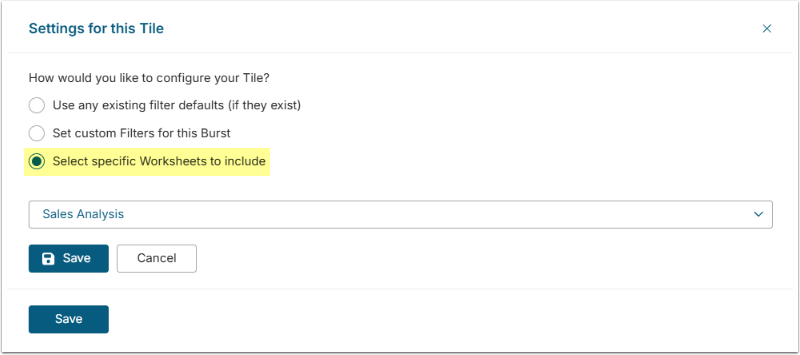
For Tableau External Reports, you can select an individual Worksheet from a Workbook to be included into the Burst.
- Name: Provide a descriptive name for your Burst. It is going to be used as an email header once notifications are sent.
- [Folder]
- [Select Folder]
- Choose a Folder to be included into the Burst;
- Admin Users will have choice of all Shared Folders created, not just the ones that are shared with the Admin User.
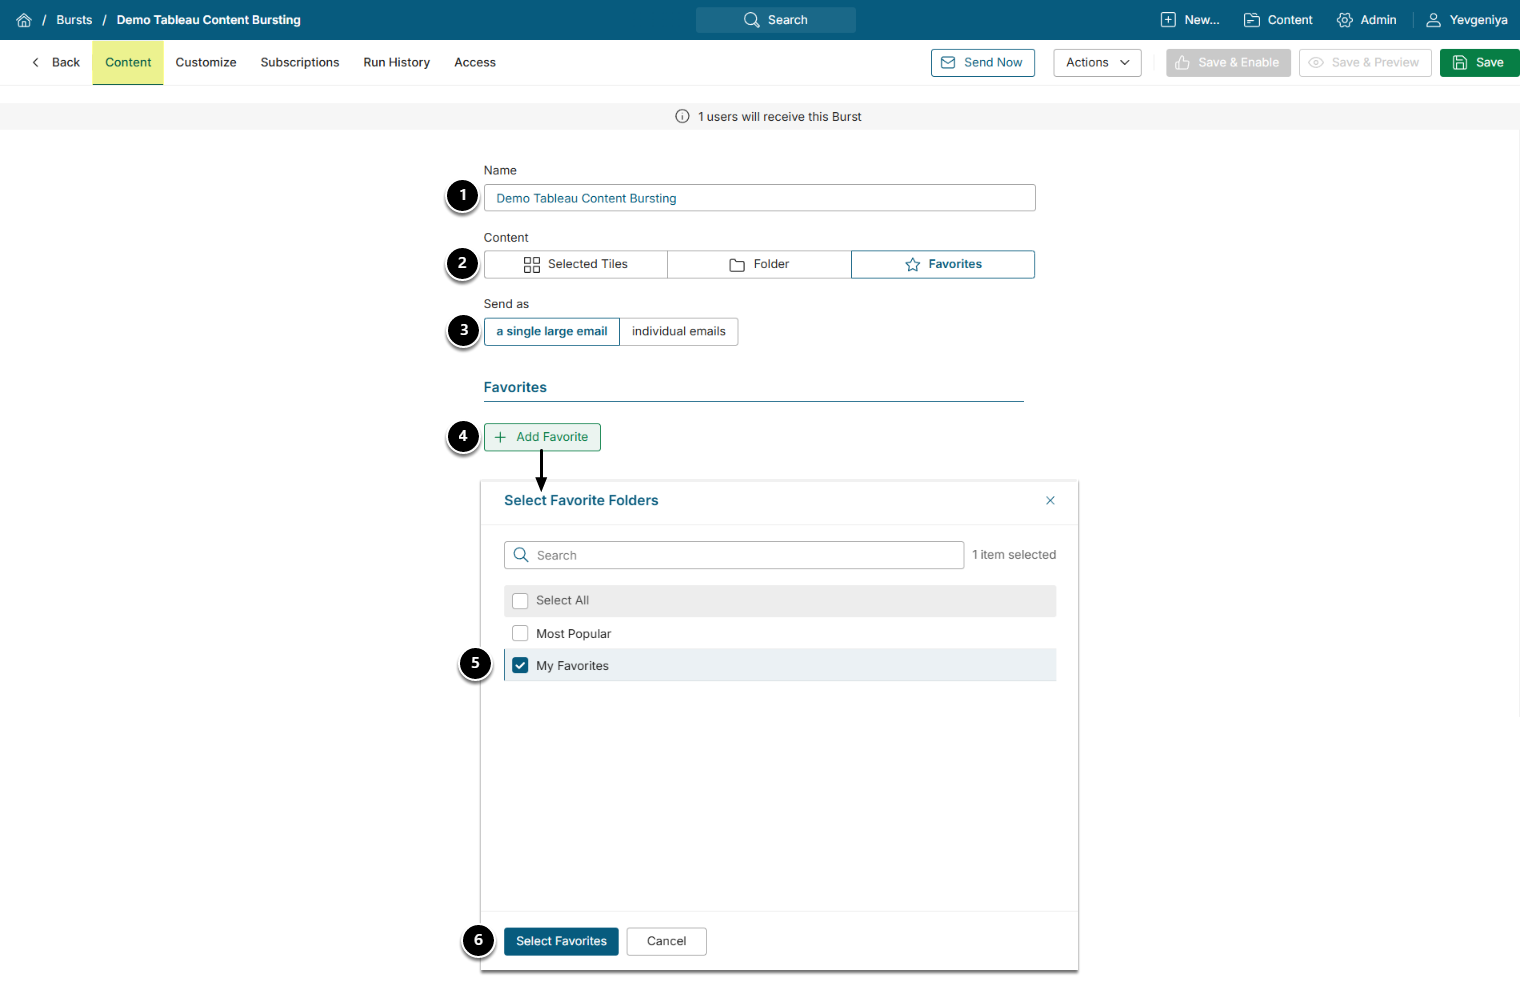
- Name: Provide a descriptive name for your Burst. It is going to be used as an email header once notifications are sent.
- Send as: Define whether each of the Favorite Folders that you are going to include in this Burst should be sent in "individual emails" or all of them should be sent as "a single large email".
- [+ Add Favorite]
- Select Favorites to be included into the Burst.
- [Select Favorites]
Elements that are actually seen in each Burst email are subject to the Security Rules for each recipient.
1.2. Schedule Field
The Schedule field allows to define how frequently the Metric Insights system distributes the Burst to the Users.
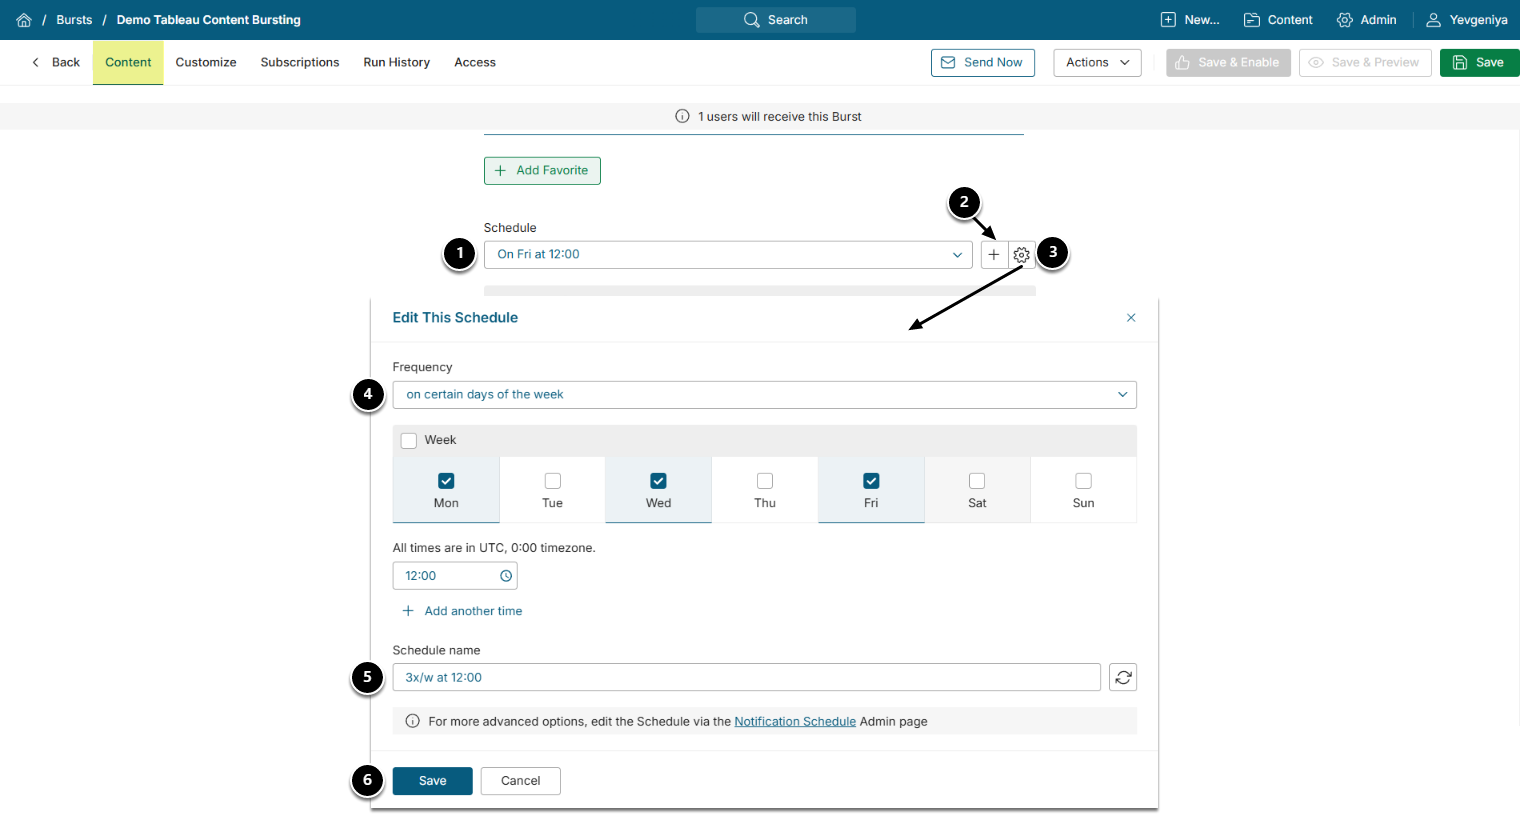
- It is possible to select an existing Schedule from a drop-down menu.
- Click Add New Schedule to create a new a new Schedule.
- For more details, refer to Creating a new schedule via Burst Editor.
- Click Edit Schedule to change settings of the Schedule chosen in the drop-down menu.
-
Frequency: Define how often the User receives the Burst:
- Every few minutes: Insert the number of minutes in the Send every field;
- Hourly: Enter the number of hours in the Send every field;
- on certain days of the week: Activate the check boxes above the necessary days of the week and select time in the All times are in ... timezone field. It is possible to select several days and several times;
- on certain days of the month: Select days of the month in the At date menu and time in the At time drop-downs. It is possible to select several days and several times;
- on certain days of the fiscal month: Select days of the fiscal month in the At date drop-down menu and time in the At time drop-downs. It is possible to select several days and several times.
- Schedule name: It is created automatically but can be changed here.
Not every Burst can be updated every few minutes or hourly. Such a frequent update will sufficiently load the system. It is strongly recommended to choose to update the Burst not more often than once a day.
1.3. "Send Burst via" Field
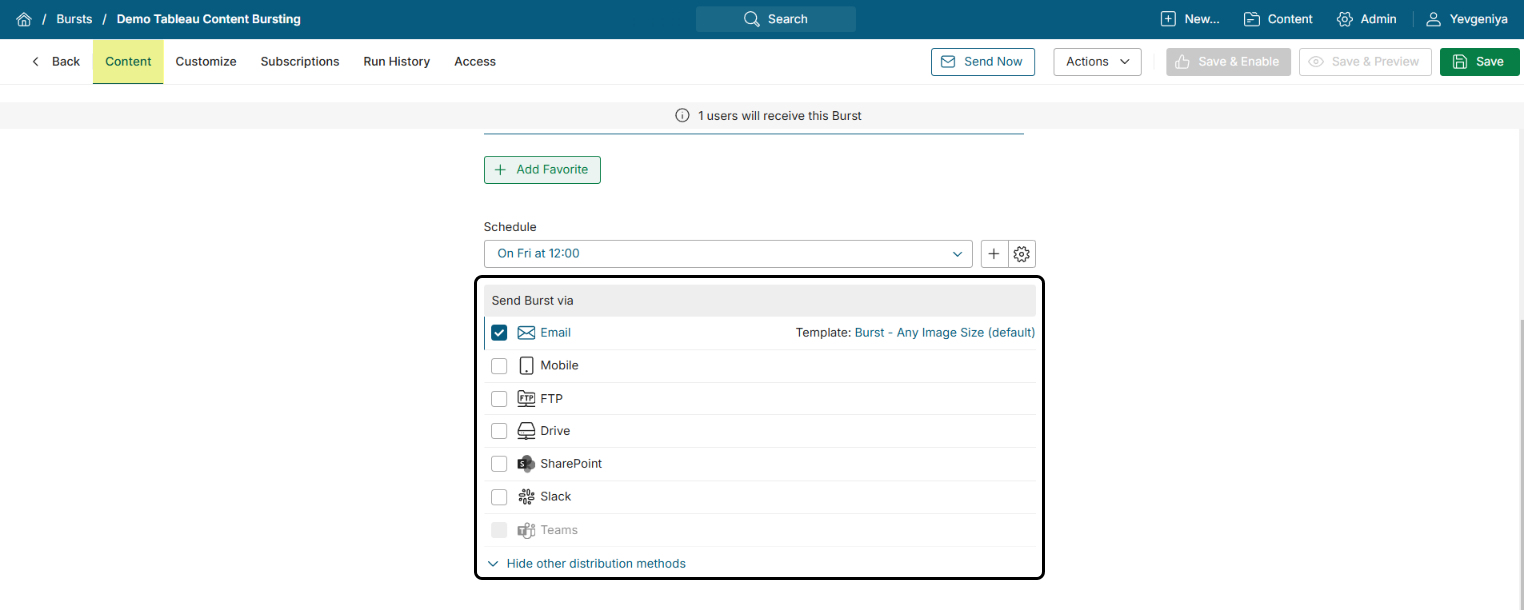
The Burst can be distributed via several different channels. For more information about each of them refer to the following articles:
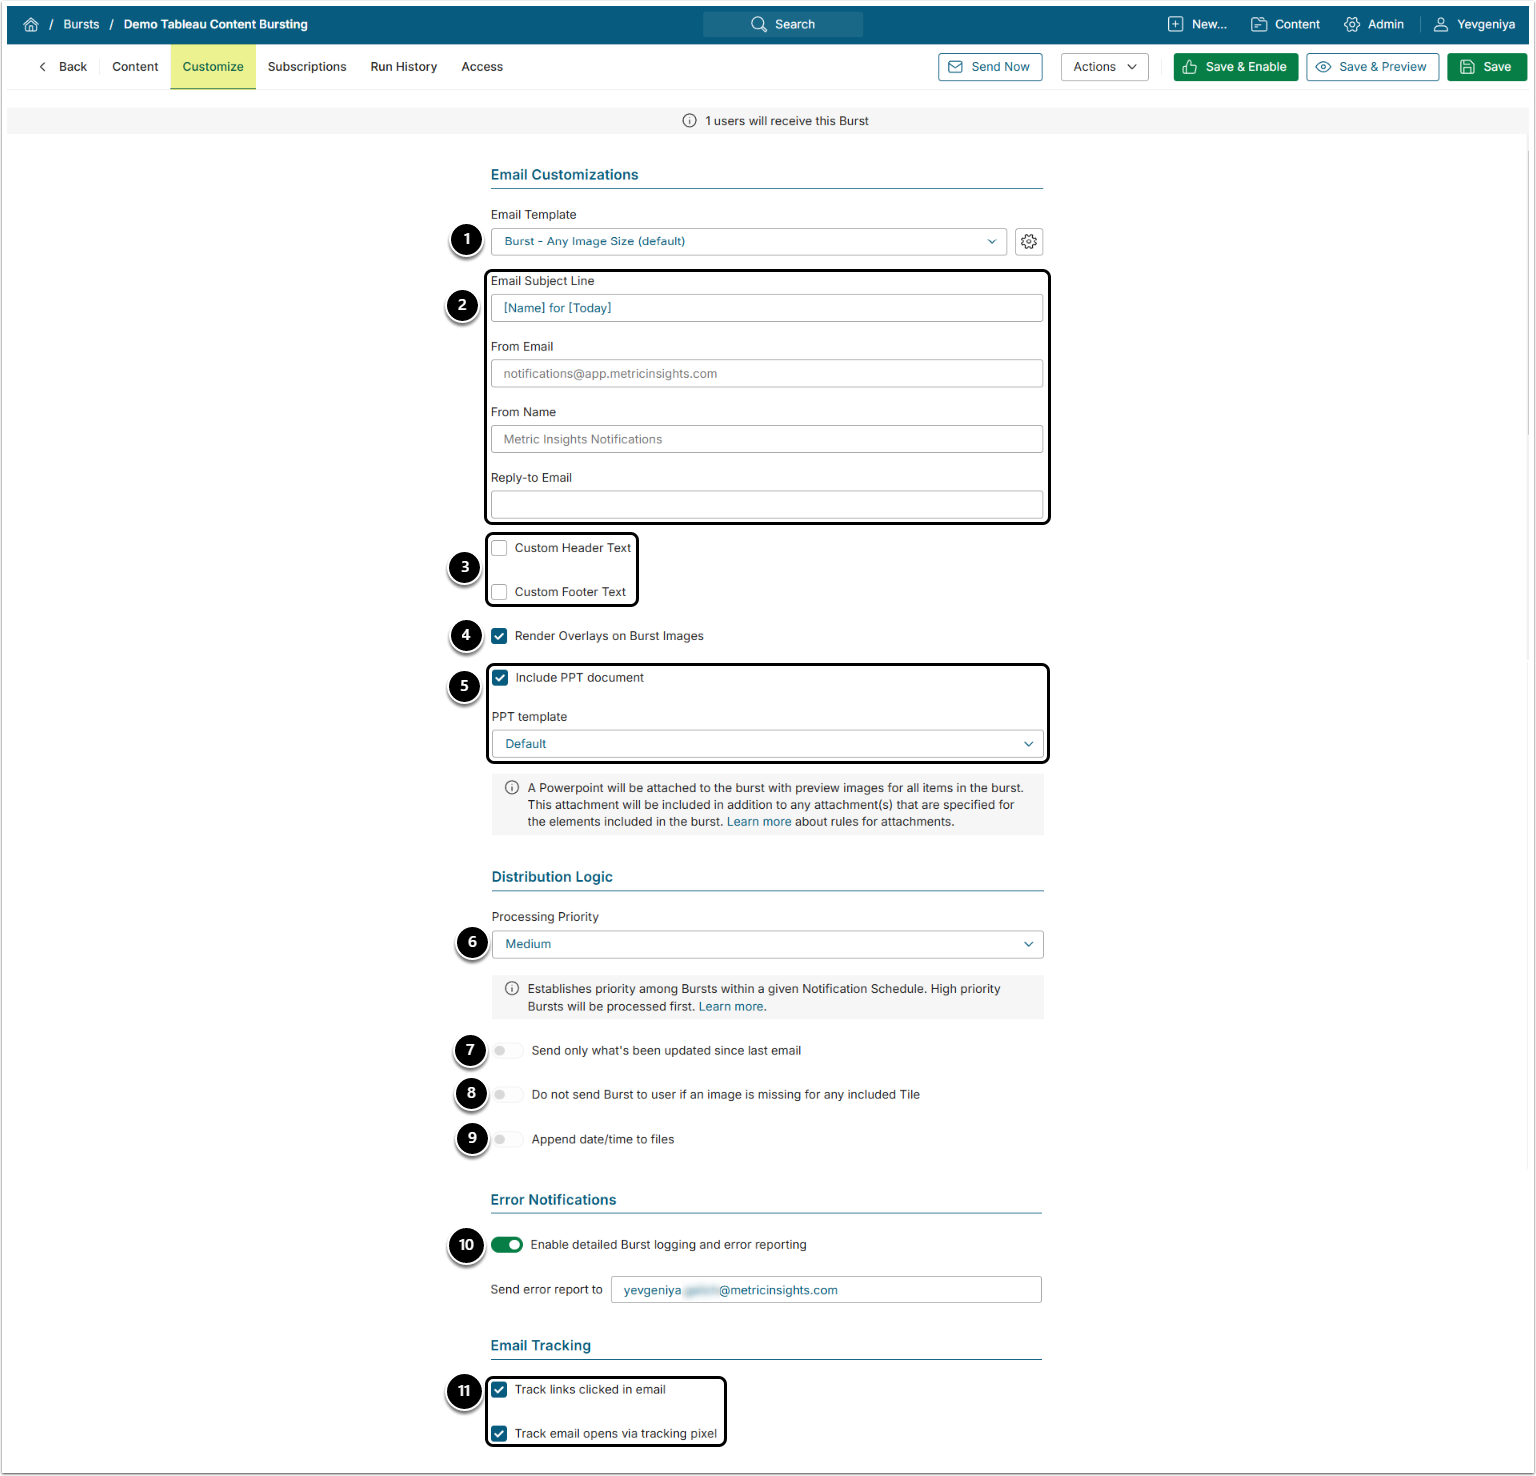
2. Customize Tab
-
Email Template: Default Burst's email template is "Burst - Any Image Size"; it was designed as a standard and flexible solution. You can add your custom template to a Burst by:
- First, adding it under Admin > Email Templates;
- Then choosing it from this drop-down list.
-
Email Subject Line: Default Subject line is "<Burst name> for <current date>", but you can enter any Subject line.
- Other Email lines can also be included or updated.
- Custom Header/Custom Footer Text: Clicking on either field will open a Text box for input. You can choose to include arbitrary text into custom fields and have that shown up as a header, footer, or both in the Burst email.
-
Render Overlays on Burst Images: Provides the possibility to include Overlays in the image provided in the Burst.
- NOTE: This only affects Overlaid Metrics. Compare lines will still be displayed.
-
Include PPT document: If enabled:
- System will automatically create and attach a Power Point Presentation of your Burst contents.
- A field opens to allow you to choose the PPT template. See details for creation of templates Utilize Custom PowerPoint Template for Bursts and Favorites.
- Processing Priority: Establishes priority for Burst sending.
-
Send only what's been updated since last email: Prevents the Bursting of old content by only sending those Elements that have been updated since last time this Burst was sent.
- NOTE: Only SharePoint/Local File External Content, Metrics, and Dataset Reports are affected by this flag. Other Element types are always included.
-
Do not send Burst to user if an image is missing for any included Tile: Prevents sending the Burst if any of the images, collected for the External Report or attached as a file for the External Content, is missing.
- NOTE: This feature is available for the Email delivery only.
- Append date/time to files: The date and time showing time the Burst was sent will be appended to all attached files.
-
Enable detailed Burst logging and error reporting: Detailed error messaging is available. See Request Email with Errors Encountered When generating Bursts.
- Selecting this options will open a field allowing input of Email address.
-
Track links clicked in email/Track email opens via tracking pixel: You can now track the engagement of your Bursts.
- If you don't see these options, set the ENABLE_EMAIL_TRACKING System Variable to "Y".
- See for more details Burst Tracking.
3. Subscriptions Tab
Three options are available for subscribing Users to a Burst:
- Based on a previously setup User Map;
- By Groups and/or Individual Users;
- Based on Folders displayed on Users Homepage.
For instructions on creating a User Map see Create a User Map.

- Set Subscribers via User Map: Enable and select the User Map in the drop-down menu.
- [Save]
Users Subscribed and/or Groups Subscribed grids will be populated with contents from User Map.
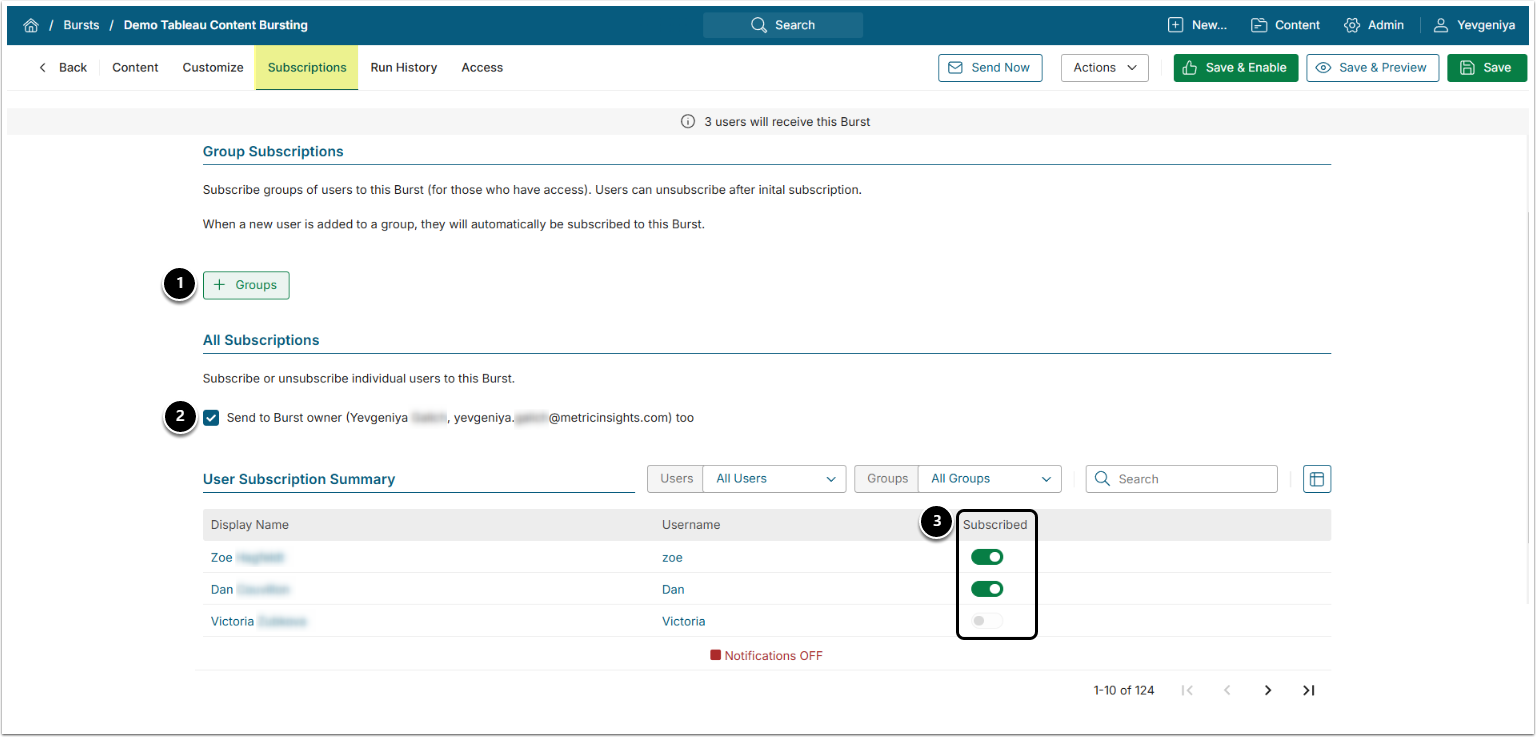
- [+ Add Groups] to add Groups of Users to the distribution list;
- Send to Burst Owner: Activate the checkbox if you want to send the burst to yourself;
- Subscribed: To add users one by one, activate the corresponding toggle switches. You can use filters at the upper right corner above the table to find Users by Name or Group.
This option is available only if you select "Folder" in the Content field of the Content tab.
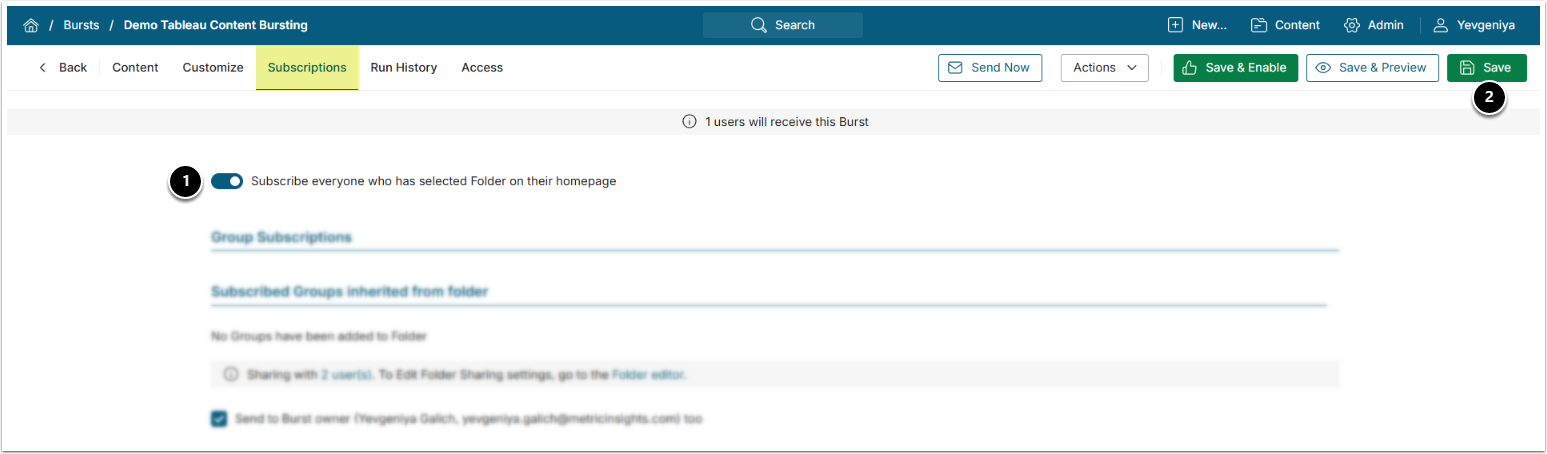
- Subscribe everyone who has selected on their homepage: Toggle on to activate. This will hide all other Subscription options.
- [Save] to see table displaying subscribed Users.
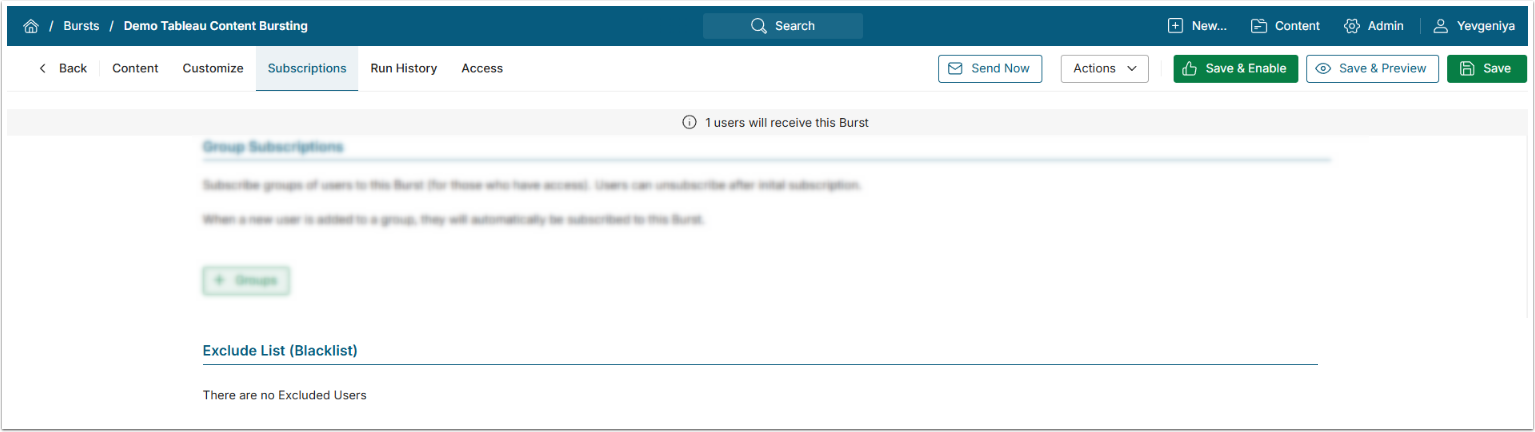
Adding Users to the Exclude List is available only from the User's account. It can be done by the User, Admin, or Power User who has permission to access that User's account.
- To learn how to log in as another User, refer to this article.
- For more information on blacklisting, refer to Burst Exclude List (Blacklist).
4. Share Access
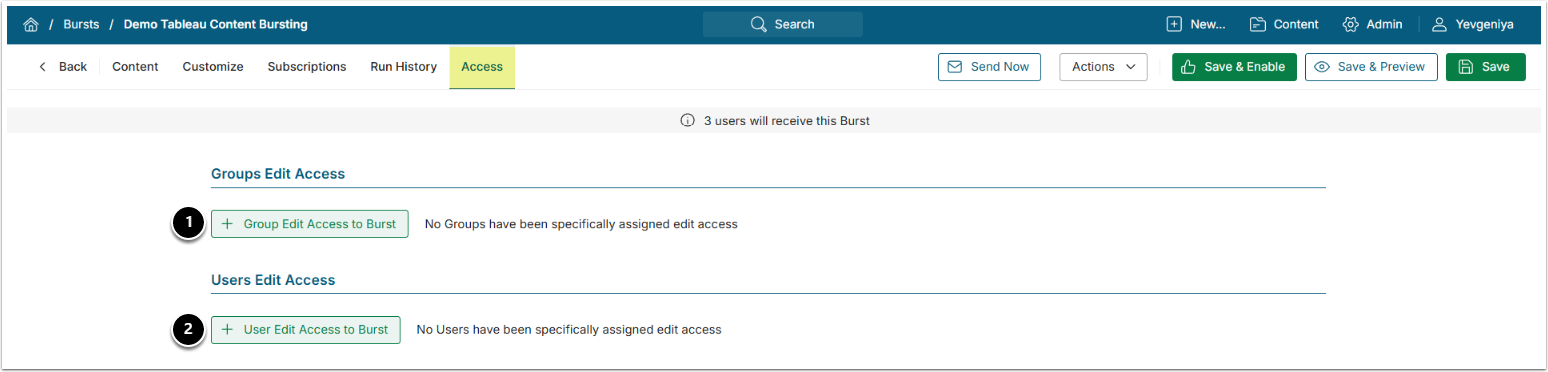
On the Access tab, you can assign the direct Edit access to the Burst to:
- Groups;
- Individual Users.
5. Enable the Burst
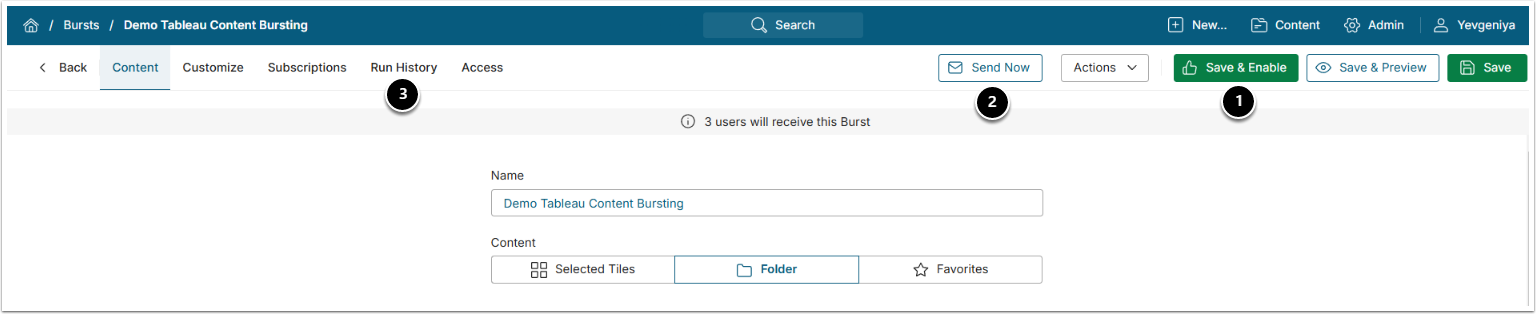
- [Save & Enable]
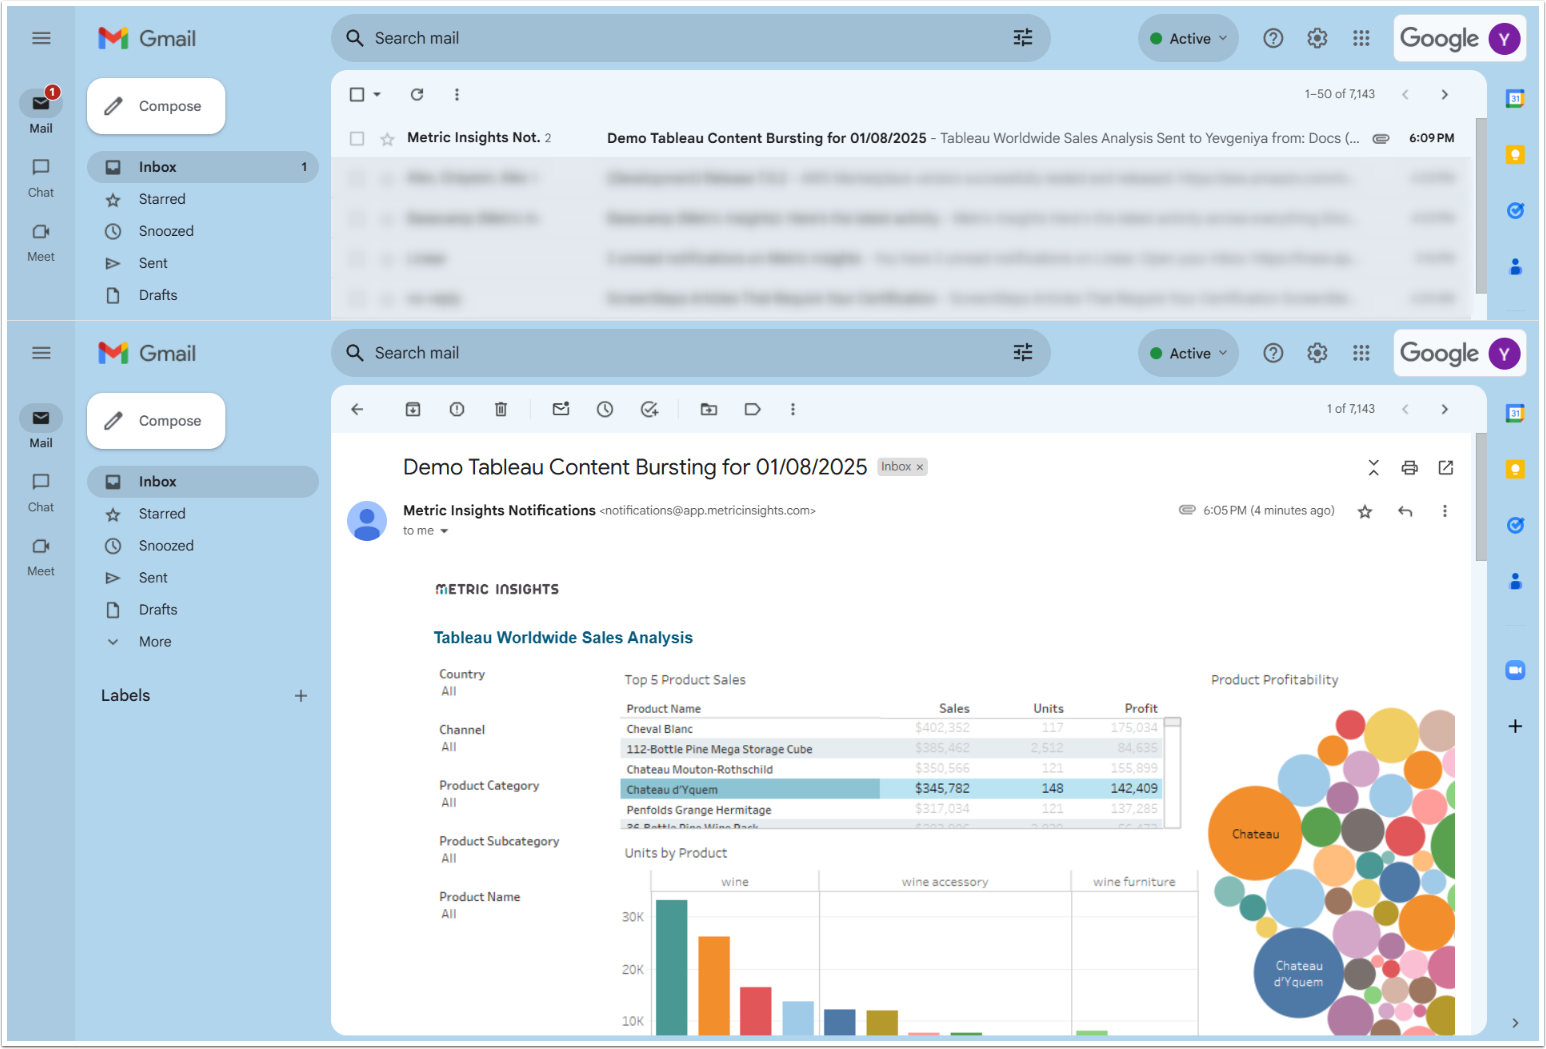
- [Send now] to check the distribution.
- Detailed log of all Burst distributions is stored in Run History tab.
Once enabled, the Report Burst will run on the schedule you set up.
5.1. Verify Burst Distribution
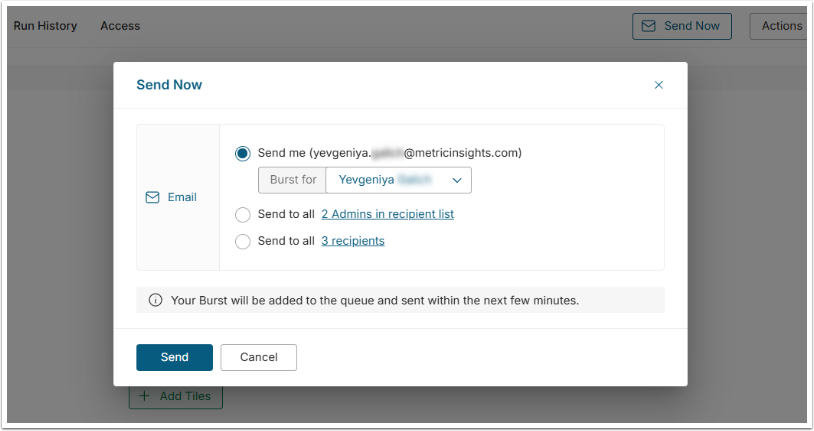
This option allows you to setup Bursts for others and then verify exactly what these Users will receive. Open the Burst for drop-down and select a Subscriber other than yourself. You will receive the Burst immediately, tailored for the selected Viewer – the system will apply any User maps, Security Privileges and Permissions, as well as any Bookmarks set for that User. NOTE: The default is to send you the Burst based on your personal settings.
[7.1.1] When set to "Y", the System Variable COMBINE_PDF_FOR_EACH_FILTER_COMBO, all Filter combinations for an External Report are merged into a single multi-page PDF. When set to "N", each Filter combination is sent as a separate PDF file. The setting is ignored if COMBINE_PDF_DOWNLOADS_IN_DIGEST is "Y" (the digest mode always merges PDFs). If both are set to "N", each Filter combination is delivered as a separate PDF.