This article describes how to configure OAuth for your Microsoft Power BI application in Azure AD.
You’ll create a new application in Azure Active Directory with the required API permissions to access Power BI content, configure authentication settings including a redirect URI for Metric Insights, and generate credentials. In Power BI Service, assign the required permissions to the service account used for OAuth token retrieval. The Azure app credentials will then be used to set up an OAuth-based Power BI data source in Metric Insights, enabling secure access to reports based on user-level permissions.
Enabling OAuth has the following benefits compared with the Username/Password authentication model:
- Ability to view content in iframes based on user account permissions rather than service account permissions;
- Available row-level security (RLS) without the need to use User Maps on MI side (you only have to enable RLS in Power BI).
Table of contents:
Video Tutorial
Create an App for Use in Azure AD
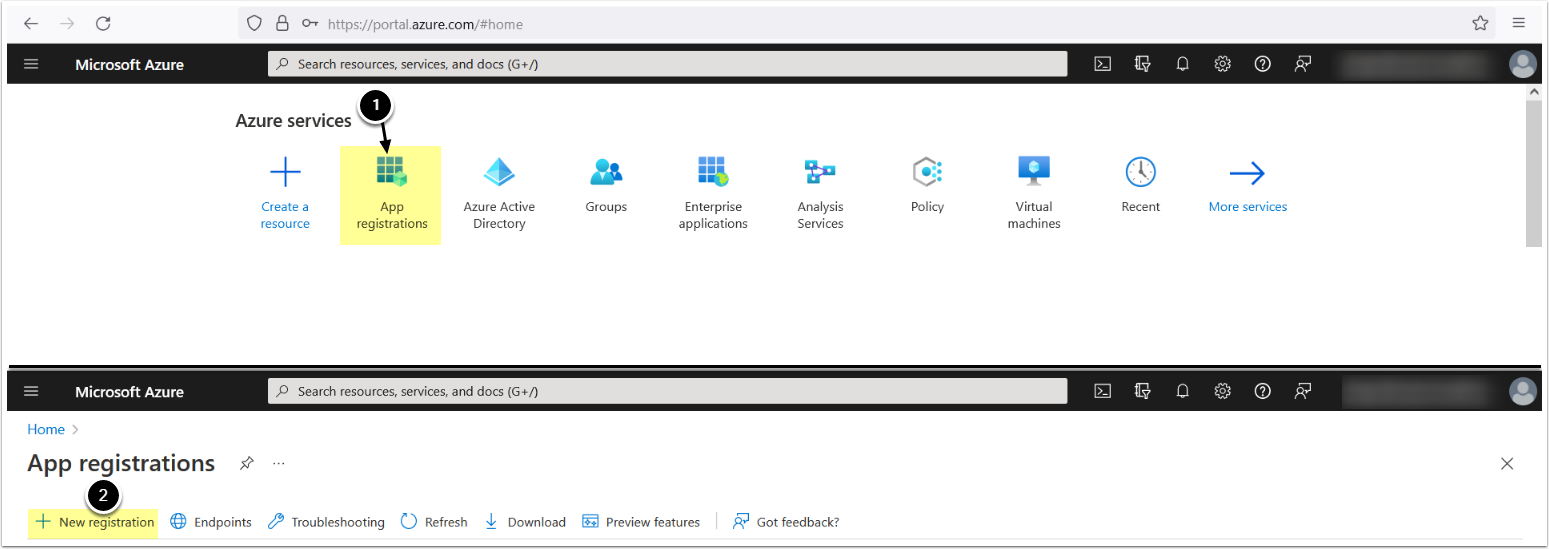
2. Enter App Info
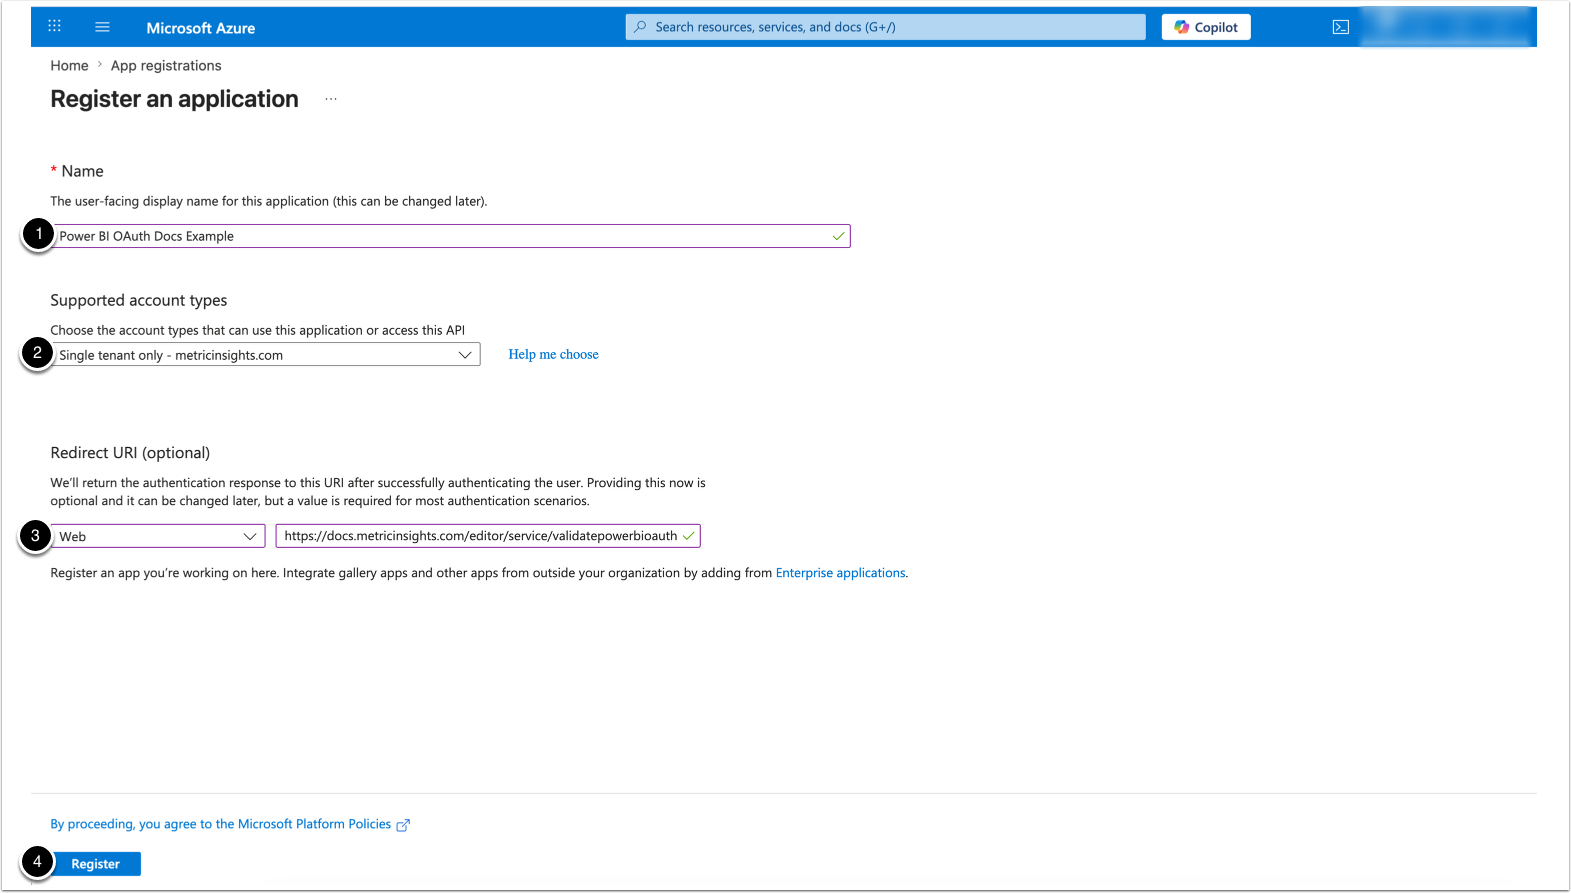
- Enter the App's Name
- Supported account types: "Single tenant only - <directory name>"
- Redirect URI: select Web, enter
https://<MI hostname>/editor/service/validatepowerbioauth - [Register]
3. Configure Authentication
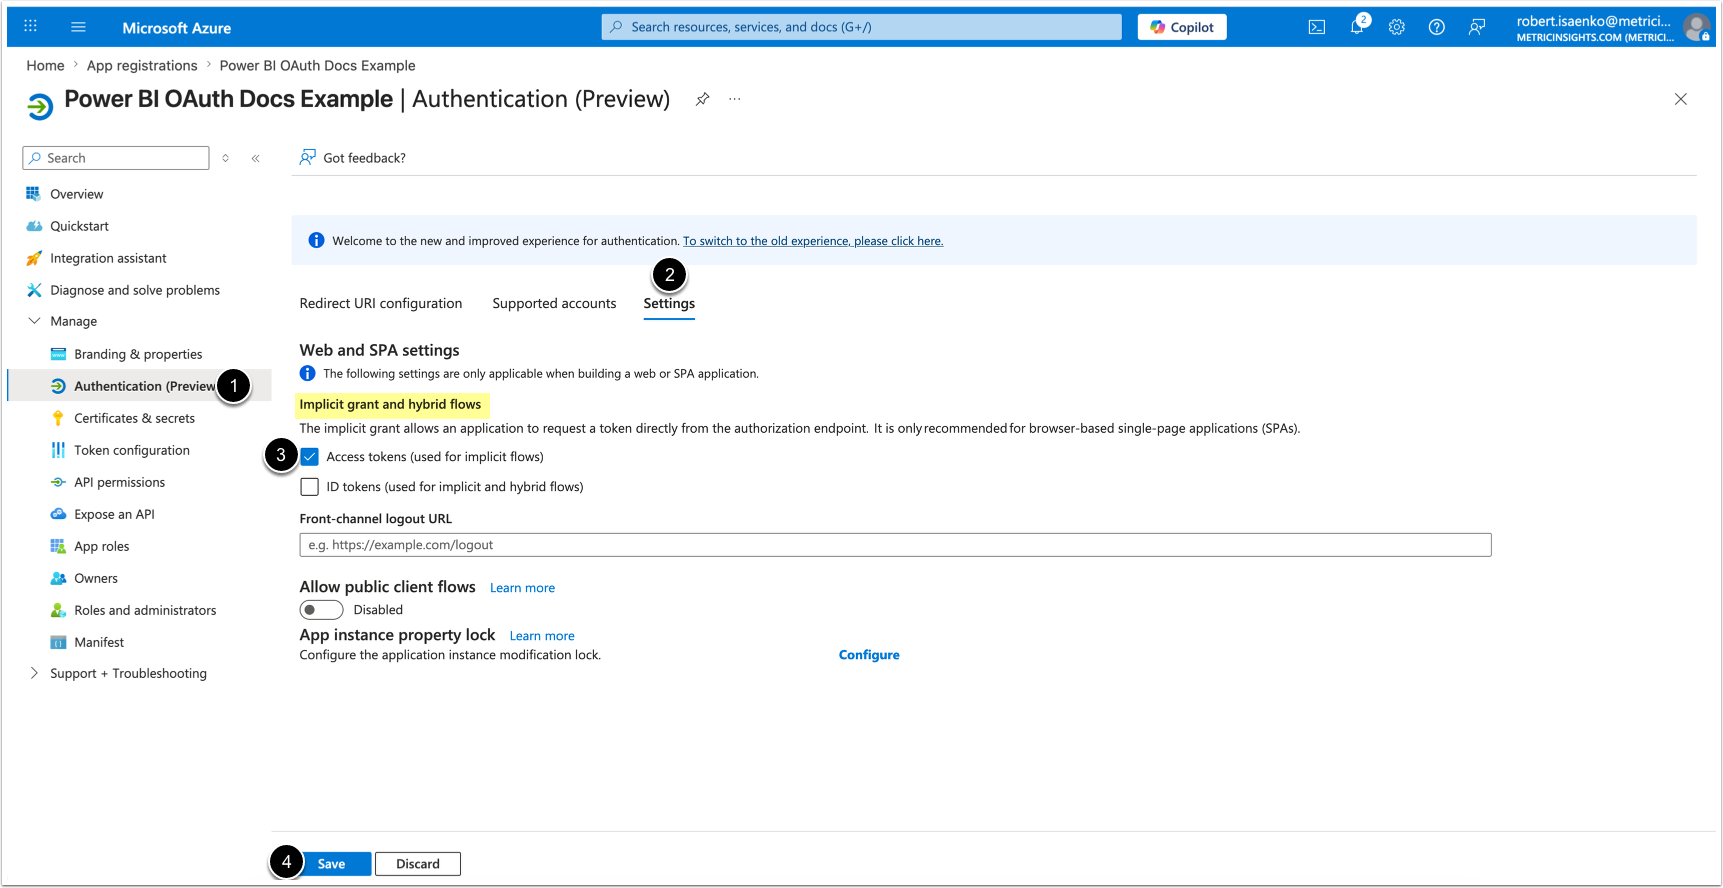
- Access Authentication tab
- Open Settings
- In the Implicit grant and hybrid flows section, activate Access tokens (used for implicit flows)
- [Save]
4. Add Office 365 Permissions
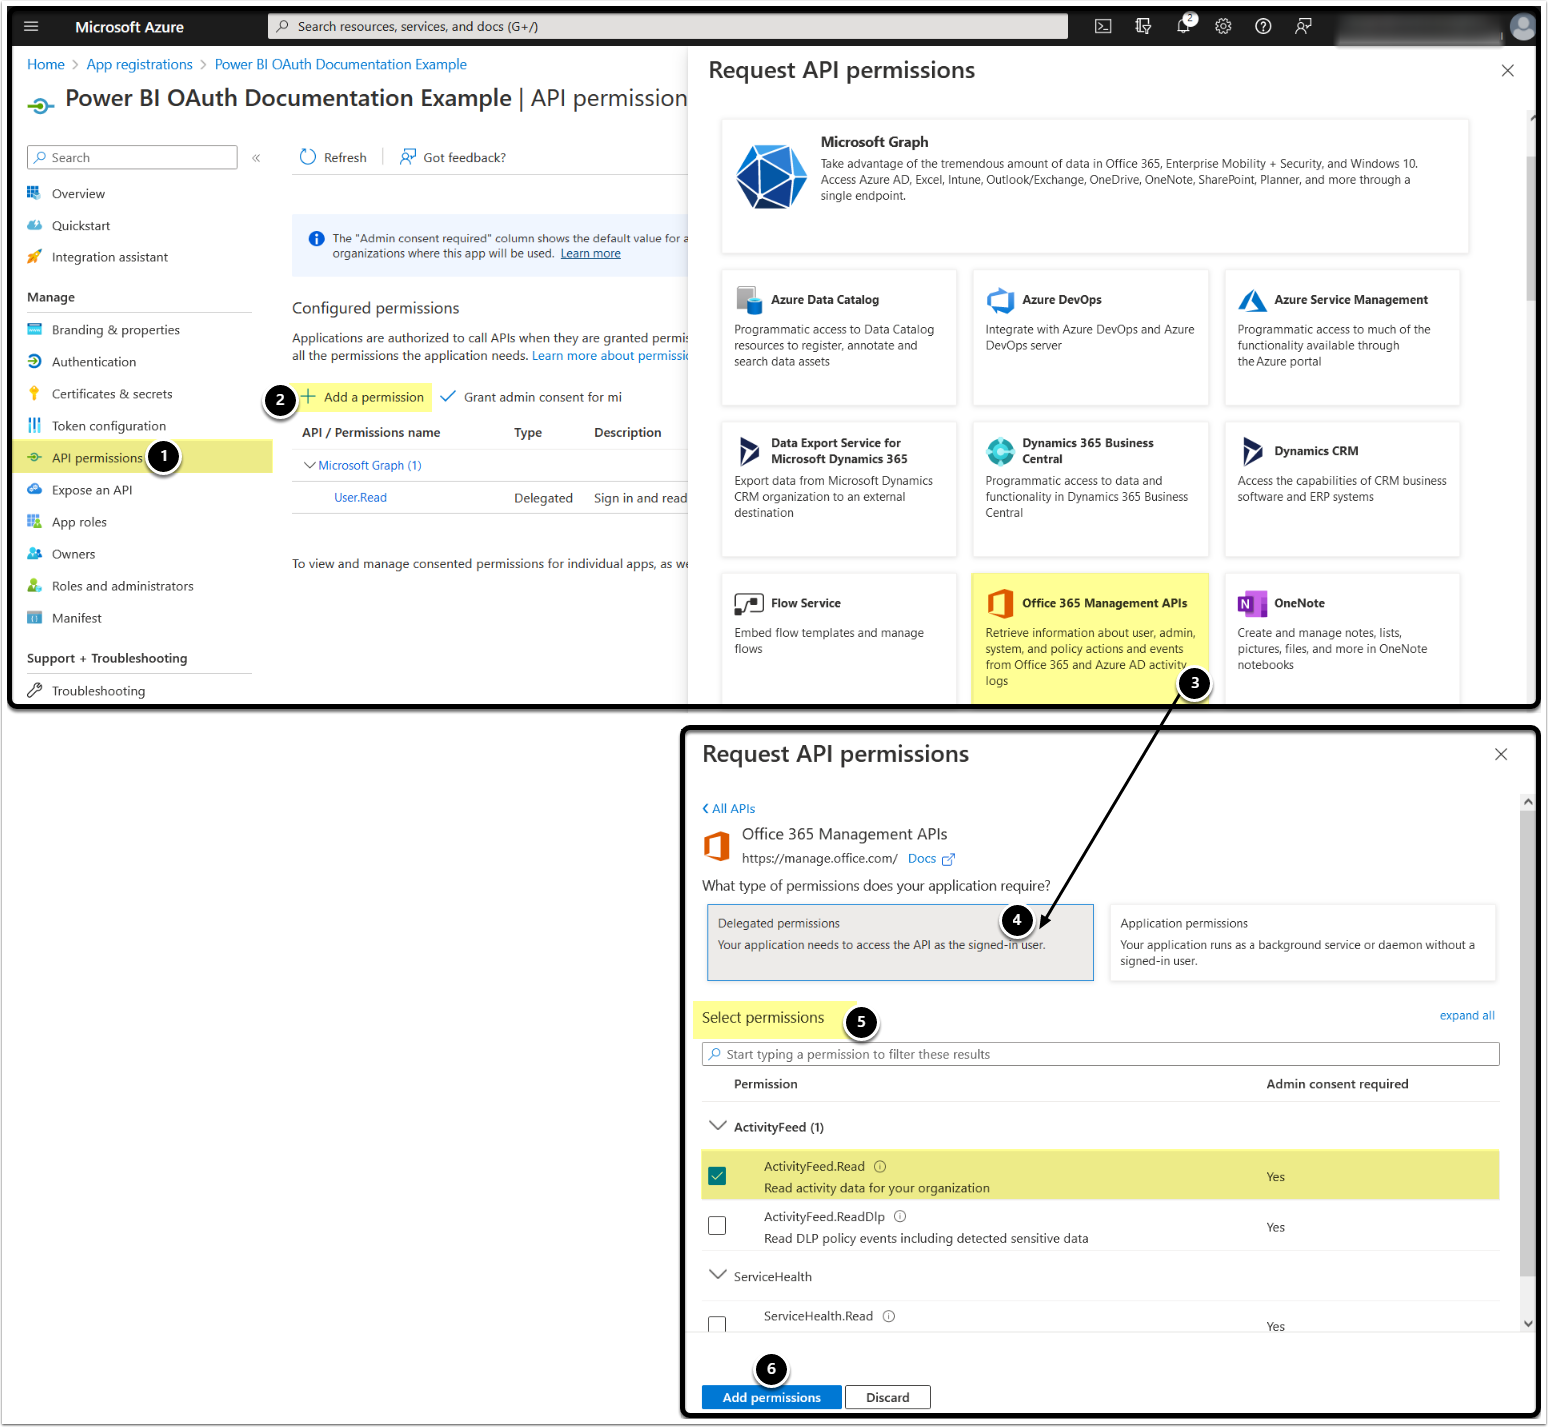
NOTE: Delegated permissions allow the application to access the API as the signed-in user.
- Access API Permissions tab
- [+ Add a permission]
- [Office 365 Management APIs]
- [Delegated permissions]
- Enable the following permission:
- Activity Feed:
- ActivityFeed.Read - This permission enables OAuth
- Activity Feed:
- [Add permissions]
5. Add Power BI Service Permissions
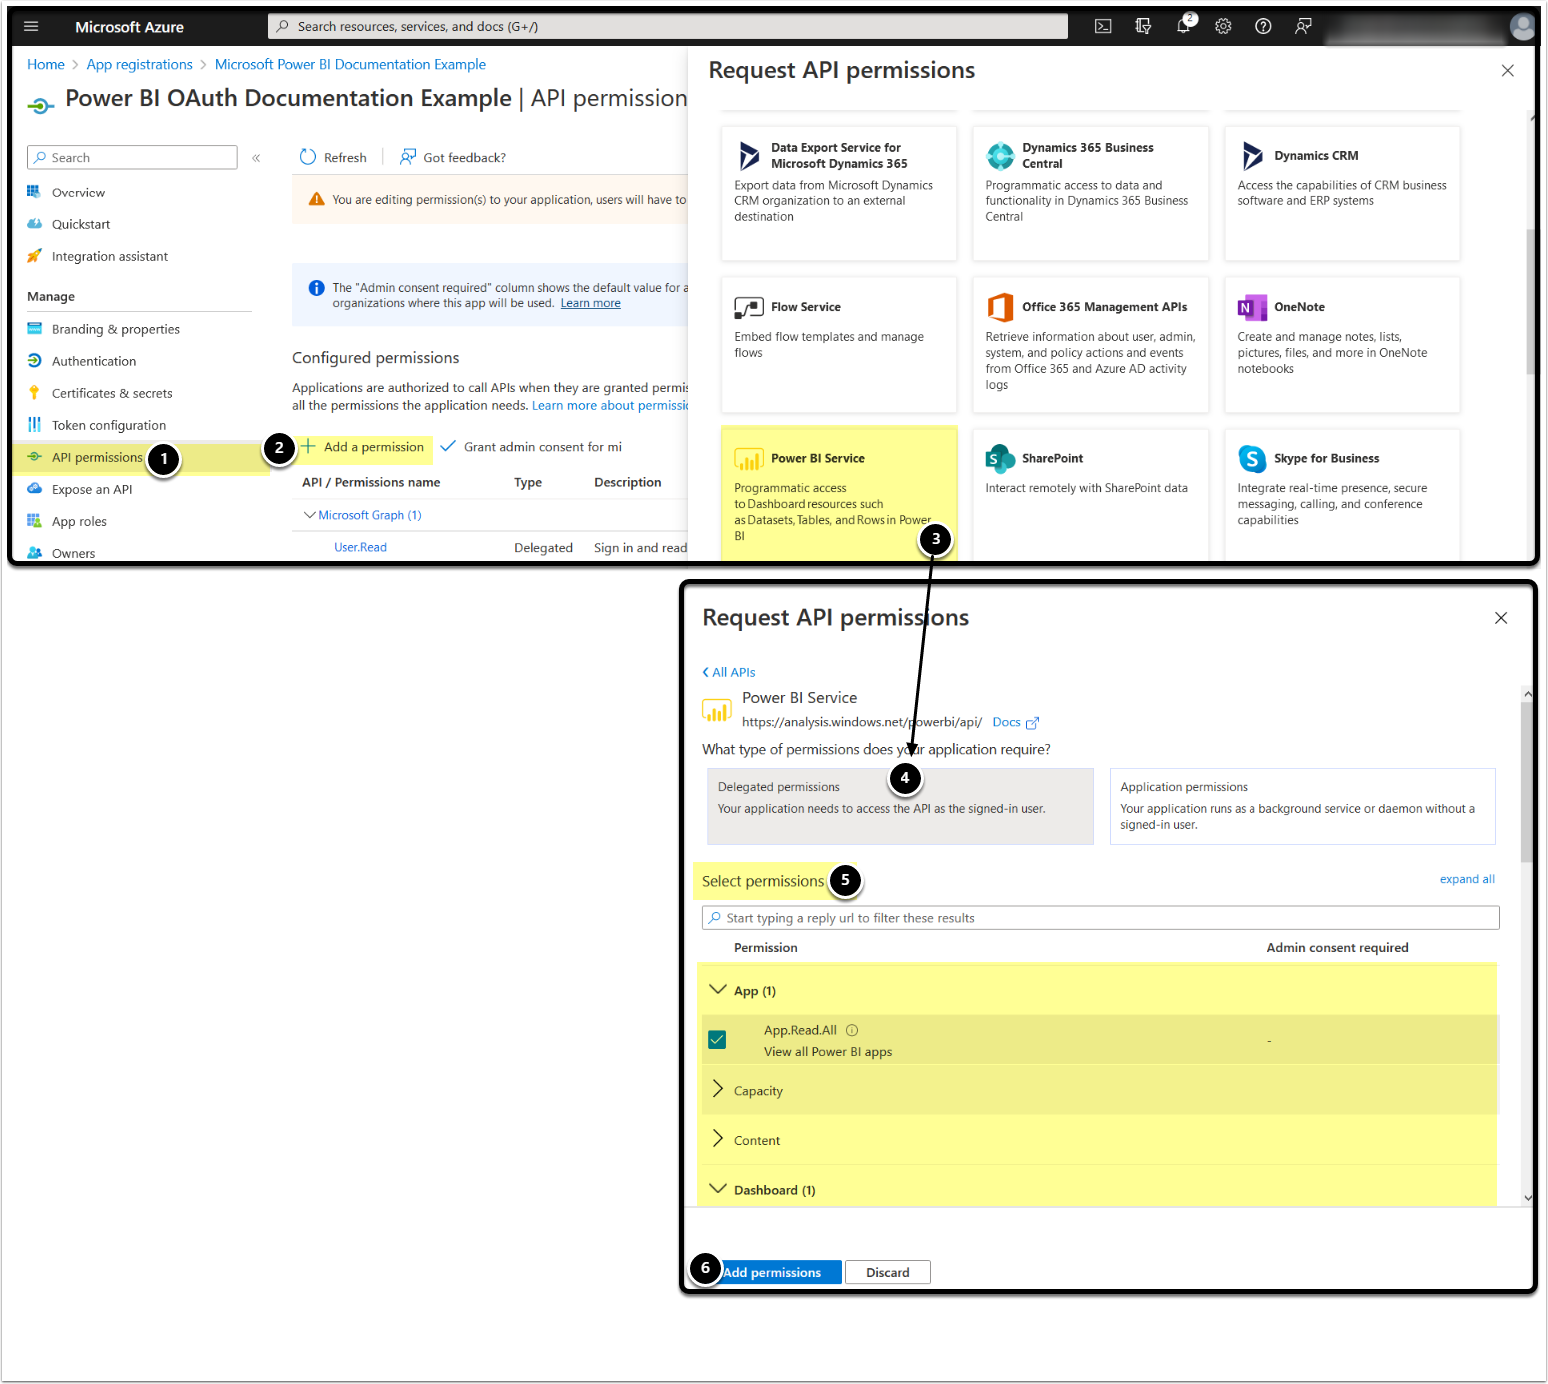
- Access API Permissions tab
- [+ Add a permission]
- [Power BI Service]
- [Delegated permissions]
- Enable the following permissions to get a list of all Power BI Apps, Dashboards, Semantic Models, Reports, and Workspaces respectively:
- App:
- App.Read.All
- Dashboard:
- Dashboard.Read.All
- Dataset:
- Dataset.Read.All
- Report:
- Report.Read.All
- Workspace:
- Workspace.Read.All
- App:
- [Add permissions]
6. Grant Admin Consent
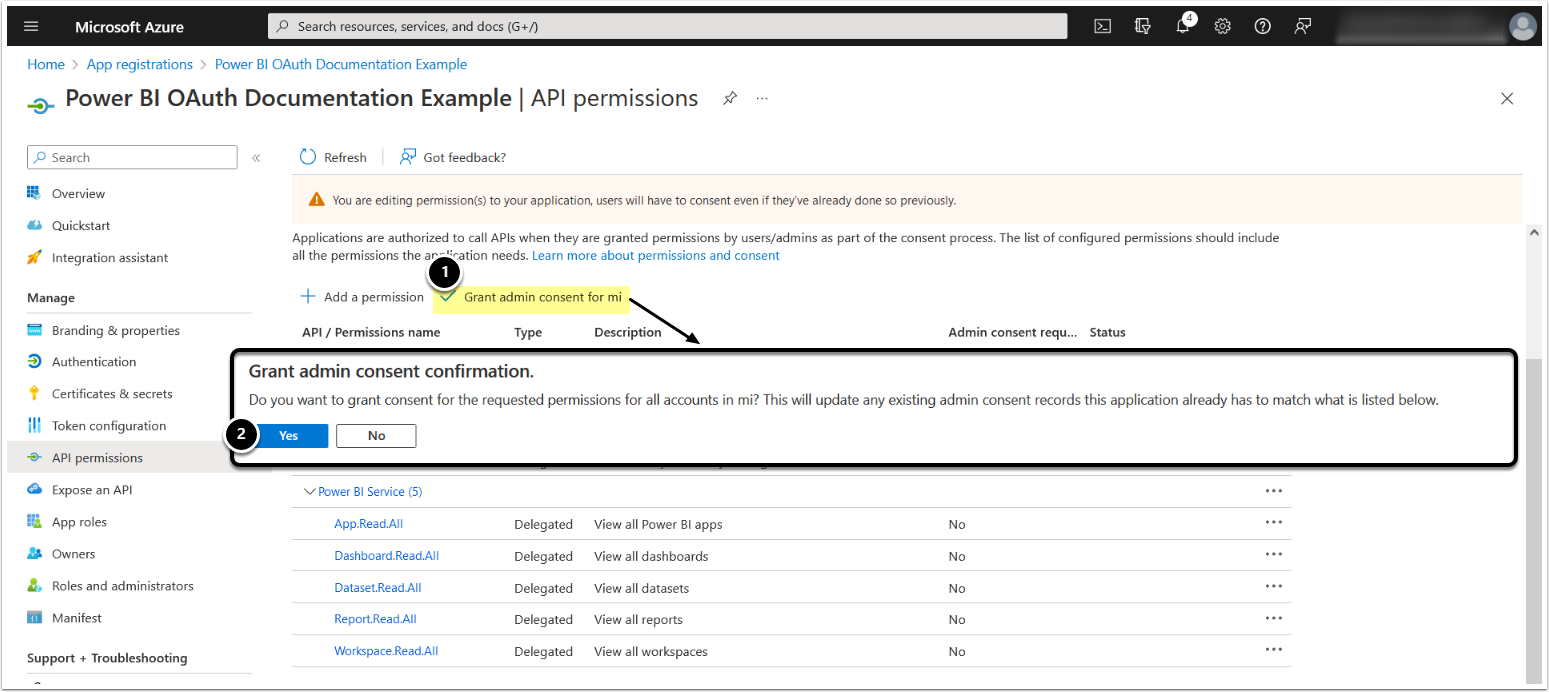
After Office 365 and Power BI Service permissions have been added, grant admin consent for the requested permissions:
- [Grant admin consent for <directory name>]
- [Yes]
7. Add a Client Secret
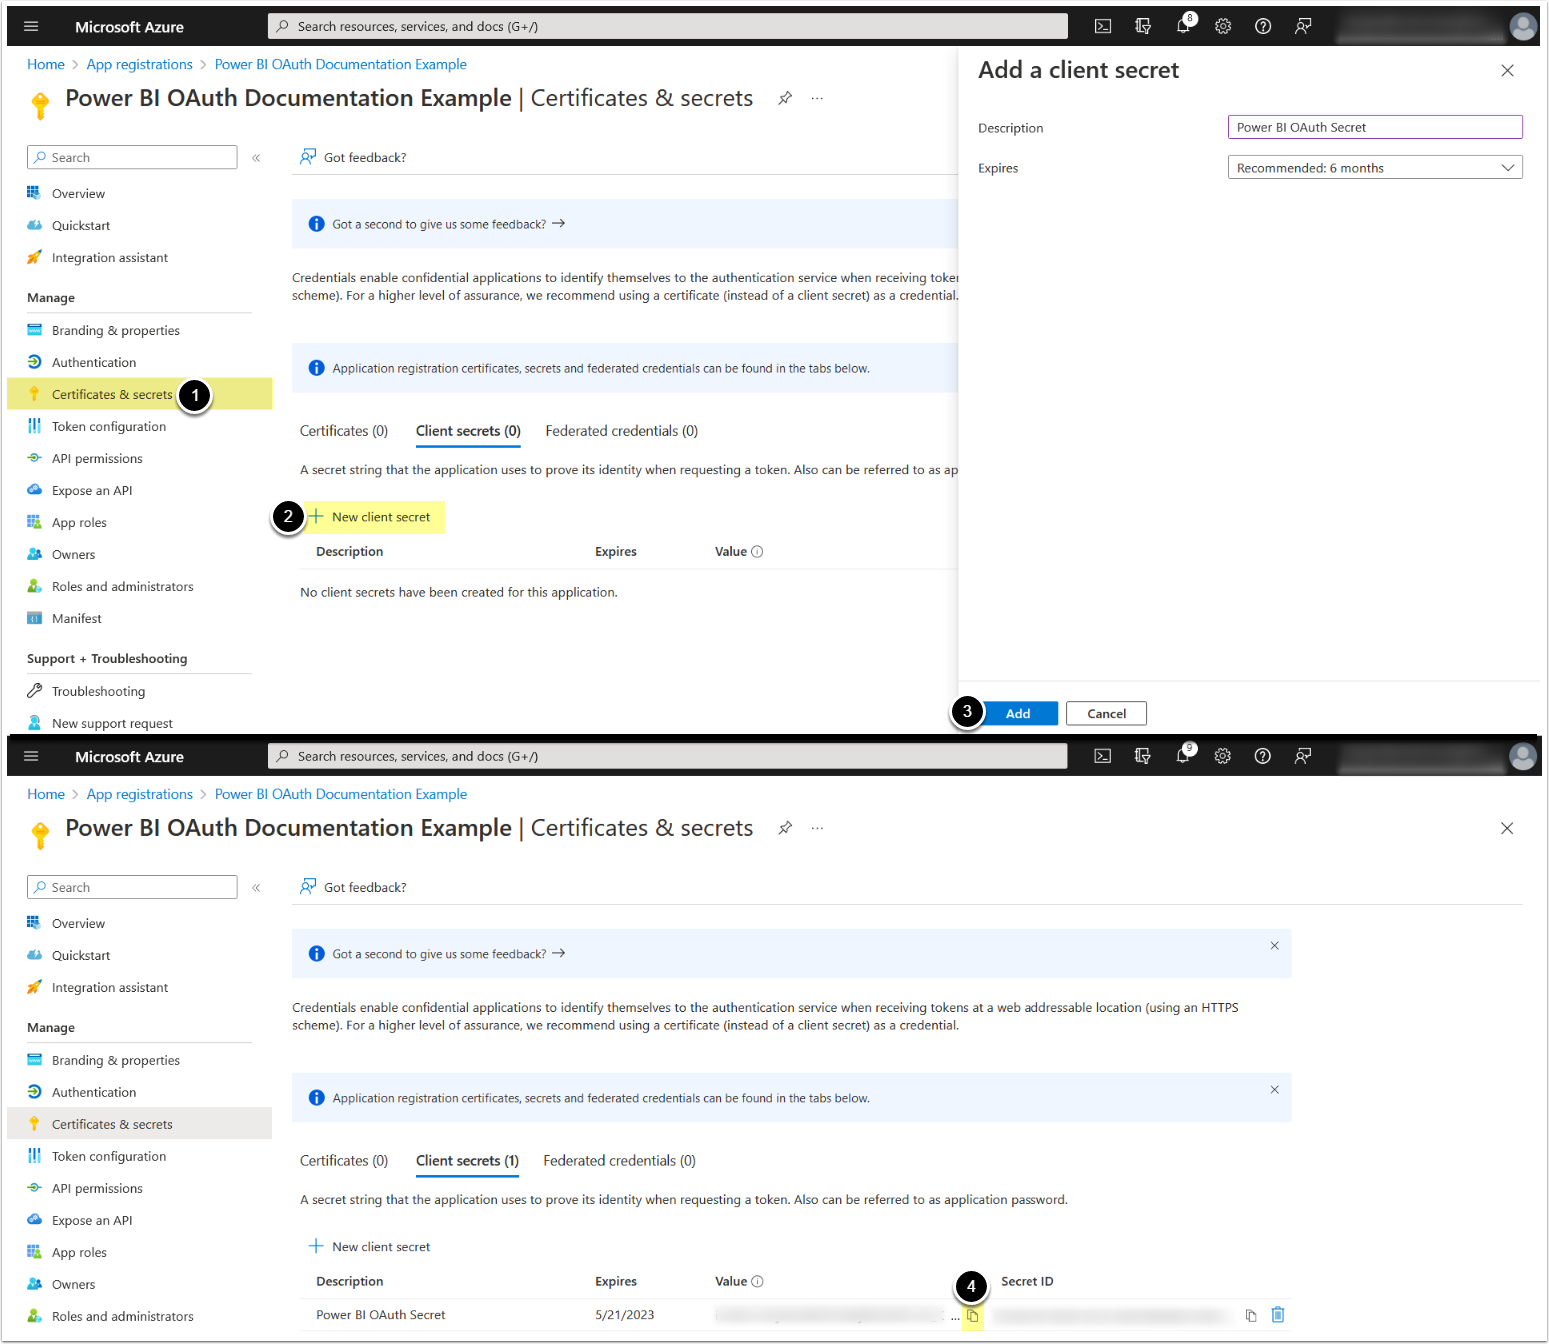
- Access Certificates & Secrets tab
- [+ New Client Secret]
- [Add]
- Copy and save Client Secret Value
8. Copy Application ID
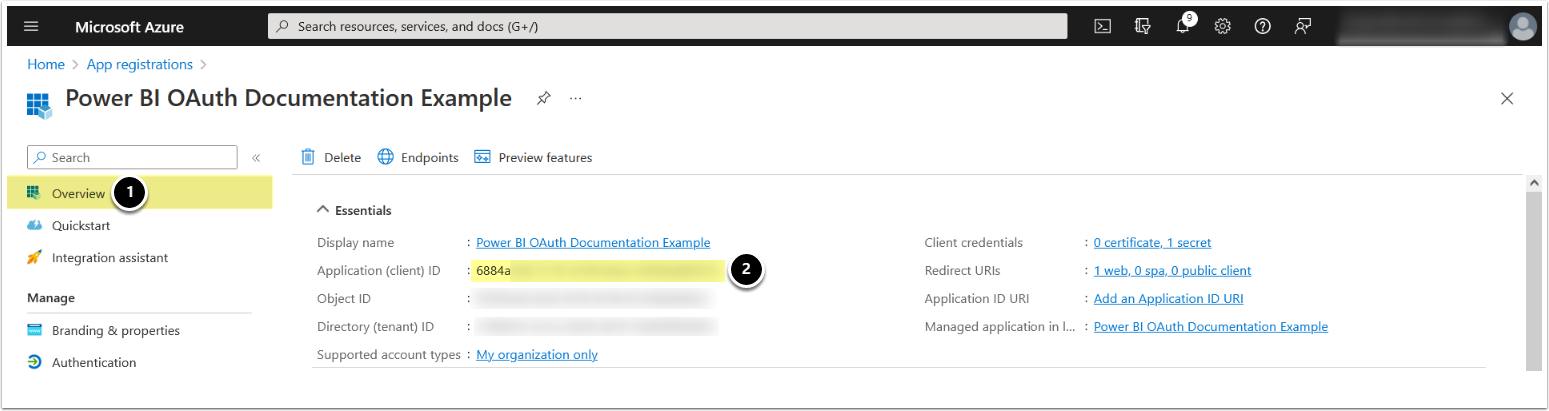
- Access Overview tab
- Copy Application (client) ID
Grant Required Power BI Permissions to Service Account
The service account used for OAuth token retrieval must have the appropriate Power BI API access and content permissions:
1. Enable Semantic Model Execute Queries REST API
Access Settings > Admin Portal
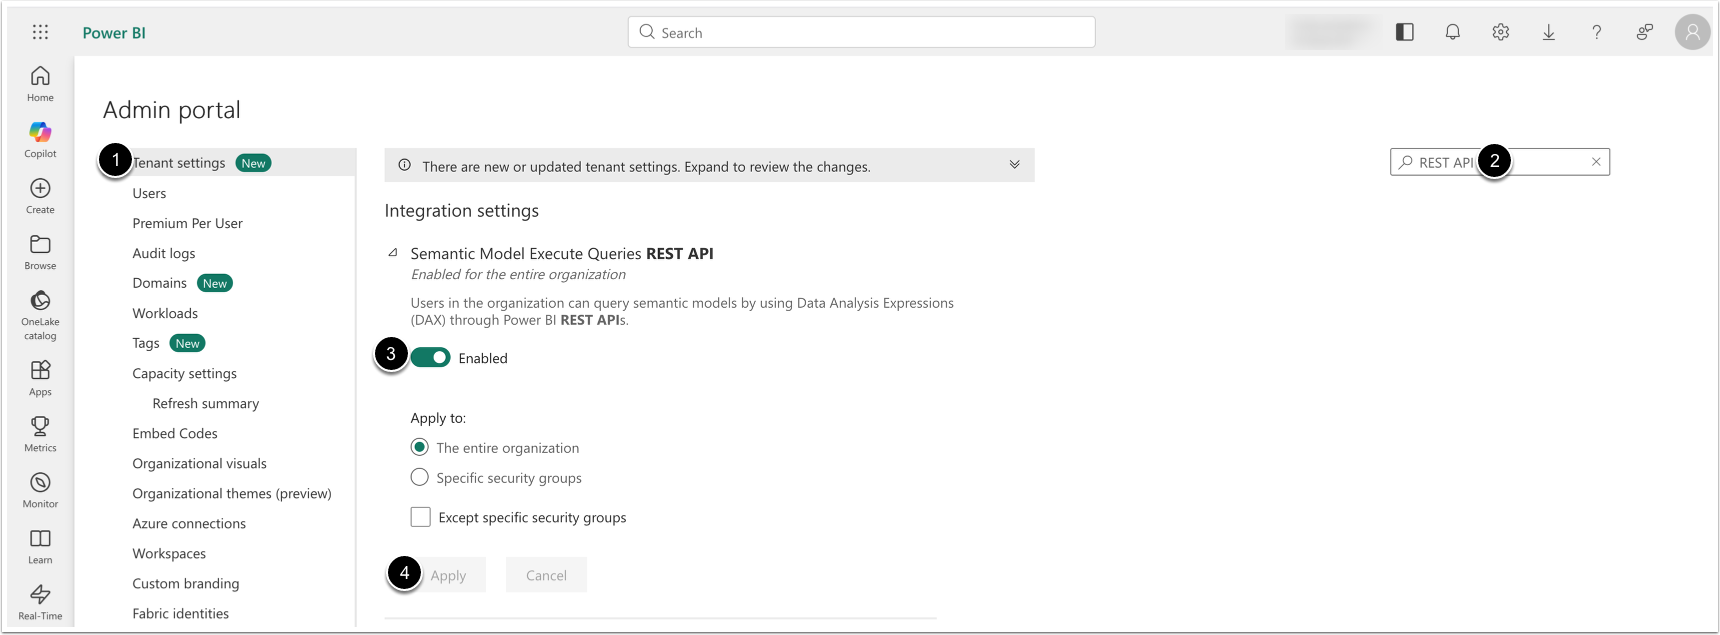
- [Tenant Settings]
- Search for Semantic Model Execute Queries REST API
- [Enable]
- [Apply]
2. Grant Permissions to Read and Build Semantic Models
Open a Semantic Model
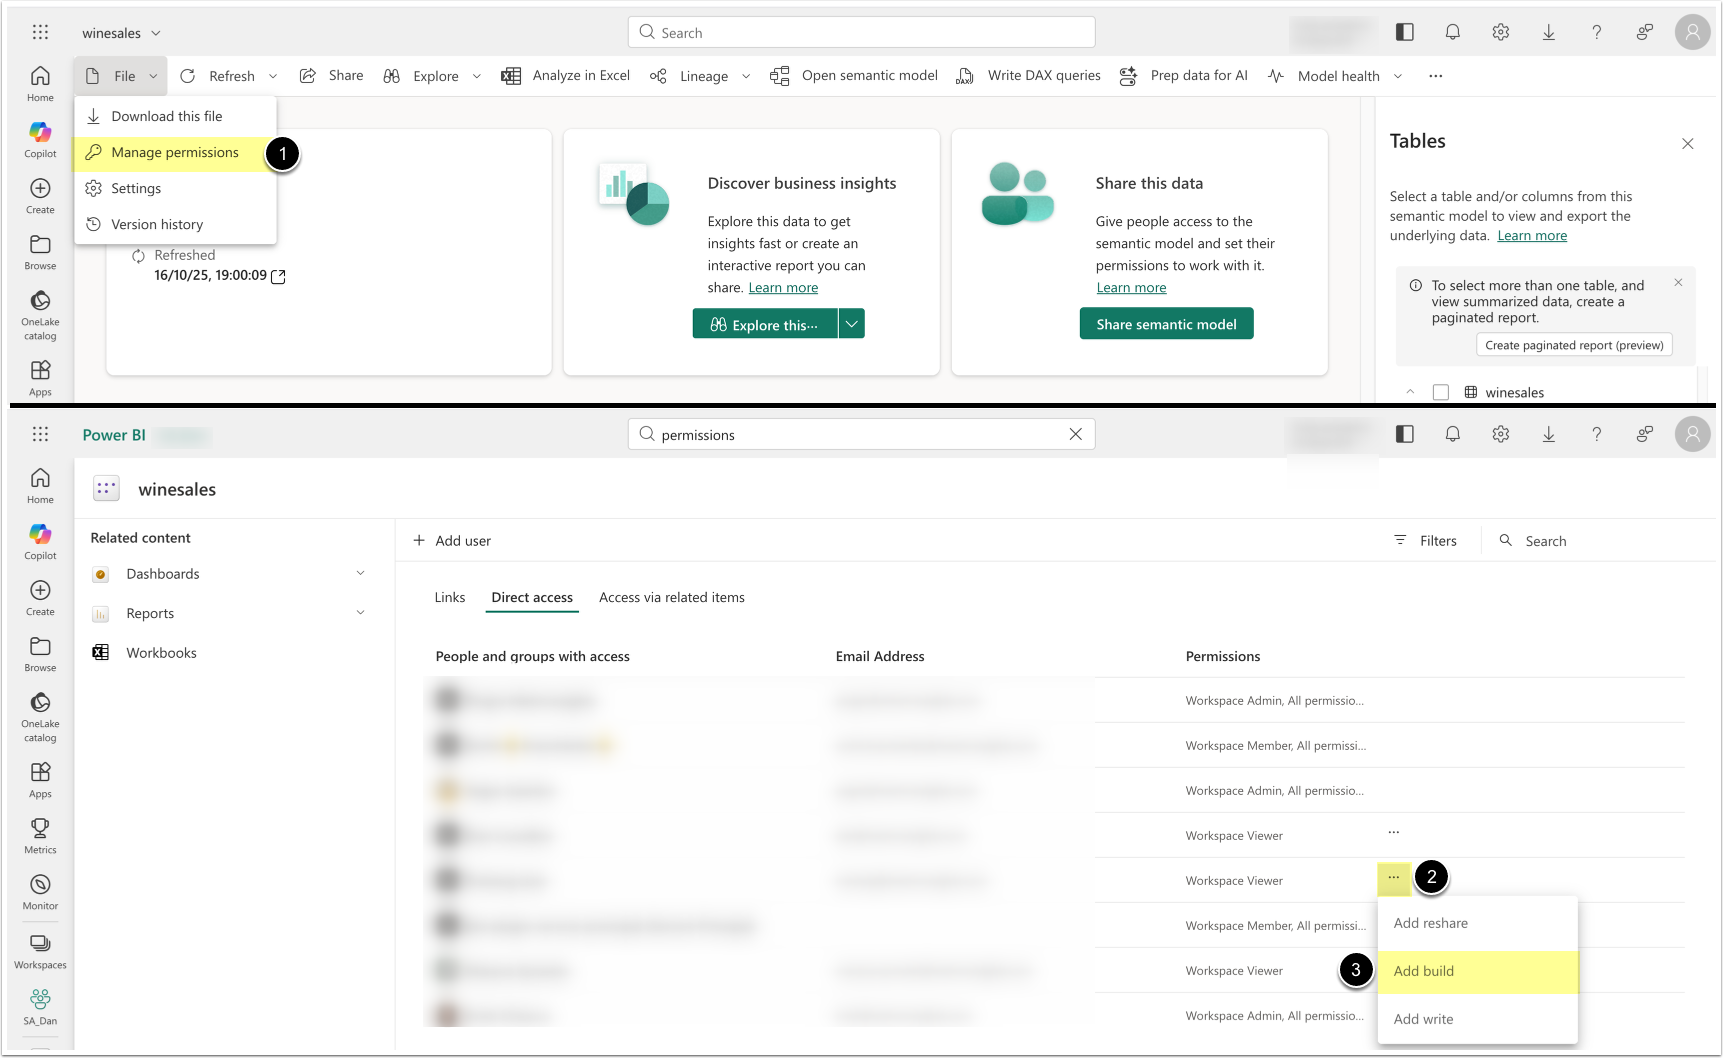
- [Manage permissions]
- Locate the service account user in the list, click [...]
- Ensure that the service account is a Workspace Viewer and has a build permission.
Alternatively, assign access via the Workspace menu:
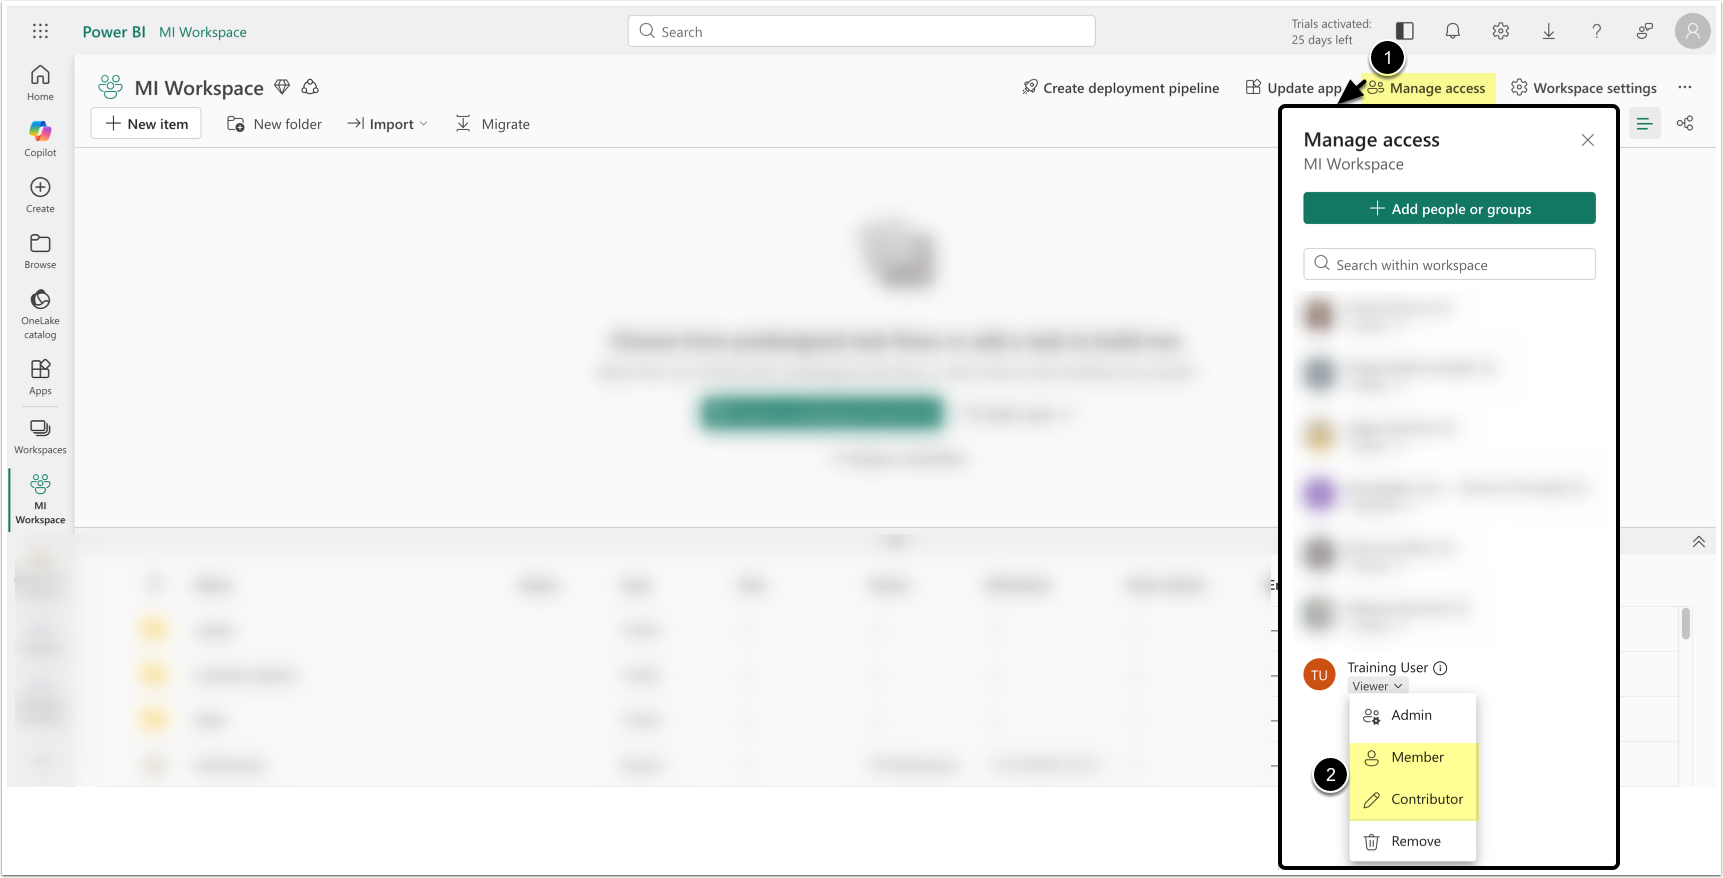
- [Manage access]
- Locate the service account and assign the Member or Contributor role.
Configure Power BI OAuth in Metric Insights
1. Create New Power BI Data Source
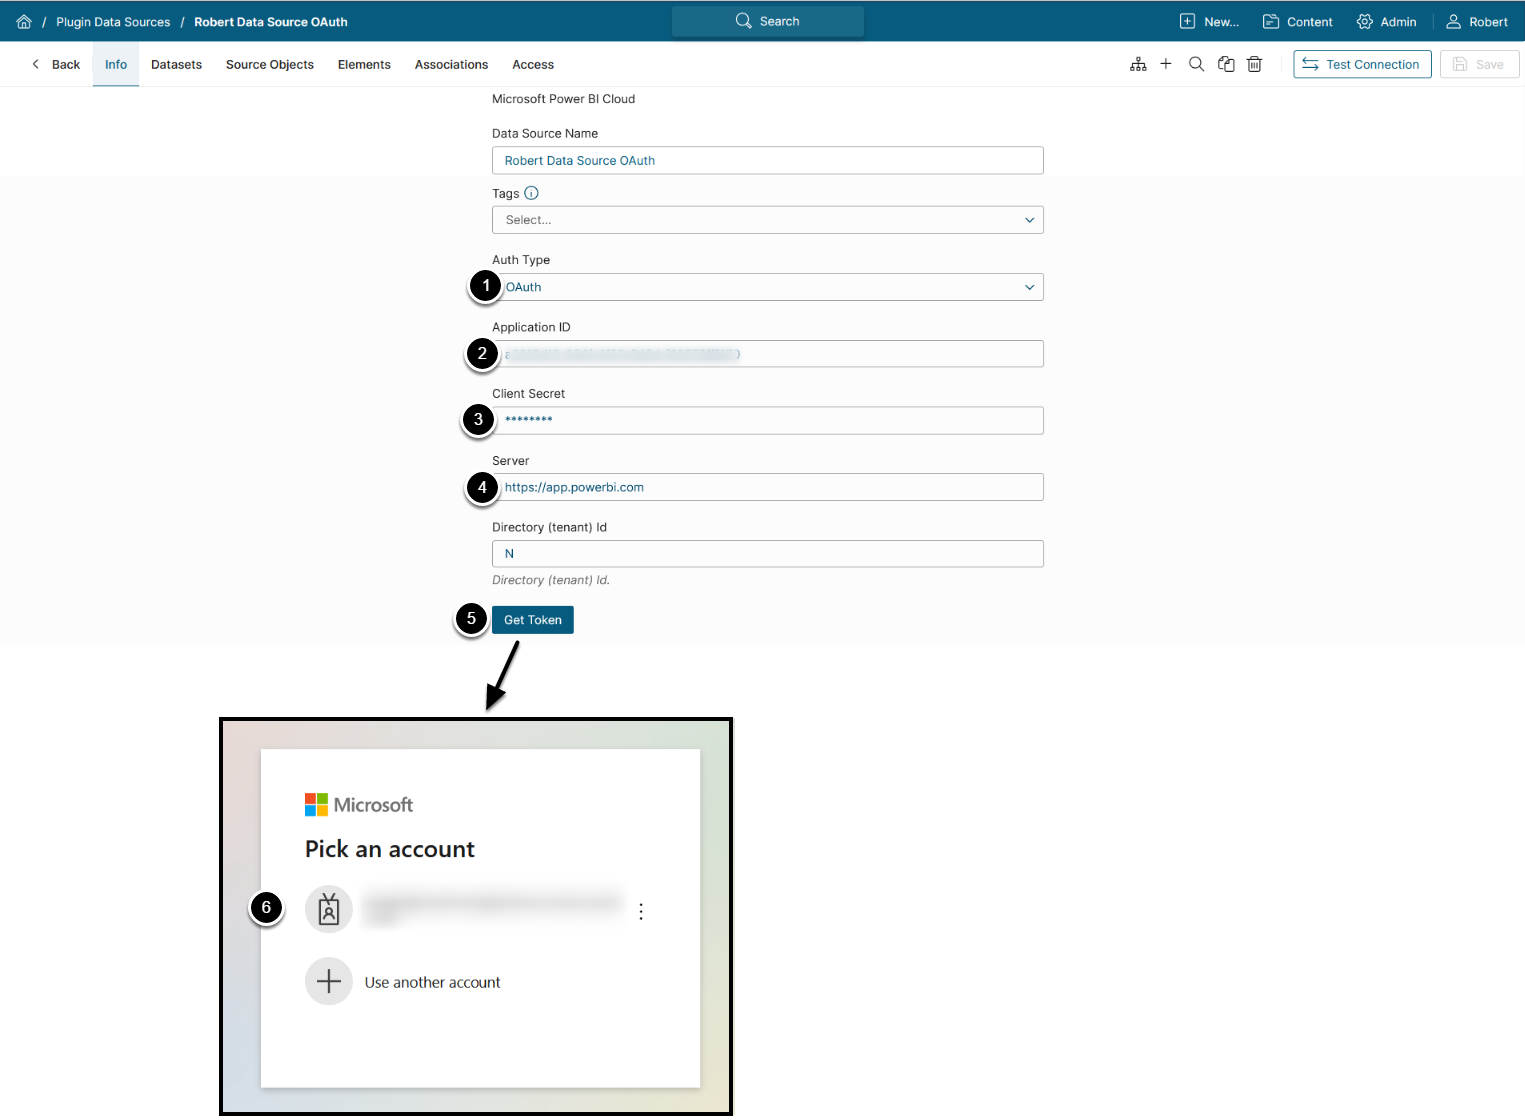
Create new Data Source under Admin > Collection & Storage > Data Sources > [+ New Data Source] > Microsoft Power BI Cloud:
- Auth Type: "OAuth"
- Provide Application ID (see Step 8)
- Provide Client Secret if it has been generated (see Step 7)
- Enter the URL of your Microsoft Power BI server (this is the same URL that you see when accessing Microsoft Power BI via your web browser)
- [Get Token]
- Authenticate with the previously configured Power BI Service account with access to necessary workspaces
NOTE: For more details on creating a Microsoft Power BI Data Source, see Establish Connectivity to Microsoft Power BI.
2. Configure Report Type: Access Admin > Plugins > External Report Types
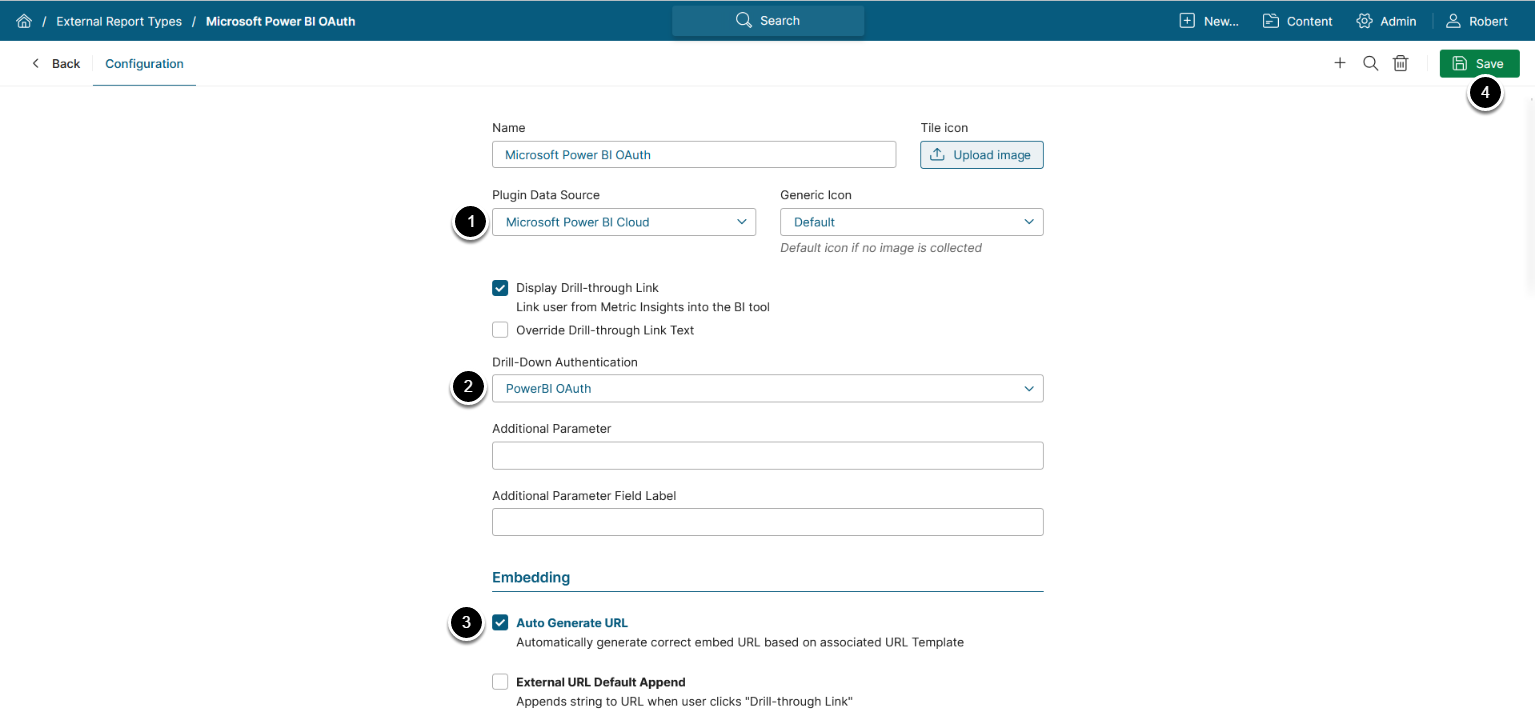
The list page containing all External Report Types available in the system opens.
Below the grid, click [+ New Data Source].
- Image Source Plugin: Microsoft Power BI Cloud
- Drill-Down Authentications: "Power BI OAuth"
- Enable Auto generate URL
- [Save]
After External Report Type for Microsoft Power BI OAuth has been configured, proceed with creating an External Report.
NOTE: See Create an External Report from Power BI for details.