This article details how to build an External Report in Metric Insights that is linked to a Report on your Microsoft Power BI server.
PREREQUISITE:
Establish connectivity to Microsoft Power BI Cloud via the respective plugin connection profile.
Table of contents:
If your External Report Viewer is displaying duplicate Filters based on your BI Tool defaults, your Admin can reset the default behavior to remove the Metric Insights filters from Viewer display.
- See How to omit Filters from External Reports for details.
1. Create New External Report
Access [+New] > External Report > Microsoft Power BI
If necessary, you can create a new Report Type, Dimension, Category, or Report Image Trigger on the go by clicking the [+] icon next to the corresponding field.
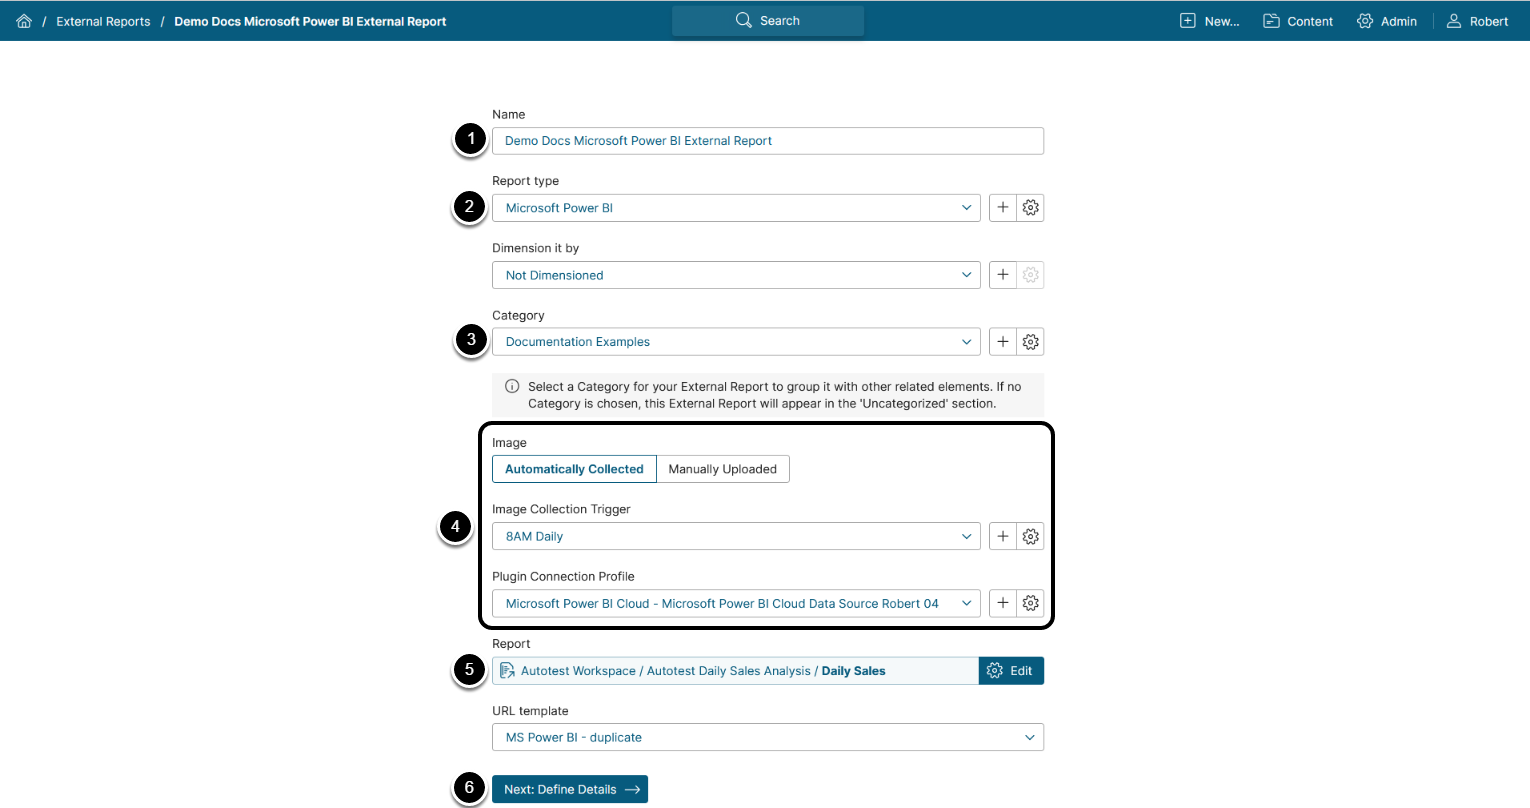
The New External Report screen opens. Provide the following information:
- Give your new External Report a Name.
- Select the Report Type.
- NOTE: If your Microsoft Power BI application utilizes OAuth, the Microsoft Power BI Cloud External Report must have a specifically defined type. See Configure Report Type for details on the corresponding External Report Type configuration.
- Place your Report in a relevant Category.
- Define whether you want the report Image to be uploaded manually or automatically. For Automated Collection, define the following settings:
- Choose the Report Image Trigger from the drop-down list.
- Select the Plugin Connection Profile you have created for Power BI.
- Select the Power BI Report from which the image will be collected.
- [Next: Define Details] to proceed with Report creation.
2. Configure External Report
NOTES:
- Microsoft Power BI content is embedded via JavaScript using the Power BI Client APIs.
- Power BI Cloud Plugin collects images by taking screenshots of them in the Chromium browser.
- When opting to display your Report as a Static Image, make sure youCollect Image before going to Viewer.
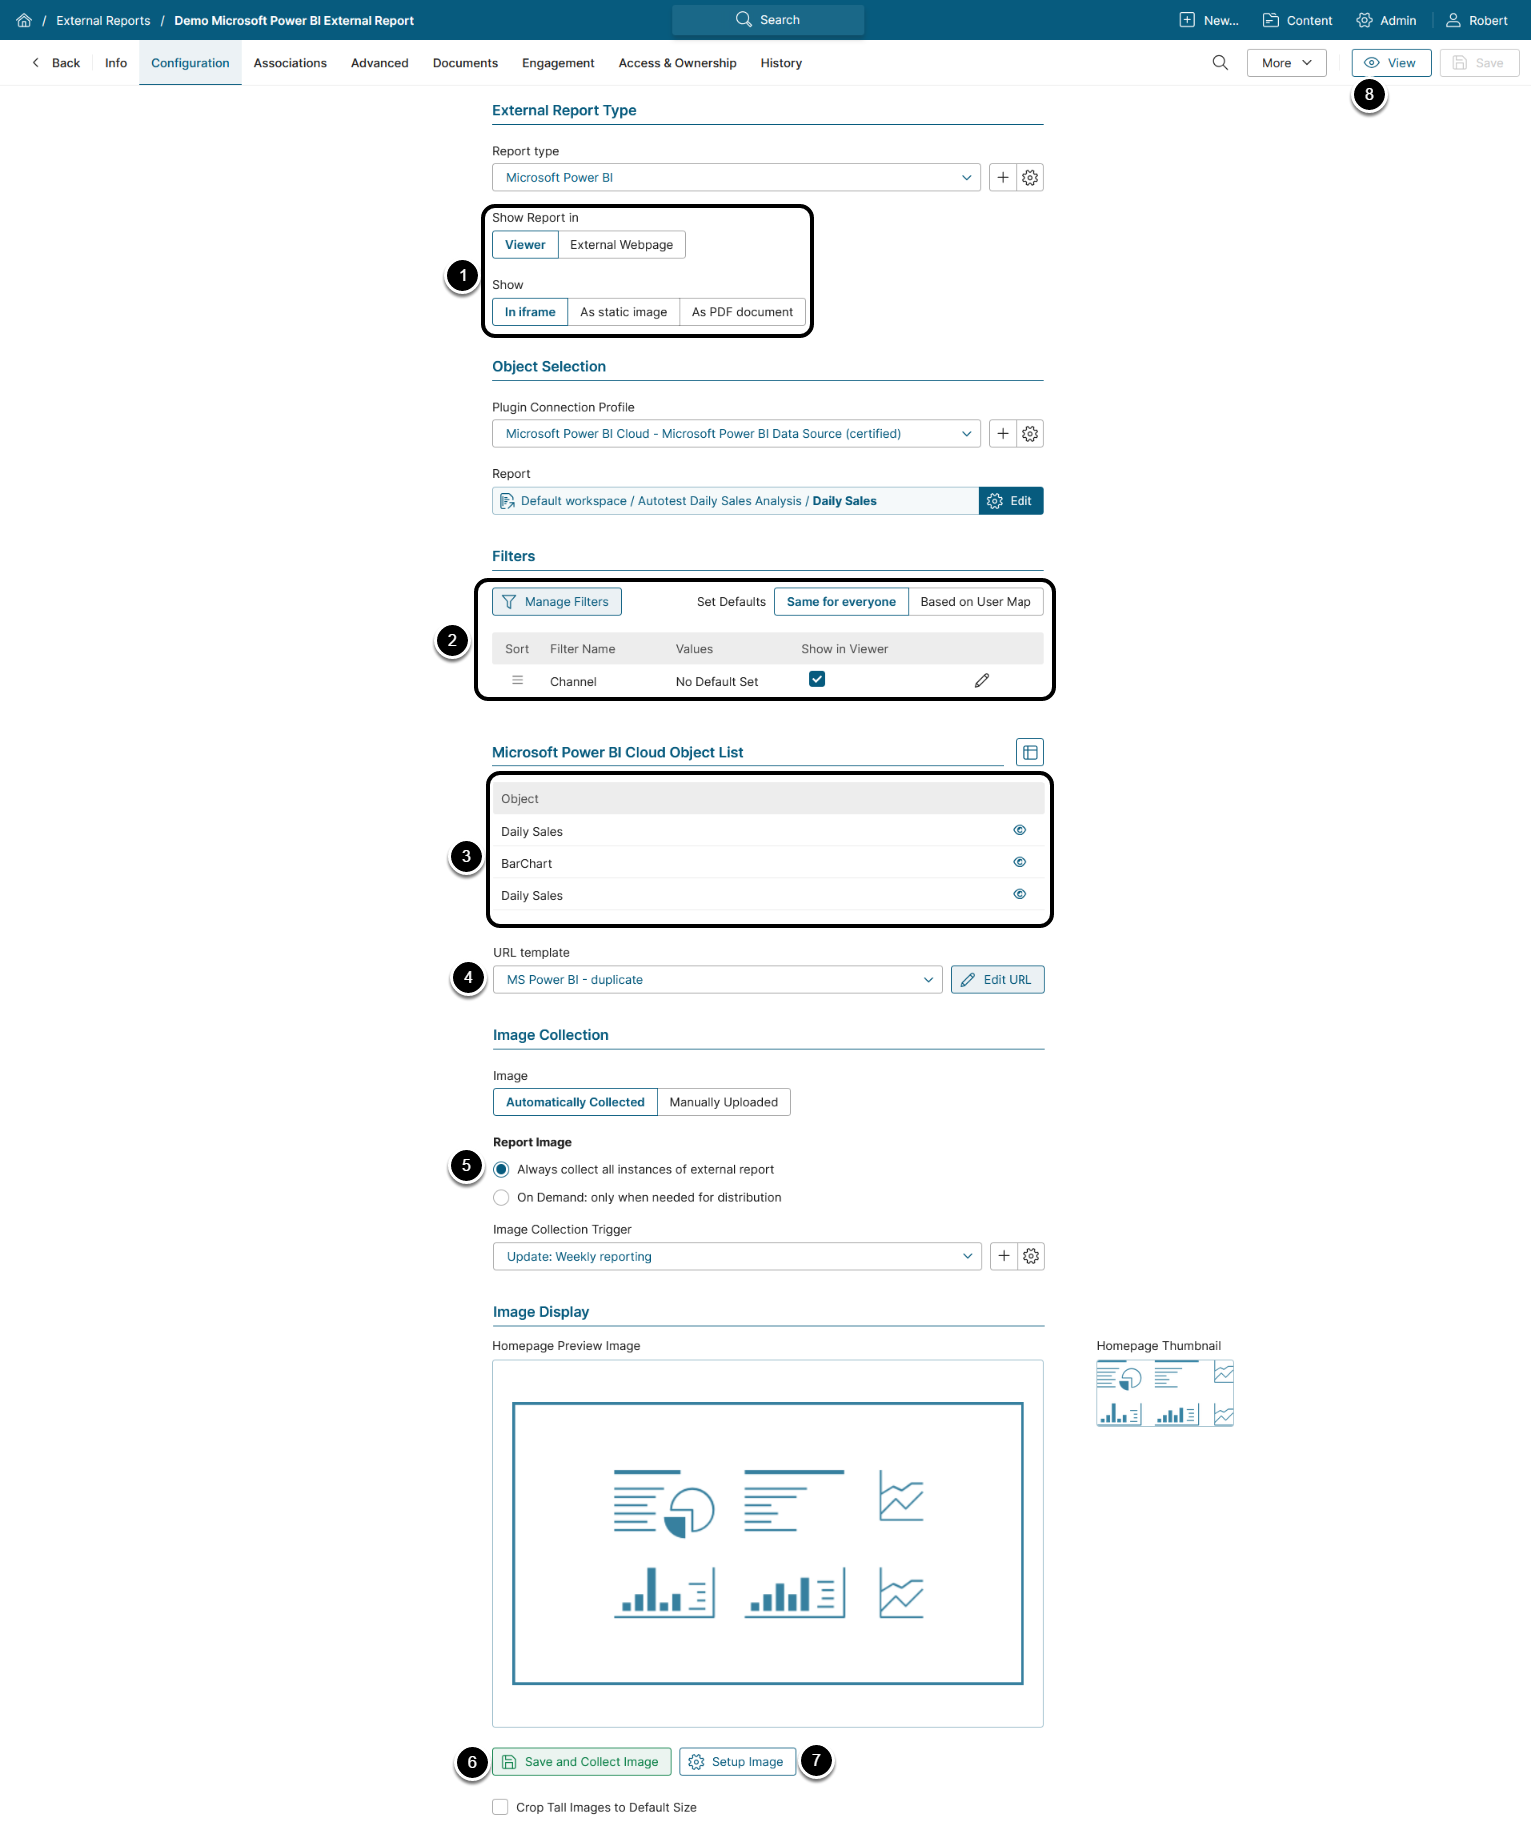
- Show Report in: Change from default "External Webpage" if you want your Report to be displayed in Viewer
- You can choose between the"iframe", "static image", and "PDF"options.
- To be able to choose the "PDF" option:
- Make sure that the External Report Type has Allow download image as PDF option enabled.
- Access the External Report's Advanced tab and enable Collect additional files: "PDF".
- Apply filters to your Report data by clicking [+Manage Filters].
- For details, see Pre-filtering Power BI Cloud Data for External Reports.
- Configure which objects are displayed in the External Report Viewer through the Microsoft Power BI Cloud Object List.
- See Hide Power BI Objects for details.
- Choose a URL template, based on which the External Report URL will be generated.
- Click [Edit URL] to modify the URL by appending a question mark (?) followed by any filter or parameter settings.
- Click [Test External Report] to test how your Report will be displayed on External Webpage or in Viewer, depending on the display option selected in the previous step.
- Report Image:
- "Always collect all instances of external report": Collect all images and cache them on a schedule.
- "On Demand: only when needed for distribution": Individual images are only collected when they need to be included in an email.
- [Save and Collect Image] to generate a Preview Image for the Homepage.
NOTE: Image Collection section looks differently if the Report Type of External Report uses "PowerBI OAuth" Drill-Down Authentication.
- See Configure Image Collection for Power BI OAuth Drill-Down Reports for details.
- Optionally, click [Setup Image] to configure image size.
- [Enable and Publish] to be able to go to Viewer.
2.1. Configure Image Collection for Power BI OAuth Drill-Down Reports
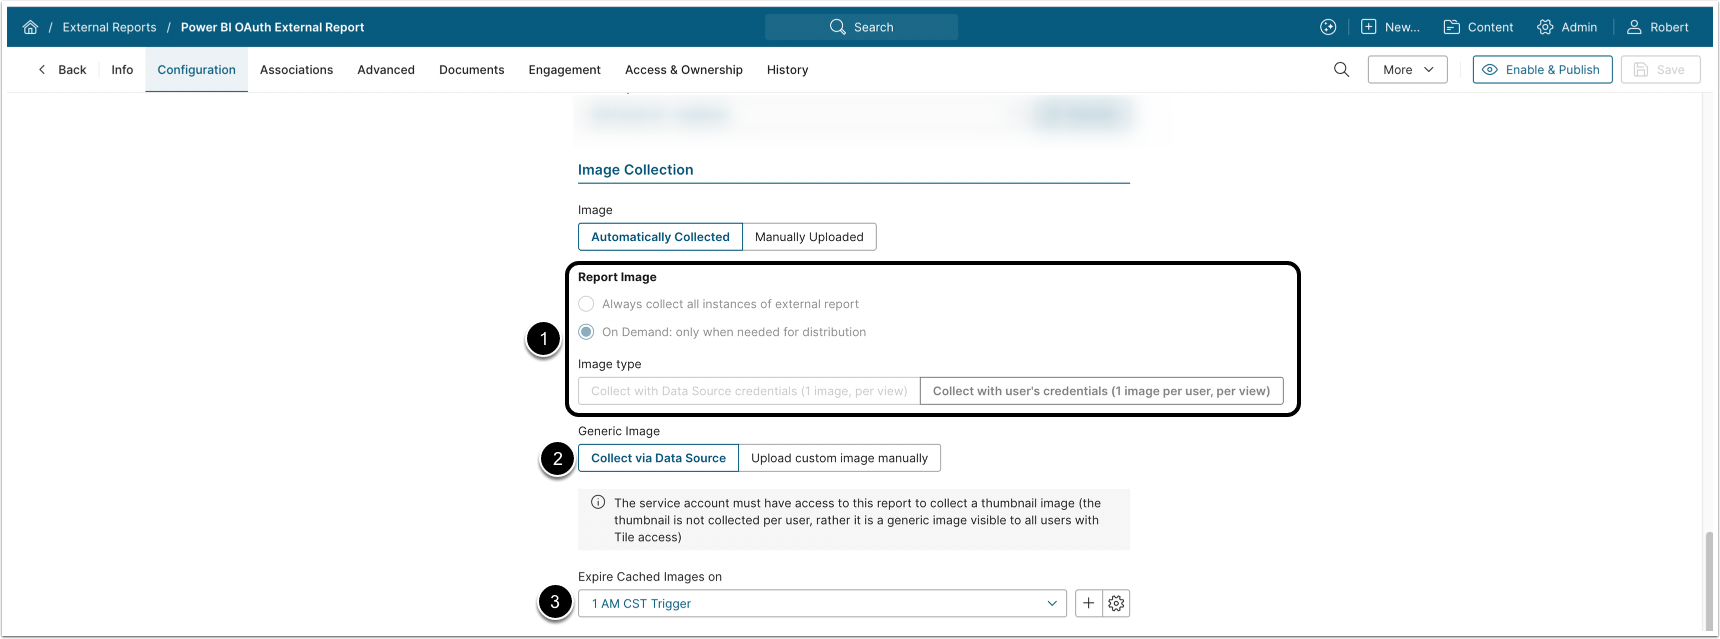
If the Report Type of External Report uses "PowerBI OAuth" Drill-Down Authentication, every user will see image based on the token generated on Power BI side.
- See What Happens When User Opens an External Report for the First Time? for details.
- Report Image and Image type are set automatically and can't be changed.
- Generic Image: Define how the Tile thumbnail is collected:
- Collect via Data Source: The Tile's generic image will be generated using a default picture of the Report.
- Upload custom image manually: The system will use a manually uploaded image as Tile's generic image.
- Expire Cached Images on: Select a Trigger to expire cached images.
3. Verify Display in Viewer
What Happens When User Opens an External Report for the First Time?
If the Report Type for the External Report uses "PowerBI OAuth" Drill-Down Authentication, every user who opens it for the first time will see the "To begin seeing preview images, click here to generate an access token." message. Clicking this message will prompt to log in to Power BI. Once the user logs in, an access token is generated on the Power BI side which system uses to define which image the user sees.
Example of how this looks in a Burst:

- Click the message.
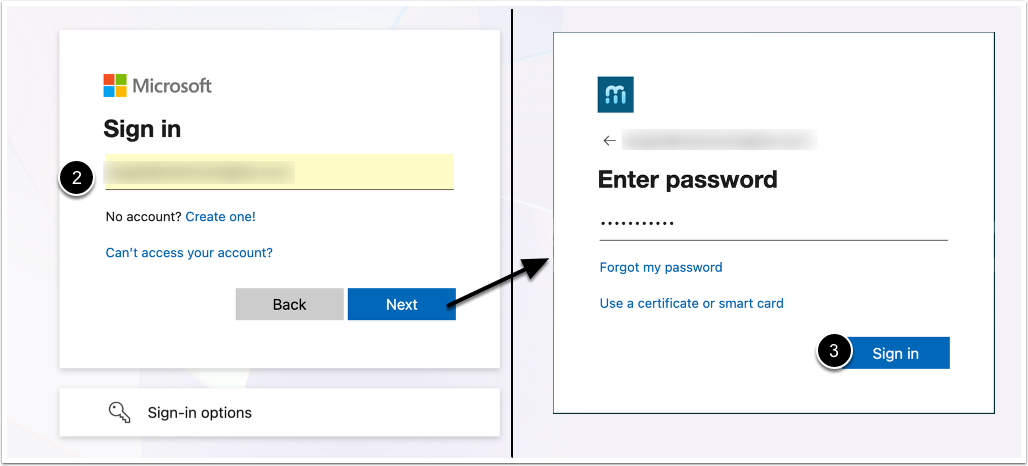
- Enter your Power BI user credentials.
- [Sign in]. This will generate a token that will allow you to view the External Report image.
Pre-Filtering and Download Options in Viewer
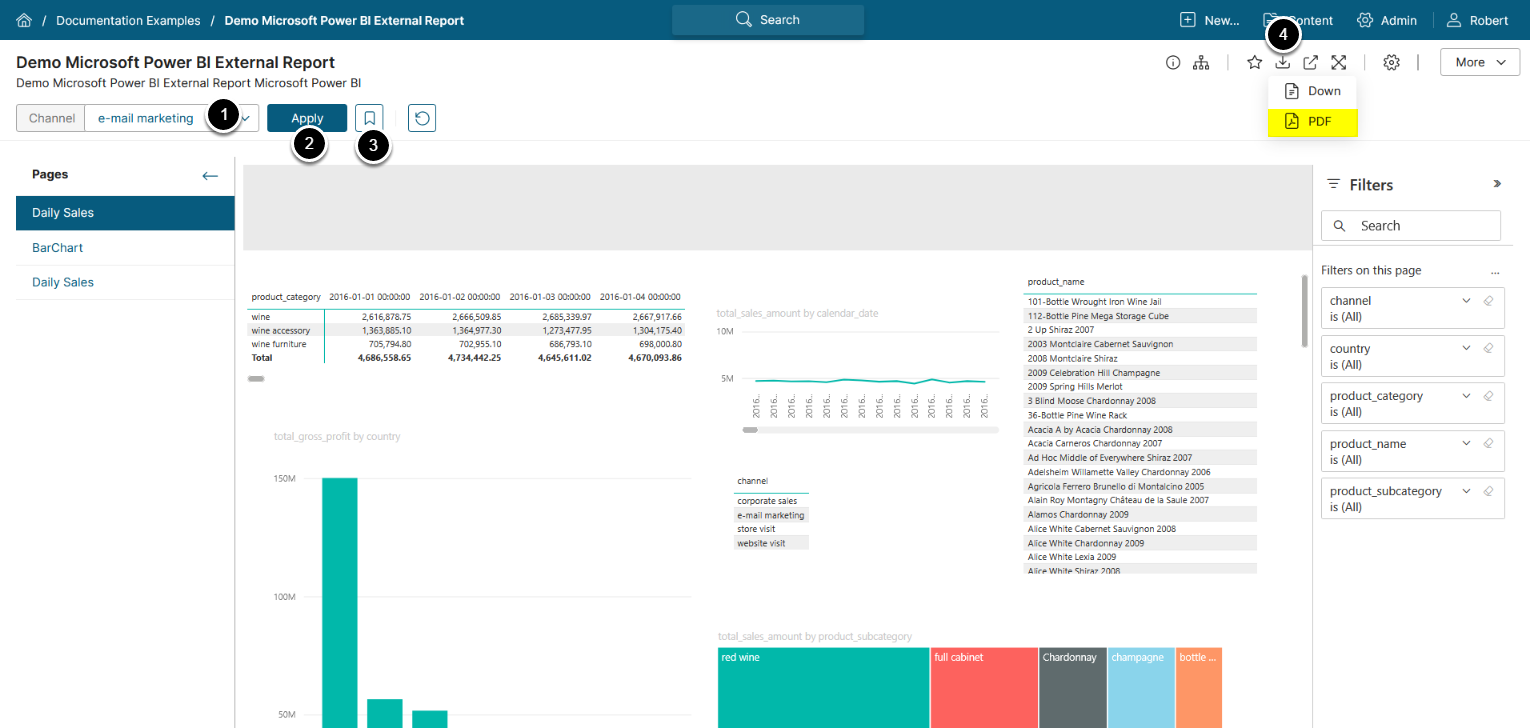
To pre-filter Report Data in the Viewer:
- Select the required Filter Value.
- Click [Apply Filters].
- Optionally, save your Filter selections as personalized Bookmarks.
- For details, go to Setting Personal Bookmarks (External Reports).
- Click the download icon to see the available download options for your External Report.
Note: To be able to download native PDF of your External Report and display the Report as PDF in Viewer:
- Power BI Premium account is required (Premium Per User (PPU) is not supported).
- Enable the corresponding parameter in the Data Source.
- See Power BI Cloud Optional Parameters section for details.
- Power BI Report should have PDF capability.
- Contact your Power BI Administrator for details.
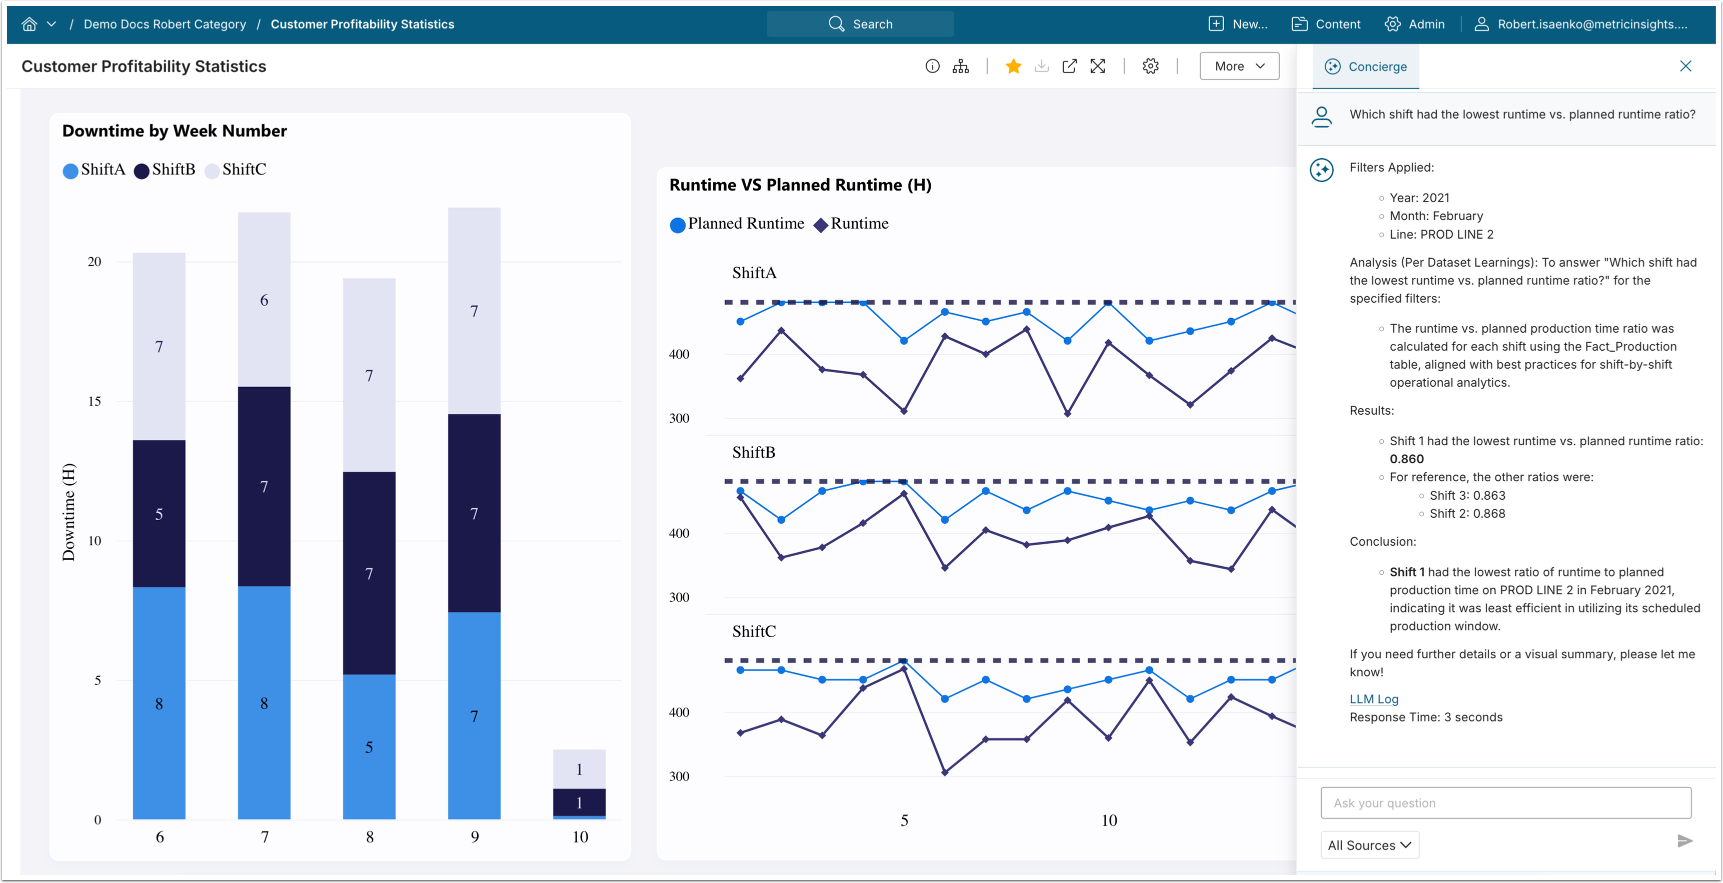
4. Talk to Your Data
BETA FEATURE: Talk to Your Data is a beta feature. Configuration steps and supported options are subject to change.
Beginning in v7.2.1, Concierge can answer analytical questions about a Power BI Cloud External Report directly in the External Report Viewer, using Power BI metadata to generate responses. To enable this feature, see Configure "Talk to Your Data" for Power BI Cloud External Reports (Beta).