This article describes how to add a library with custom components to the App Builder. There are two approaches of configuring and maintaining custom components:
- Customer-developed and maintained custom components: Your organization's developers build components for use with App Builder.
- You will need to build a component library to upload it to Metric Insights.
- MI-developed Custom Components: Metric Insights developers will build the specific components that meet your requirements, you only have to upload the Library to Metric Insights.
TABLE OF CONTENTS:
1. Add New Library with Custom Components
1.1. Create a New Library
Access Content > Apps > Libraries
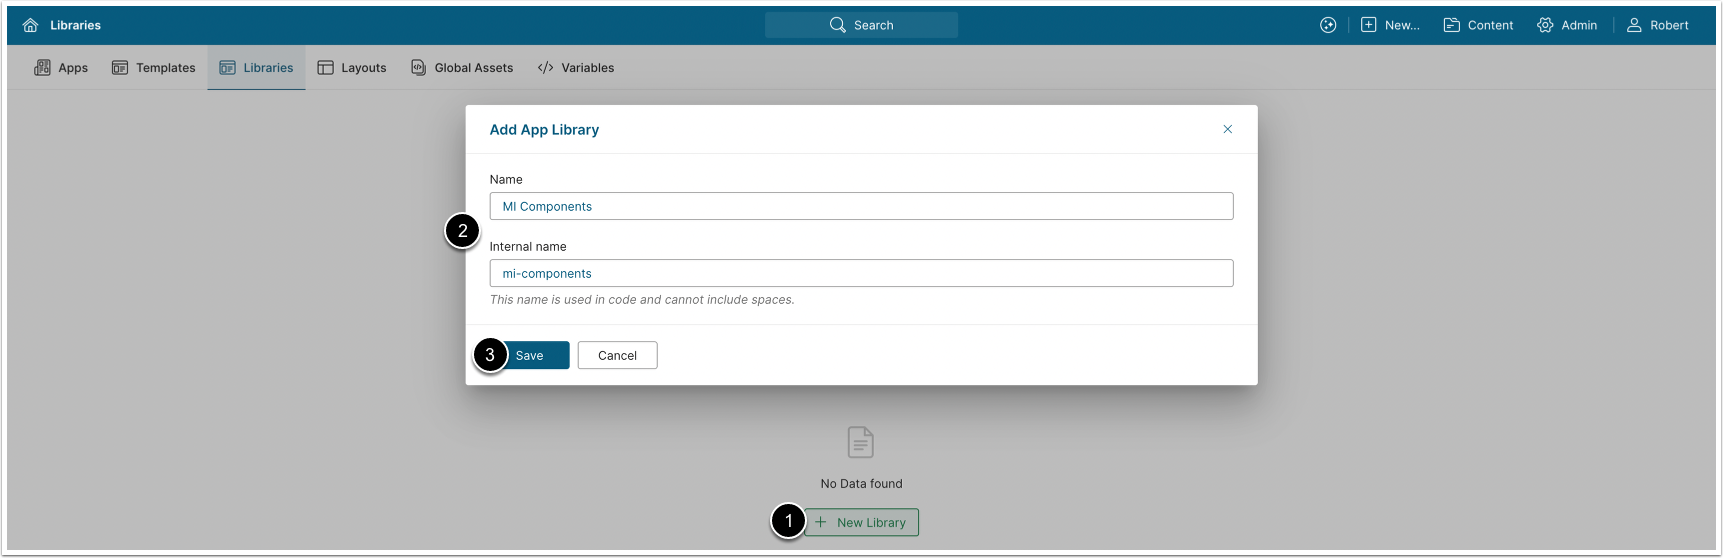
- [+ New Library]
- Enter a Name and Internal name for the Library.
- NOTE: The Internal name must match the name of the component directory.
- Request this name from the Metric Insights support for MI-developed custom components, or see Library Structure for customer-developed custom components.
- NOTE: The Internal name must match the name of the component directory.
- [Save]
1.2. Configure Git Sync
NOTE: Alternatively, you an upload Assets from the Assets tab.
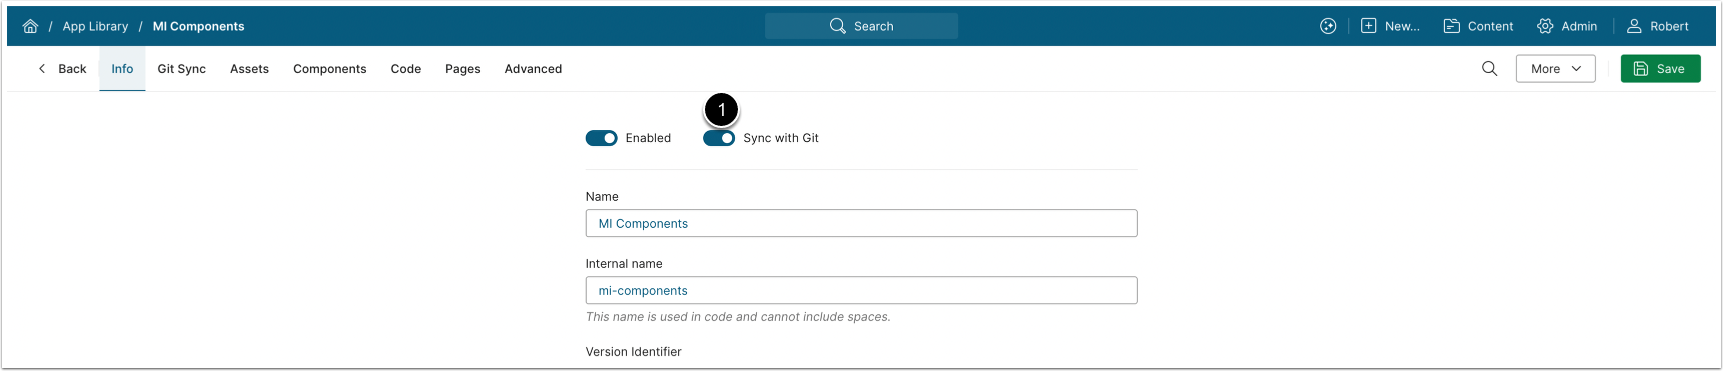
- Enable Sync with Git
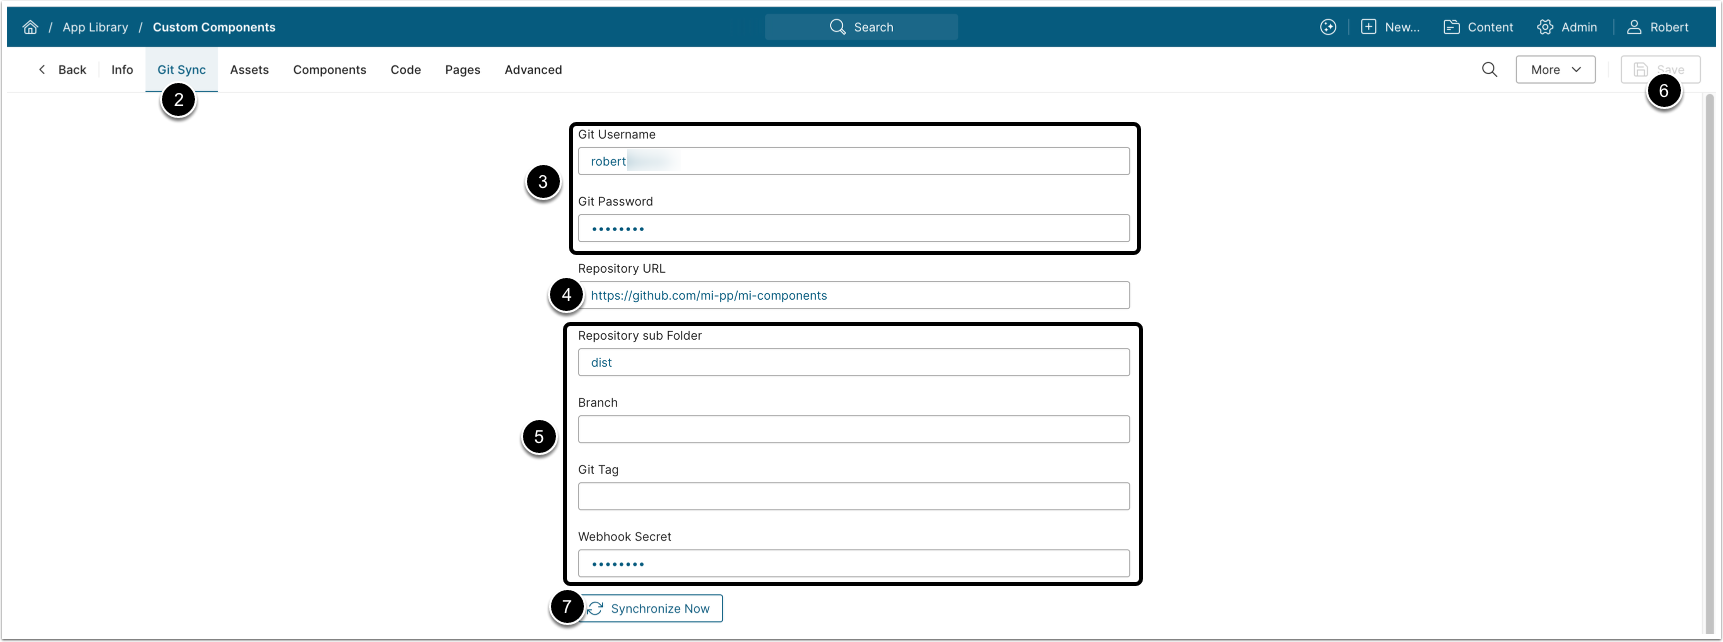
- Access Git Sync tab.
- Git Username / Git Password: Enter your GitHub credentials.
- Repository URL: Enter the URL of a repository with custom component library to sync with.
- Optionally, configure the following parameters:
- Repository sub Folder: Specify a subfolder path to fetch only its contents.
- Branch: Enter the branch name you want to sync.
- Git Tag: Enter a tag to sync with a specific version of the repository.
- Webhook Secret: Provide a Webhook Secret.
- NOTE: This feature allows you to automatically update App Template assets on specific events, for example, on Git push to a repository.
- [Save]
- [Synchronize Now]
1.3. Configure and Verify Asset Sync
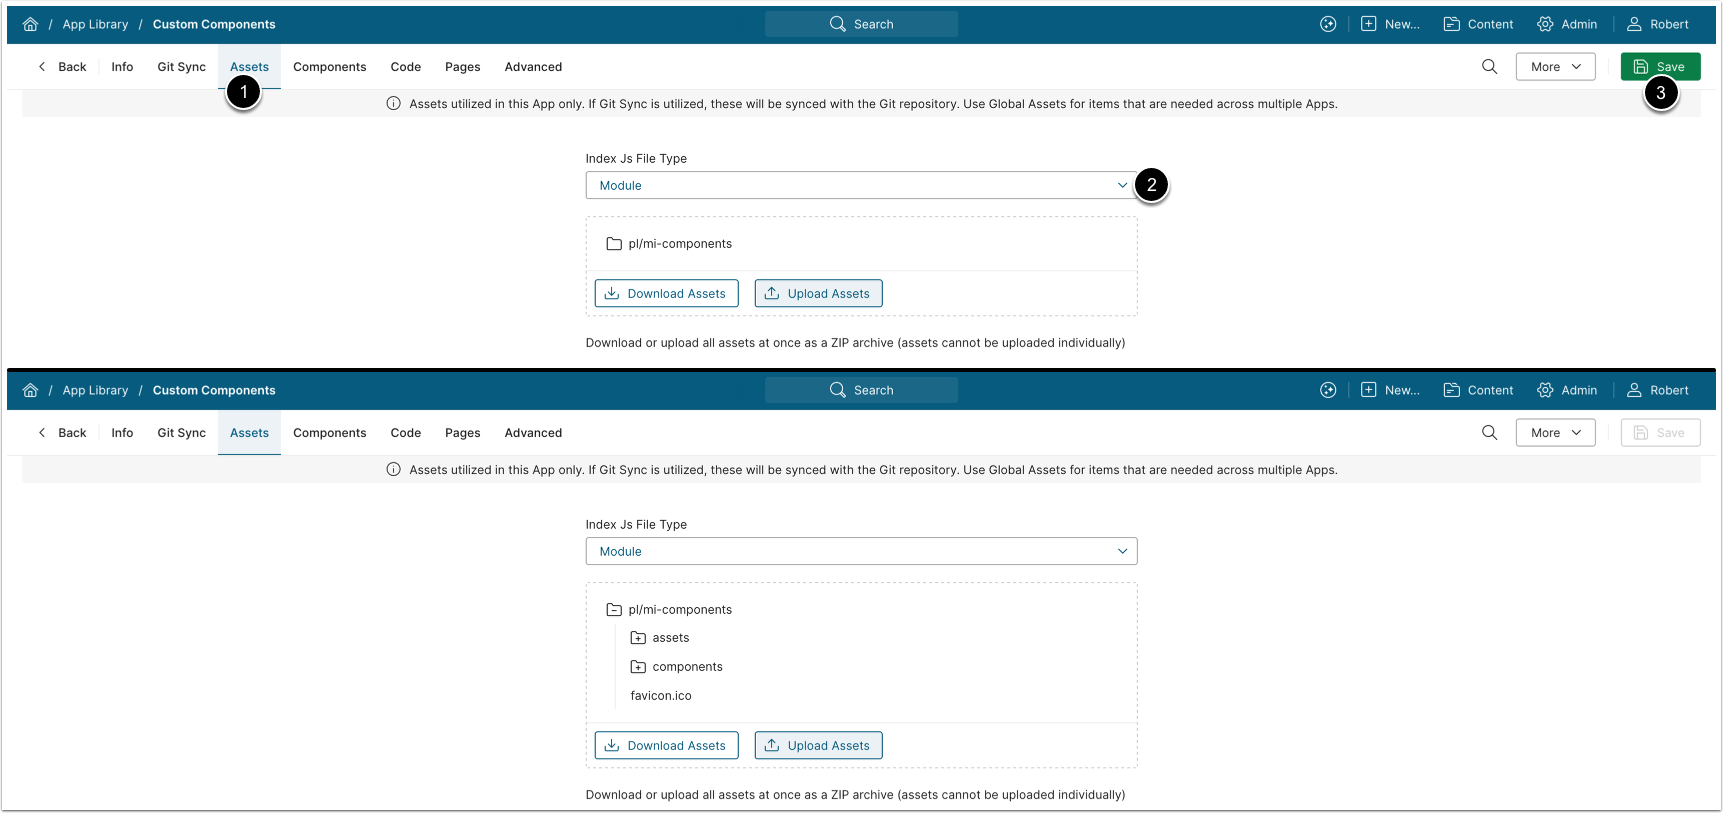
- Access the Assets tab.
- Set Index Js File Type to "Module".
- [Save], this will refresh the list of assets. Verify that all library assets have been synchronised.
1.4. Enter Code for Custom Component Library
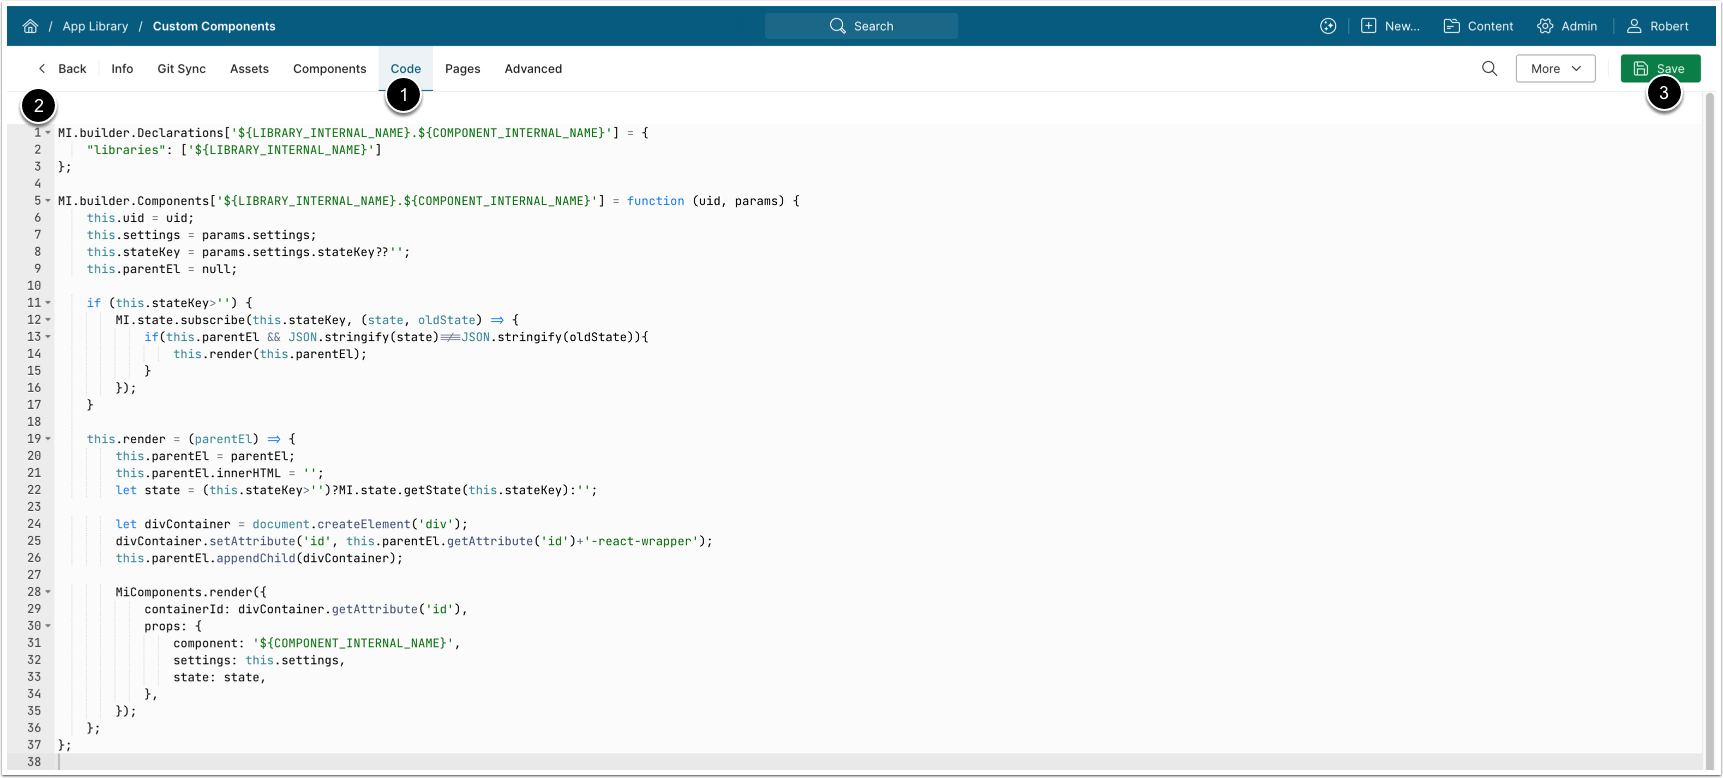
NOTE: The code that integrates the custom components into the App Builder can differ depending on the components architecture and library framework.
- For MI-developed custom components: Request the code for your custom components from support@metricinsights.com.
- For customer-developed custom components: See how to Write Code for React Custom Components.
- Access the Code tab.
- Enter the code for your custom components integration.
- [Save]
2. Use Custom Components in App Builder
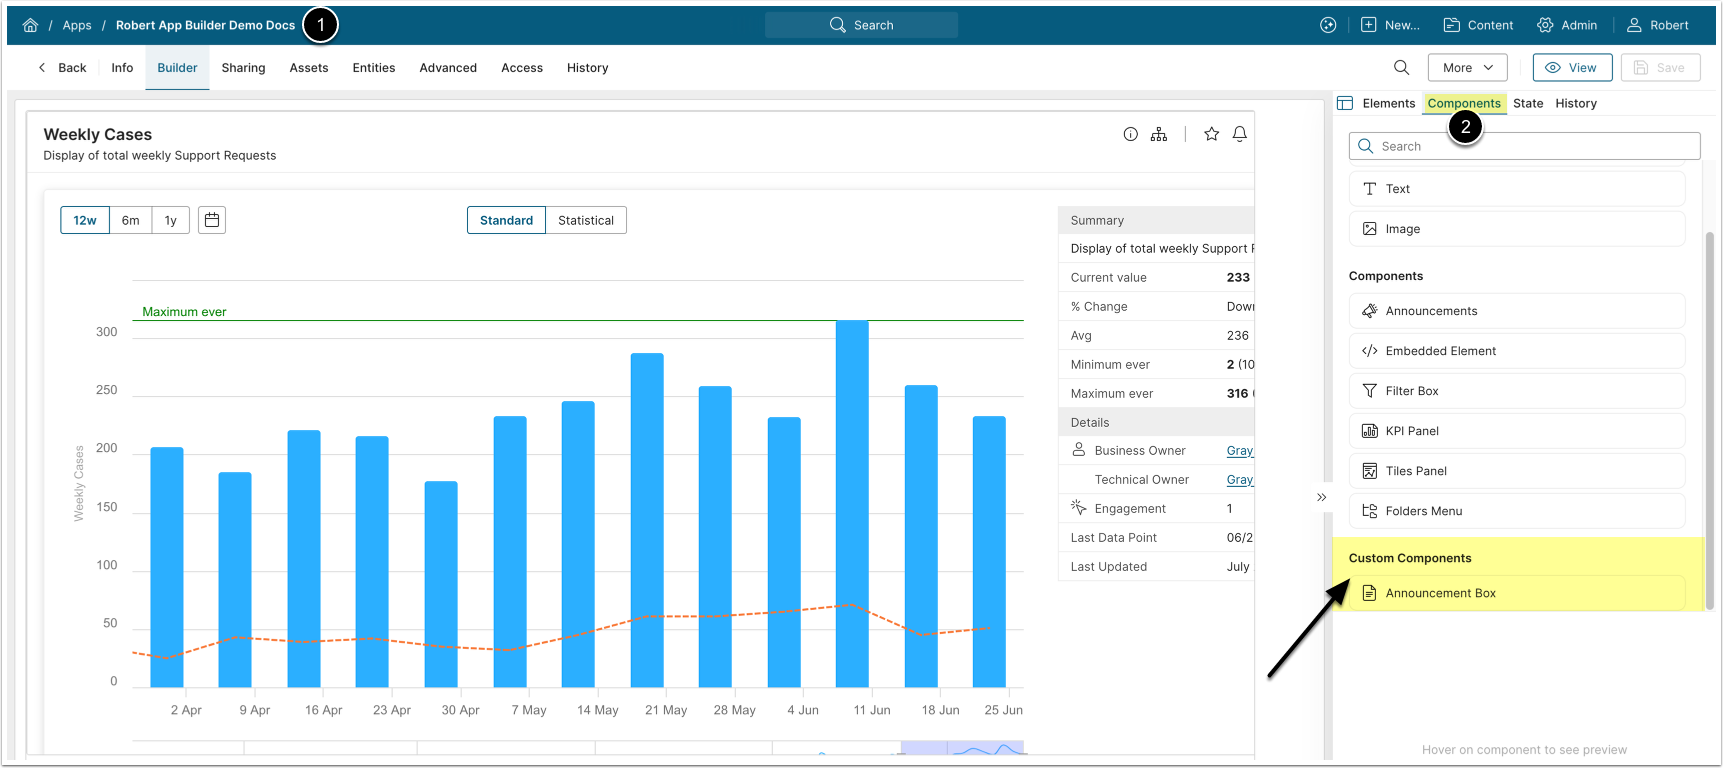
- Open an existing App that uses the App Builder, or create a new one.
- Open the Components tab. The added custom components are displayed at the bottom of the menu.