Portal Pages have been renamed to Apps in 7.1.0.
This article describes how to embed a Feedback Prompt on an App created from an App Template.
PREREQUISITES:
- Сreate an App Template
- Create an App to embed a Feedback Prompt
The process comprises the following steps:
1. Create a Feedback Prompt and Enable It
Access Content > Feedback Prompts
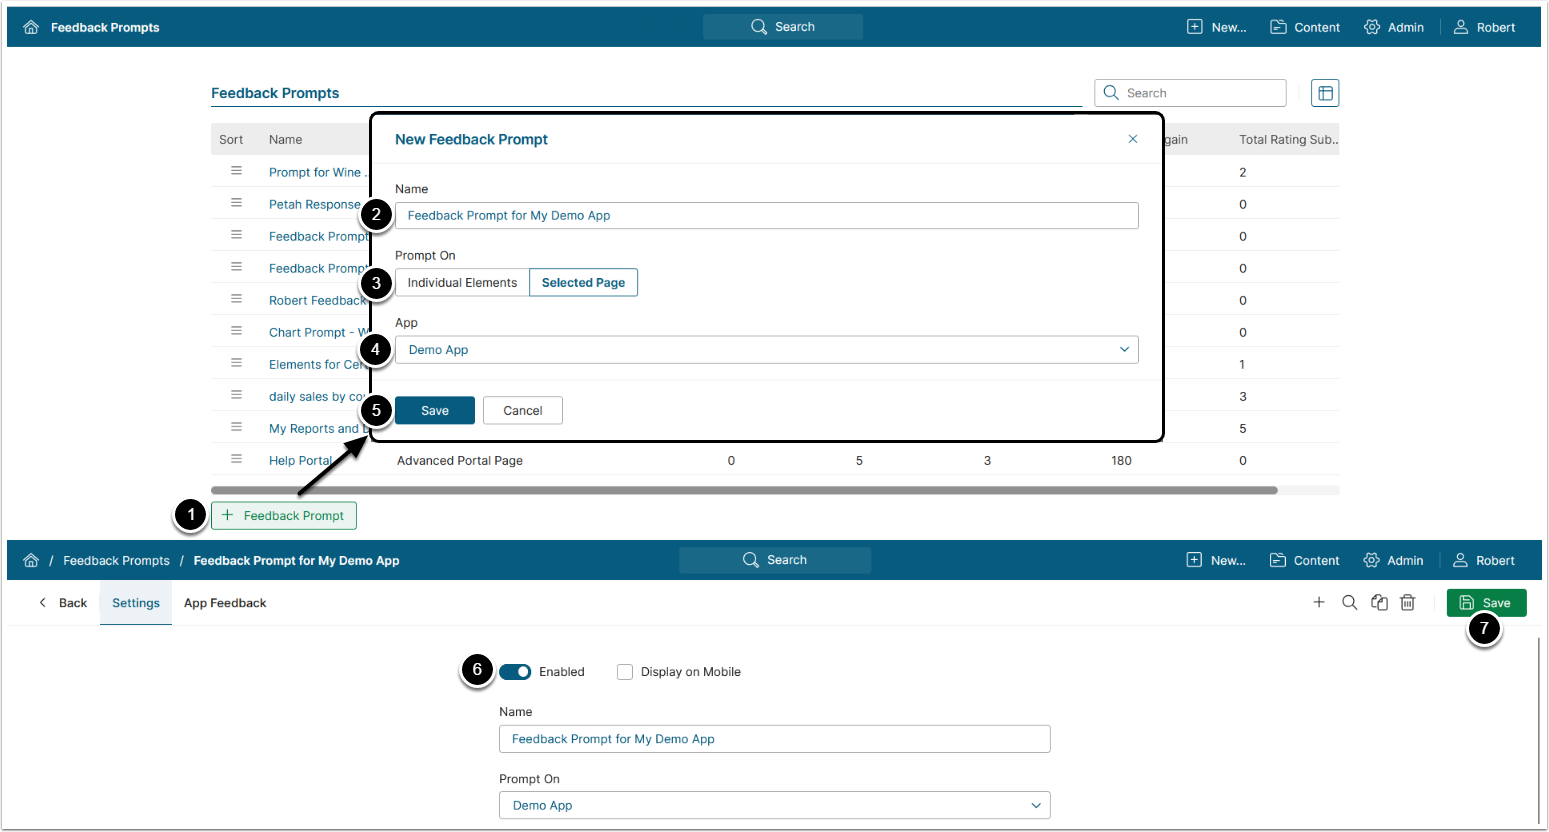
- [+ Feedback Prompt]
- Enter a Name for the Feedback Prompt
- Prompt on: Selected Page
- Select an App (Page) to utilize the Feedback Prompt
- [Save]
- Set the Feedback Prompt to be Enabled
- [Save]
For more details on Feedback Prompt configuration, see Create a Feedback Prompt.
2. Configure App Template Info
- For MI v7.1.0+: Access Content > Apps > Select an App > Info tab
- For MI versions prior to 7.1.0: Access Content > Portal Pages > Select a Portal Page > Info tab
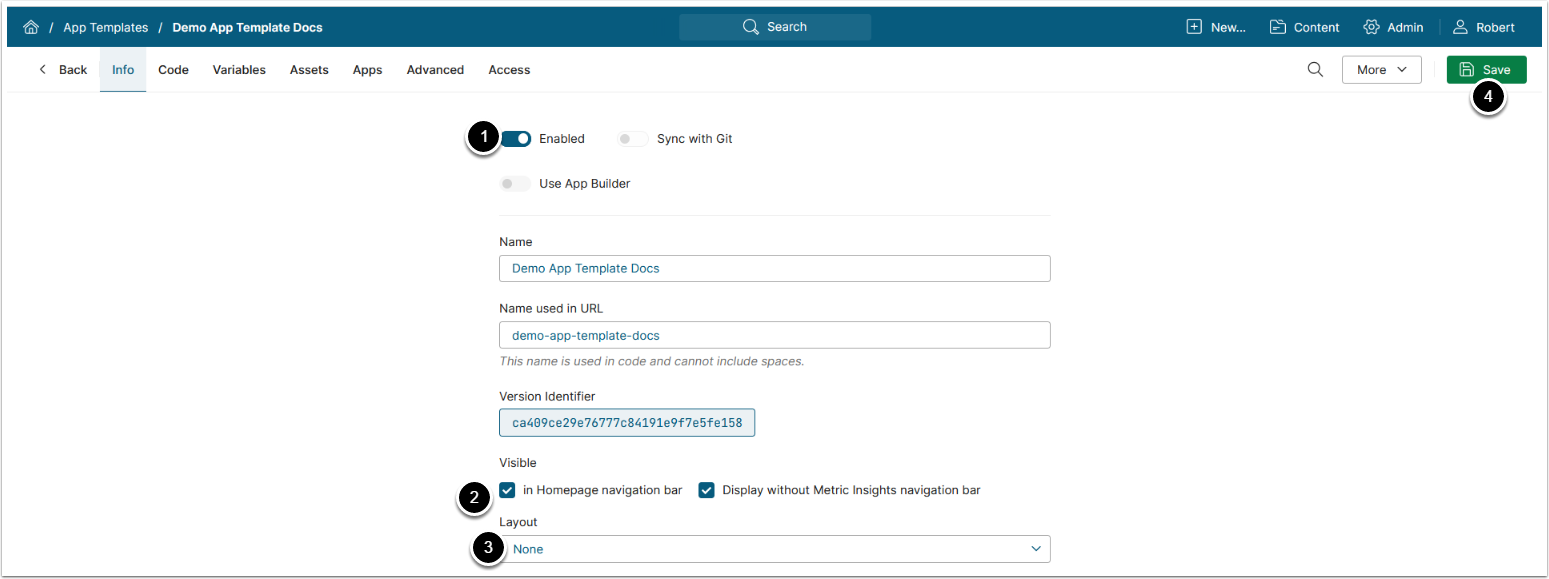
- Enable the App Template
- For v6: Activate Display without Metric Insights navigation bar
NOTE: In v7, if Display without Metric Insights navigation bar is activated, add the following code to your App Template:
<script src="/auth/info.js"></script>
<script defer="defer" src="/js/main.js"></script>
<link href="/css/main.css" rel="stylesheet">- Layout: None
- [Save]
3. Configure App Template Variables
Access the Variables tab

- [+ Variable]
-
Name: APP_NAME
- For MI v6, the Variable Name should be set to PAGE_NAME
- Type: Text
-
Default Value: Enter the Name used in URL of the App created from the current App Template. This App will display the Feedback Prompt
- See Overview of Apps for details on App configuration
- [Save Variable]
- [Save]
4. Configure App Template Code
v7
Access the Code tab
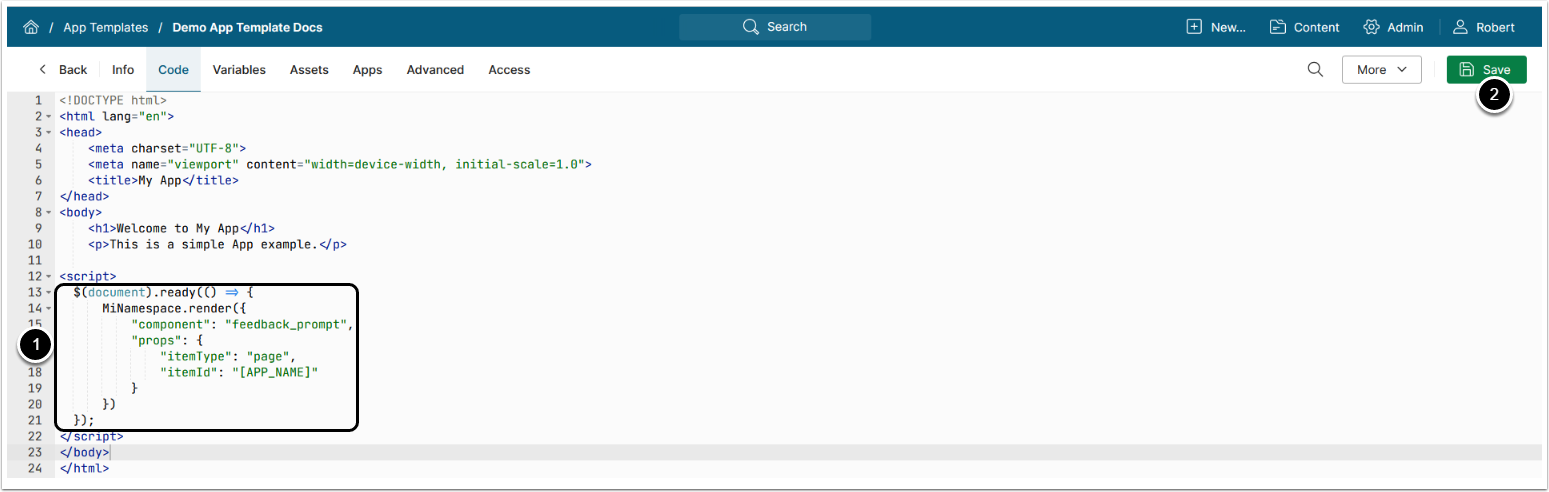
- Paste the following code snippet to the App Template's code:
$(document).ready(() => {
    MiNamespace.render({
        "component": "feedback_prompt",
        "props": {
            "itemType": "page",
            "itemId": "[APP_NAME]"
        }
    });
});- [Save]
v6
Access the Code tab
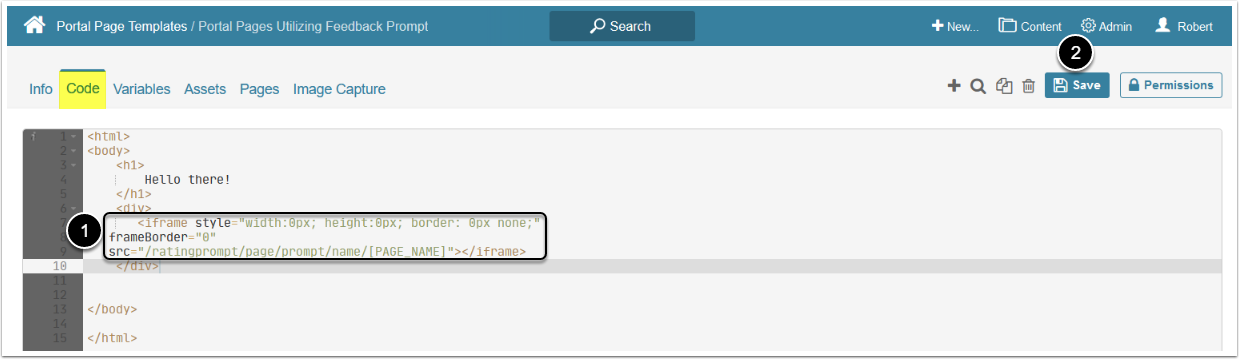
- Paste the following code snippet to the Portal Page Template's code:
<div>
 <iframe style="width:0px; height:0px; border: 0px none;"
   frameBorder="0"
   src="/ratingprompt/page/prompt/name/[PAGE_NAME]"></iframe>
</div>- [Save]
5. Access the App with a Feedback Prompt
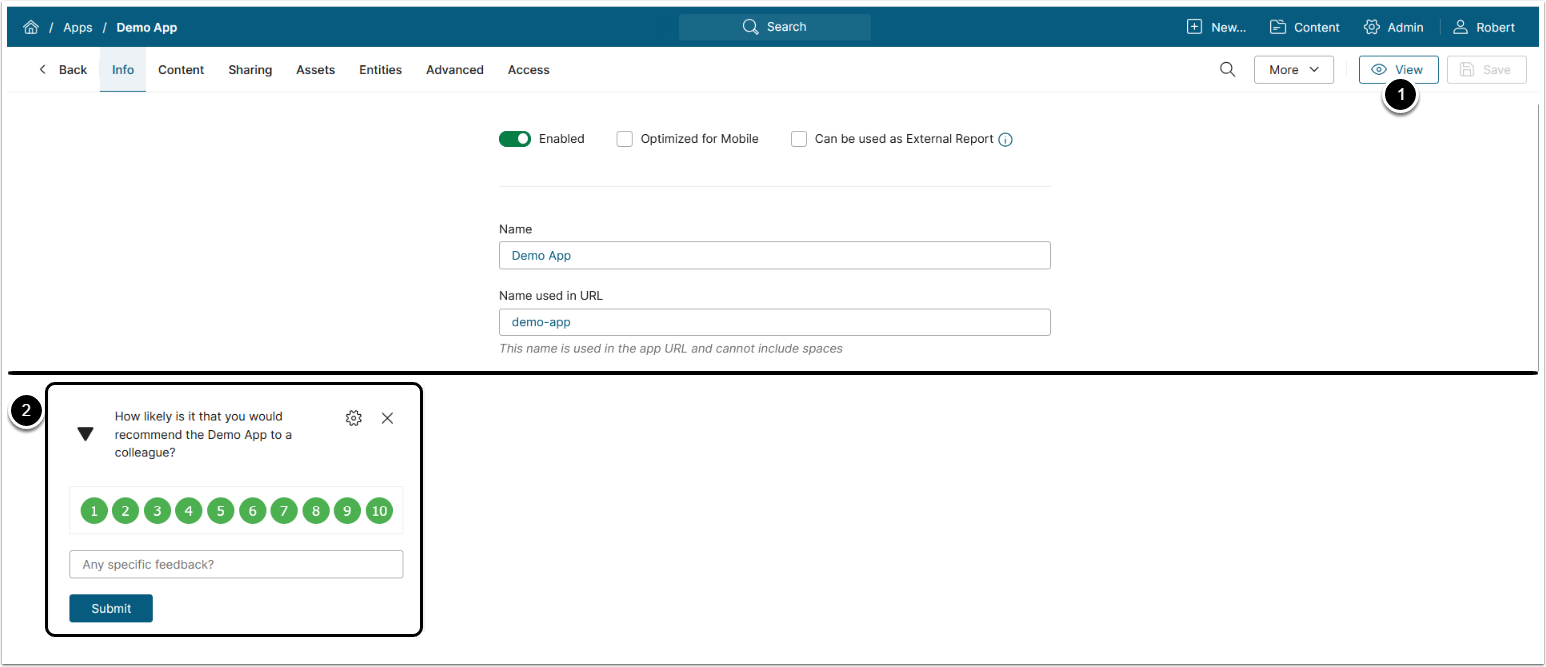
Access the App created from the current App Template. The Name used in URL of this App was utilized in the App Template Variables configuration.
- [View]
- The Feedback Prompt is displayed on the App