Portal Pages have been renamed to Apps in 7.1.0.
Portal Page Developer Helper allows you to write code for Apps in any IDE and then import it to your Metric Insights application as an App Asset. Also you can launch your App on localhost before applying any changes to the actual App's code.
PREREQUISITE:
- Install Node.js
Table of contents:
1. Create App Template and App
1.1. Create App Template
For MI v7.1.0+: Access Content > Apps > Templates tab
For MI versions prior to v7.1.0: Access Content > Portal Pages
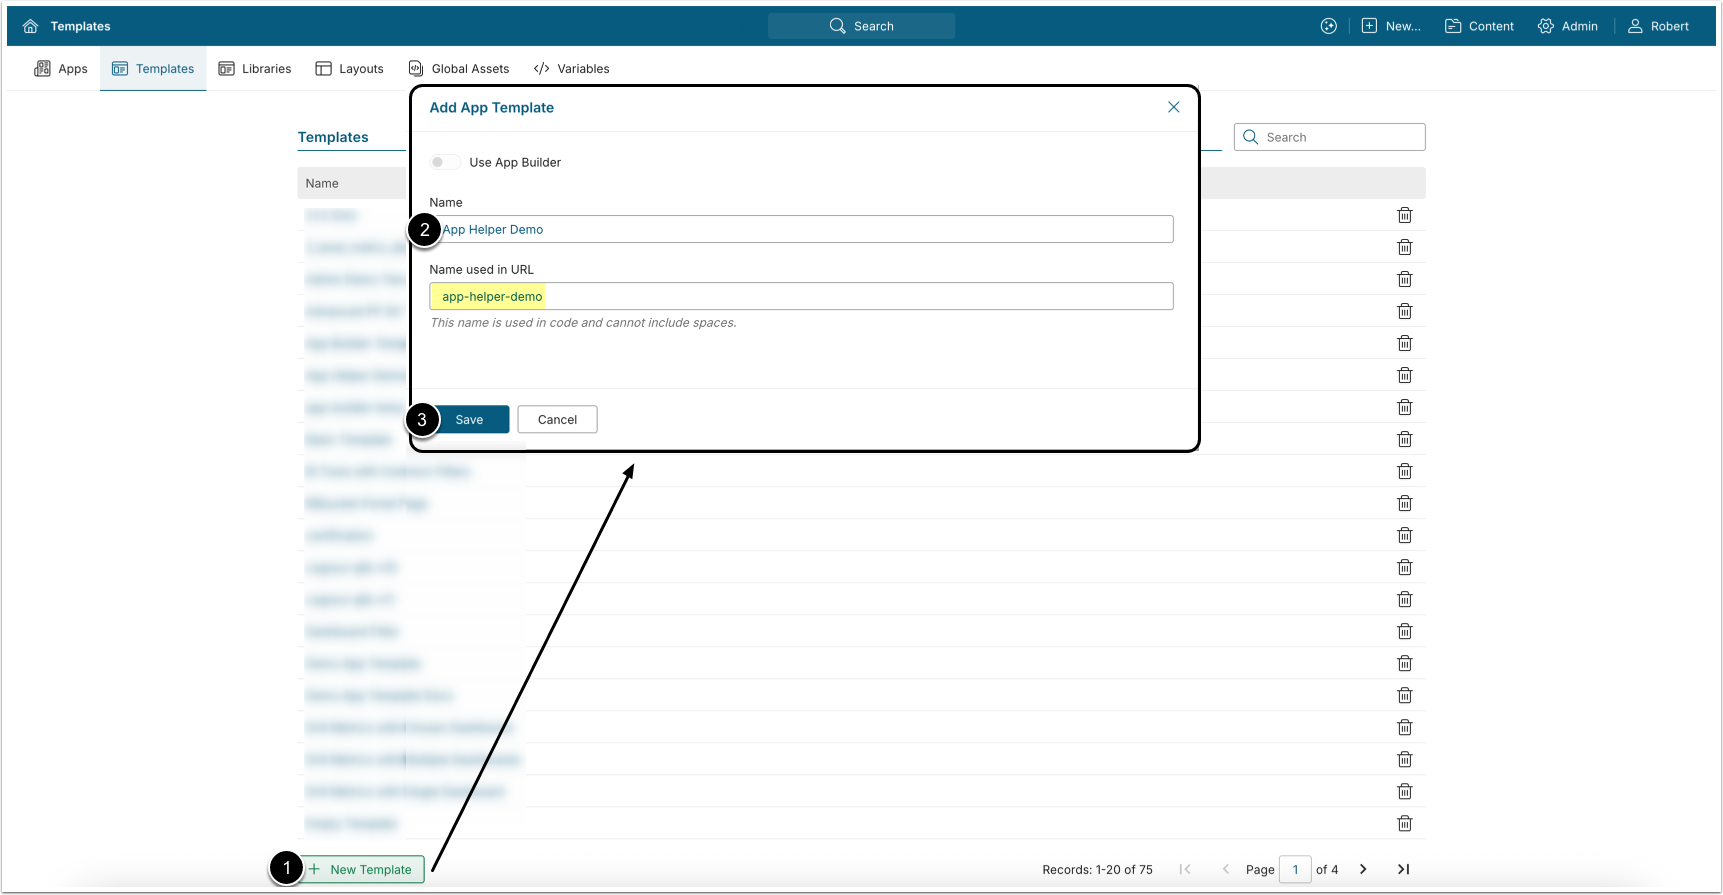
- [+ New Template]
- Name: Enter a name for the App Template.
- [Save]
1.2. Create App
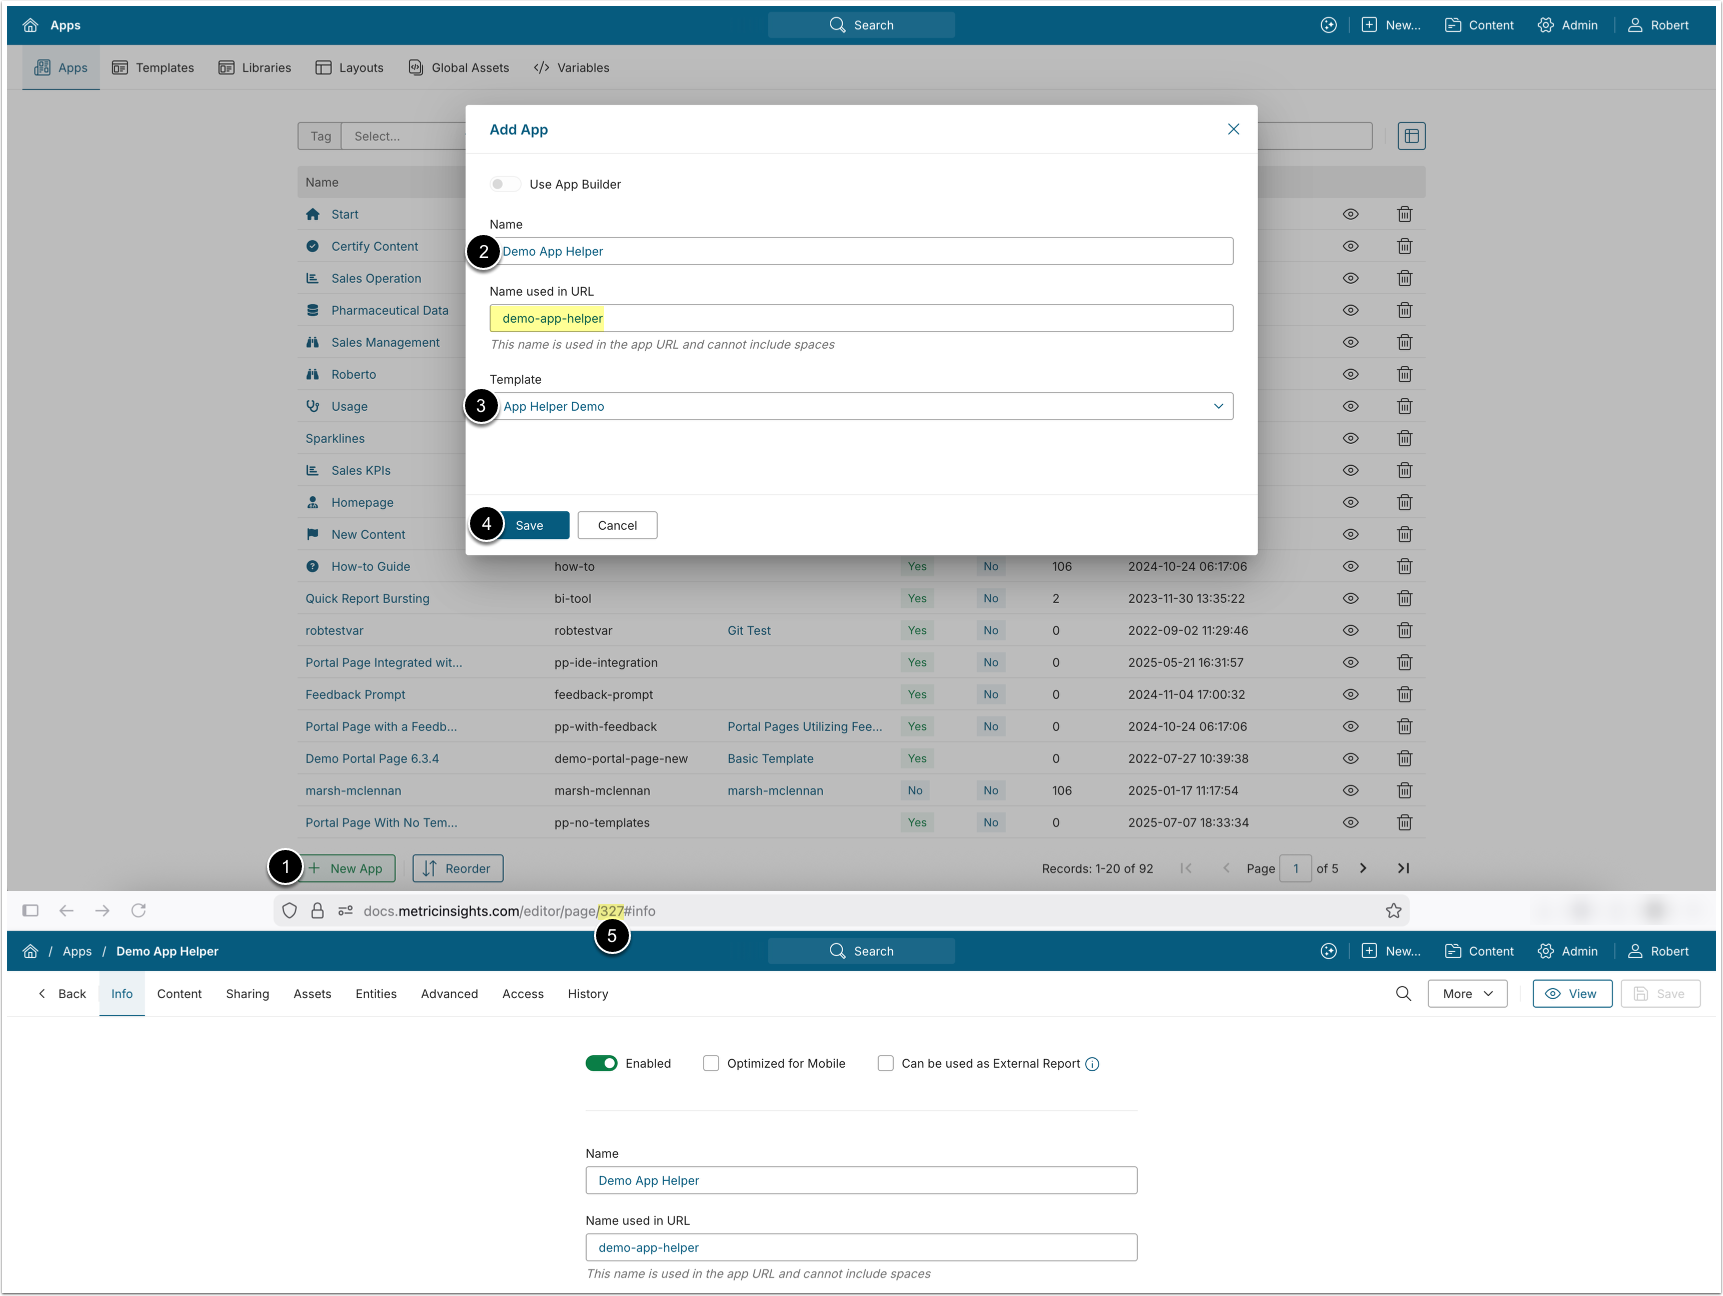
- [+New App]
- Enter an App Name, this will automatically generate the Name used in URL.
- Note the Name used in URL down, it will be needed later for integration configuration.
- Select the previously created App Template.
- [Save], this will open the created App.
- Copy and note down the App's ID from the URL, this value will also be needed for further configuration.
NOTE: See Overview of Apps (Portal Pages) for general information on configuring Apps.
2. Initialize New Project
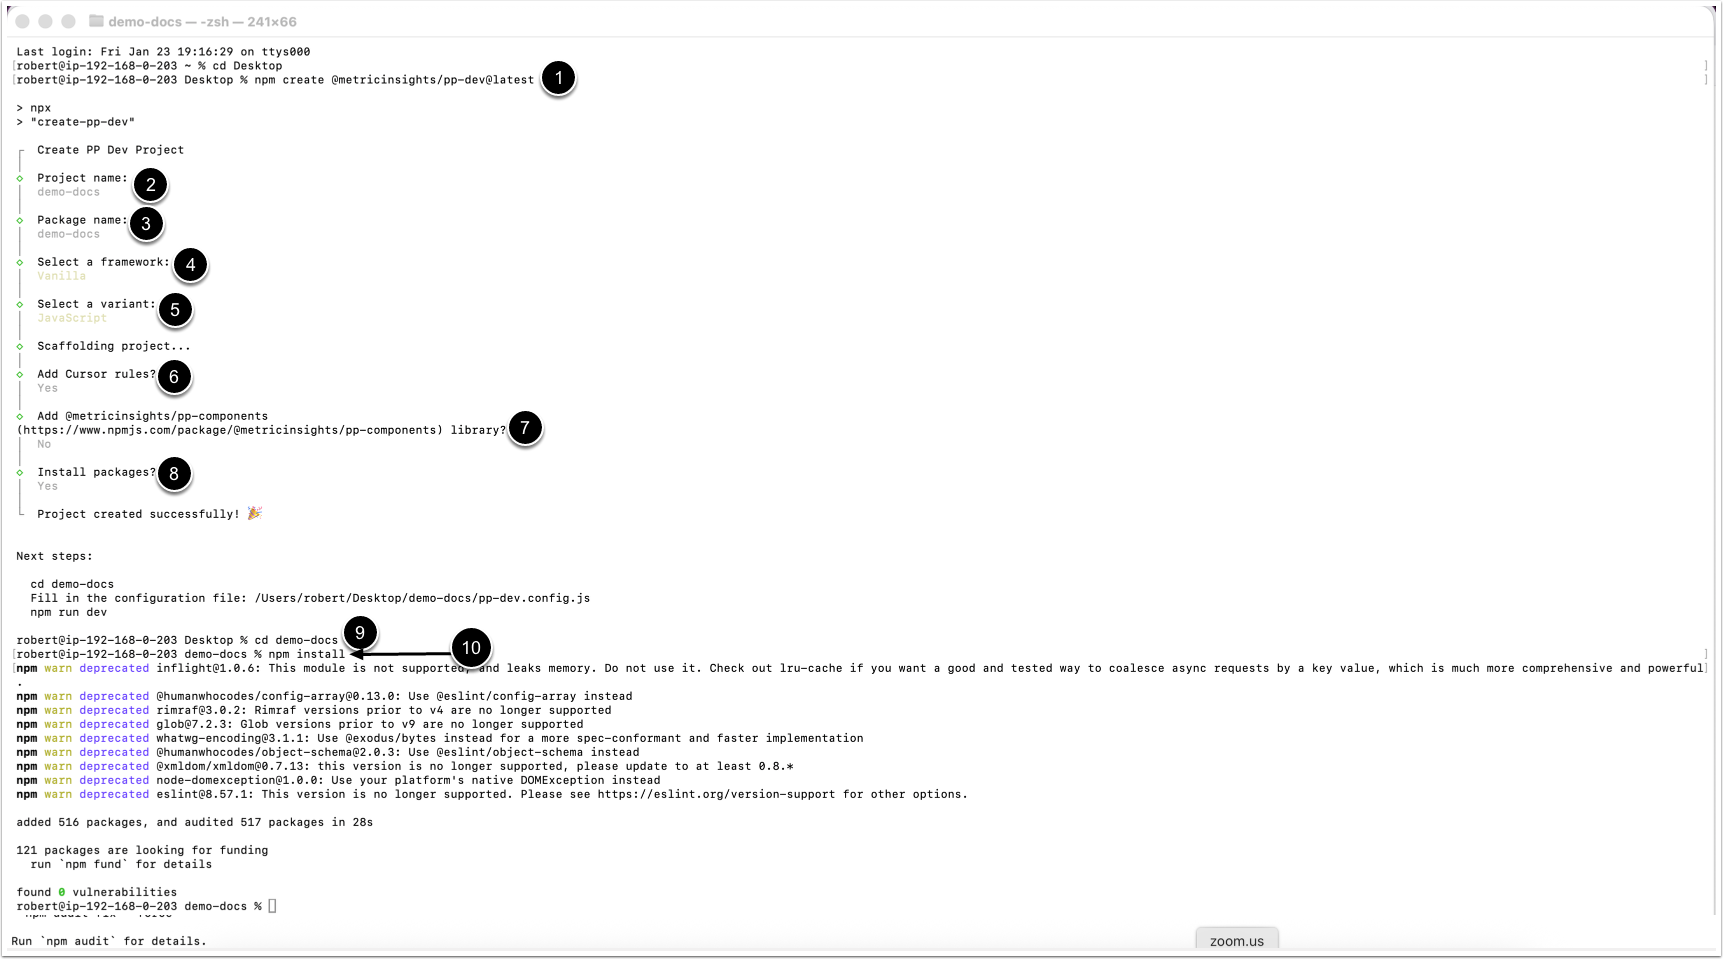
- Start scaffold:
npm create @metricinsights/pp-dev@latest- Name your project.
- Name the package: Enter the App's Name used in URL value.
- Select a framework.
- Select a language variant.
- Choose whether to add Cursor rules.
- Choose whether to add MI components.
- Choose whether to install
npmpackages. - Switch to the project directory:
cd <project name>- Run
npm install
3. Open App Directory in IDE
4. Modify Config File
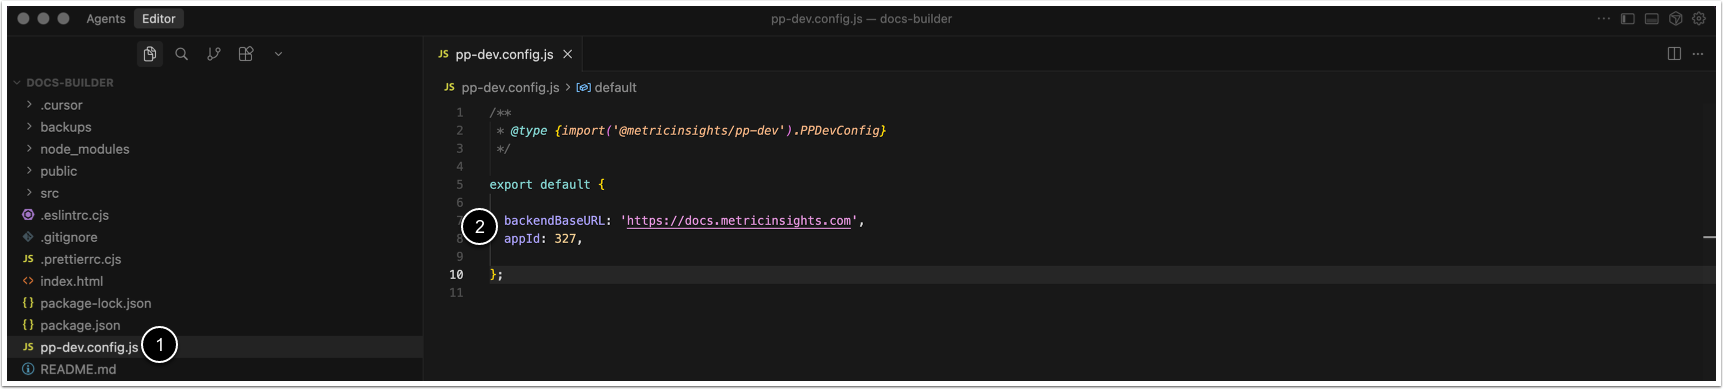
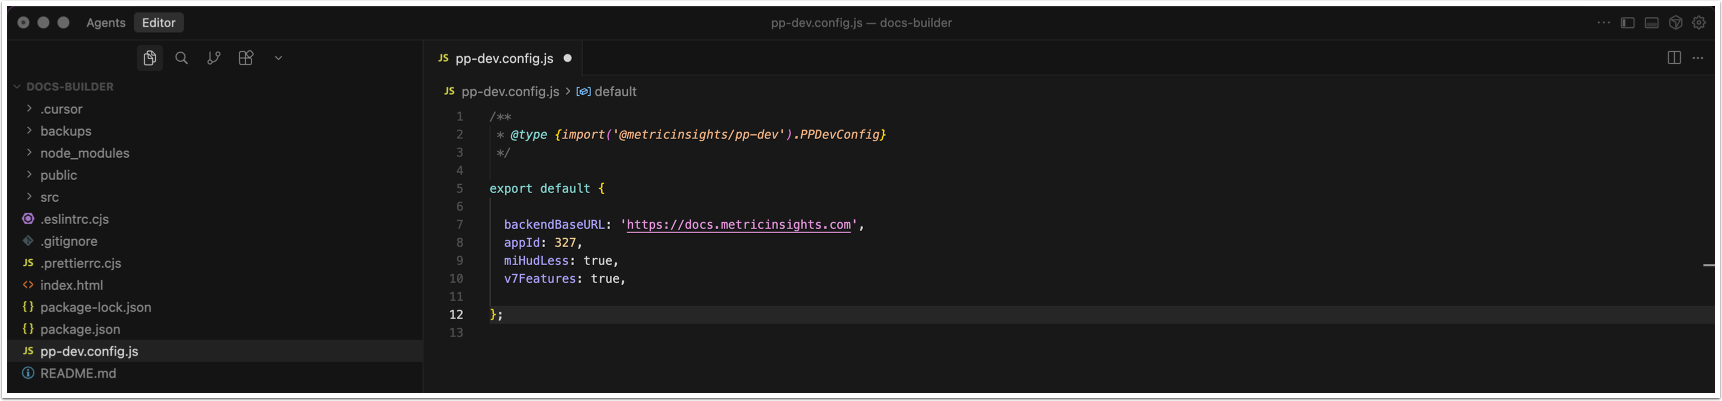
Note: File extension of the config file pp-dev.config may vary depending on the options selected on project initialization.
- Open the config file
pp-dev.config - Enter values for the parameters:
backendBaseURL(string): The URL of your MI instance.appId(integer): The ID of the previously created App.portalpageIdparameter is deprecated, useappIdinstead.
Save the entered data.
4.1. Configure Optional Parameters
Modify the config file pp-dev.config with optional parameters described in the table below.
| Parameter | Value Type | Default Value | Description |
| miHudLess | boolean | false |
|
| integrateMiTopBar | boolean | false | Integrates the Metric Insights Top Bar and required scripts into the app build.
This parameter can be utilized for the following use-cases:
|
| templateLess | boolean | false |
|
| enableProxyCache | boolean | true | Enables caching of proxied requests to reduce the number of back-end calls. The cache stores resources such as stylesheets and images.
|
| proxyCacheTTL | integer | 600000 | Proxy cache time-to-live in milliseconds.
|
| disableSSLValidation | boolean | false | Disable SSL certificate validation for
proxy requests. |
| imageOptimizer | boolean | object | true | Control image optimization.
|
| outDir | string | dist | Output directory for builds. |
| distZip | boolean | object | true | Controls whether build output is zipped. Can be an object to configure output directory and file name. Object
options: {
outDir?: string,
outFileName?: string
} |
| syncBackupsDir | string | backups | Directory used to store asset backups synchronized from the Metric Insights server. |
| v7Features | boolean | false | Enable Metric Insights v7 features:
|
| personalAccessToken | string | process.env.MI_ACCESS_TOKEN | Personal Access Token used to authenticate with the Metric Insights instance.
MI_ACCESS_TOKEN=your_token_here |
5. Configure package.json File
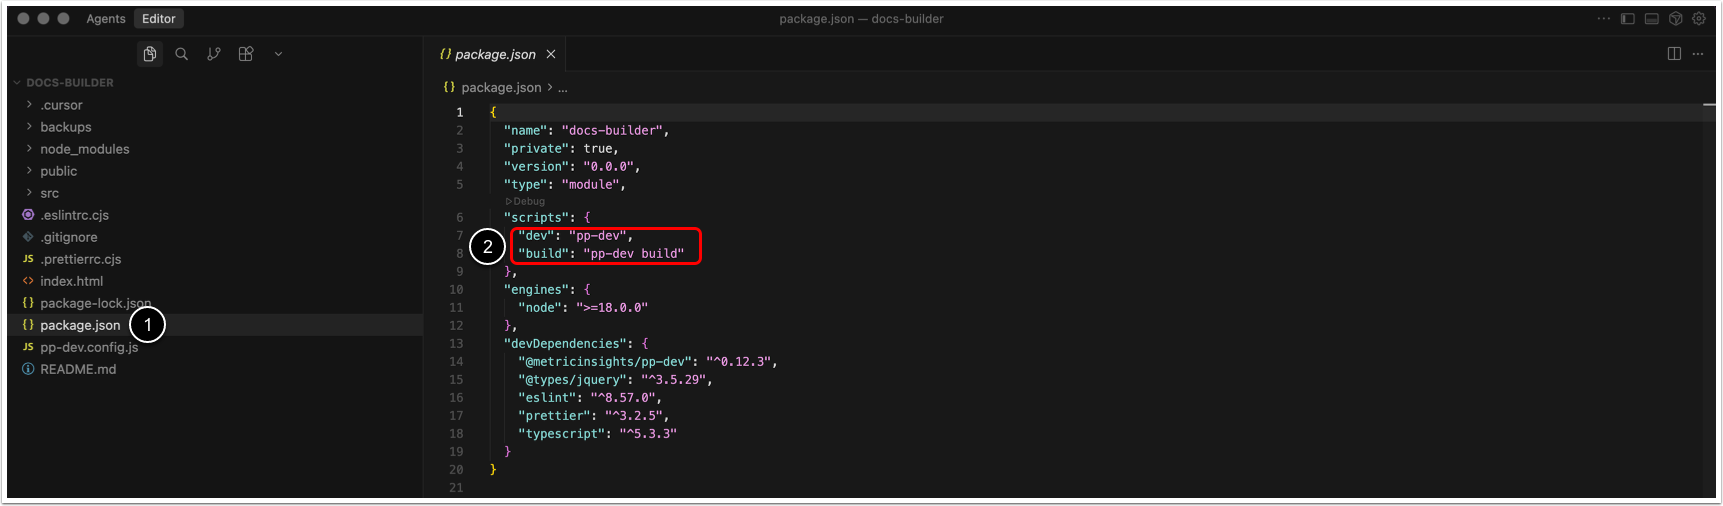
- Open
package.json - Add the following code to the
scriptsproperty:
"dev": "pp-dev",
"build":"pp-dev build"
Save the config file.
6. Create Content for App
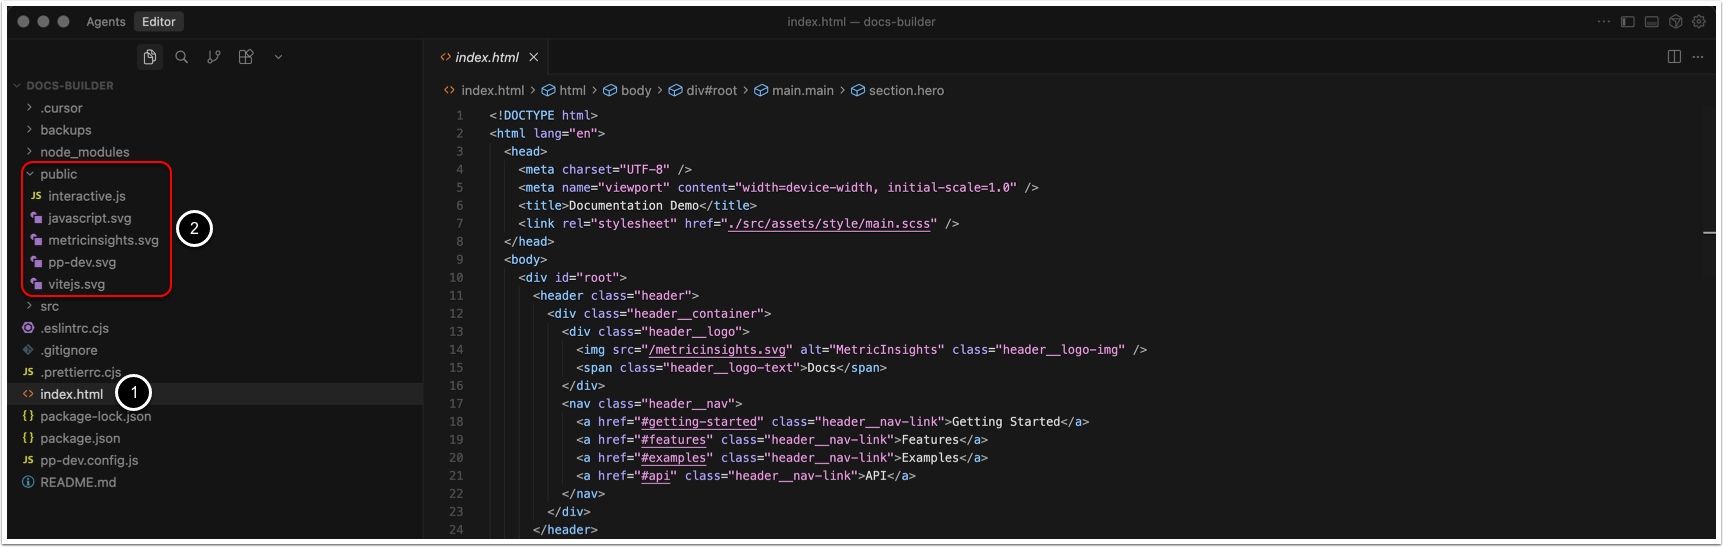
Note: Files that are not used in the App are not transferred to the archive with App assets. The exception is the directory public.
- Enter the App's code in the
index.htmlfile. - Optionally, create a directory named
publicthe contents of which are transferred to the archive with App assets regardless of being utilized in the App.- The contents of the
publicfolder are transferred to the root of the archive with App assets. However, you can create folders inside thepublic, these folders and their contents will be transferred to the archive's root.
- The contents of the
7. Open App Locally
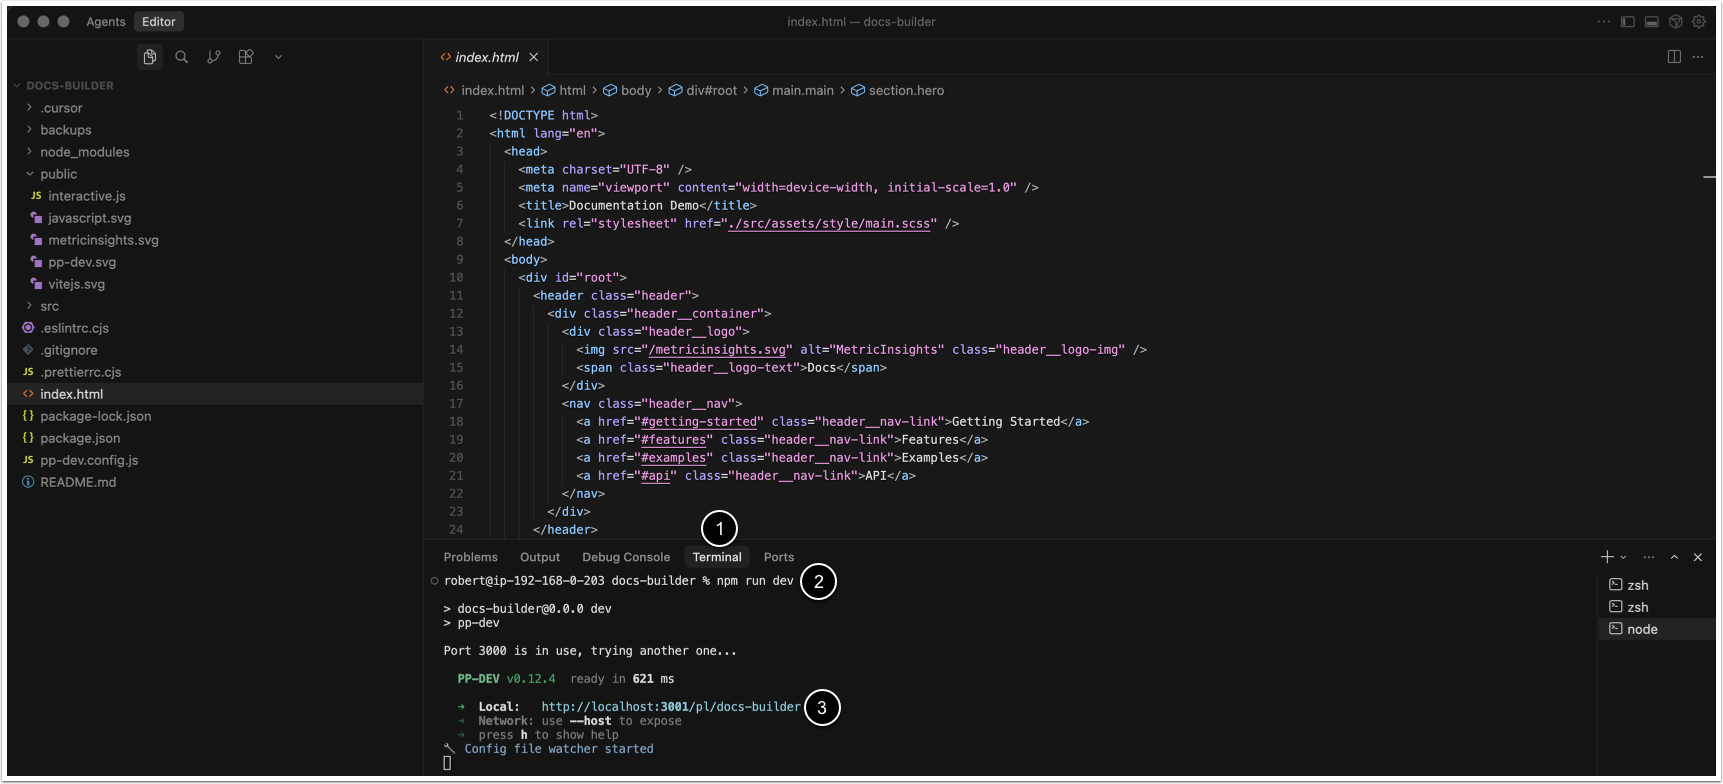
- Open Terminal.
- Run
npm run dev- Optionally, press h to open console shortcuts.
- Ctrl + click on the local link or copy and open it in the browser.
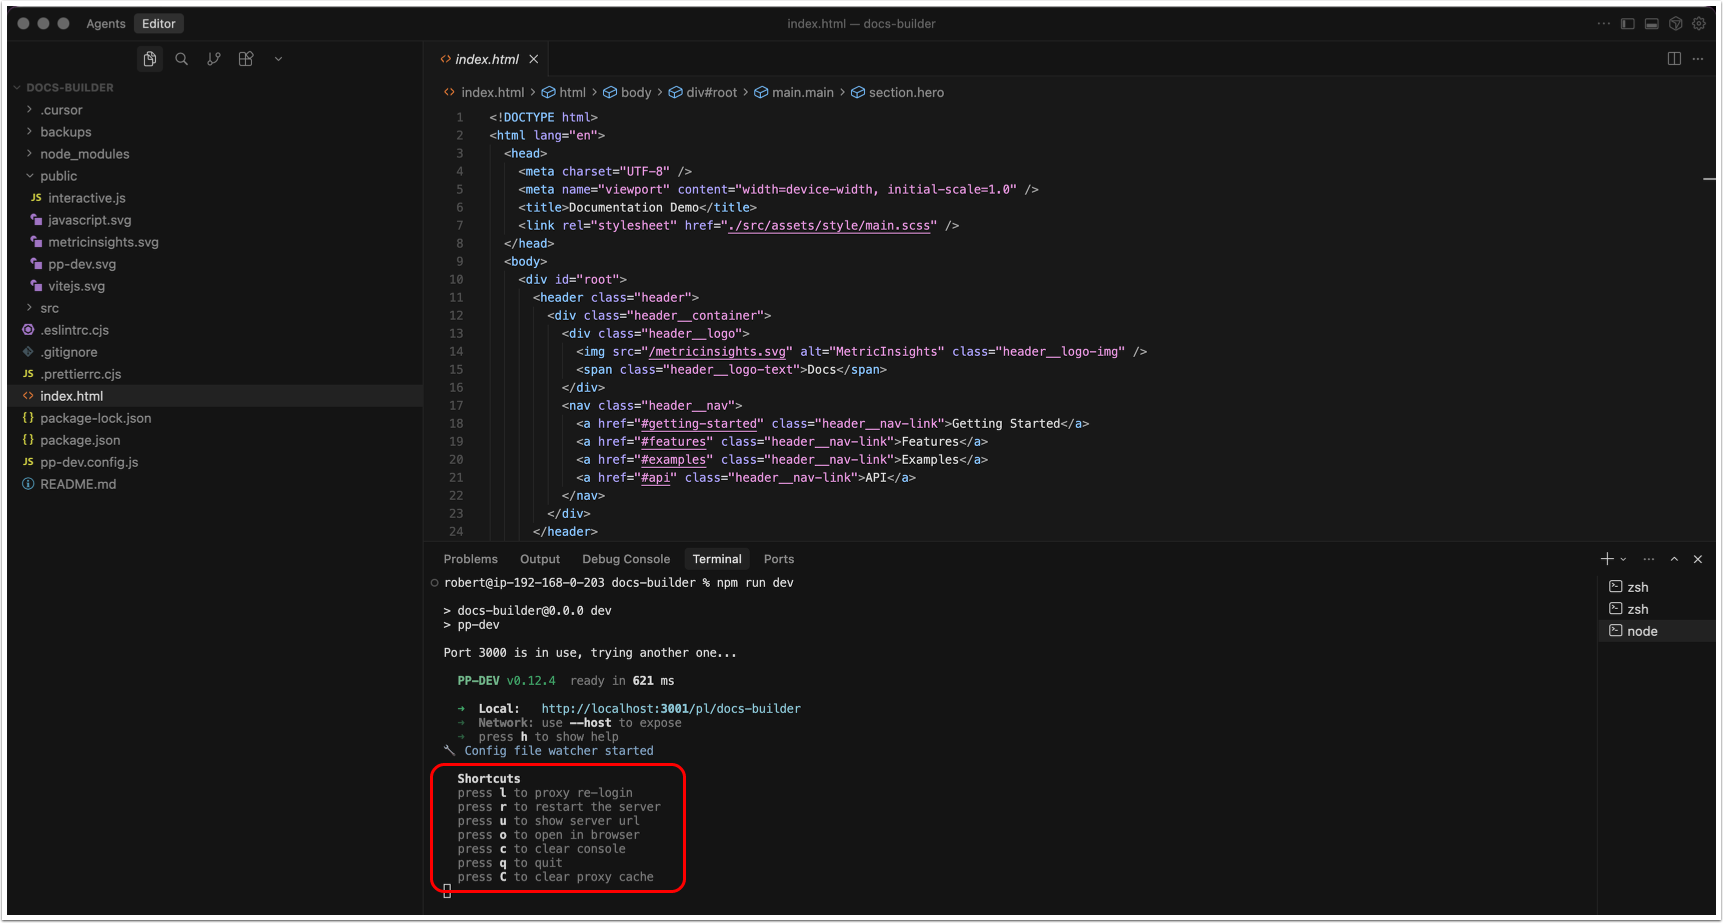
NOTE: The shortcuts are currently not available for Next.js
The following console shortcuts are available:
- l: Re-login to the proxy server.
- r: Restart the server.
- u: Show server URL.
- o: Open in browser.
- c: Clear console.
- q: Quit.
- C: Clear proxy cache.
8. Log In to Metric Insights
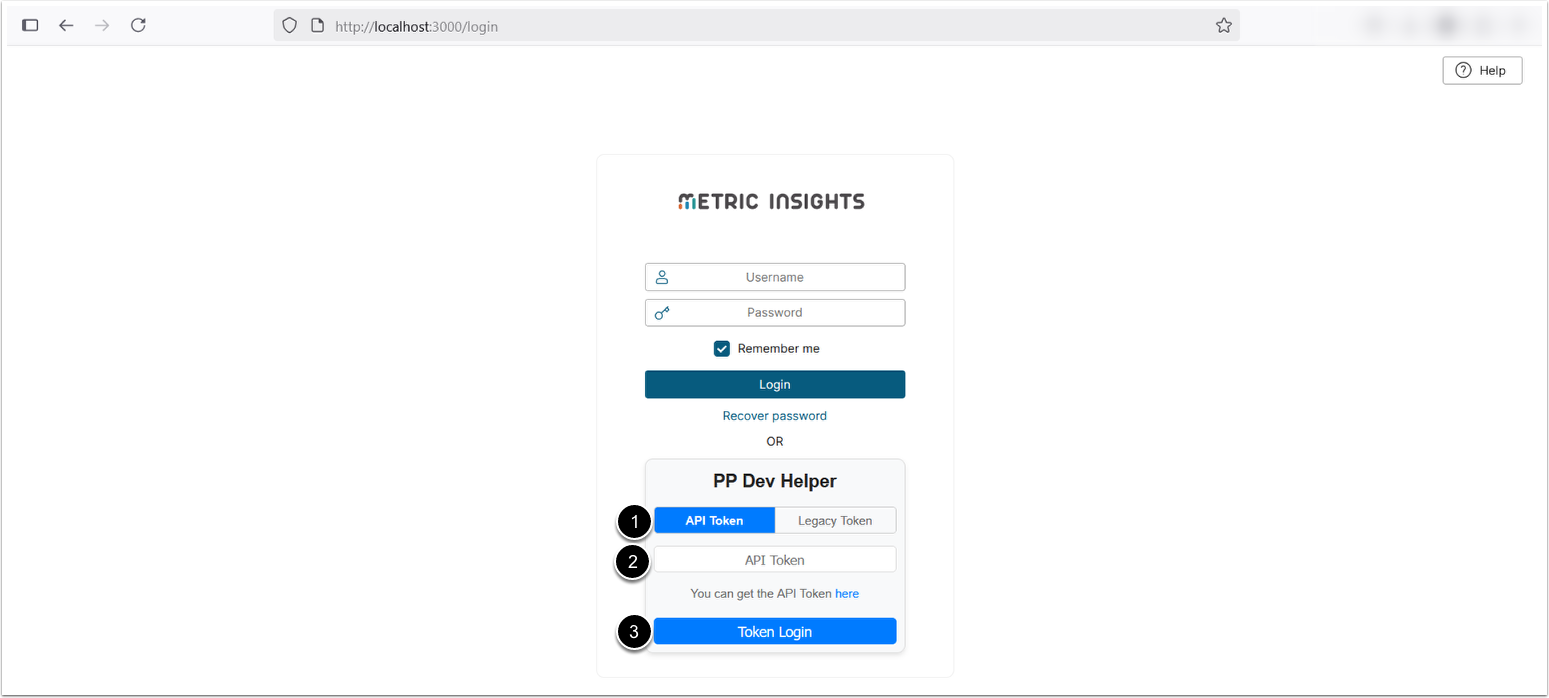
- Choose whether to log in with the Personal API Token, or Legacy Token.
- Enter the selected API Token.
- [Token Login]
9. View Opened App Locally And Work With Tool Panel
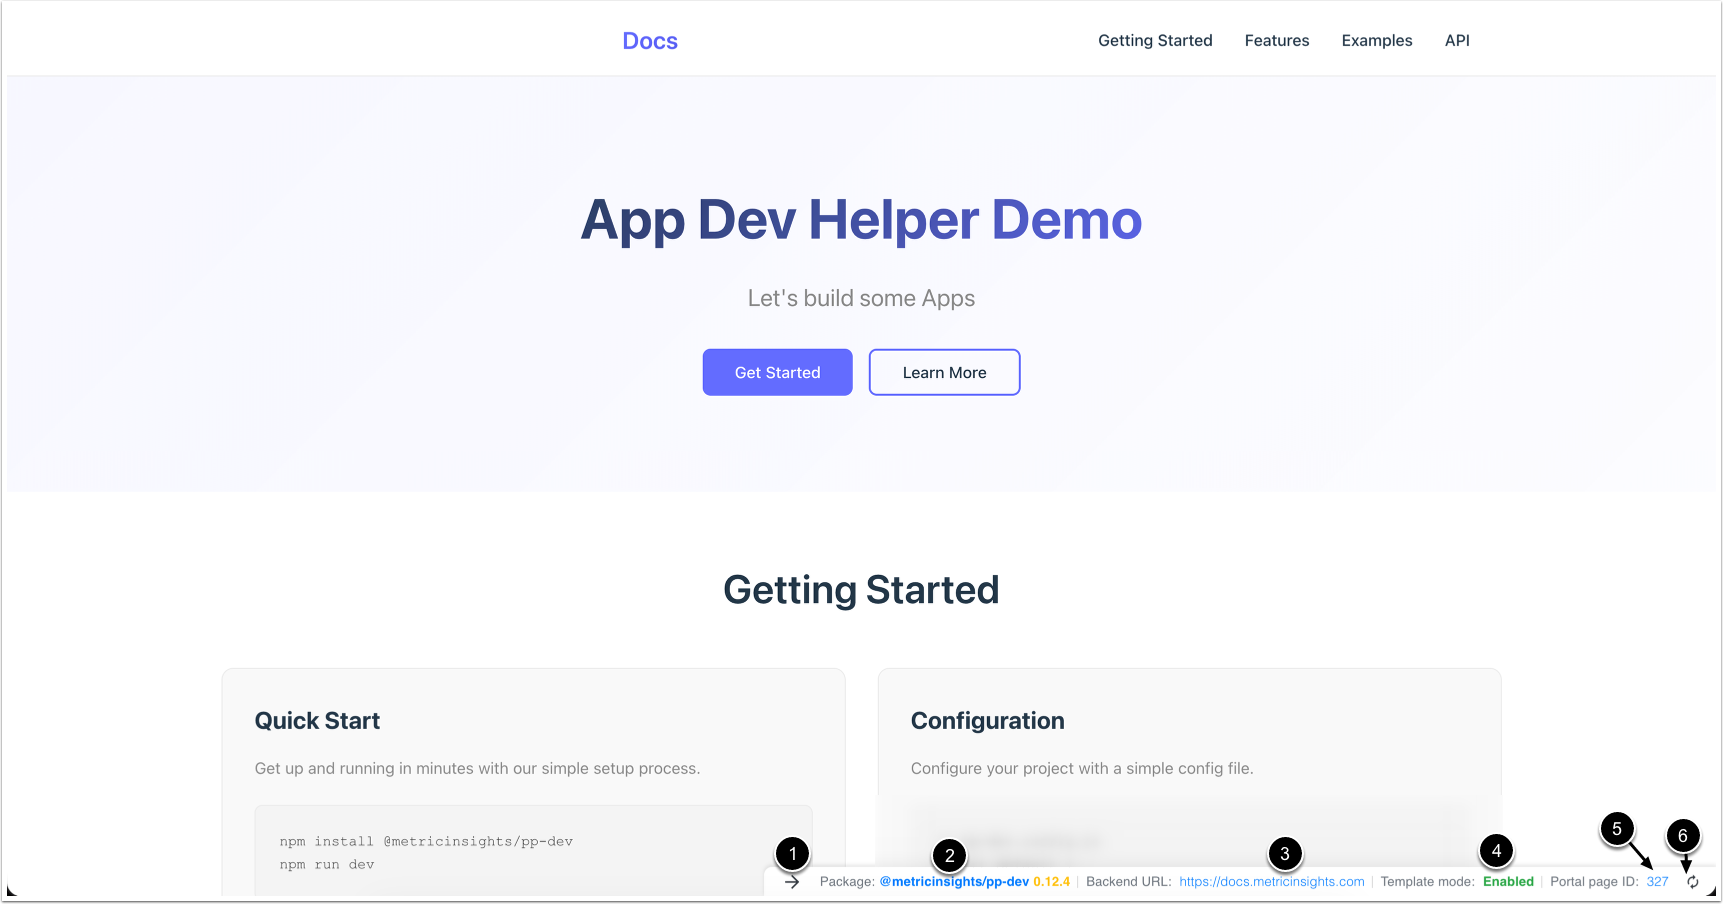
Once the App is opened, the Portal Page Developer Helper tool panel is displayed at the bottom-right corner of the screen with its controls:
- Hide tool panel.
- Open link to the npm package of the Portal Page Developer Helper.
- Open link to the Metric Insights instance.
- Shows whether or not the Template mode is enabled. This is controlled by the templateLess parameter.
- Open link to the App on the Metric Insights instance.
- Uploads assets to the backups directory and upload them to the MI instance specified in the config file.
10. Build App Assets
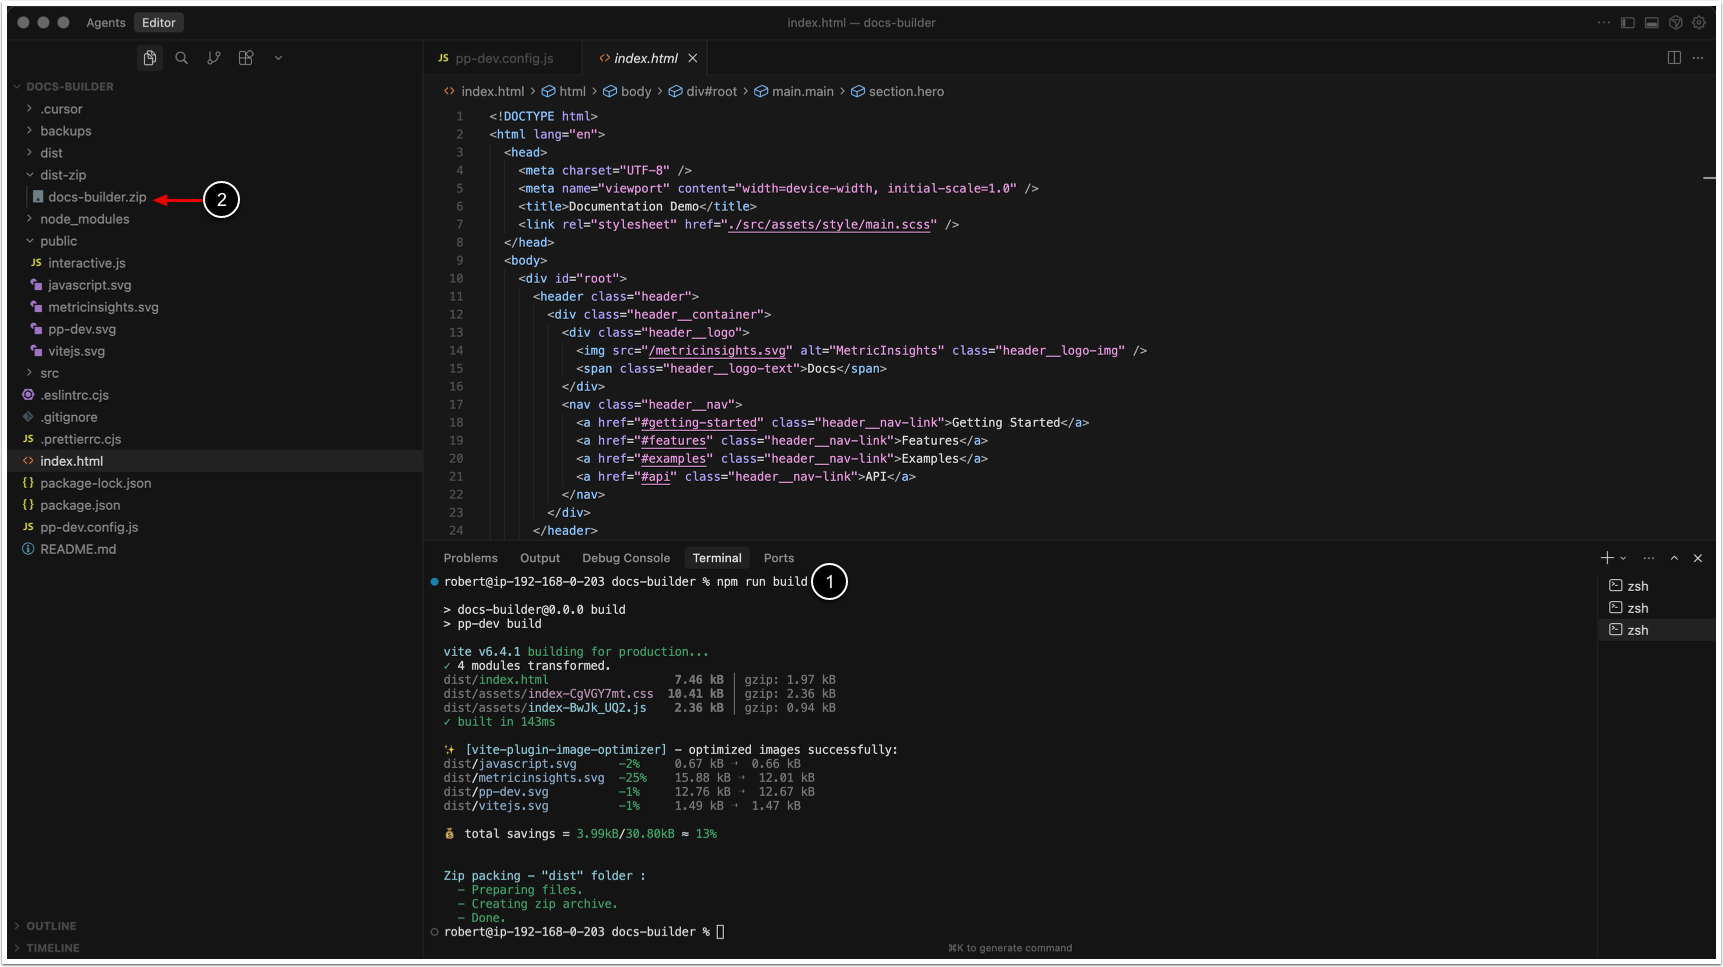
- Execute
run npm buildin the terminal. - Folder
dist-zipis created and contains a zip archive with App's assets and contents of the public directory. This archive can be uploaded to the Metric Insights' instance.