This article describes configuration of an App handling Snowflake OAuth authentication. The described approach applies to Metric Insights v7.1.0+ and comprises the following steps:
- Define a Custom Script that makes API calls to Snowflake and returns obtained access tokens to the App:
- The Custom Script sends a request to the Snowflake token endpoint using the Client ID and Client Secret. These credentials are securely stored as Custom Script Parameters, with the Client Secret encrypted.
- The Custom Script handles token exchange using authorization code (for first-time authentication), or refresh token (for renewing access).
- The obtained access token is stored as an App Entity and can be accessed via the Entity API.
- Create an App Template and App to interface with the Custom Script:
- The App Template serves as a blueprint for creating Apps with different parameter values, avoiding the need to duplicate code.
- The App initiates authentication using the Snowflake OAuth authorization endpoint with the configured Client ID and redirect URI.
- The App provides the user interface to trigger OAuth authentication and retrieve tokens from Snowflake.
Table of contents:
NOTE: The names of Custom Script, App Template, App, and associated Variables, Parameters, and Entities must exactly match the names specified in the instructions below for the configuration to function.
1. Configure Custom Script
1.1. Create New Custom Script
Access Admin > System > Custom Scripts
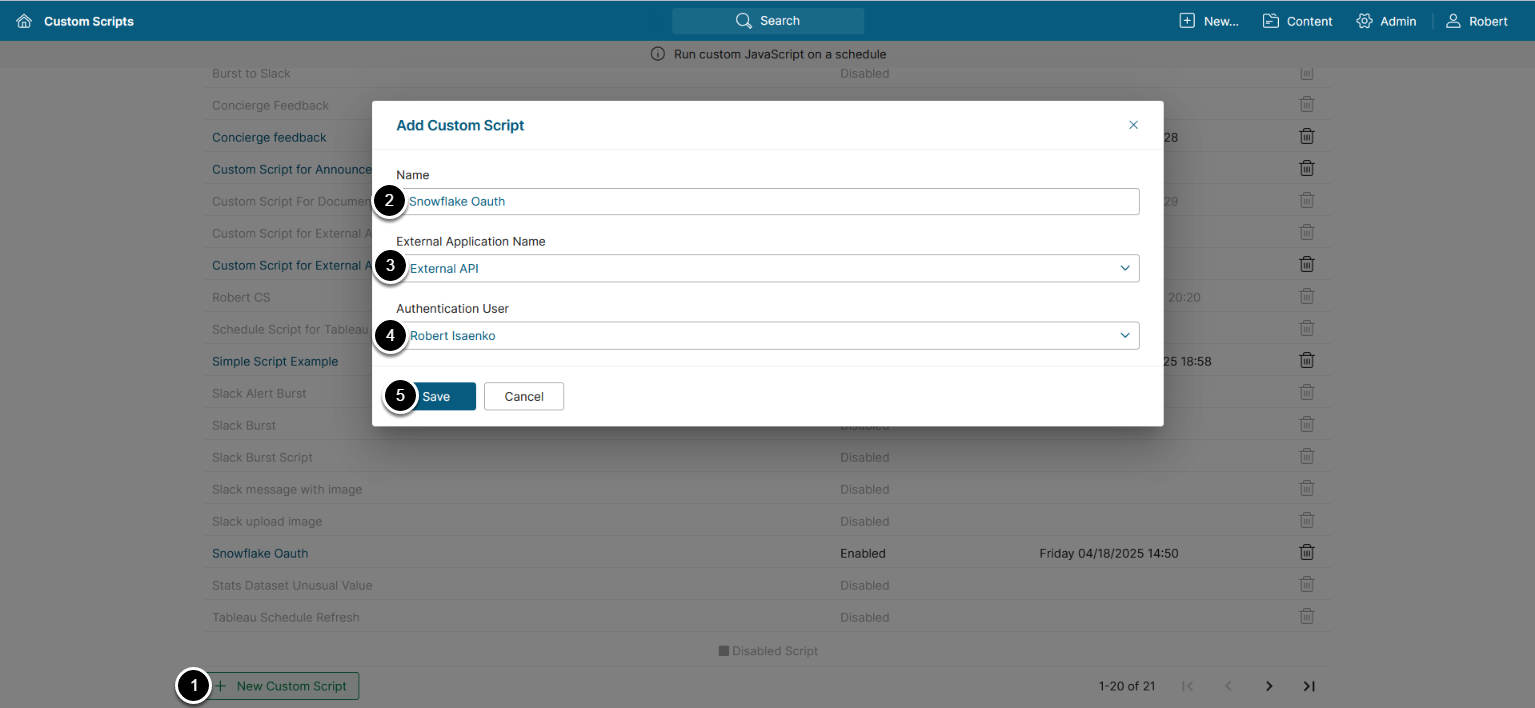
- [+ New Custom Script]
- Name: Snowflake Oauth
- External Application Name: Choose an External Application to automatically generate an API token for the Custom Script.
- Authentication User: Choose a User on whose behalf the Custom Script will operate.
- [Save]
NOTE: See Configure Custom Scripts for more details.
1.2. Add Custom Script Parameters
1.2.1. Add clientId Parameter
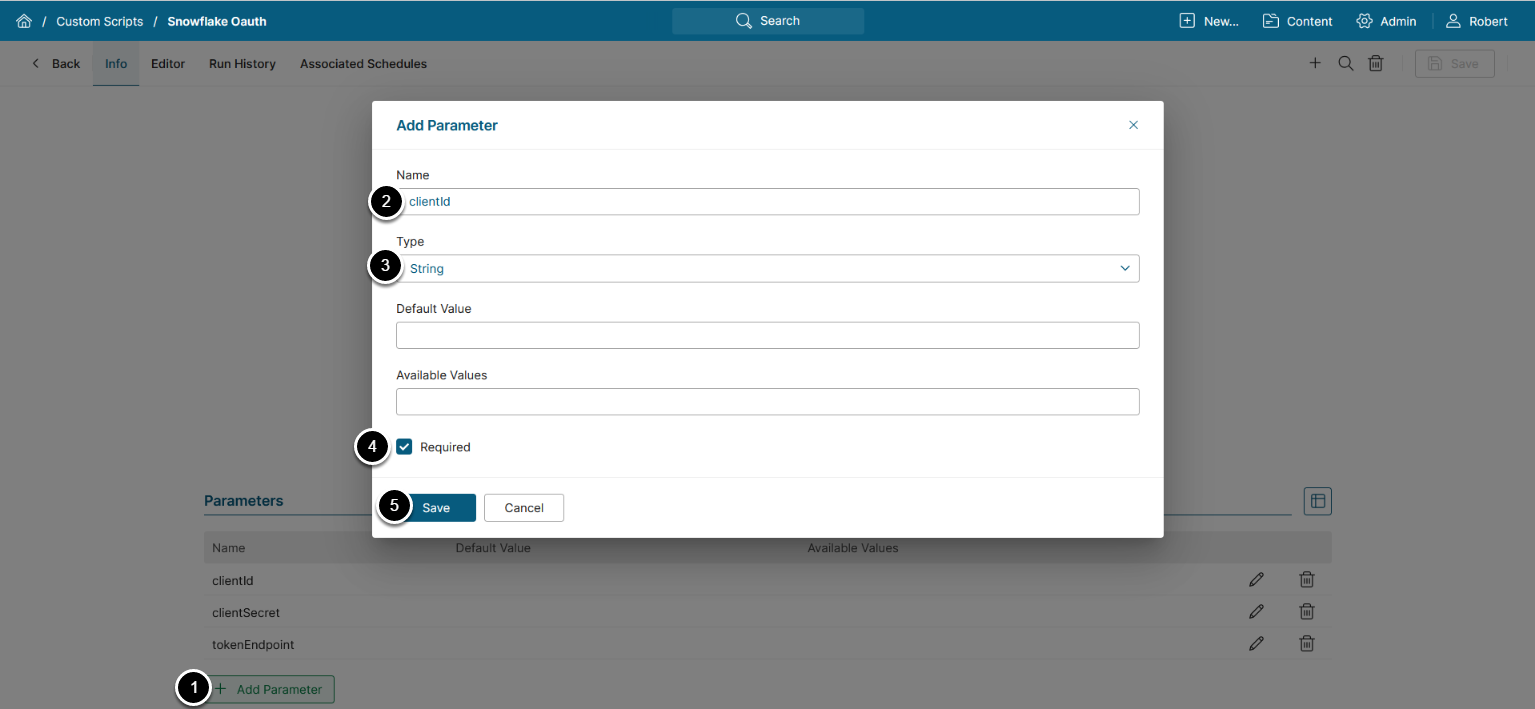
- [+Add Parameter]
- Name: clientId
- Type: String
- Activate the Required checkbox
- [Save]
1.2.2. Add clientSecret Parameter
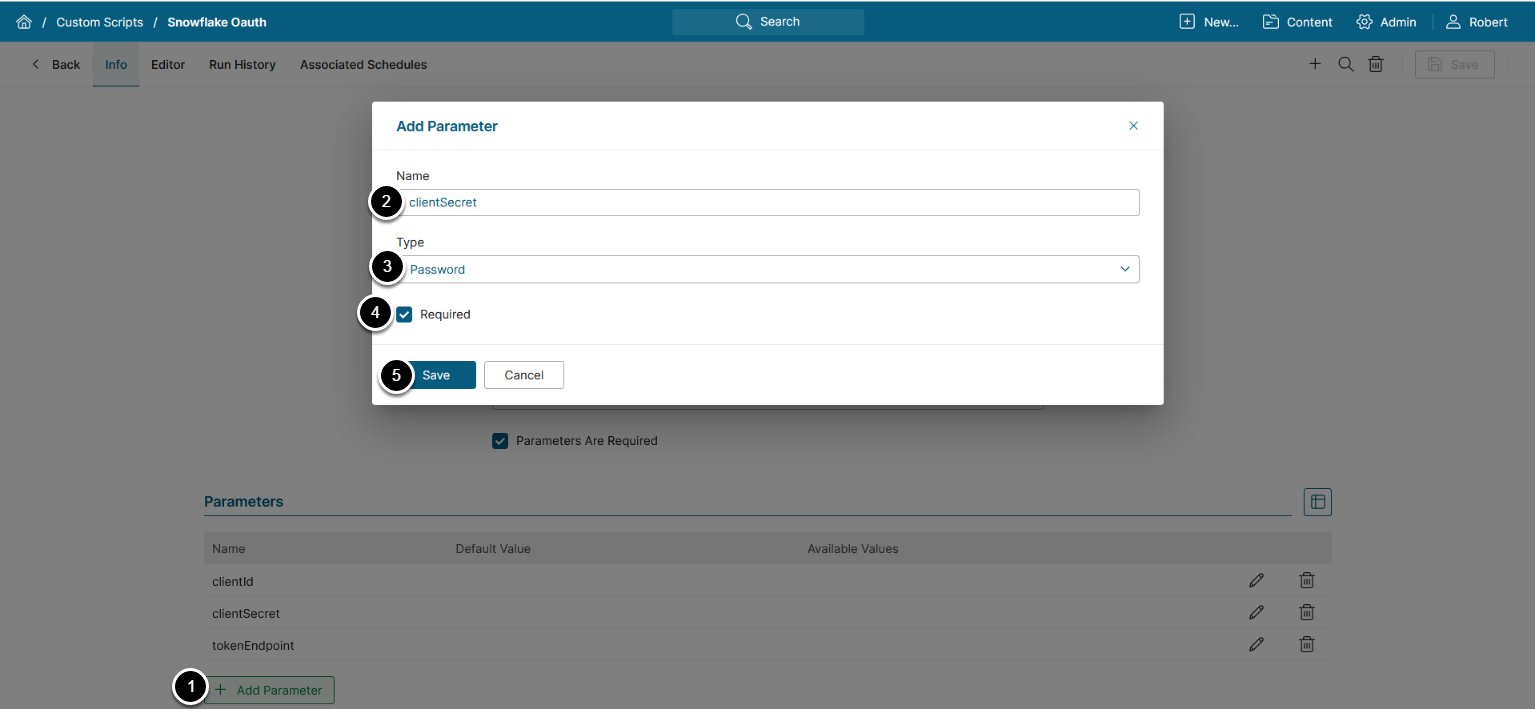
- [+Add Parameter]
- Name: clientSecret
- Type: Password
- Activate the Required checkbox
- [Save]
1.2.3. Add tokenEndpoint Parameter
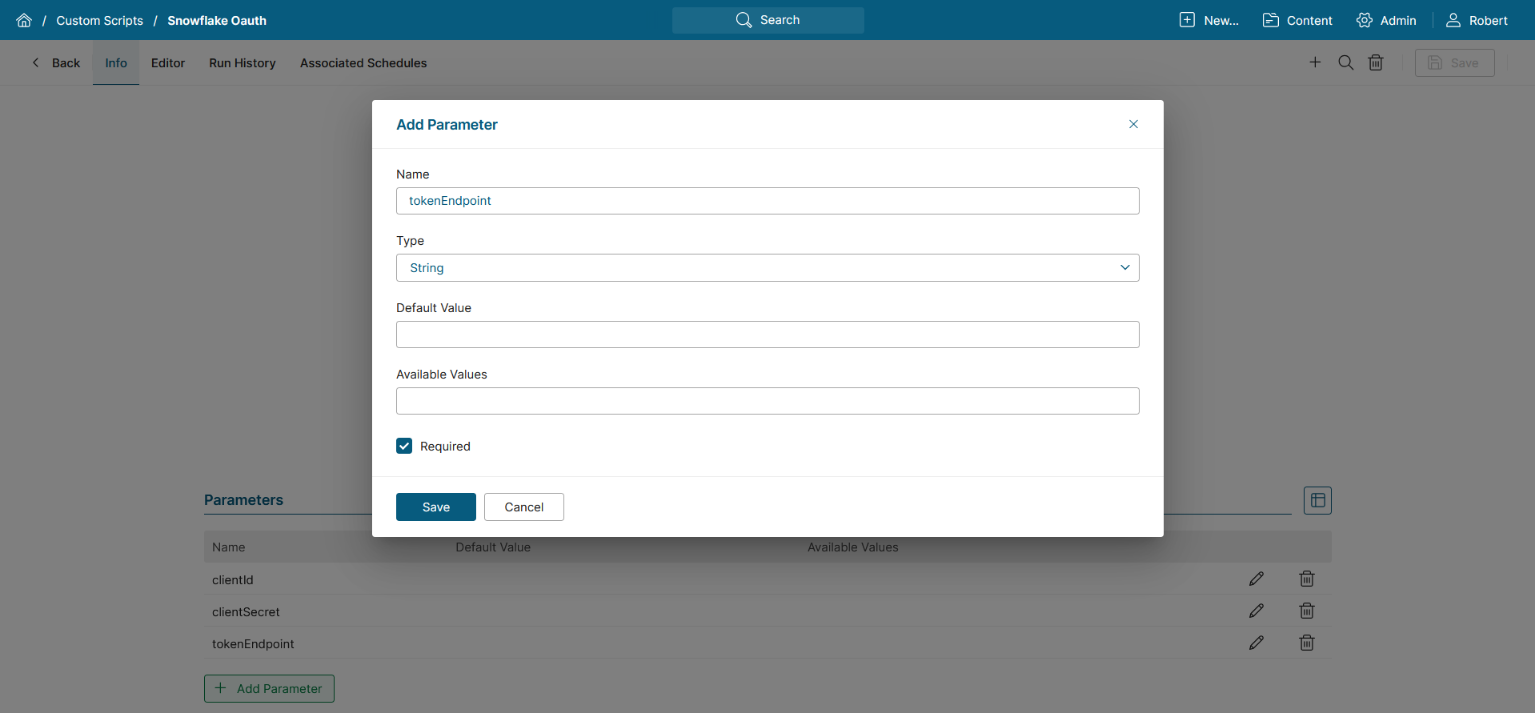
- [+Add Parameter]
- Name: tokenEndpoint
- Type: String
- Activate the Required checkbox
- [Save]
1.3. Add Parameter Set
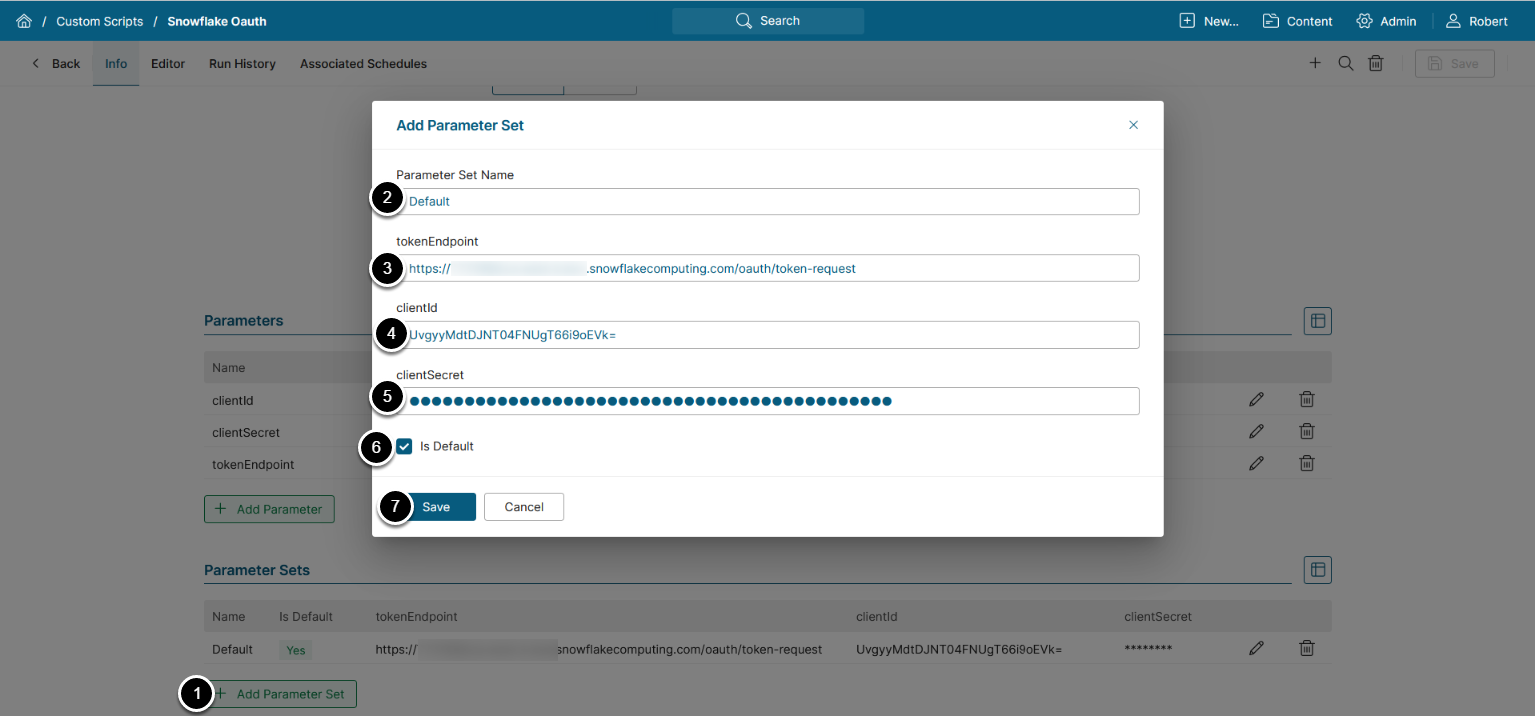
- [+Add Parameter Set]
- Parameter Set Name: Enter a name for the Parameter Set
-
tokenEndpoint: Enter the Snowflake token endpoint in the following format:
https://<snowflake_account_url>/oauth/token-request - clientId: Enter Client ID of the integration
- clientSecret: Enter Client Secret for the integration
- Is Default: Activate the checkbox
- [Save]
- [Save and Enable] the Custom Script
1.4. Enter Custom Script Code
Access the Editor tab

The Custom Script works as follows:
- Checking Custom Script parameters, authorization code, and Redirect URI from the previous OAuth request.
- Checking whether to fetch an access token with authorization code (for a first-time login), or renew the previously fetched access token using a refresh token.
- Sending request to Snowflake API Token endpoint to obtain a token.
- Client ID and Client Secret stored as Custom Script's parameters are used
Copy the code below and paste it to your Custom Script Editor:
if ('undefined' === typeof customScript.parameters) customScript.parameters = {};
if ('undefined' === typeof req) req = { code: '', redirect_uri: '' };


function getToken() {
    let data = { redirect_uri: req.redirect_uri };
    if (req?.code > '') {
        data.grant_type = 'authorization_code';
        data.code = req.code;
    } else if (req?.refresh_token > '') {
        data.grant_type = 'refresh_token';
        data.refresh_token = req.refresh_token;
    }


    $.ajax({
        type: 'POST',
        url: customScript.parameters.tokenEndpoint,
        headers: {
            'content-type': 'application/x-www-form-urlencoded',
            authorization:
                'Basic ' + window.btoa(customScript.parameters.clientId + ':' + customScript.parameters.clientSecret),
        },
        data: data,
        dataType: 'json',
        success: function (response) {
            customScript.result(JSON.stringify(response));
            setTimeout(() => customScript.close(), 100);
        },
        error: function (response) {
            customScript.result(JSON.stringify(response));
            setTimeout(() => customScript.close(), 100);
        },
    });
}
getToken();NOTE: A Custom Script parameter value can be accessed via customScript.parameters.<parameter_name>.
- See Basic Practices for Custom Scripts Developers for details.
- Once you have pasted the code, [Save and Enable].
2. Configure App Template
2.1. Create New App Template
Access Content > Apps
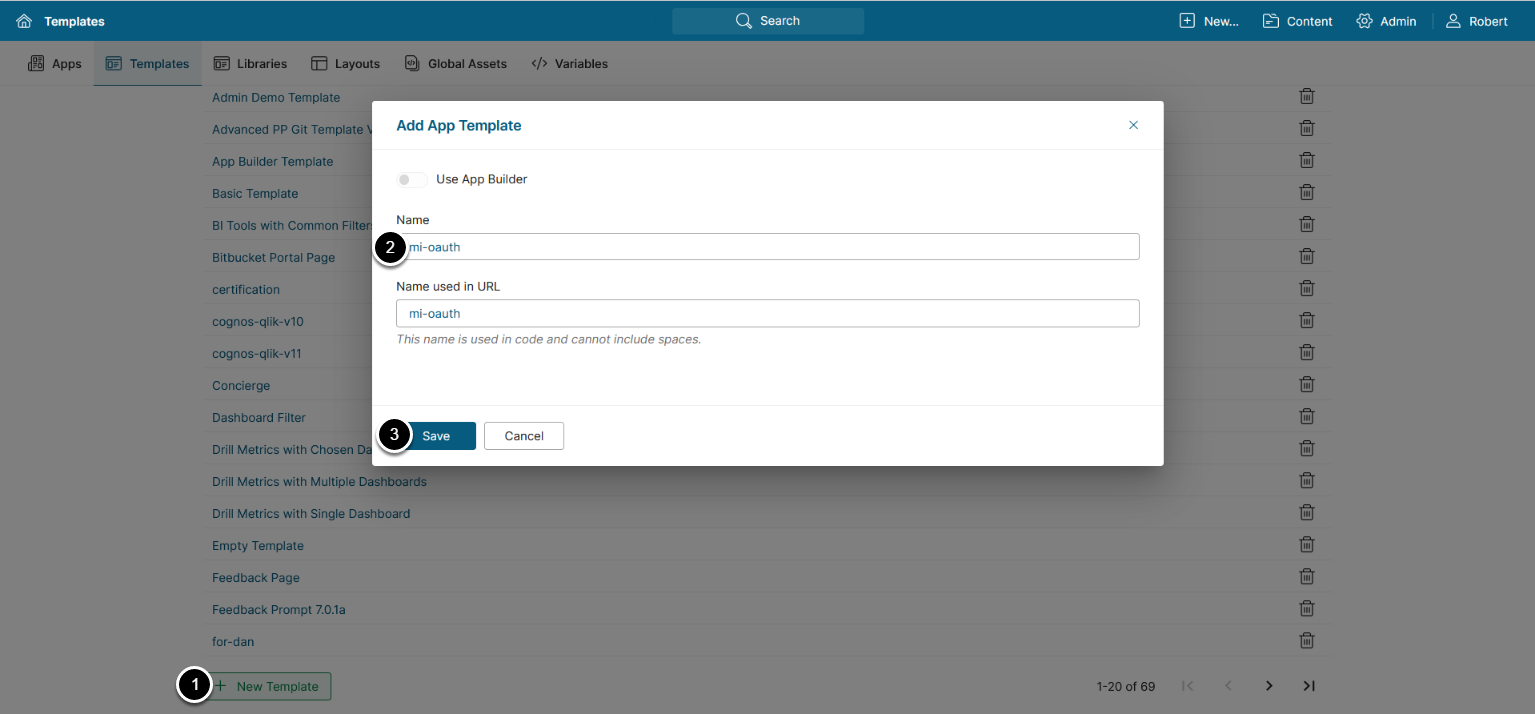
- Name: mi-oauth
- [Save]
NOTE: See App (Portal Page) Templates Basics for details.
2.2. Upload Assets
Access the Assets tab

-
[Upload Assets], select the
dist.zipfile with the App assets
2.3. Add Template Variables
Access the Variables tab
2.3.1. Add client_id Variable

- [+ Variable]
- Name: client_id
- Type: Text
- [Save Variable]
2.3.2. Add endpoint Variable
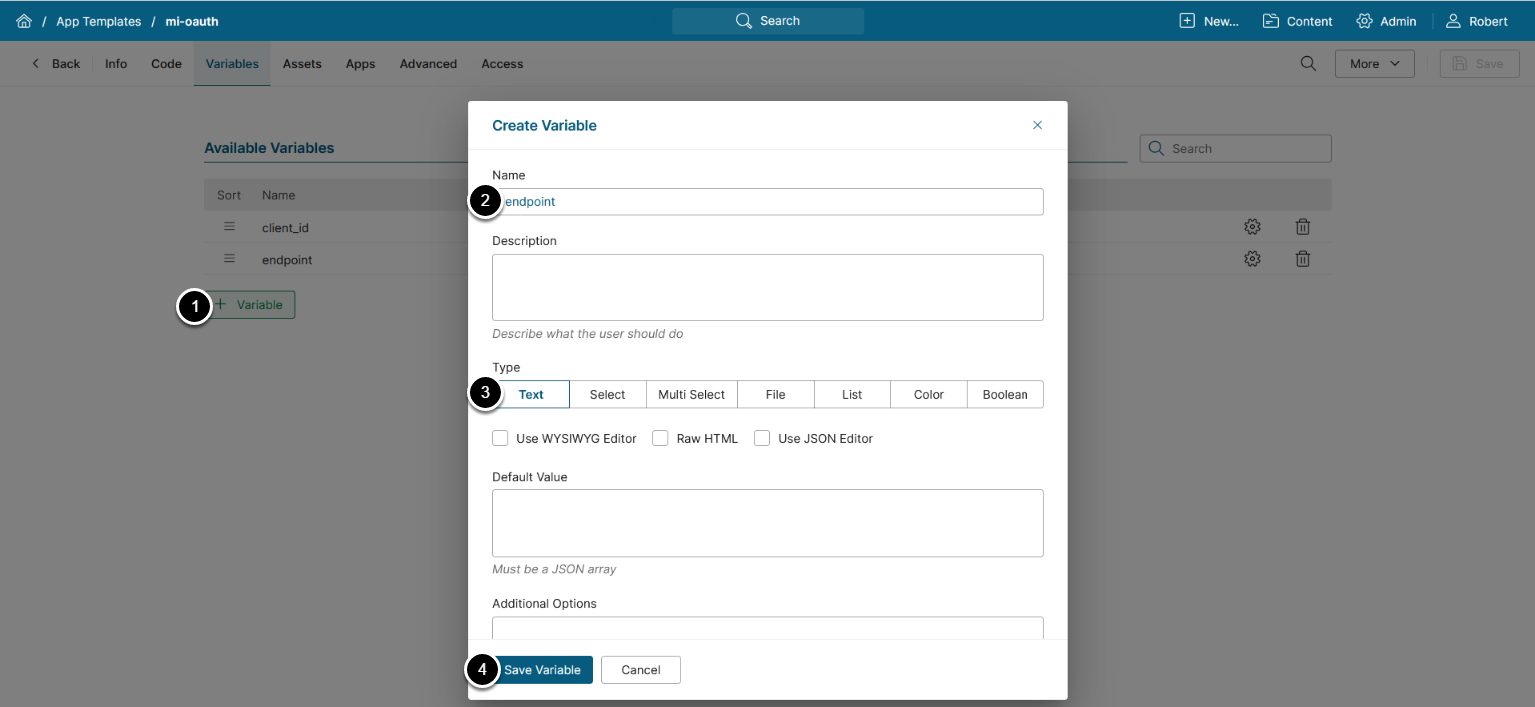
- [+ Variable]
- Name: endpoint
- Type: Text
- [Save Variable]
3. Configure App
3.1. Create New App
Access Content > Apps
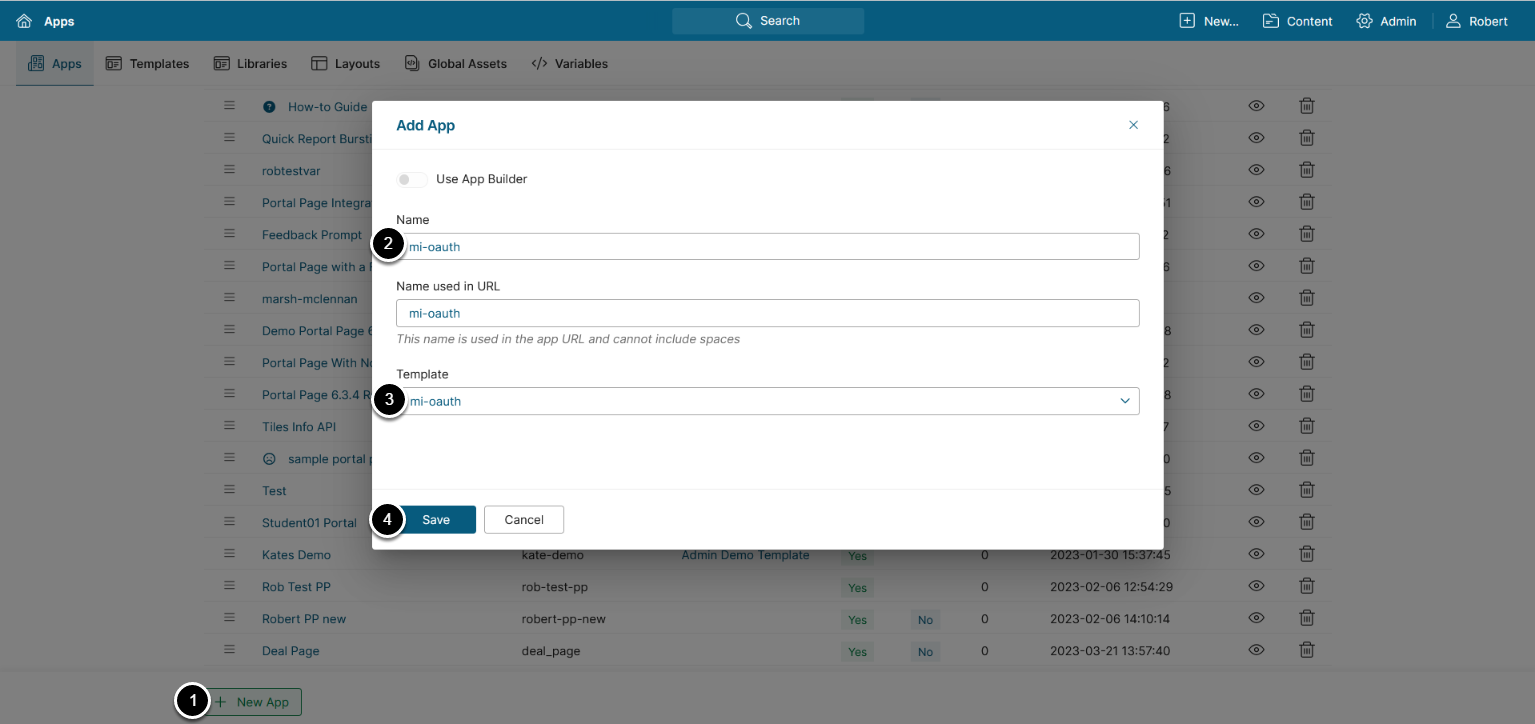
- [+ New App]
- Name: mi-oauth
- Template: Select the previously created mi-oauth App Template
- [Save]
NOTE: See Overview of Apps (Portal Pages) for details on creating Apps in Metric Insights.
3.2. Enter Content Values
Access the Content tab

- client_id: Enter Client ID of the integration
-
endpoint: Enter Snowflake OAuth endpoint in the following format:
https://<snowflake_account_url>/oauth/authorize - [Save]
3.3. Configure App Entities
3.3.1. Add access_tokens Entity
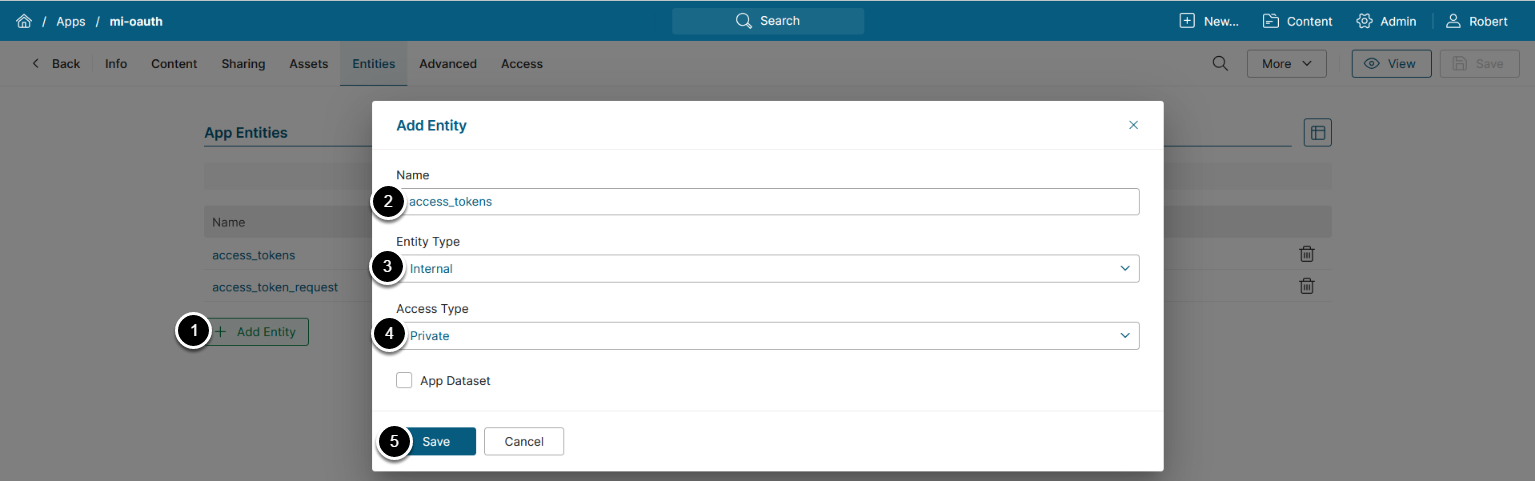
- [+ Add Entity]
- Name: access_tokens
- Entity Type: Internal
- Access Type: Private
- [Save]
3.3.2. Add access_token_request Entity
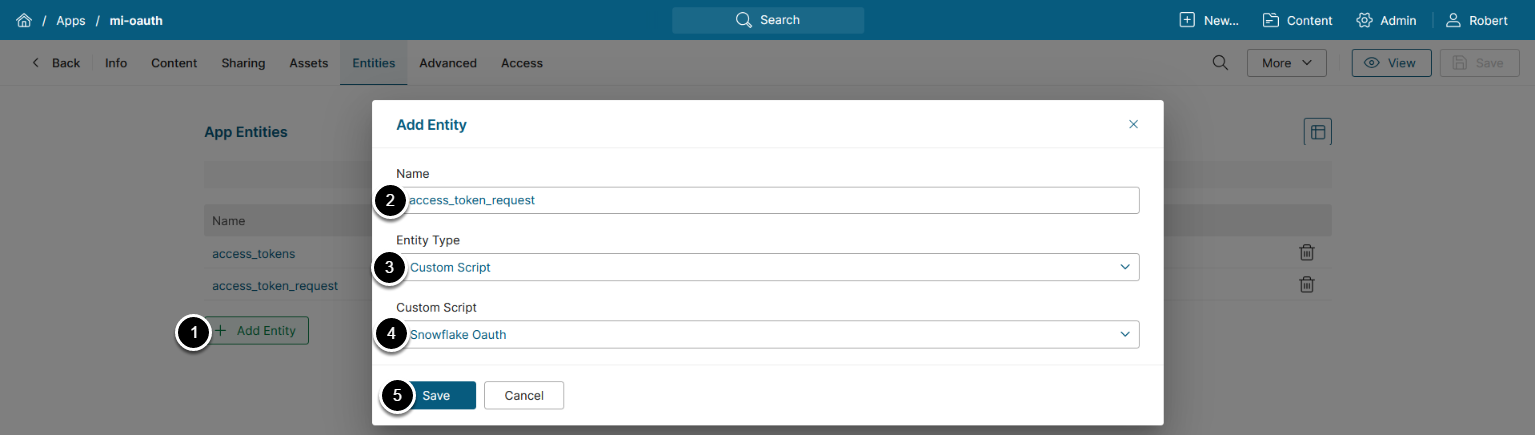
- [+ Add Entity]
- Name: access_token_request
- Entity Type: Custom Script
- Custom Script: Select the previously created Snowflake Oauth Custom Script
- [Save]
4. Access App

- [View]
- [Get Access Token]
- [Sign in] using Snowflake credentials
- [Allow]
- The App displays a message indicating that an access token has been retrieved
4.1. Obtain Access Token Stored in App Entity
To obtain the value of the fetched access token stored in App Entity, execute the following request to Entity API:
 fetch("<MI_hostname>/data/page/mi-oauth/access_tokens",
   {
    method: "GET",
   }
);
The obtained token data is stored in the following format:
{
    "data": [
        {
            "id": "token",
            "value": {
                "access_token": "ver:1-hint:8364XXX",
                "token_type": "Bearer",
                "expires_in": 600,
                "refresh_token": "ver:2-hint:1276XXX",
                "refresh_token_expires_in": 7775999,
                "scope": "refresh_token session:role:ACCOUNTADMIN",
                "username": "METRICINSIGHTS",
                "user_first_name": "John",
                "user_last_name": "Doe",
                "idpInitiated": false,
                "expires_timestamp": 1745334043
            }
        }
    ],
    "count": 1
}
See the fields description in the table below:
| Field Name | Description |
|---|---|
| access_token | Value of the Snowflake access token |
| token_type | Access token type.
|
| expires_in | Number of seconds left until access token expiration |
| refresh_token | Value of Snowflake refresh token |
| refresh_token_expires_in | Number of seconds left until refresh token expiration |
| scope | Defines what permissions and roles the token grants
|
| username | Username of the user to whom the token belongs |
| user_first_name | First name of the user to whom the token belongs |
| user_last_name | Last name of the user to whom the token belongs |
| idpInitiated | Whether the session was initiated by an Identity Provider; e.g., SSO login ("true"), or by the system/user ("false") |
| expires_timestamp | Unix epoch time of access token expiration |