A Metric Insights' Dataset or Element can be populated automatically based on data fetched from Google Sheets. This article describes how to create a Dataset using Google Sheets Data Source.
PREREQUISITE:
Established connectivity to Google Sheets via the respective plugin connection profile.
1. Start Creating a New Dataset
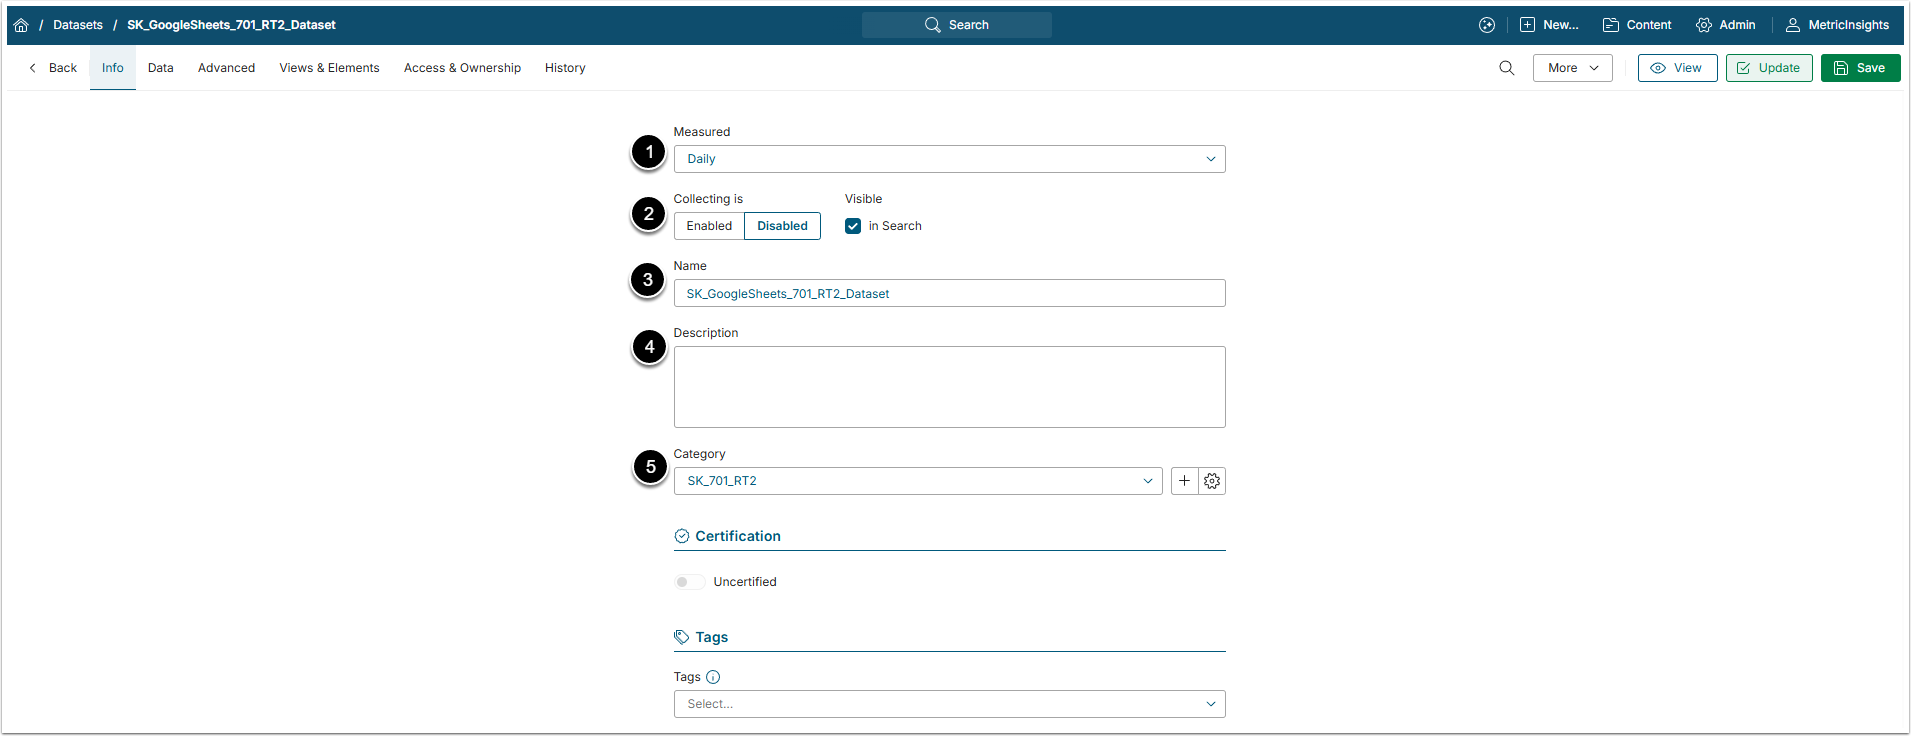
Access +New > Datasets > Create New
Enter the basics:
- Measured: Select the measurement interval that applies to the level of aggregation that you want in your result set.
- Collecting: New Datasets are always disabled by default to make sure that you can take time to configure them properly before enabling. This setting is duplicated at the top of the screen.
- Name: Provide a unique name for your Dataset. Preferably, the Dataset name should explain what kind of data it contains.
- Description: Optionally, provide any additional information about your Dataset.
- Category: Specify the Category where you Dataset will be placed.
2. Define the Settings for Data Collection
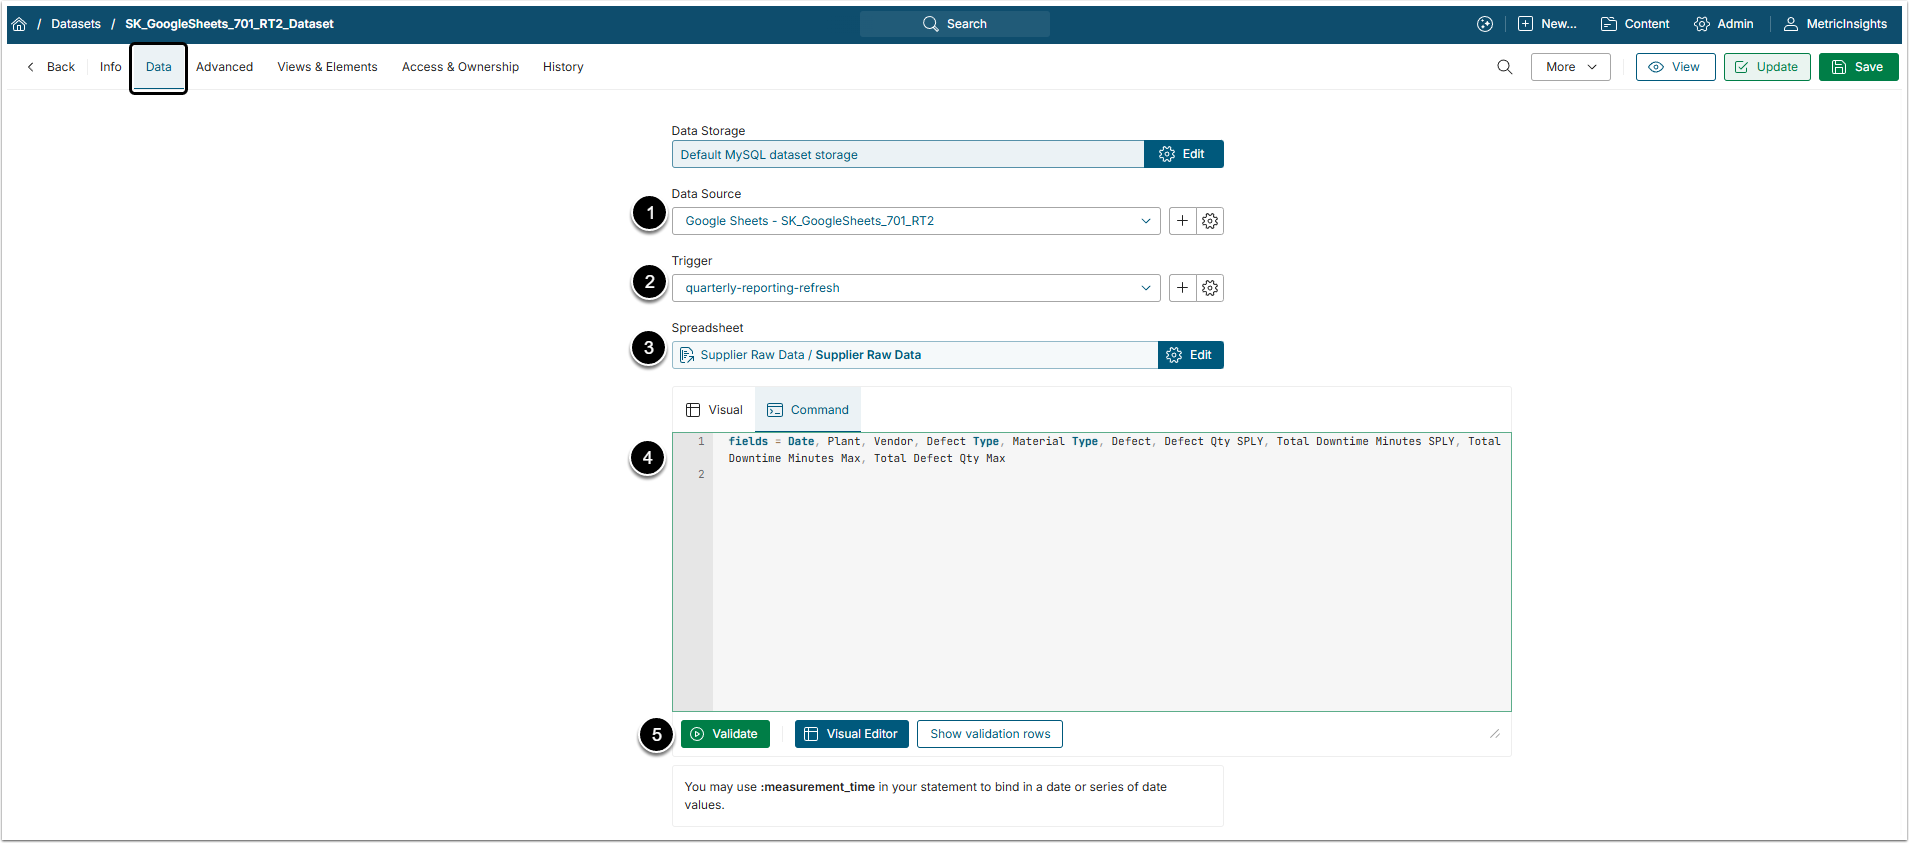
Move to the Data tab to define the source of data and how often it should be updated.
- Data Source: Select the connection profile you have created for Google Sheets.
- Trigger: Specify the Trigger that will be used to collect data for your Dataset.
- Spreadsheet: Select a Google Spreadsheet that should serve as a basis of your Dataset.
- Input an MIQL Plugin Command listing all the data you would like to fetch from Google Sheets. Alternatively, use the Visual Editor.
- [Validate]
2.1. Example Using the Visual Editor
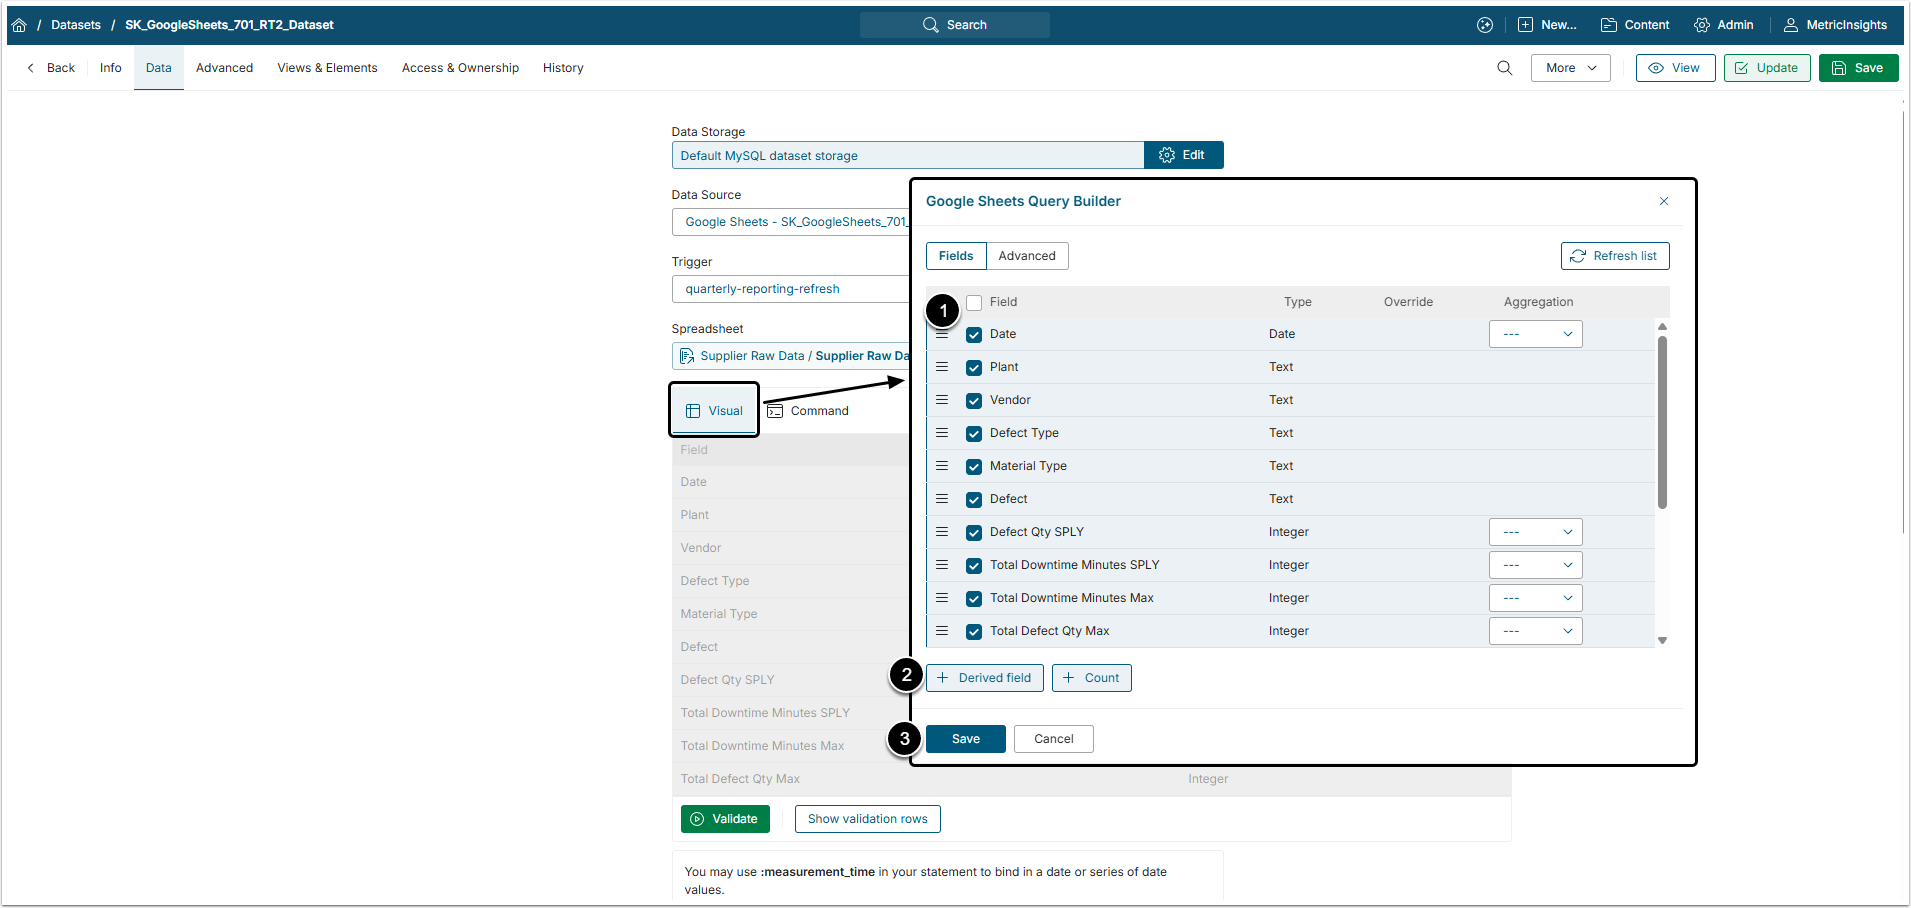
The Google Sheets Query Builder allows constructing commands without the need to learn the plugin syntax and avoiding typos/mistakes.
- Select the fields for your Dataset.
- Optionally, add Derived fields and/or Count of duplicate rows.
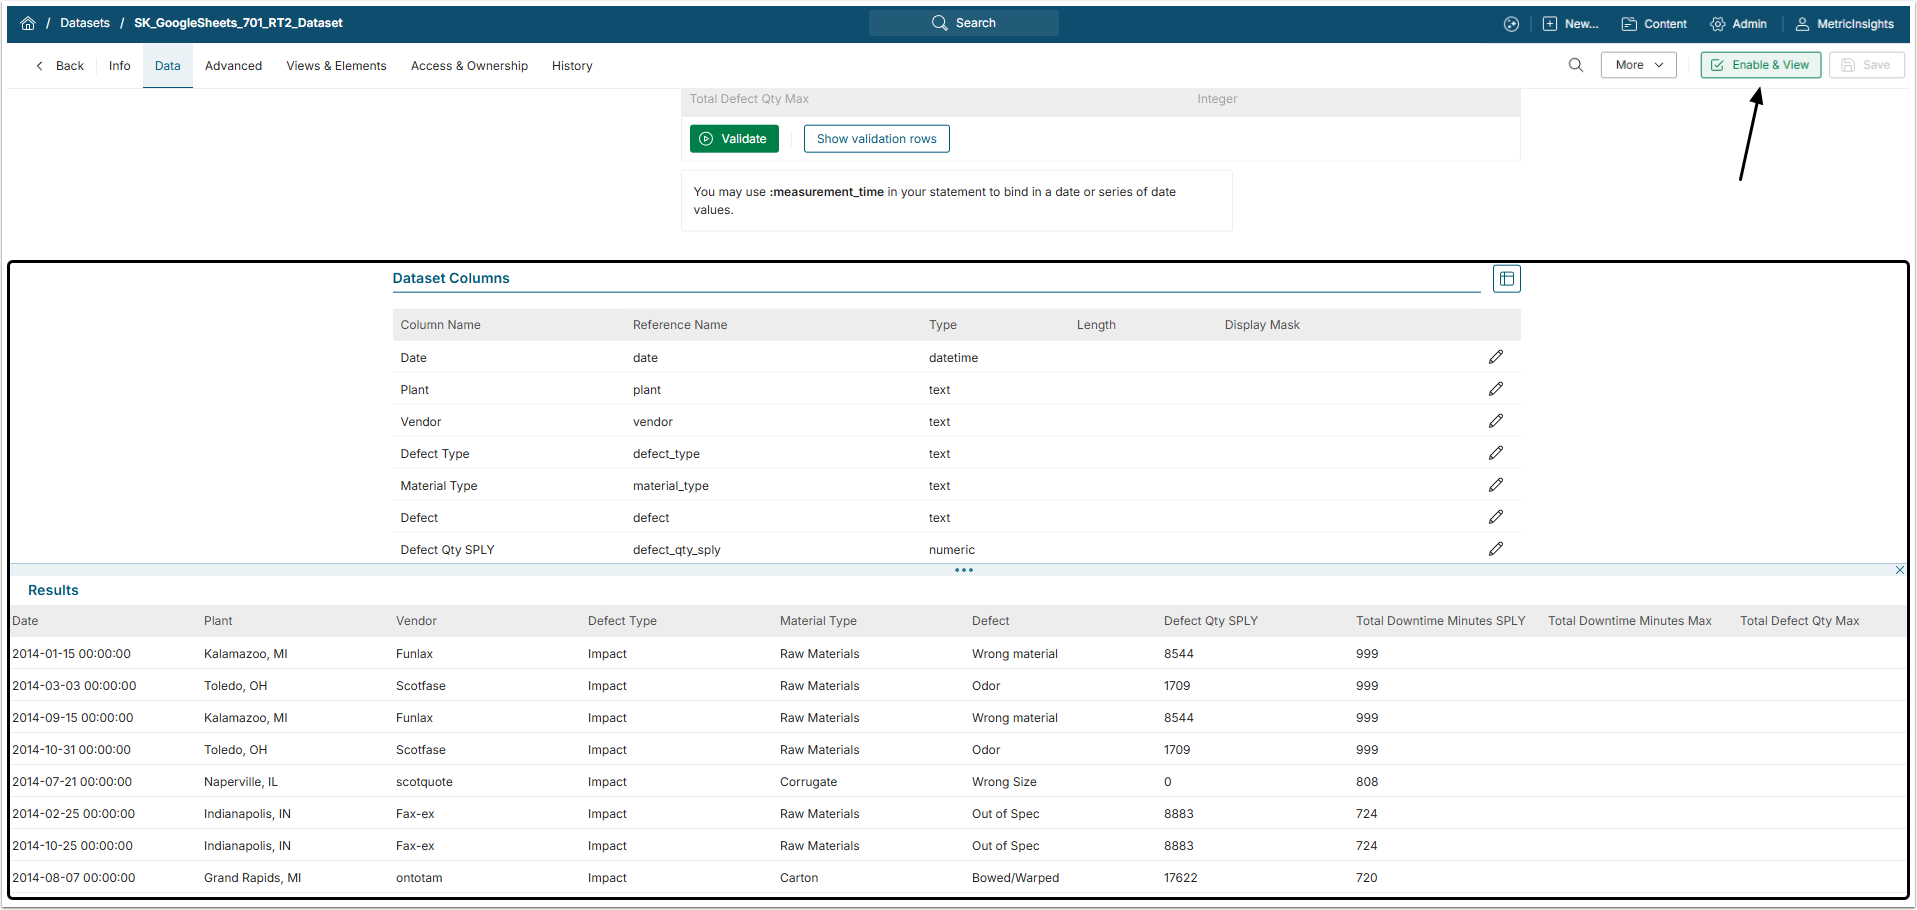
- [Save] the settings. Plugin command validation will start automatically.


