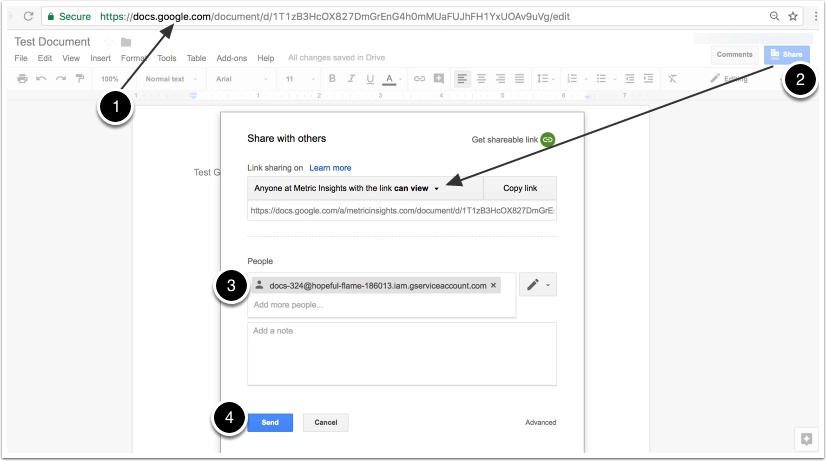
This article describes how to connect to your profile Google Drive in order to use the files from this Data Soure as a basis for the future External Reports in Metric Insigths.
The procedure incudes:
1. Create a Google Service Account
For this scenario you need aservice account, which is an account that belongs to your application instead of to an individual end user. Follow the instrunctions below to set it up. For more details, refer to Google Documentation.
1.1. Access Google Developers Console
https://console.developers.google.com/projectselector/iam-admin/iamWhen logged in from the account that contains the required files on a Google Drive, follow the link above.
1.2. Service Accounts > Create
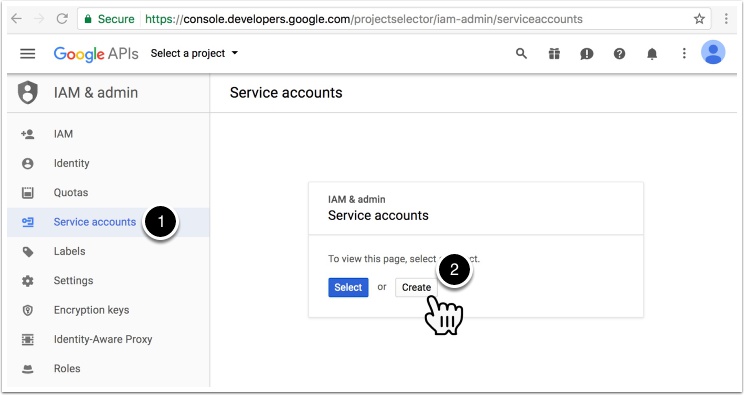
- On the left side of the screen in the IAM & admin panel select Service accounts
- In the pop-up menu choose Create.
1.3. Service Account Settings
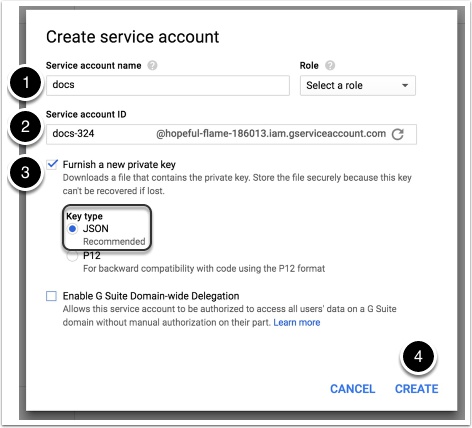
- Service account name: Define a name for your service account.
- Service account ID: is going to be generated automatically after you define a service account name.
- Furnish a new private key: Check this box to create a new private key. The required key type is JSON.
- At the bottom of the pop-up click Create.
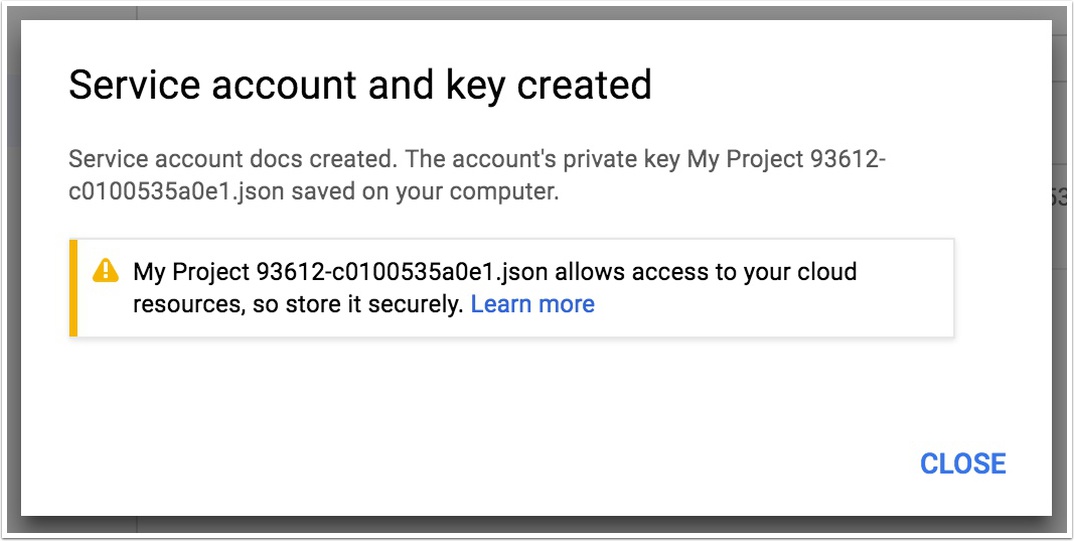
NOTE: Once you click Create, the JSON key is generated and automatically downloaded to your computer. Remember the file location.
3. Metric Insights' Side Authorization
After setting up the Google Side, create a Google Drive Data Source in Metric Insights:
3.1. Access Admin > Data Sources > [ + New Data Source ]
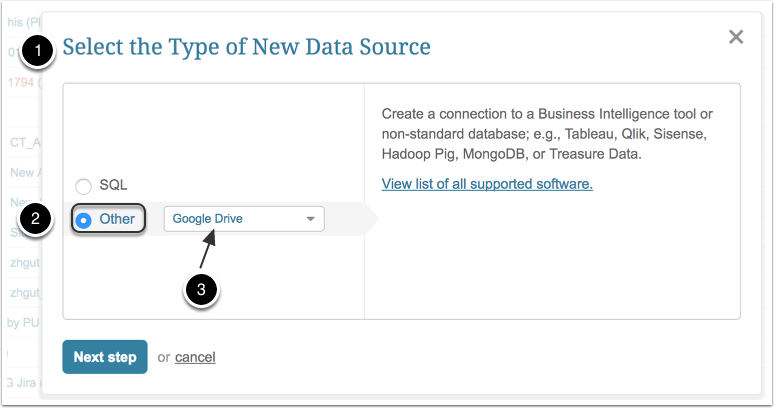
- The Select the Type of New Data Source pop-up opens.
- Select Other Data Source Type and choose Google Drive from the drop-down list.
- Proceed with creating a Data Source by moving to the Next step.
3.2. Provide the Required Google Drive Parameters
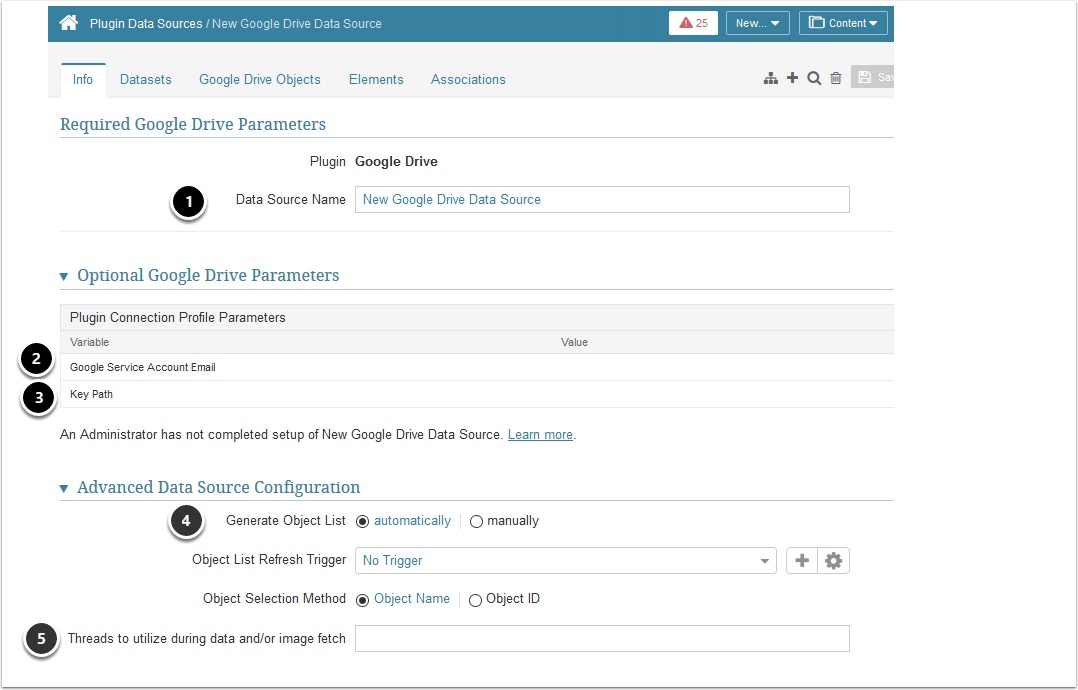
- Data Source Name will default, but you may modify if needed
- Google Service Account Email: Define a service account email. See Step 1.3 for details.
- Key Path: Define the path to the directory where you placed the JSON file with a generated private key in Step 1.4.
-
Generate Object List: This setting influences options available in the Google Calendar Object List tab:
-
automatically: just click Refresh list and all Reports are going to be fetched by the system
- [New in 5.3.2] Object List Refresh Trigger will appear allowing you to schedule the Refresh function
- manually: Reports may be added one-by-one or via CSV file
-
automatically: just click Refresh list and all Reports are going to be fetched by the system
- Optionally, specify the maximum number of concurrent Threads per Trigger execution to be used in background processing when the system updates Metrics and Reports for this Data Source. If you do not specify any value for this setting, batch data collection processing will be single-threaded.
Save your settings.
4. Create an External Report Using this file as a Source
Google Drive Plugin collects images by communicating with the tool via API.
In Metric Insights access New > External Report > Google Drive.
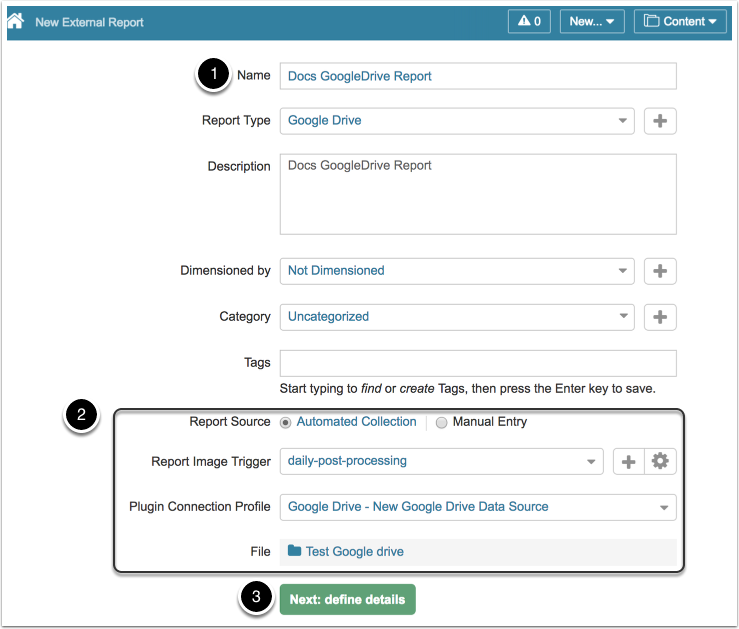
- Give your new report a Name
- Define whether you want report content to be updated manually or automatically. In case you choose Automatic Collection, define the following settings:
- Define the Report Image Triggerfrom drop-down list.
- Select an existing Plugin Connection Profile that we have created in Step 3.
- Select a File available for that connection profile.
- Click Next: define details to proceed with Report creation.
- Collect image
- Enable and Publish
