This article describes how to integrate with Google Services (BigQuery, Analytics, Calendar, Spreadsheet) in order to fetch their data into a Metric Insights' portal.
To establish connectivity with Google Services, you need to configure an API Console Project and create a single Client ID that will serve as a basic identifier between any Google plugin and a Metric Insights instance.
WORKFLOW:
- Build an API Project in the Google API Console
- Enable APIs for your Project
- Configure OAuth Consent Screen
- Get Authorization Credentials
PREREQUISITES:
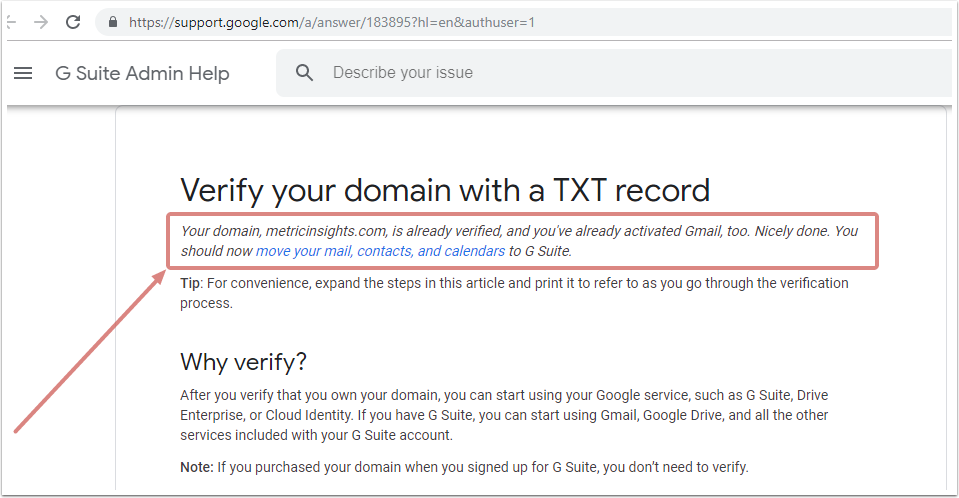
- Your domain must be verified for Google Services
- Allow network connectivity access from the Metric Insights server to https://bigquery.googleapis.com (port 443)
To check whether your domain has been verified, follow this link Verify your domain with a TXT record
If Google informs you that your domain is authorized, proceed with the steps described below.
1. Build an API Project in Google API Console
- The API Console is where you enable and disable APIs, manage and view traffic data, and set up authentication.
- Learn more from Manage APIs in the API Console
- A project is a collection of settings, credentials, and metadata about the application or applications you are working on that make use of Google APIs and Google Cloud Platform resources.
- For details, click Manage projects in the API Console

Go to: https://console.developers.google.com
Select the API project or create a new one
2. Enable APIs for your Project
NOTE:
- Enabling an API associates it with the current project.
- The process of enabling an API varies depending on the API. Some APIs will prompt you to accept their Terms of Service before you can enable them.
- Find out more from Enable and disable APIs
- If you want to integrate several Google services with Metric Insights, you can enable the corresponding APIs from the API Library.
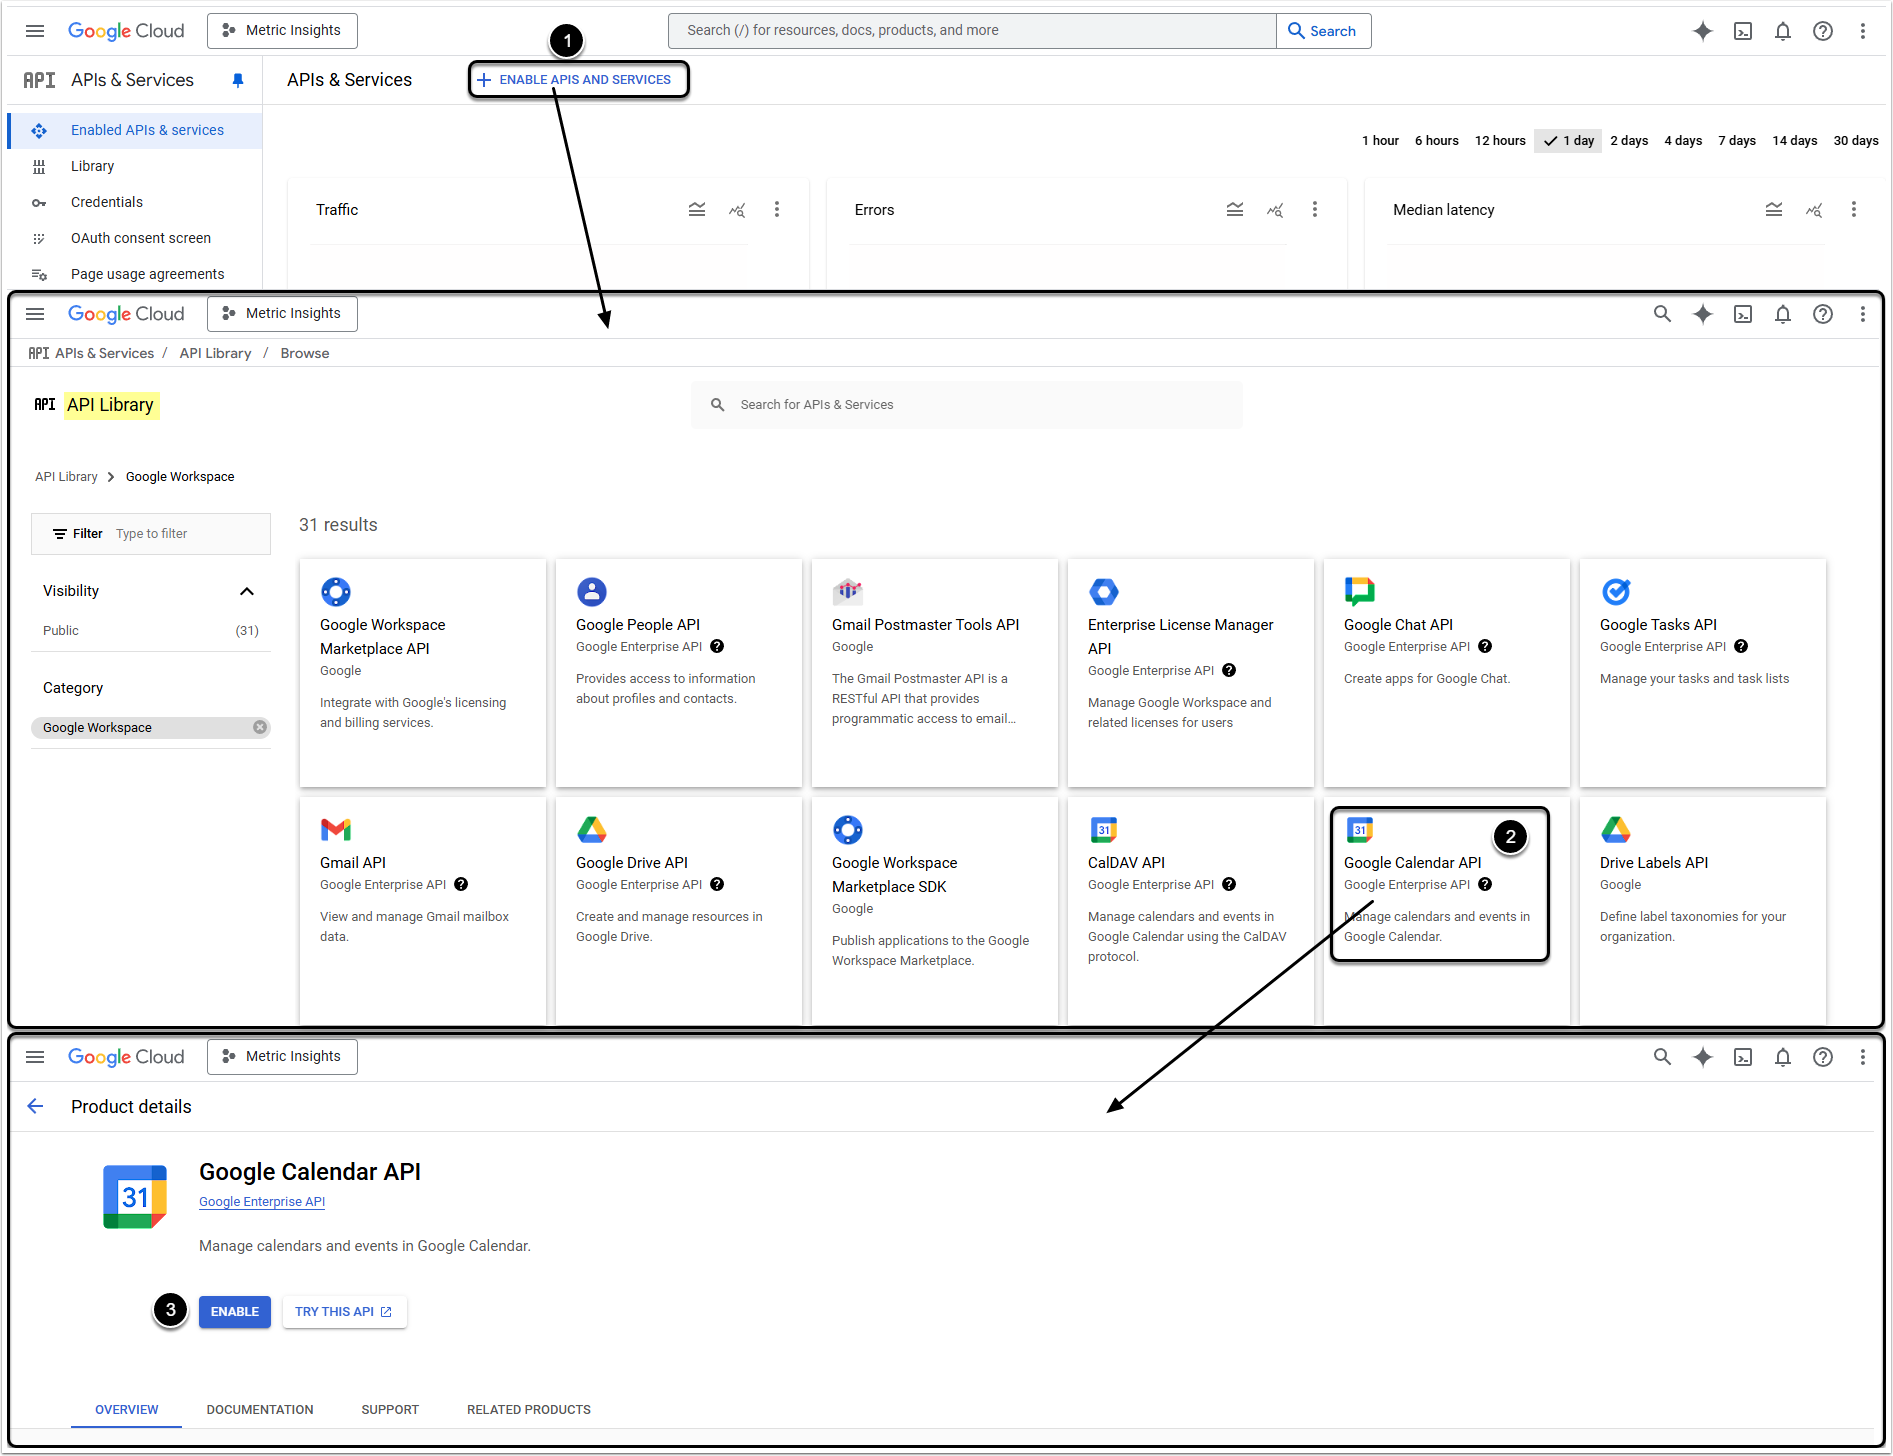
- Click Enable API at the top of the page. You will be redirected to the APIs Library
- Slect the required API and open its Product details. You can enable APIs for all supported services (BigQuery, Calendar, Spreadsheet, etc.) in this single Project
- Click [Enable]
3. Configure OAuth Consent Screen
The OAuth consent screen has to be configured before obtaining OAuth Client ID.
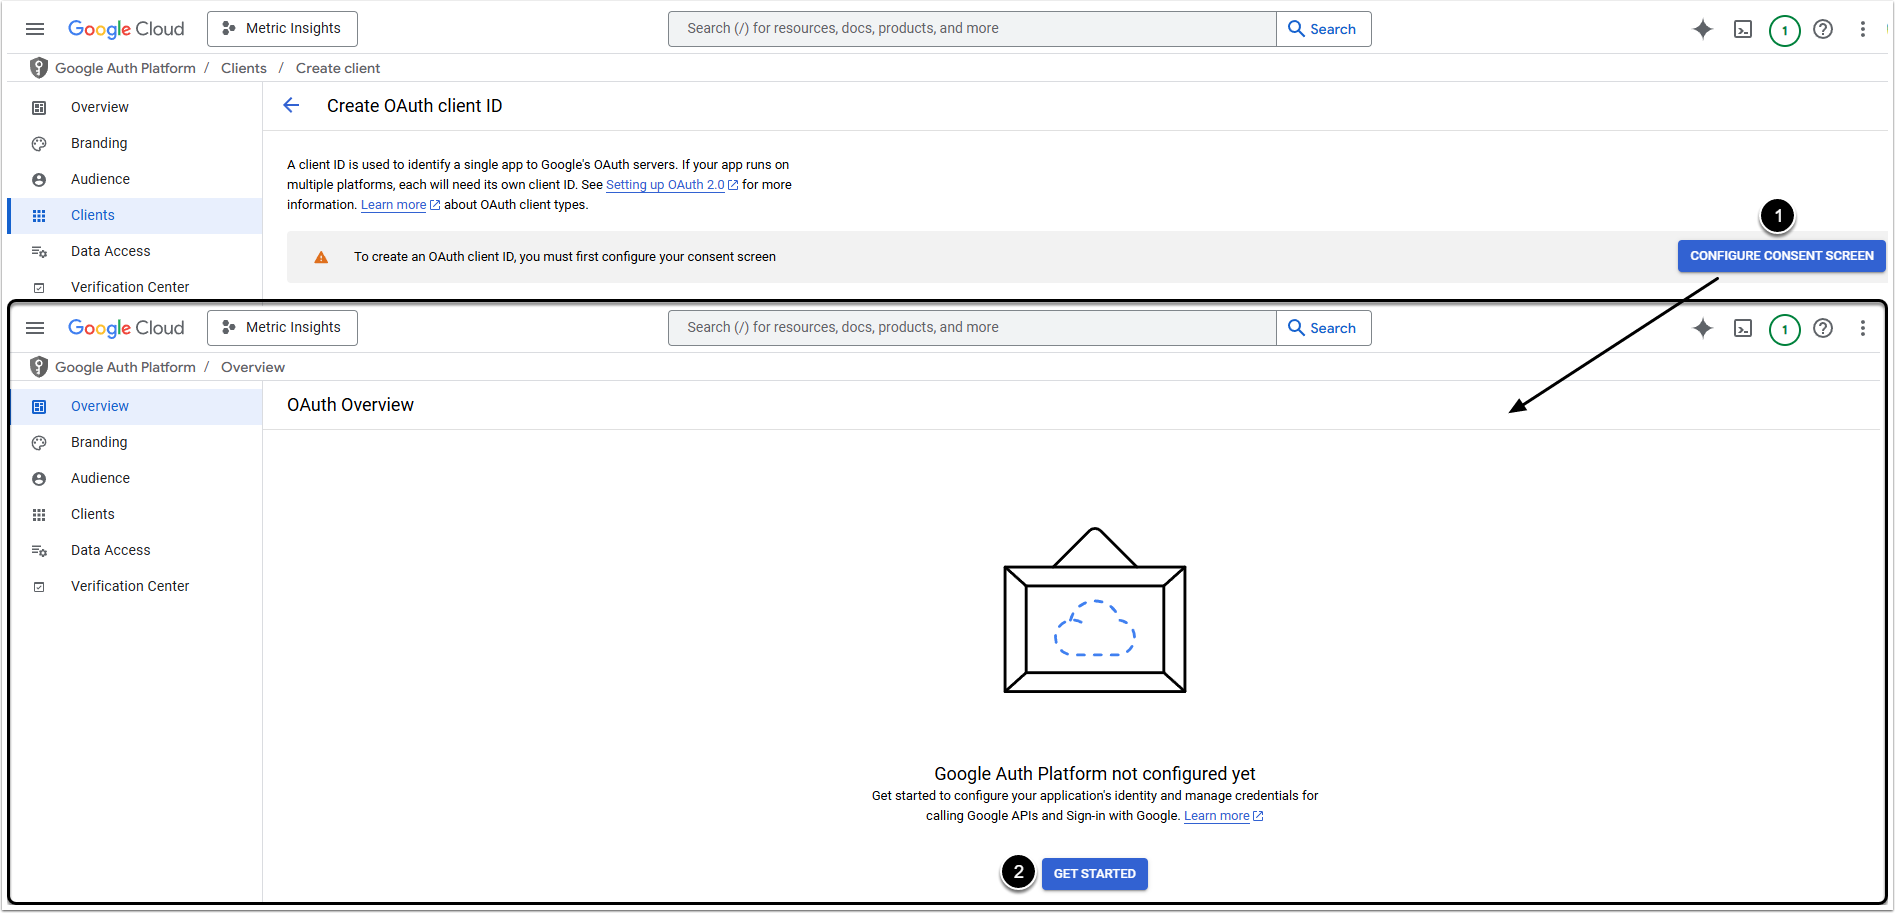
- Click [Configure Consent Screen]. You will be redirected to the Google Auth Platform
- Click [Get Started] and go through the steps to do the initial setup of OAuth consent screen
3.1. Select User Type
User Type defines the application's audience.
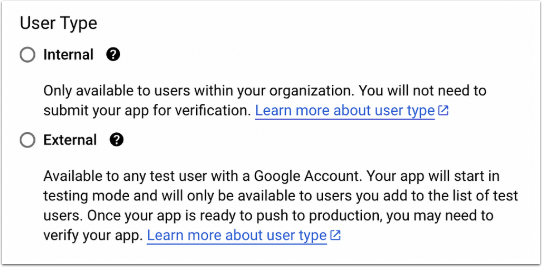
There are two User Types:
- Internal: The application will be available only to users within the organization
- External: Any user with Google Account will be able to each to the app
The chosen User Type can be checked in the Audience tab of Google Auth Platform.
For more information, check User Type.
3.2. Add Scopes
Scopes are permissions that are requested from users to allow your project to access specific types of private user data from their Google Account.
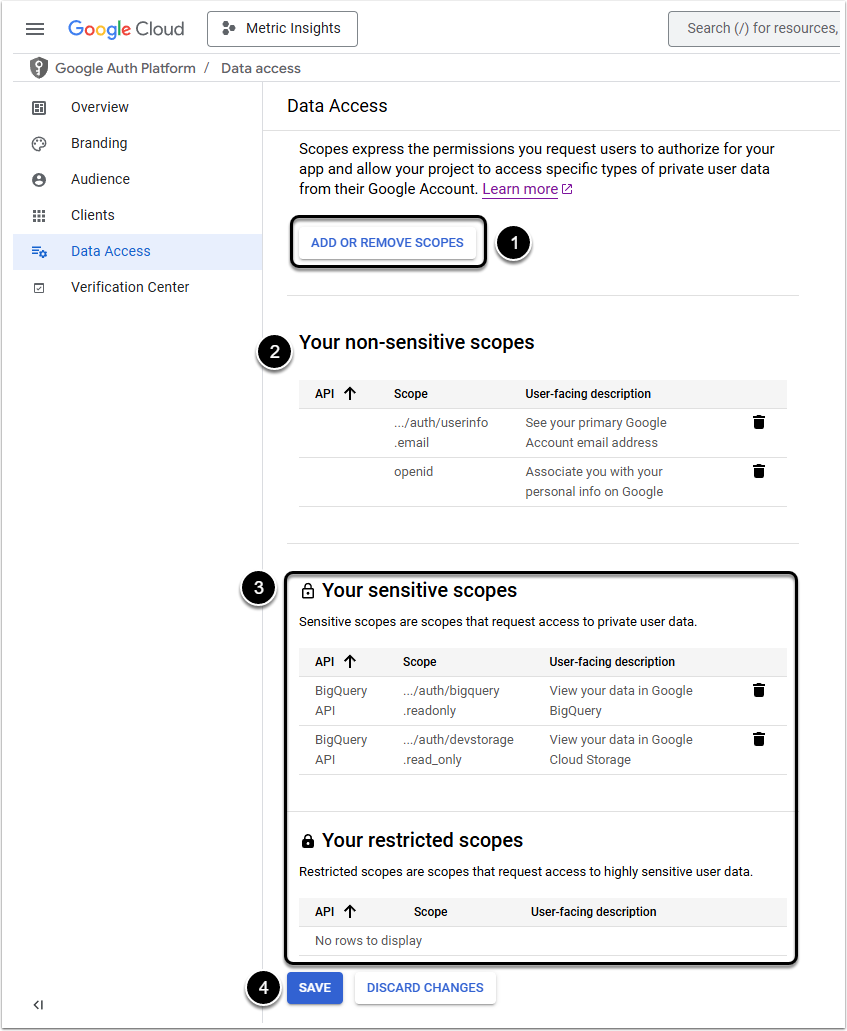
- Click [Add or Remove Scopes] to open the Update selected scopes pop-up window
- Non-sensitive scopes does not require Google verification
- Sensitive and restricted scopes require verification by Google if the chosen User Type is Public and have a sensitive indicator on the Google Cloud Console's OAuth consent screen configuration page
- Click to [Save] the changes
For more information about scopes, check OAuth 2.0 Scopes for Google APIs.
4. Get Authorization Credentials
Only one Google Project and one Web Client are required to establish connectivity to all supported Google services via plugins offered by Metric Insights.
Despite the fact that only one account (where the API Console Project was created) serves for establishing connection between Google and Metric Insights, other Google accounts can be used to create Data Sources for Elements.
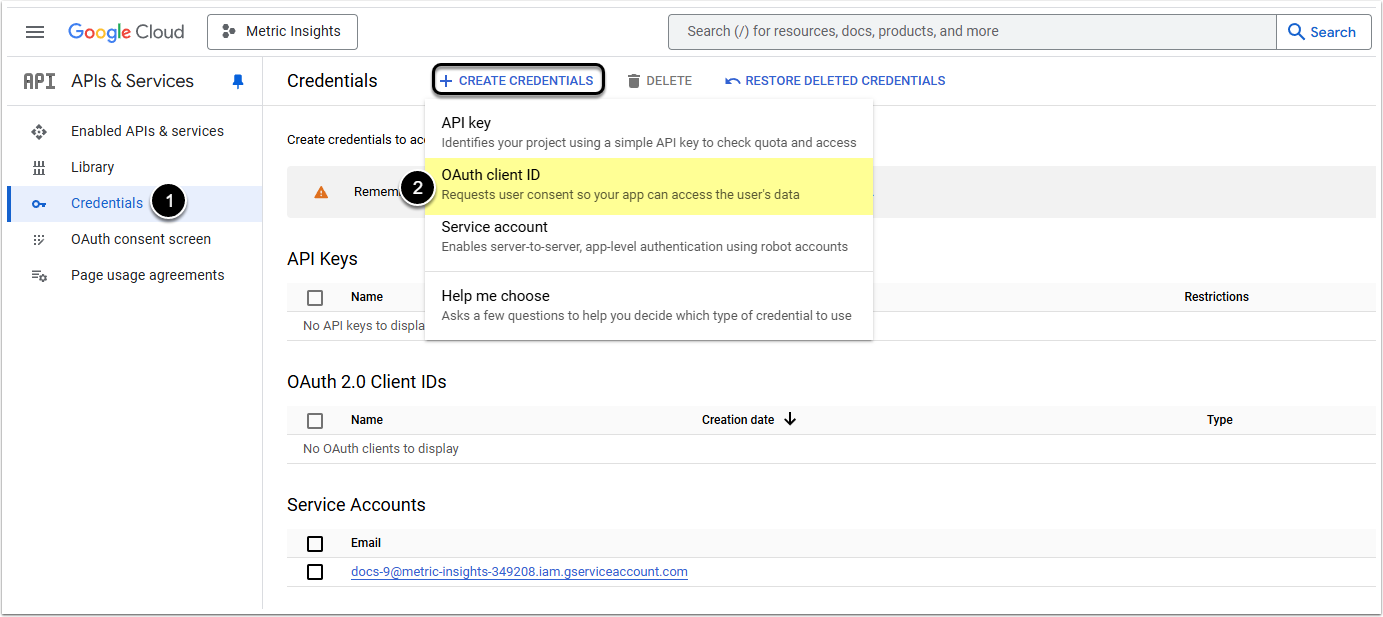
- Go to Credentials on the left side panel
- Click + Create Credentials and select OAuth client ID from the drop-down list
4.1. Configure a Web Client
Since your Web Client will be using OAuth 2.0 to access Google APIs, it must have authorization credentials that will serve as its identifiers to Google's OAuth 2.0 server.
Client ID and Client secret are used to access the APIs that you have enabled for your project.
NOTE: Applications that use JavaScript to access Google APIs must specify authorized JavaScript origins. The origins identify the domains from which your application can send API requests.
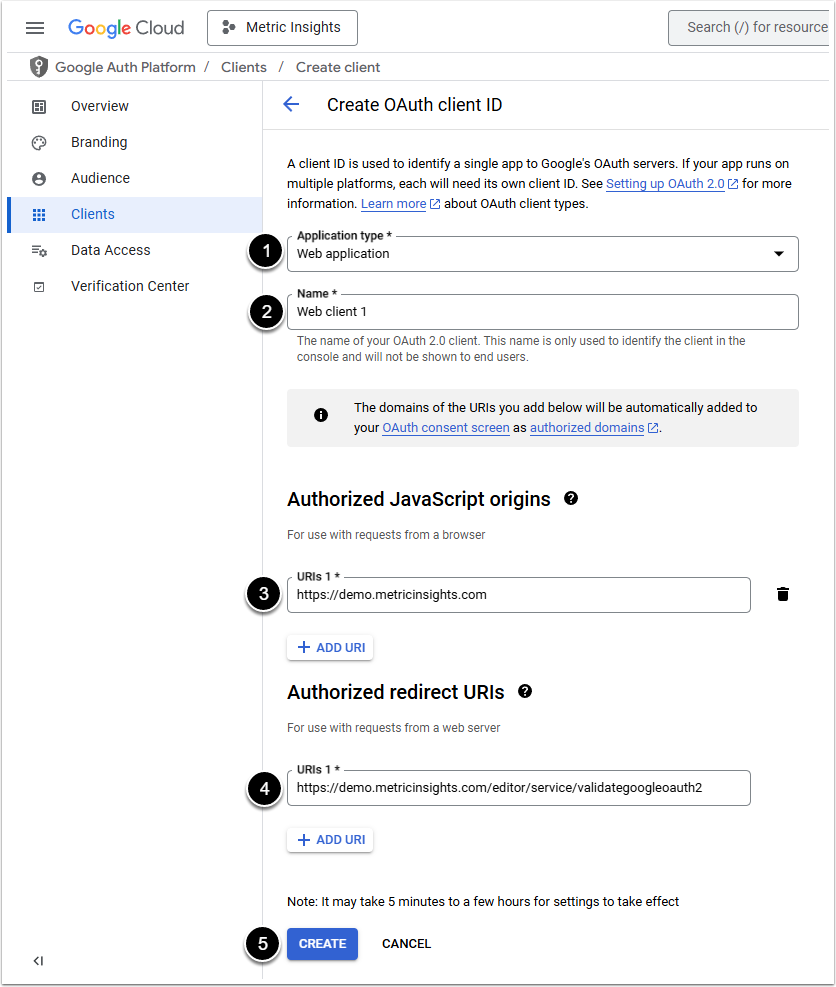
- Application type: Select "Web Application" from the drop-down menu
- Name: Enter a meaningful name
- Authorized JavaScript Origins: Enter the URL. Example: if the hostname is demo.metricinsights.com, the default is:
https://demo.metricinsights.com - Authorized Redirect URIs: Enter path to callback value as
/editor/service/validategoogleoauth2or/data/editor/service/validate-google-oauth2. Example: if the hostname is demo.metricinsights.com, the full value becomes:
 https://demo.metricinsights.com/editor/service/validategoogleoauth2
 or
https://demo.metricinsights.com/data/editor/service/validate-google-oauth2NOTE: If connection is established via JDBC, use /data/editor/service/validate-data-source-oauth Redirect URI instead.
5. [Create]
NOTE: This value is referenced by Metric Insights at Admin > System > System Variables. Look for GOOGLE_OAUTH2_REDIRECT_URI in the list. System Variables are available to System Administrators only.
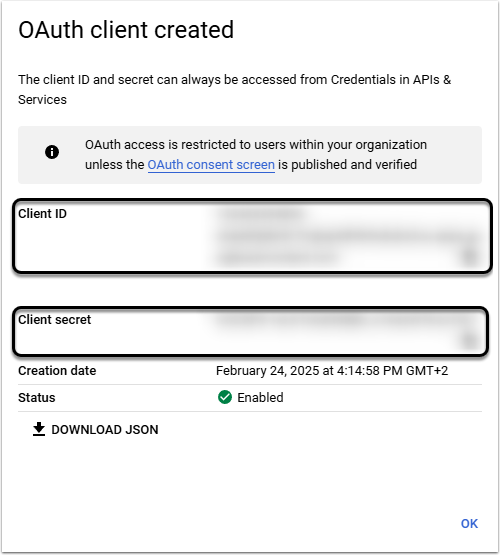
4.2. Use Client Credentials for Google Authentication
After Client ID and Secret Key are displayed, record these values to use for Google Authentication.
4.3. Authentication with a Google Service
To be able to source data from a Google Service, provide Authentication Values in the Connection Profile Parameters.
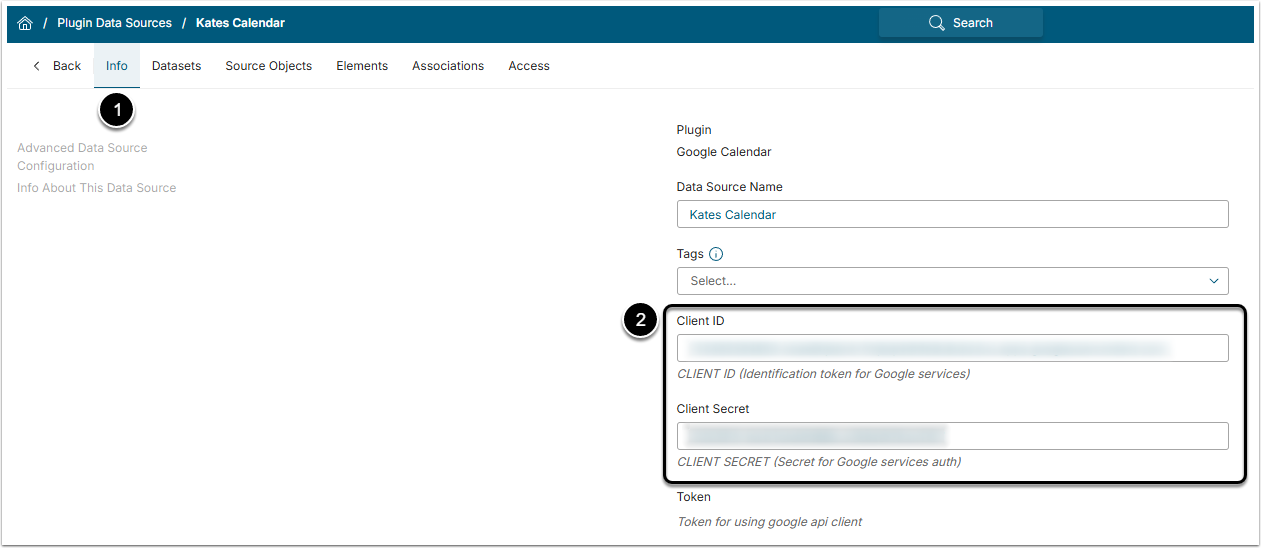
When creating a Connection Profile with a Google Service:
- Go to Plugin Data Sources Editor > Info tab
- Among the Required Parameters, specify Client ID and Client Secret