Beginning in Release v6.2.4, users can change their default UI language under My Settings. This is a beta feature has been designed specifically for the convenience of content consumption and can be enabled by System Admins under System Variables.
The list of supported screens and menus is as follows:
- Homepage
- Burst Editor
- External Report Viewer
- External Content Viewer
- User Preferences
- Menu and sub-menu items (New, Content, Admin, and User)
Admins can apply custom changes to both static and dynamic UI elements by uploading translations via a CSV file. The possibility to add a new language manually is planned for future releases.
1. Enable Language Options for Users
Access Admin > System > System Variables
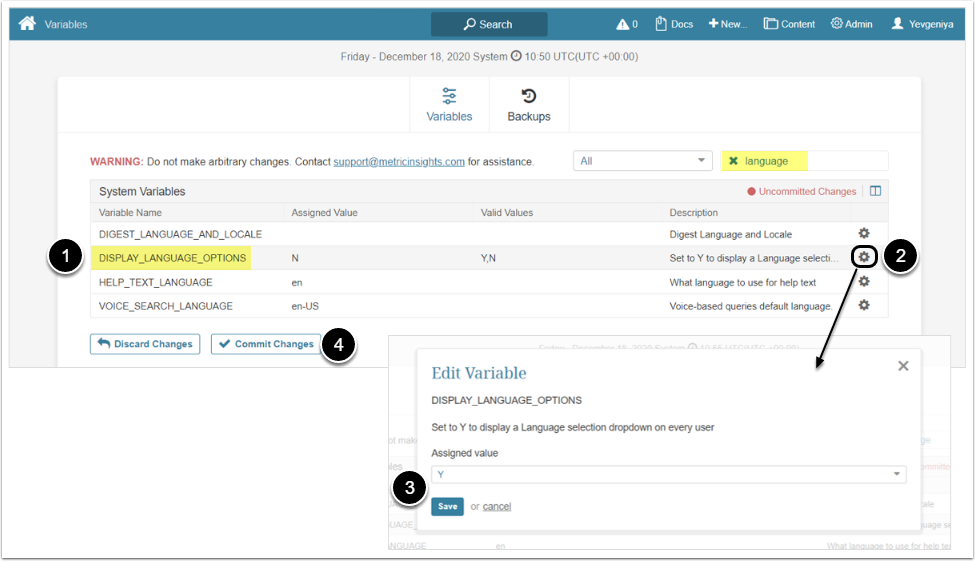
- Find the DISPLAY_LANGUAGE_OPTIONS variable
- Click the edit icon. The Edit Value dialog opens.
- Set the variable to "Y" and [Save]
- [Commit Changes]
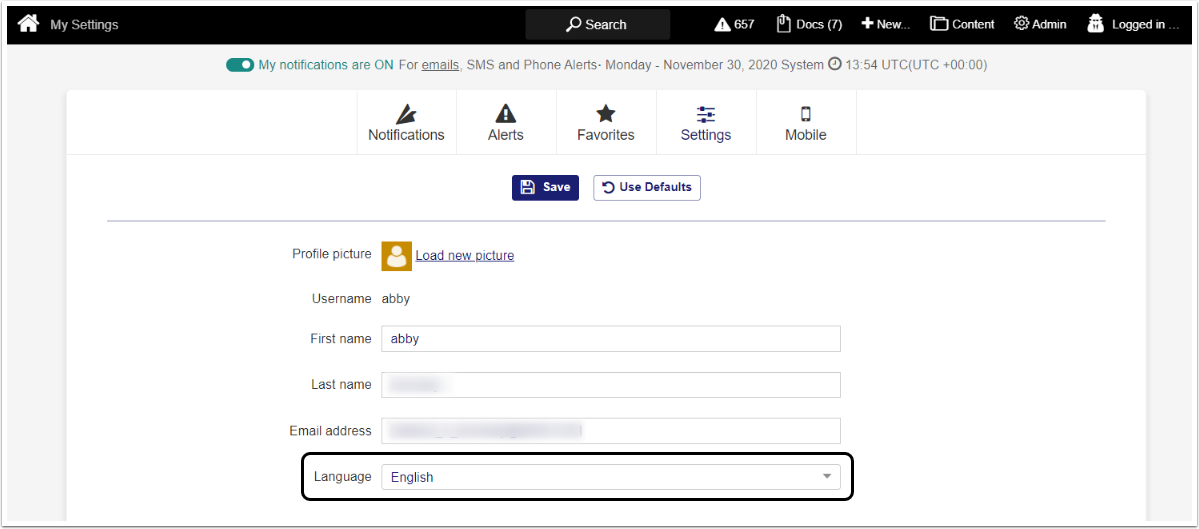
Language options have now become available under My Settings as shown on the screen below.
2. Apply Custom Changes to Translations
Access Admin > System > Vocabulary or <hostname>/admin/vocabulary (for versions prior to 6.3.3)
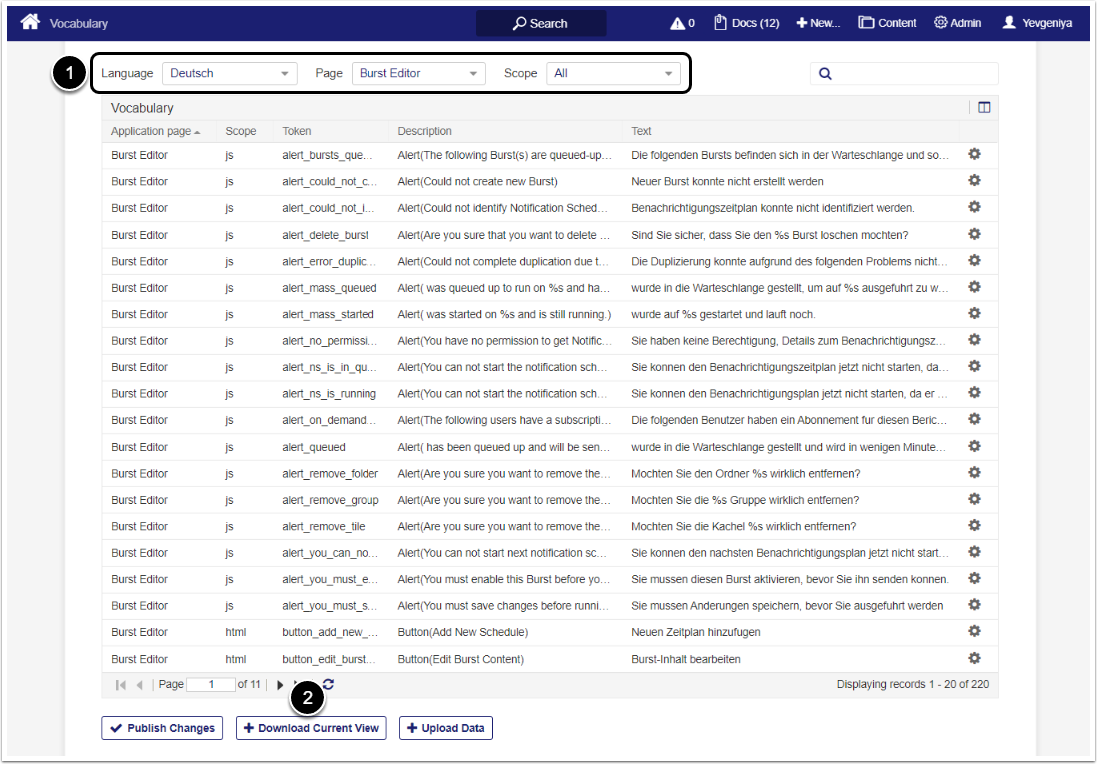
- Select:
- Language
- Page
- Scope
- [+Download Current View]
2.1. Modify the CSV File
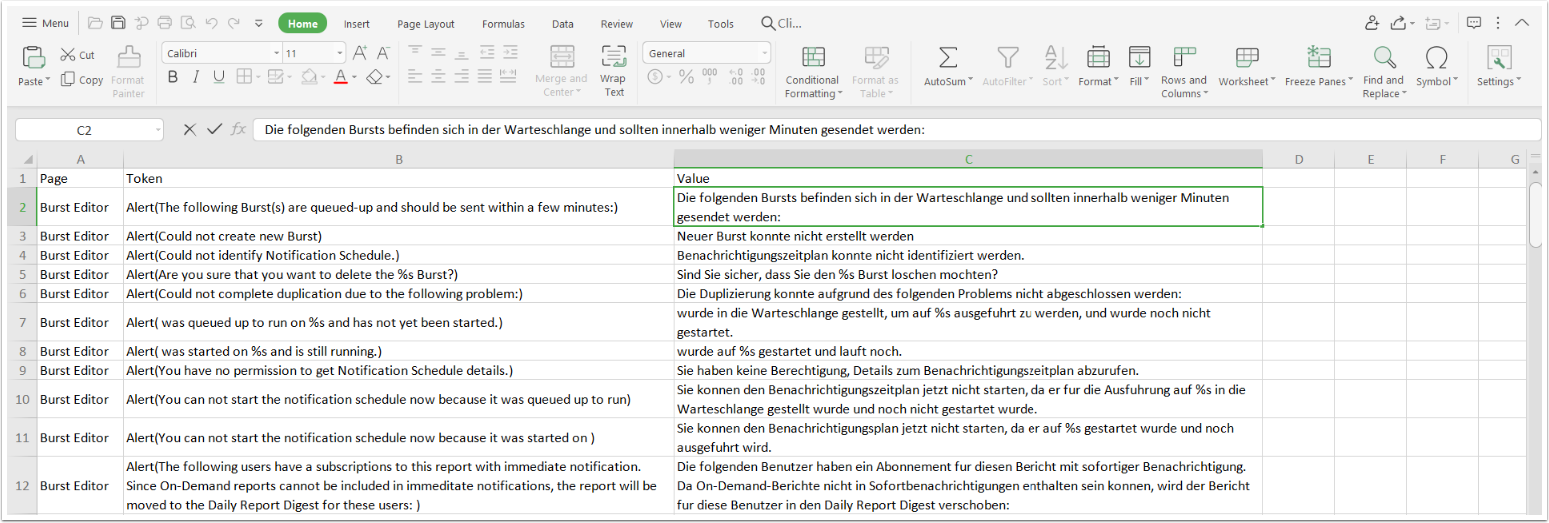
Once finished, save the file locally.
2.2. Upload the File and Save Changes
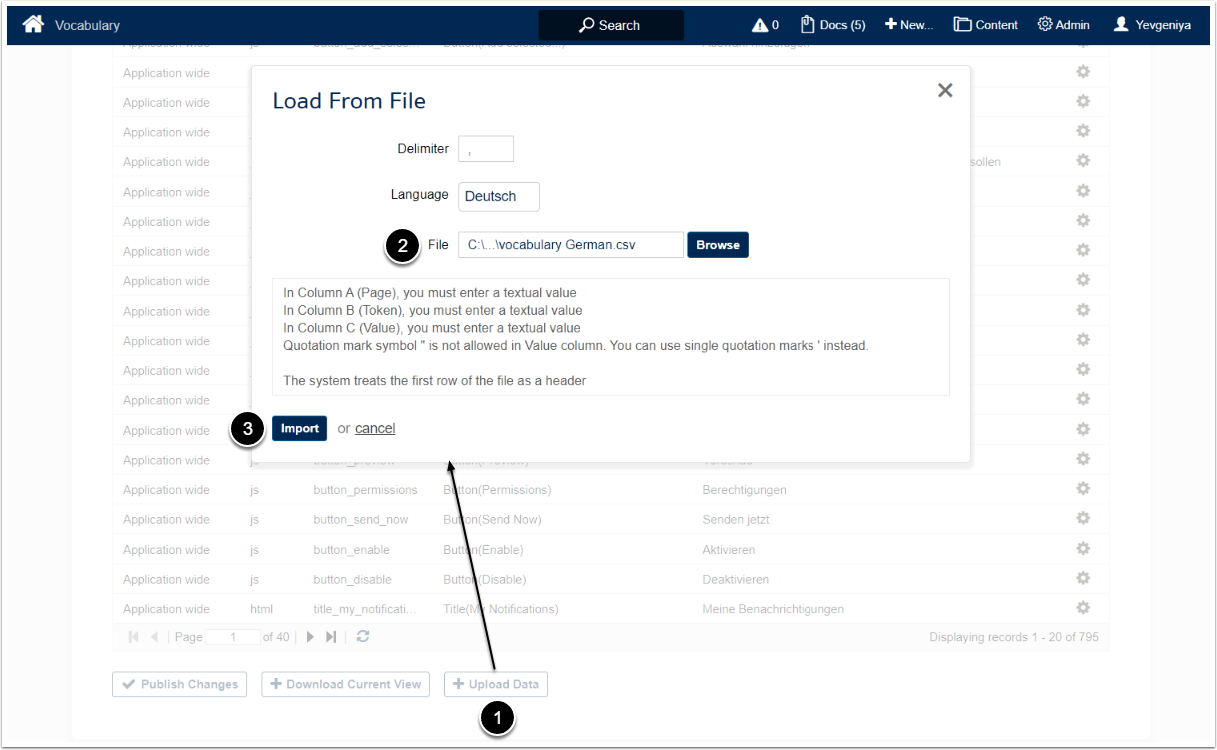
- Click [+Upload Data]
- Locate the file
- [Import]
NOTE: Avoid using double quotation marks (") in the translation file. Use single quotation marks instead (').
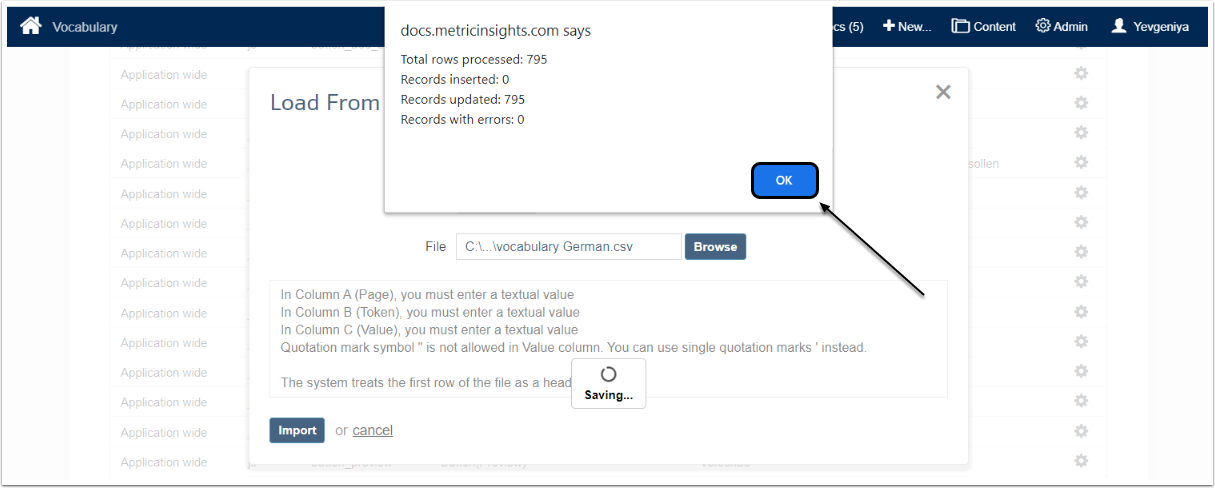
Once the system successfully finishes processing data, you will see the following dialog. Click [OK].
2.3. Publish Changes
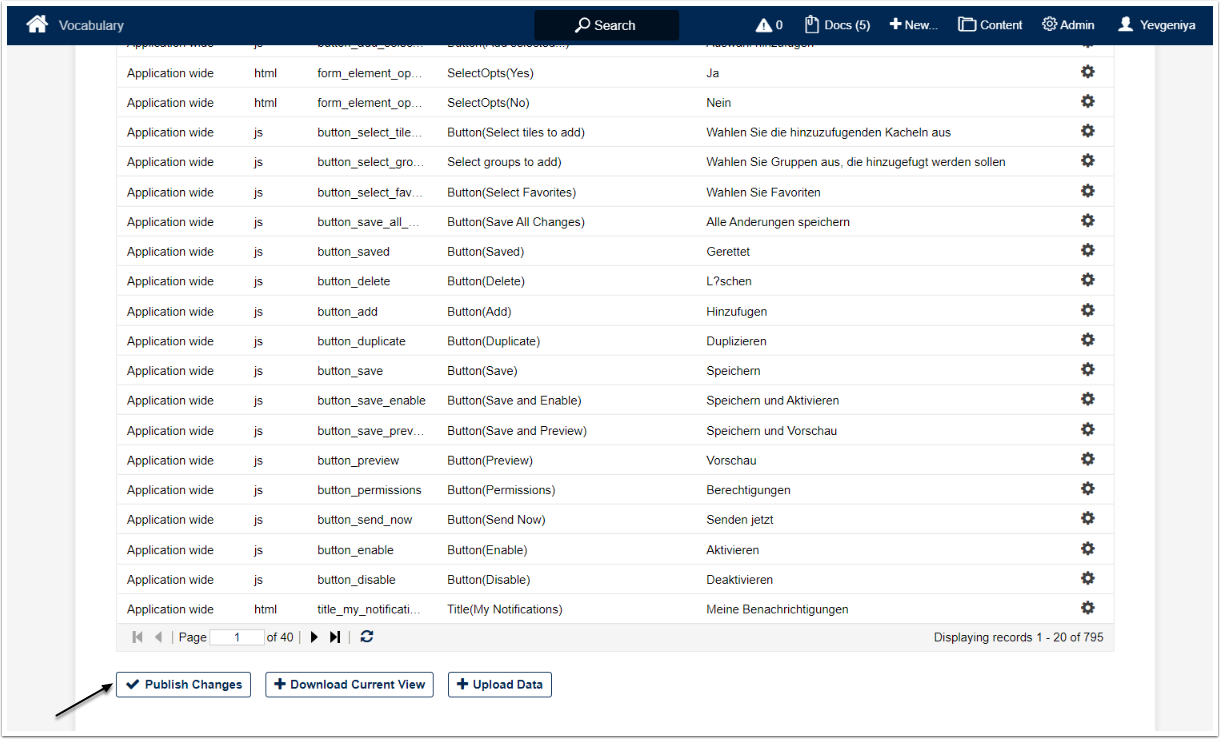
After you have clicked [Publish Changes], you may need to refresh the page.