Categories help Users organize their Content into understandably named sets. They are used to simultaneously grand Users access to bunches of Elements and group tiles at the Homepage. This article describes how to create a Category and add Elements to it.
NOTE: Categories will be most helpful if their title represents a meaningful grouping of information that all Users can understand.
1. Create a Category
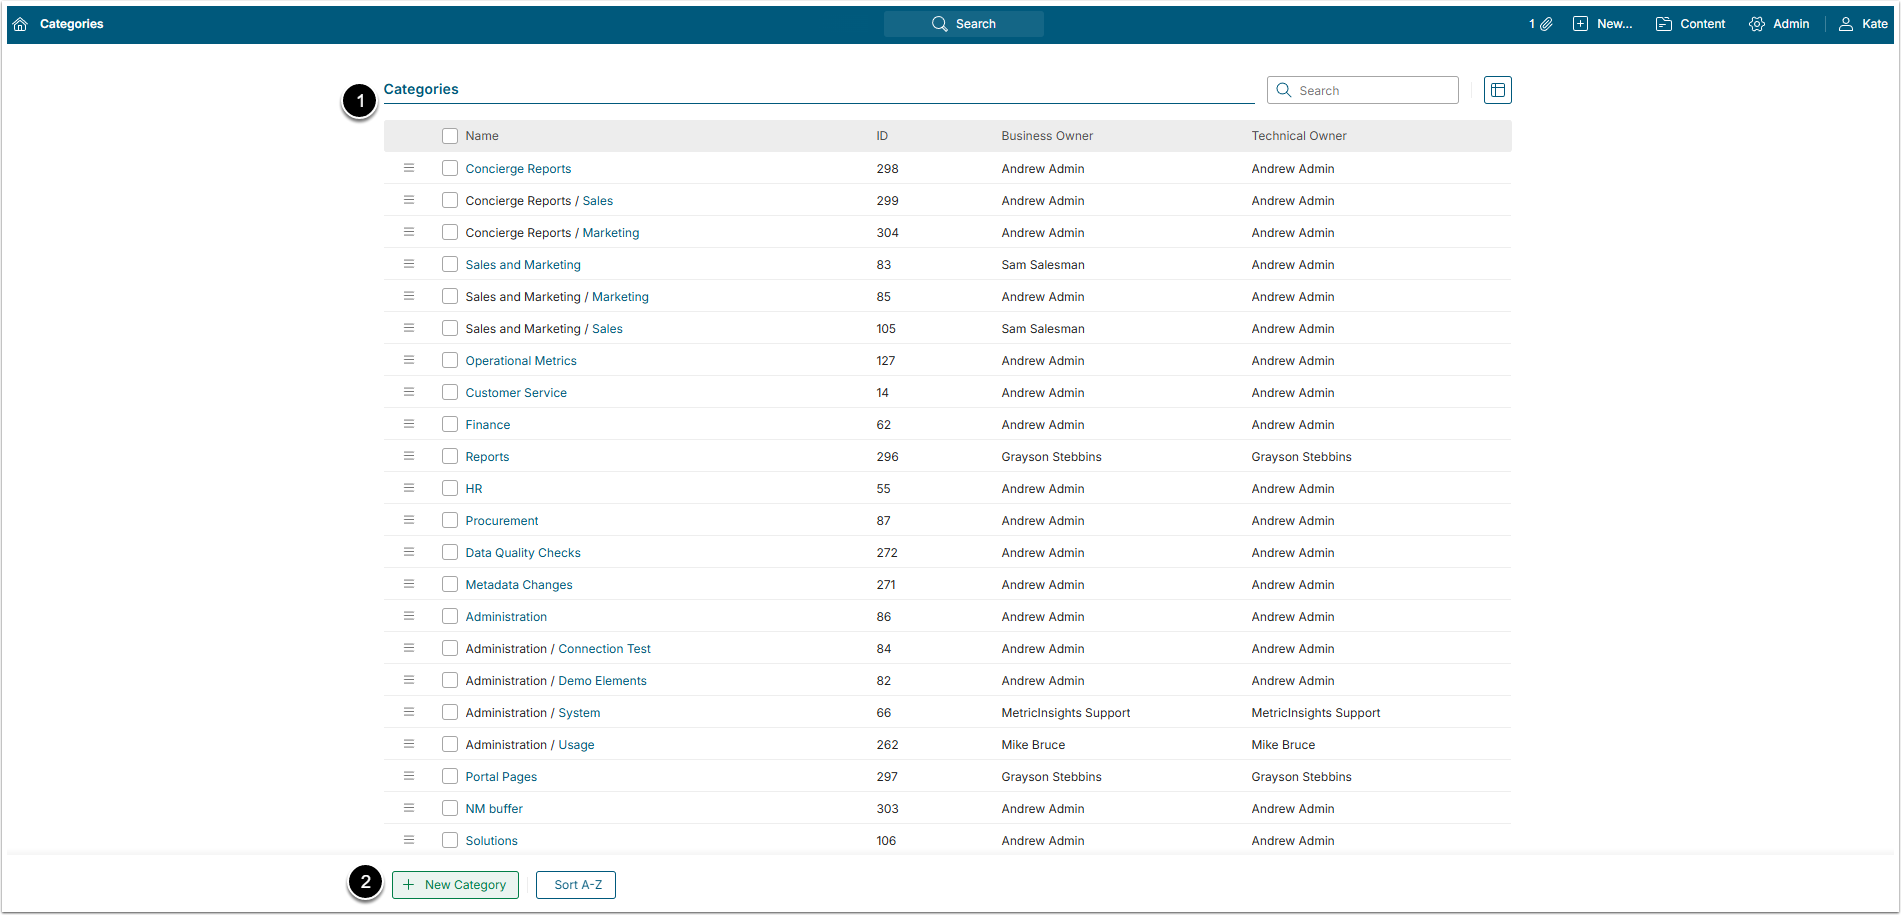
Access Content > Categories
The list of Categories previously created in the system opens. To add a new Category click [+ New Category].
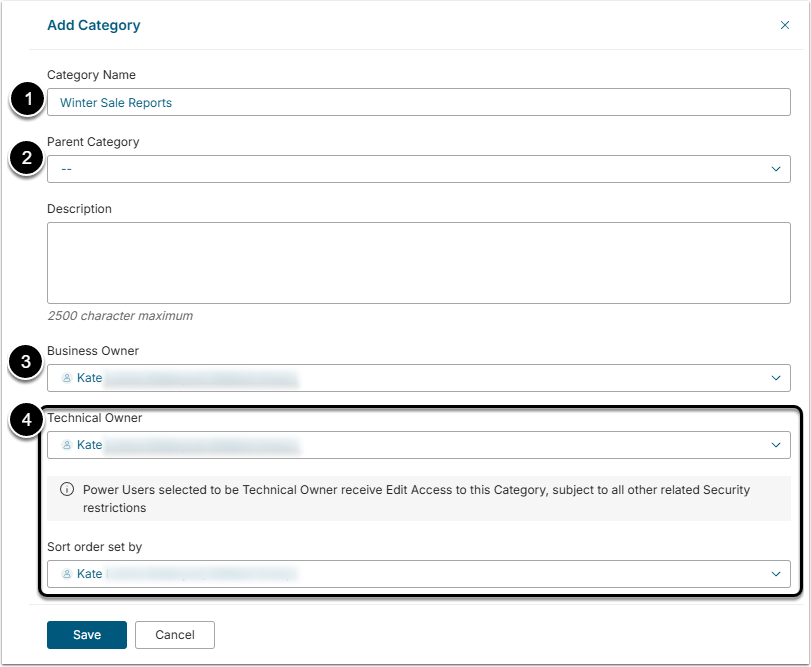
1.1. Provide basic Category information

-
Category Name: Give the Category a descriptive name;
- It can be up to 50 characters long;
- Parent Category: If the Category being created is a subcategory, select the Parent Category from the drop-down list. If it is an independent Category, leave this field empty;
- Business Owner: Select the Business Owner of the Category, who may be any User. The difference between Business and technical Owners is describes in this article;
- Technical Owner / Sort Order set by: Choose either Admin or Power User.
[Save] to access the Category Editor.
NOTE: Names of the Categories have to be unique. However:
- Identical subcategories can be created for different Categories. For example, both "Financial" and "Revenue" Categories can have a subcategory "Customer Activity"
- An unlimited number of subcategories with non-unique names can be created at different levels of hierarchy. For example, "Training" Category can have a "Training" subcategory and that subcategory can have a "Training" subcategory of its own
NOTE: Categories/subcategories are shown at the Homepage once at least one Element is added into them.
2. Configure Category Access
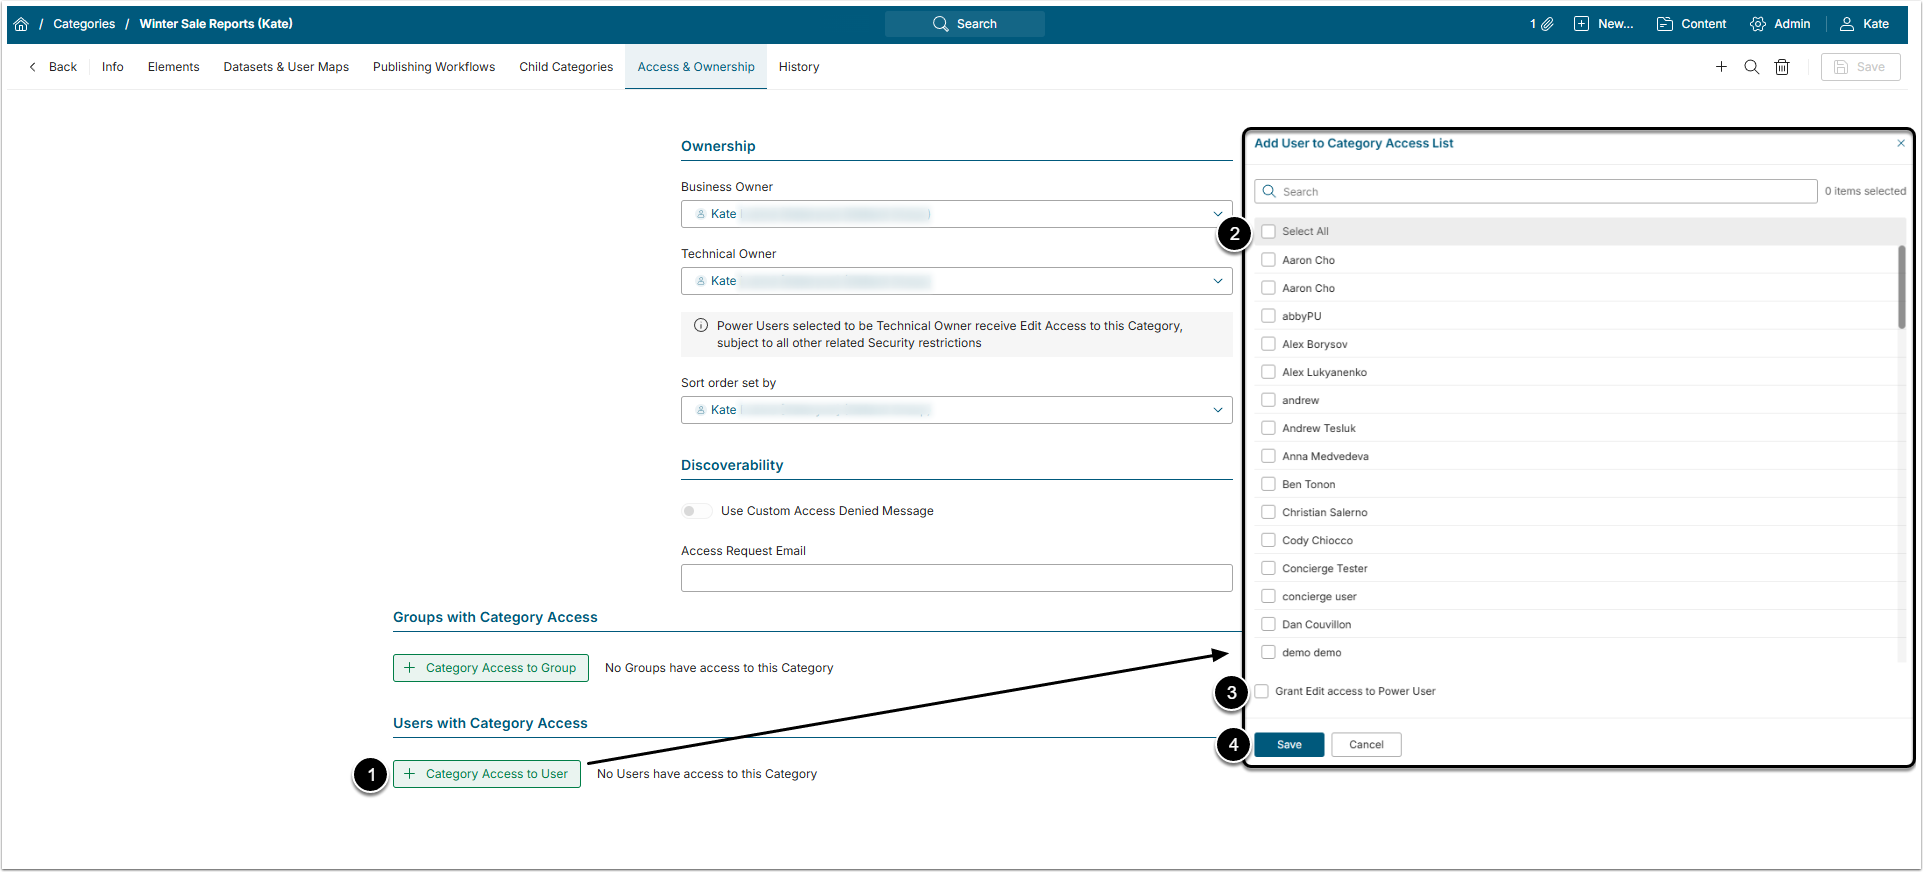
Go to Access & Ownership tab
The process of granting access to user and group is identical:
- [+ Category Access to User];
- Select Users/Groups from the list;
- Optionally, give the User Edit Access ;
- [Save].
For more details about Category Access, check the Granting Users Access to Category article.
3. Add Elements to the Category
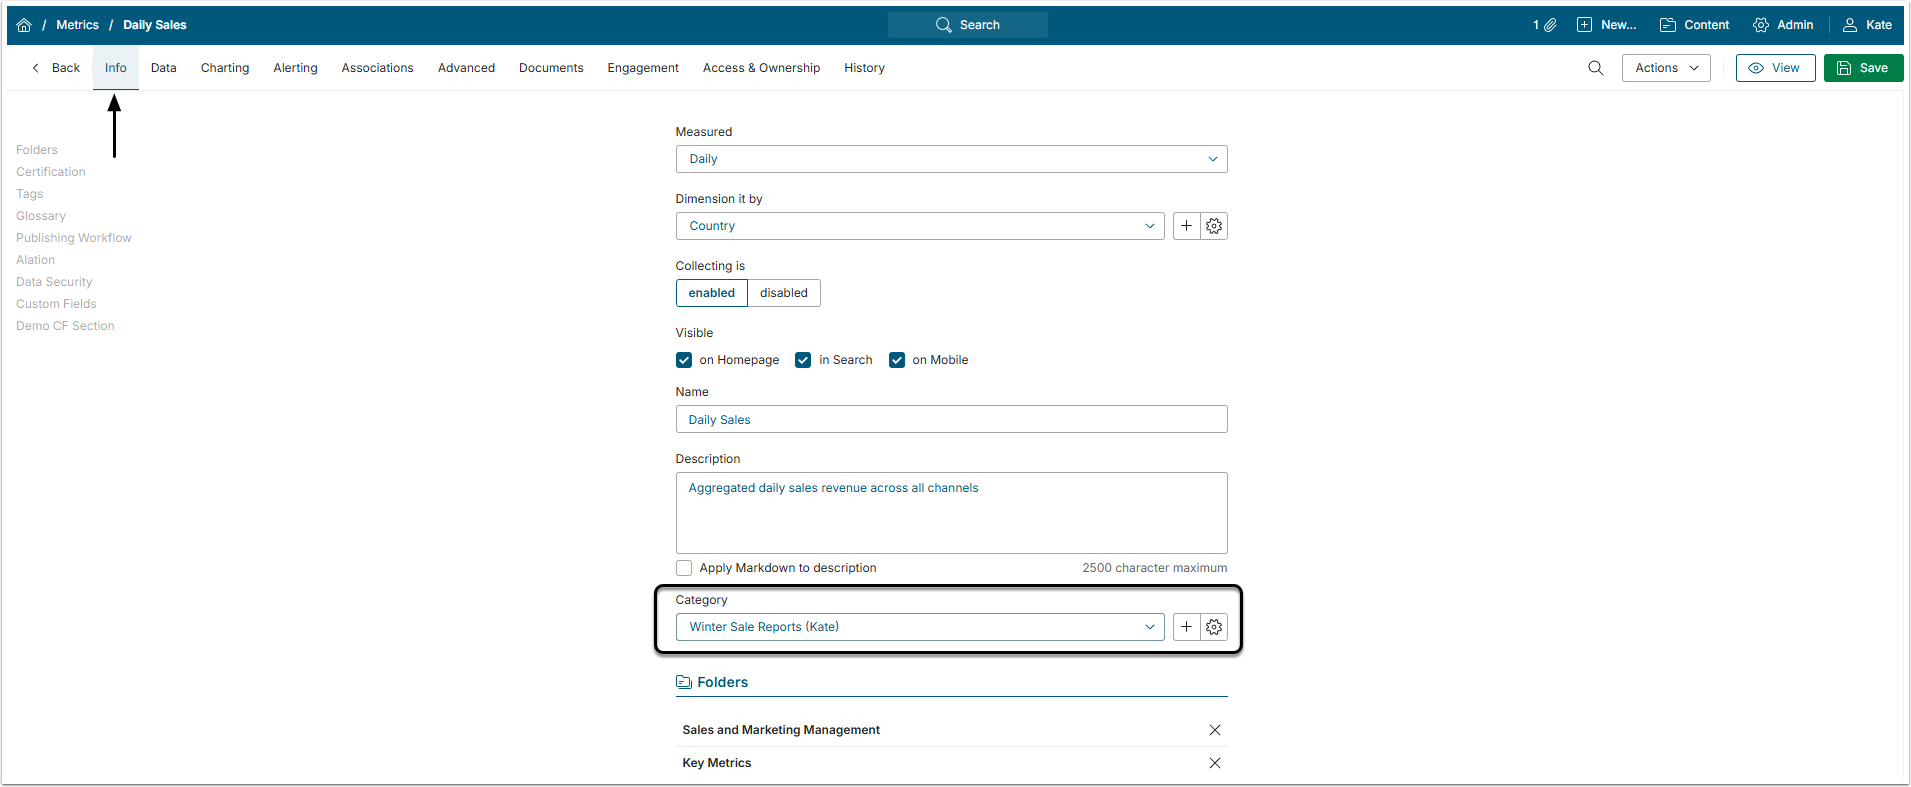
To add an Element to the Category, go to that Element's Editor.
On the Info tab, find the Category field and select the Category from the drop-down menu. Don't forget to [Save] the changes.
3.1. Define Element Visibility for this Category
Once the Category is created, it contains no Elements. After they are added, you can make all Elements of this Category either "visible" or "invisible".
Go to Elements tab
- [Change Element Visibility];
- Activate the toggle switch to make all Elements of the category visible on the Homepage;
- [Apply Changes] for new settings to come into effect.


