Metric Insights is available on Microsoft Marketplace, and can be deployed as a virtual machine directly through the Azure portal. This article will detail how to setup and install Metric Insights on a Microsoft Azure virtual machine.
Table of contents:
NOTE: Contact support@metricinsights.com to configure the number of cores for your license.
1. Access Microsoft Marketplace
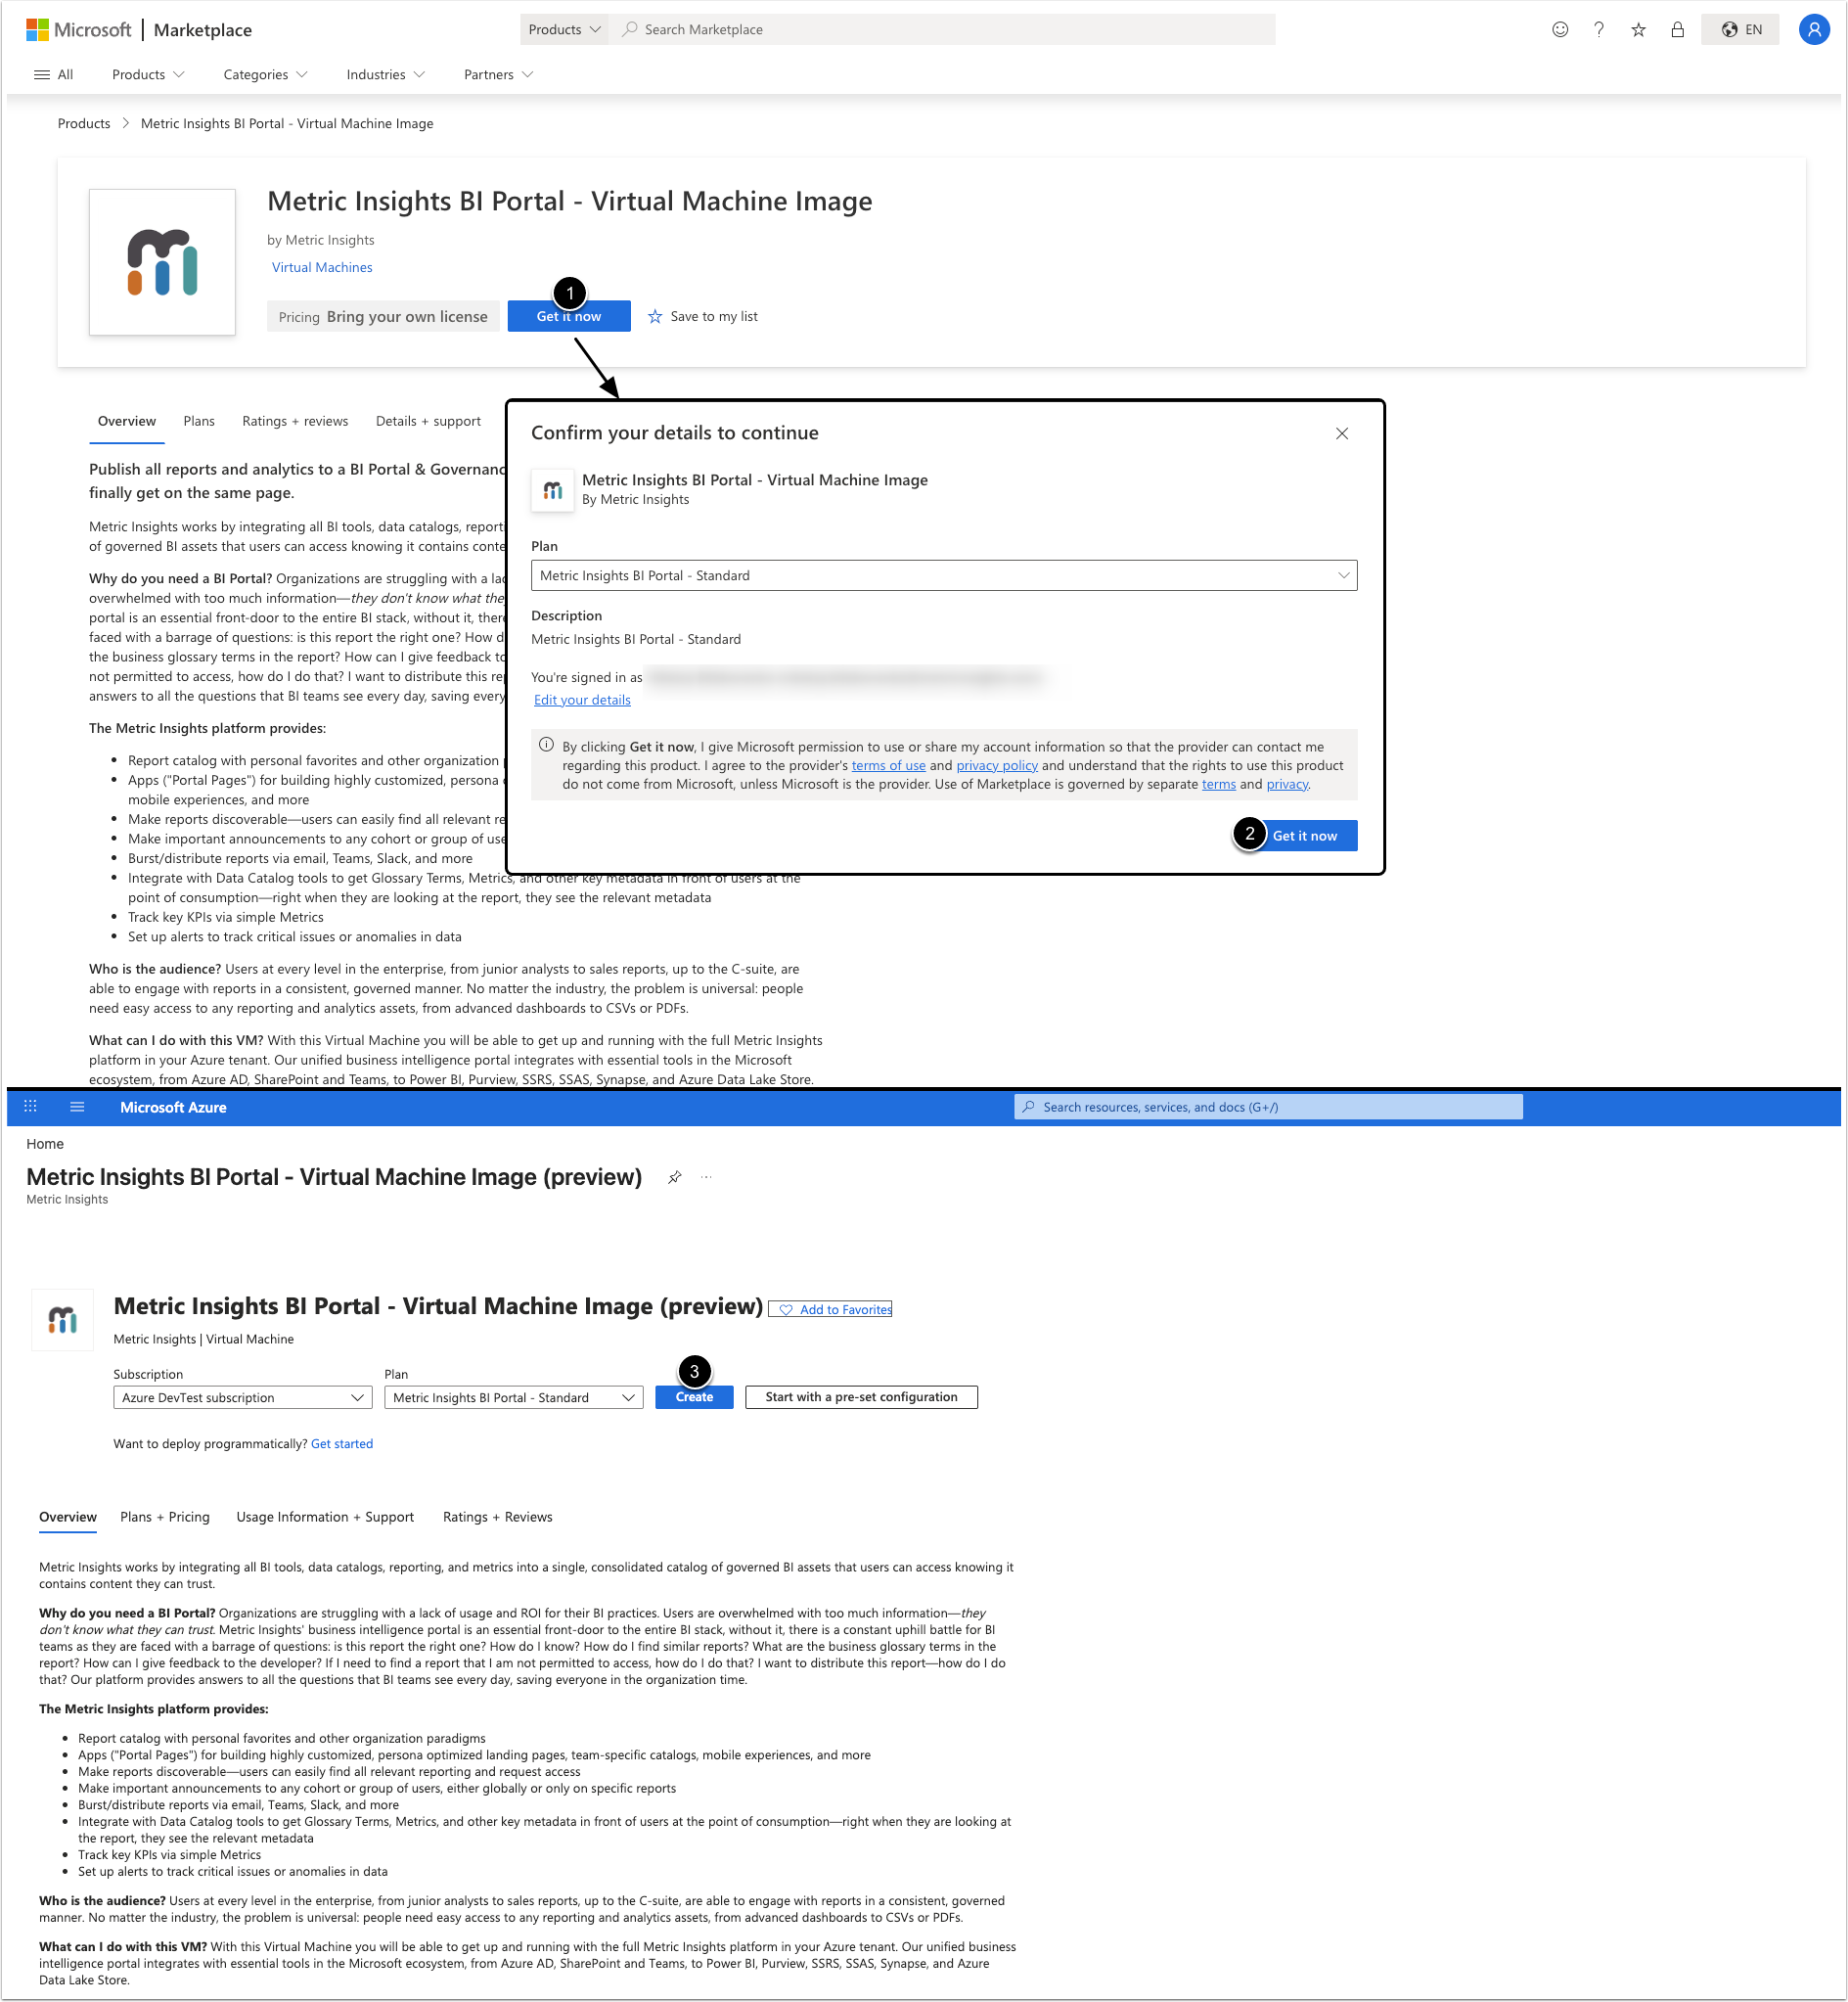
- [Get it now]
- Sign in to the opened pop-up, then click [Get it now]
- You will be redirected to the Azure Portal, then click [Create]
2. Create Virtual Machine
2.1. Basics Tab
2.1.1. Configure Subscription and Instance Details
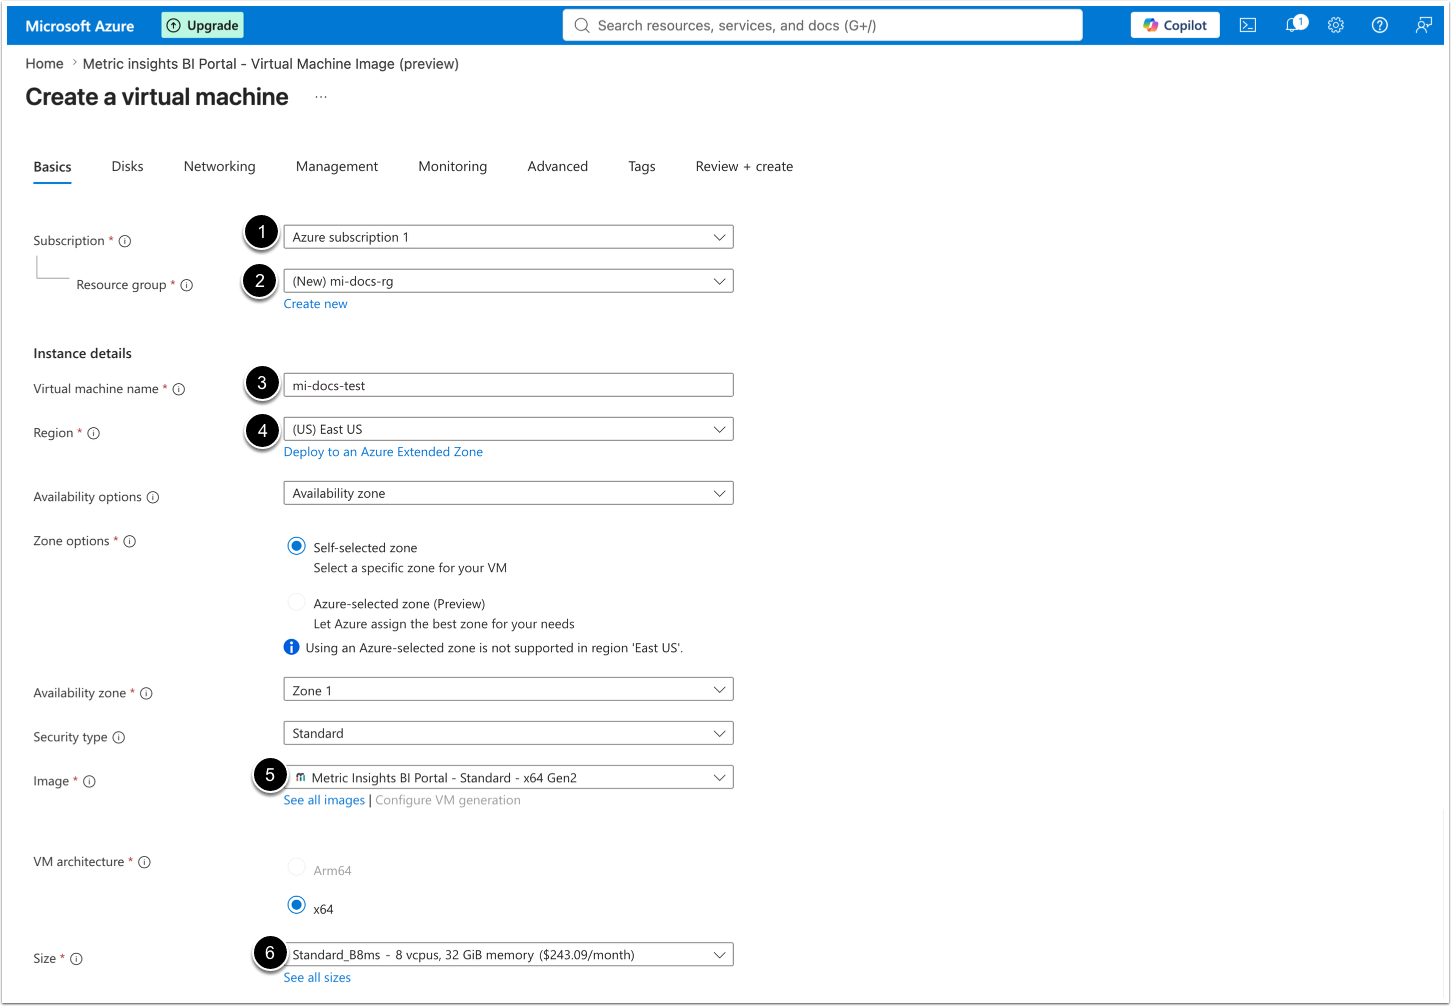
- Select your Subscription from the dropdown list.
- Select an existing Resource group or create a new one by clicking [Create new]
- Enter Virtual machine name.
- Specify Region parameter.
- Verify that the Image corresponds to the Metric Insights image from the Microsoft Marketplace.
- For Size choose a virtual machine that meets the requirements described here.
2.1.2. Configure Administrator Account
Define Administrator account Authentication type.
There are two options:
SSH Public Key Authentication
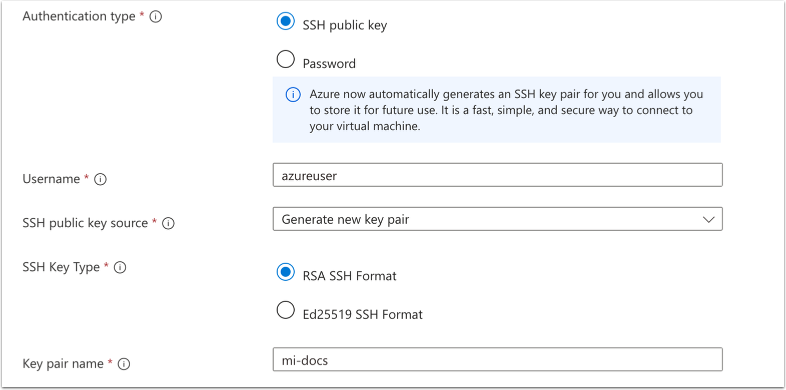
For SSH public key you can set Username and generate a new key pair or use an existing one.
Password Authentication
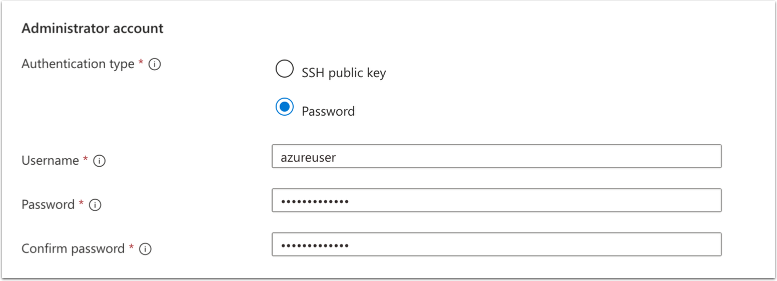
For Password you can set Username with Password that meet the form requirements.
2.1.3. Configure Inbound Port Rules
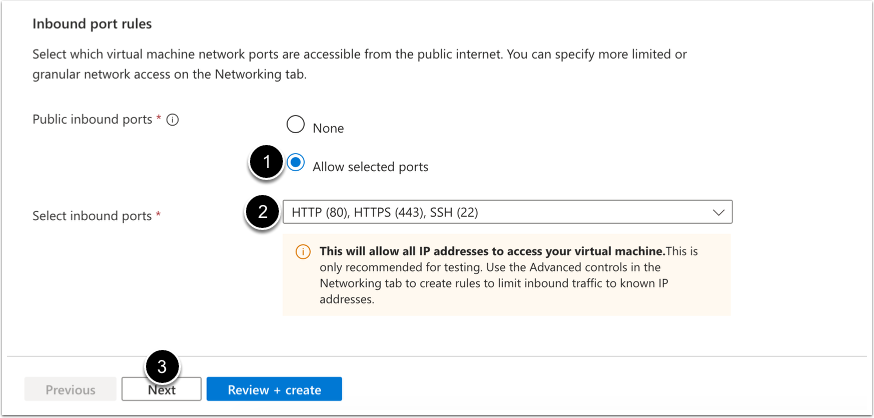
- Public inbound ports: Allow selected ports
- Select inbound ports: HTTP (80), HTTPS (4430), SSH(22)
- [Next]
2.2. Disks Tab
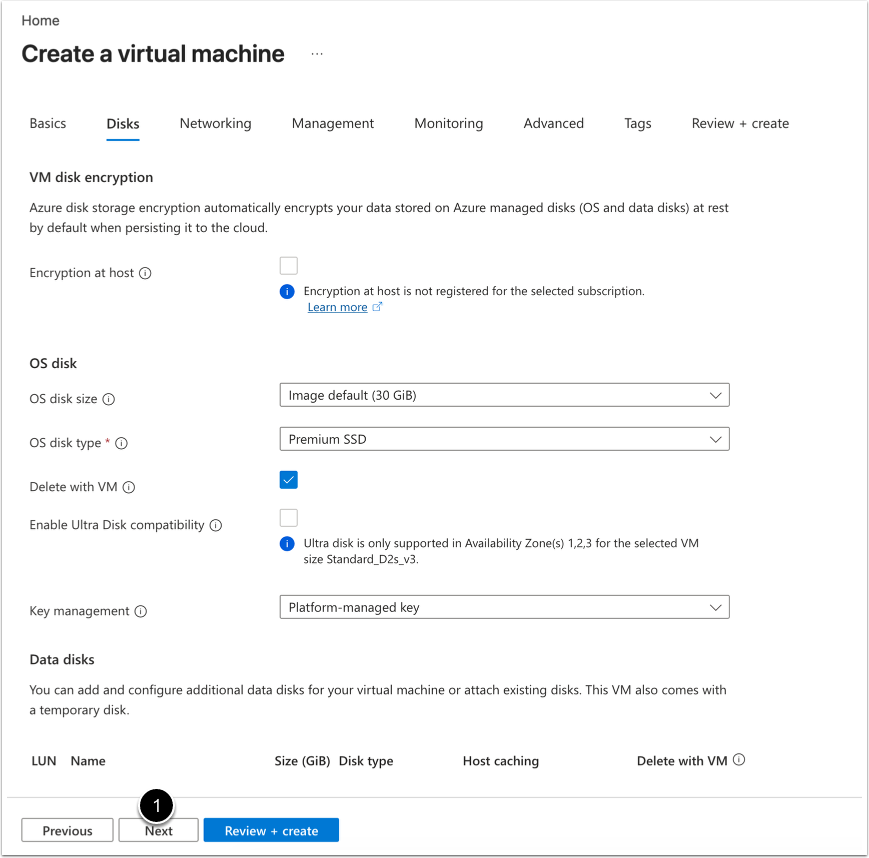
- On the Disks tab, you can proceed with the defaults and click [Next].
2.3. Networking Tab
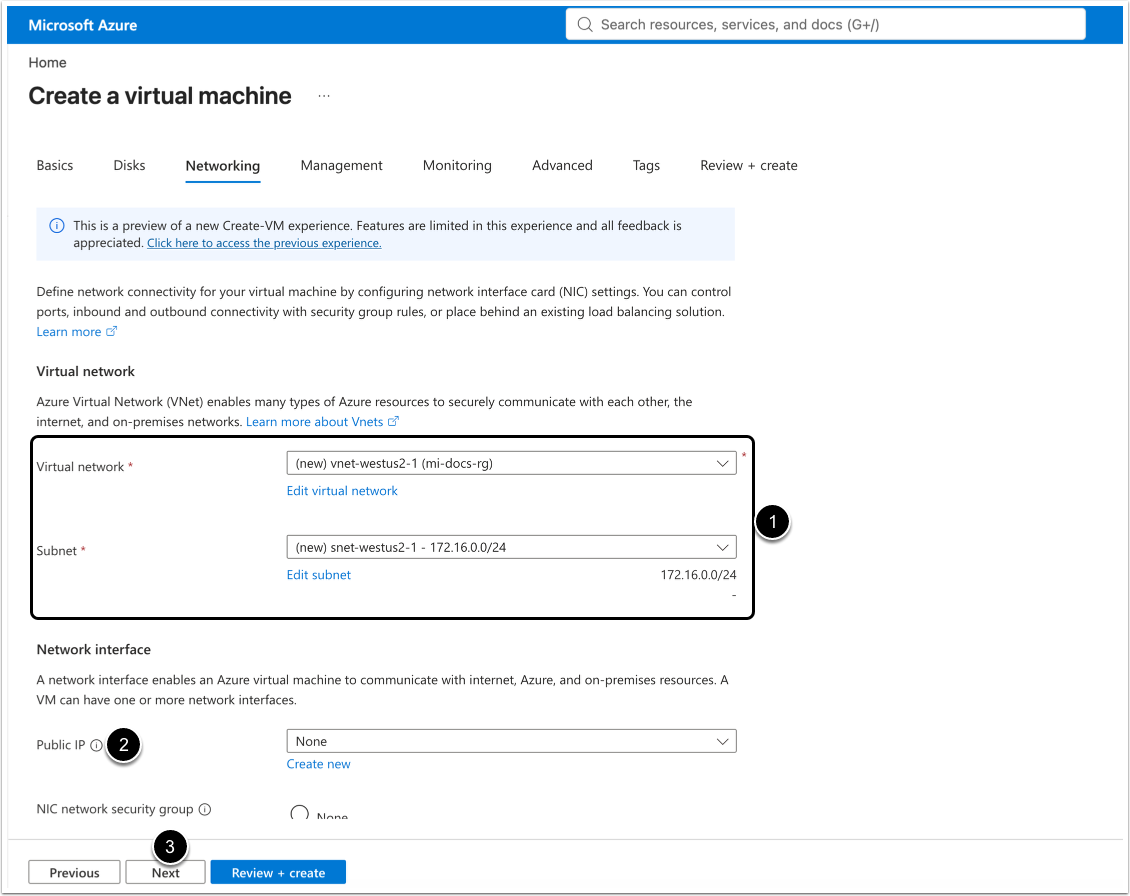
- New Virtual network and Subnet are created automatically. Alternatively, you can select the existing ones via the corresponding dropdown lists.
- Configure Public IP by clicking [Create new] or selecting an existing one.
- For other parameters, you can proceed with defaults and click the [Next]
2.4. Management Tab
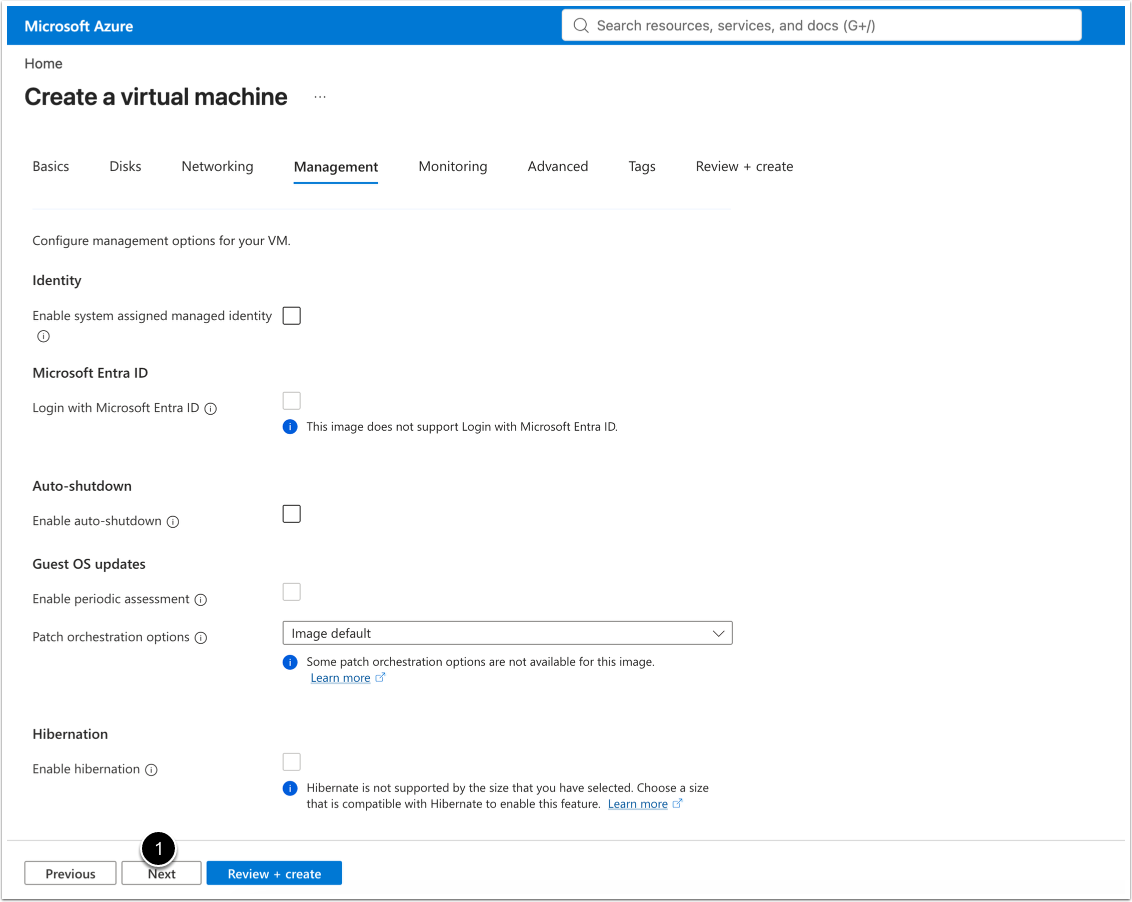
- On the Management tab, you can proceed with defaults and click [Next].
2.5. Monitoring Tab
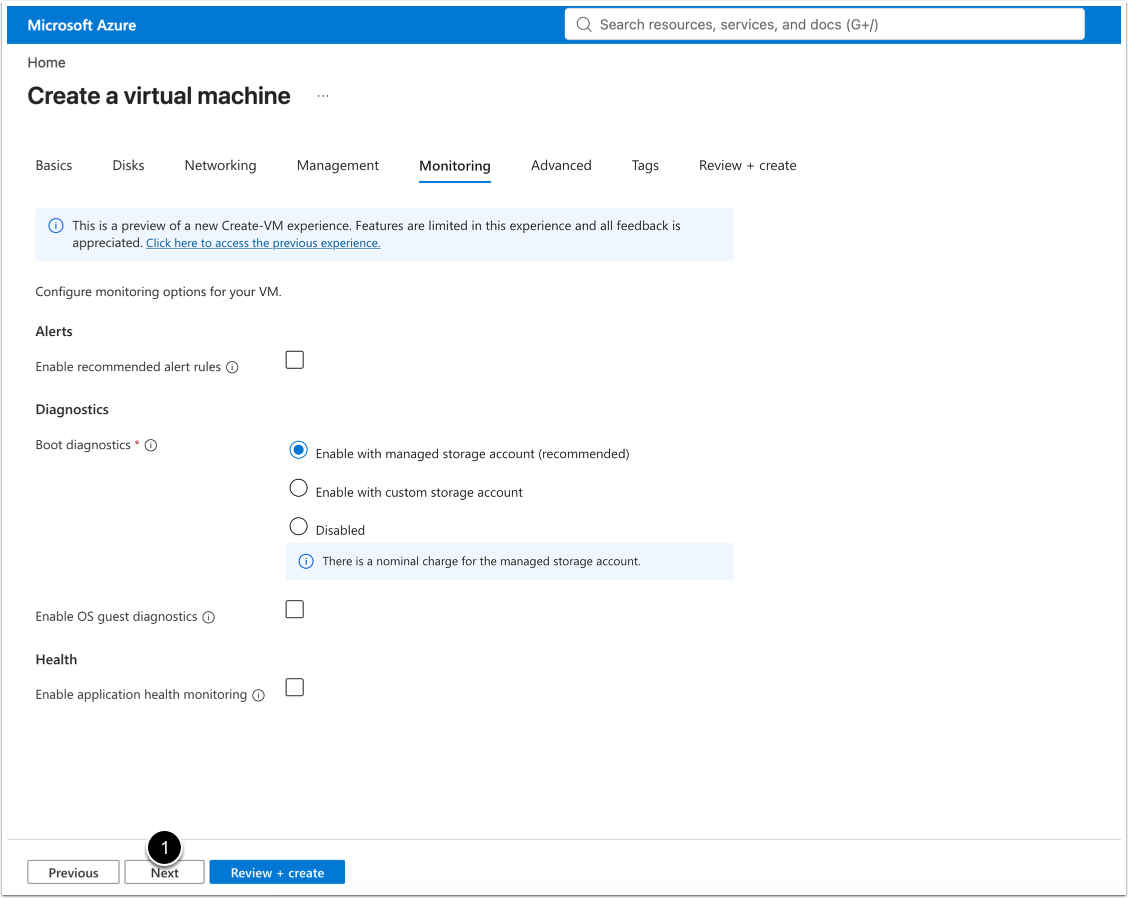
- On the Monitoring tab, you can proceed with defaults and click [Next].
2.6. Advanced Tab
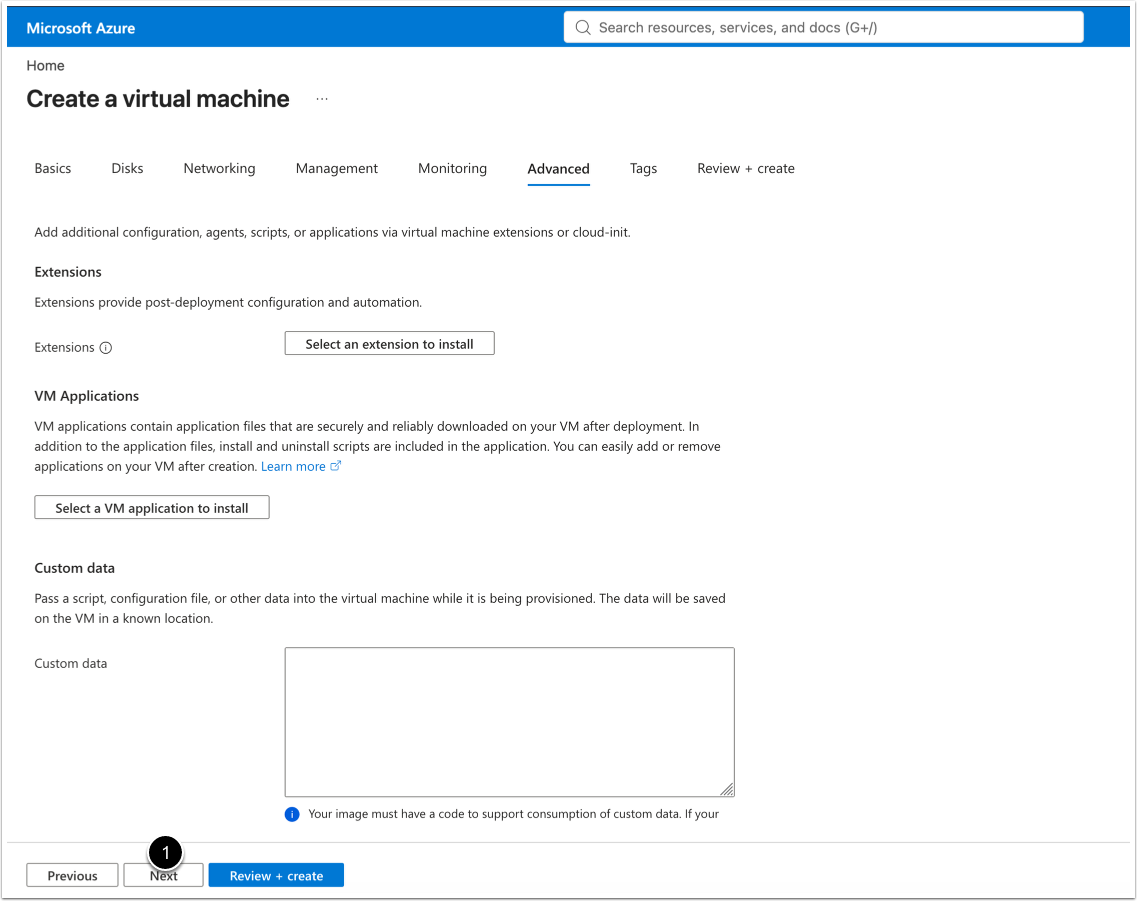
- On the Advanced tab, you can proceed with defaults and click [Next].
2.7. Tags Tab
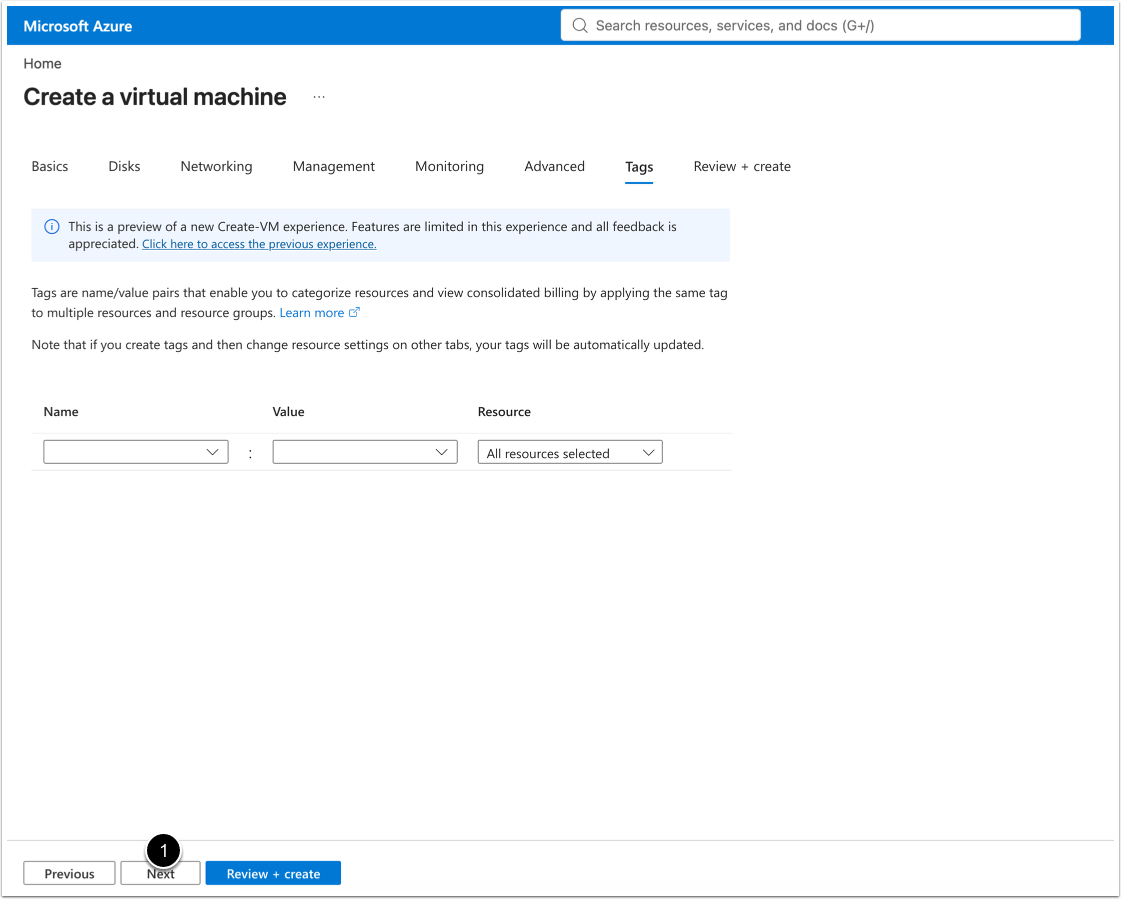
- On the Tags tab, you can add tags and proceed by clicking [Next].
2.8. Review + create Tab
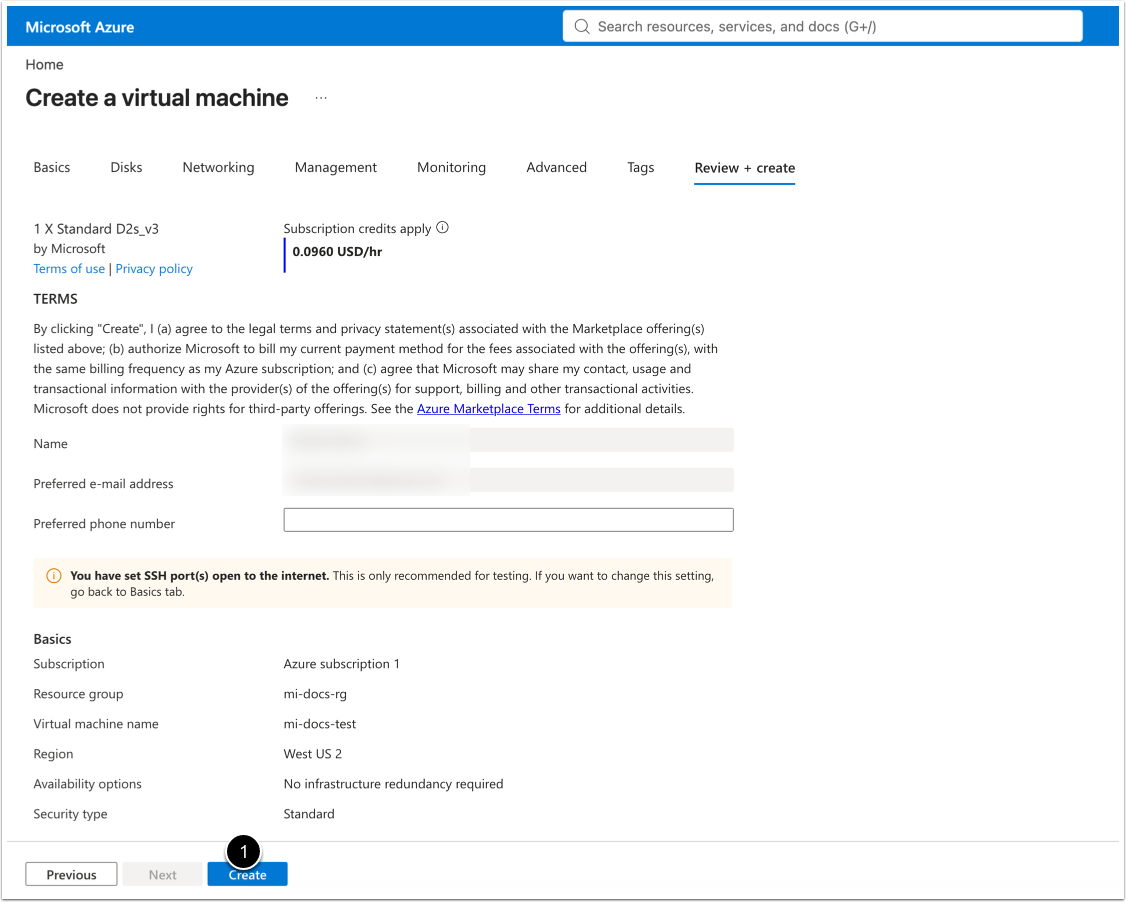
- On the Review + create tab upon successful validation, review defined parameters. If everything is correct proceed by clicking the [Create].
3. Open the Necessary Ports for Metric Insights to Work
3.1. Go to Resource
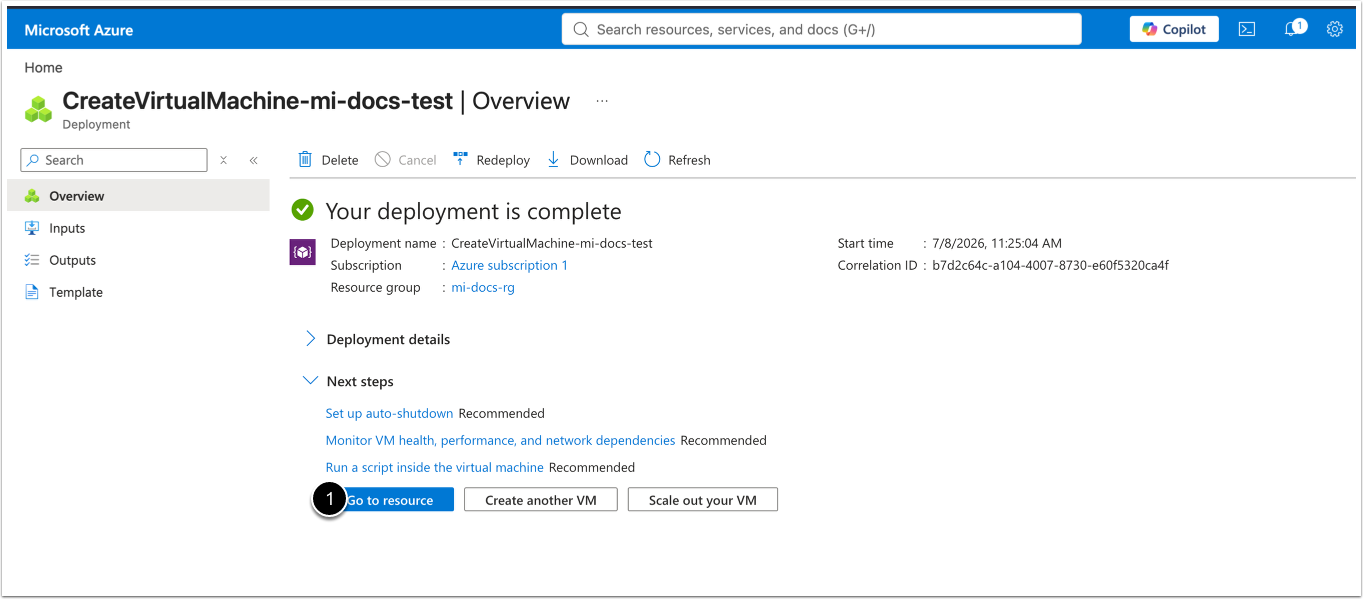
- Wait until all resources will be created, then [Go to resource].
3.2. Access Networking Menu
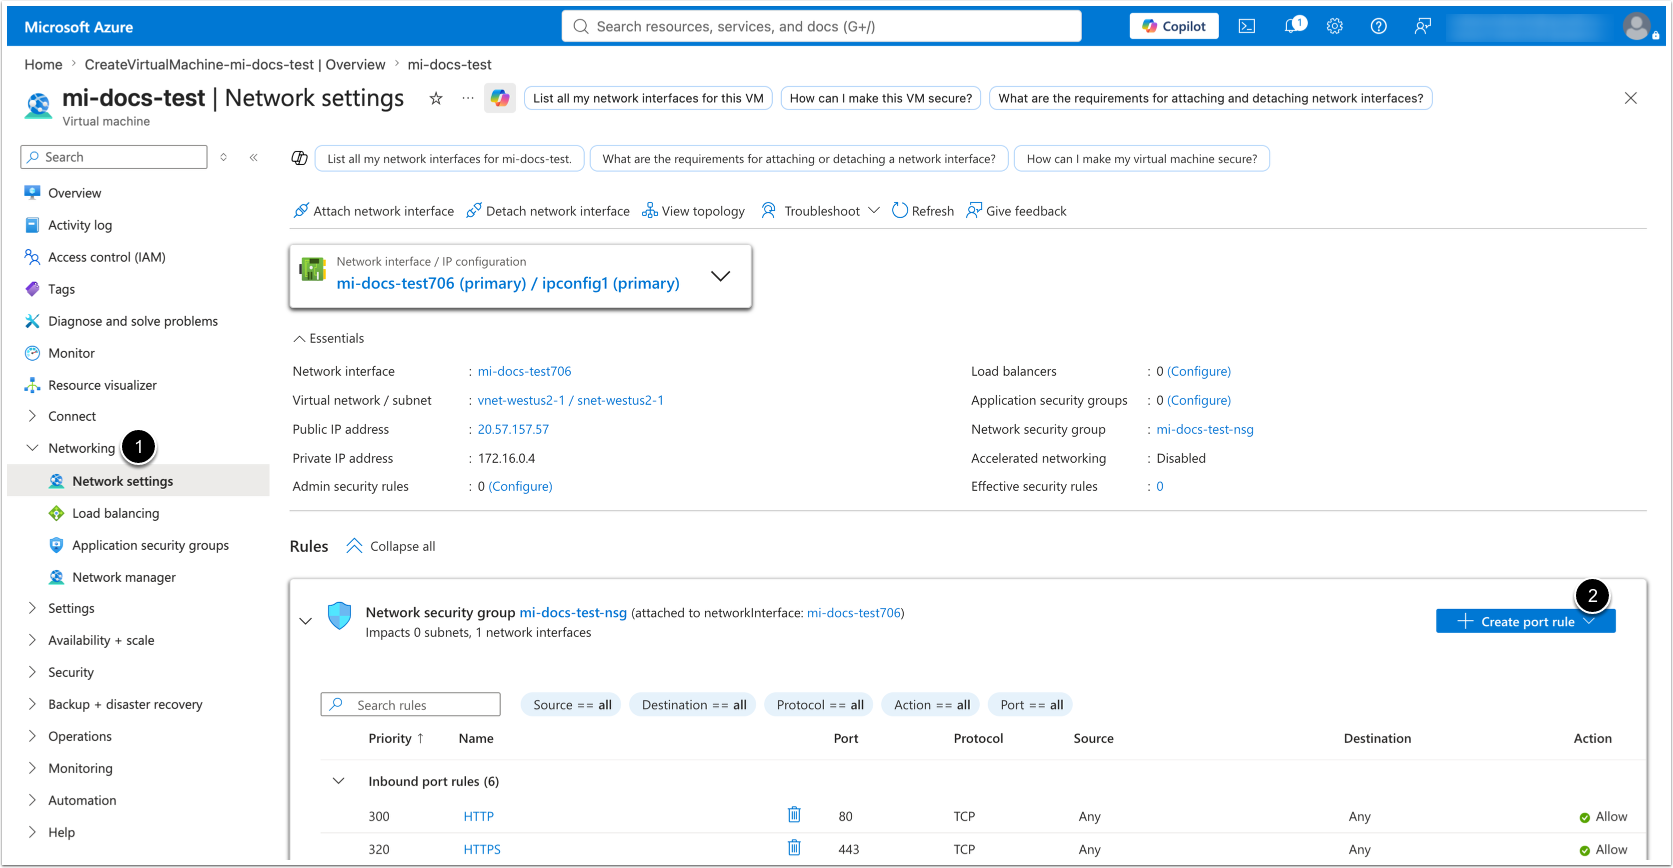
At this point, you should have a running virtual machine.
On the left menu click on the Networking:
- Access Networking > Network settings
- [+ Create port rule] > [Add inbound port rule]
3.3. Add Inbound Ports Rules
In the opened popup, add the ports 8081 and 2550-2551 as described below.
3.3.1. Add Port 8081
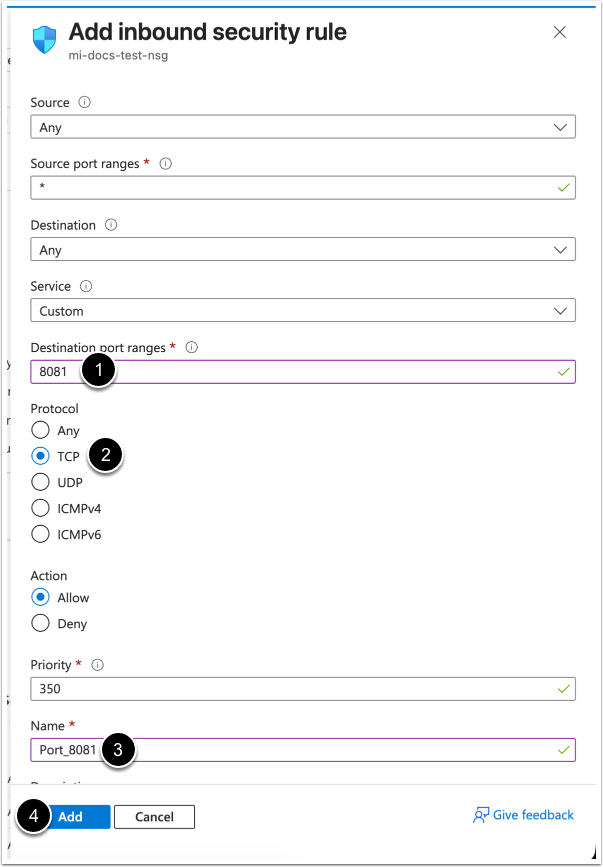
- Destination port ranges: 8081
- Protocol: TCP
- Enter a rule Name.
- [Add]
3.3.2. Add Ports 2550-2551
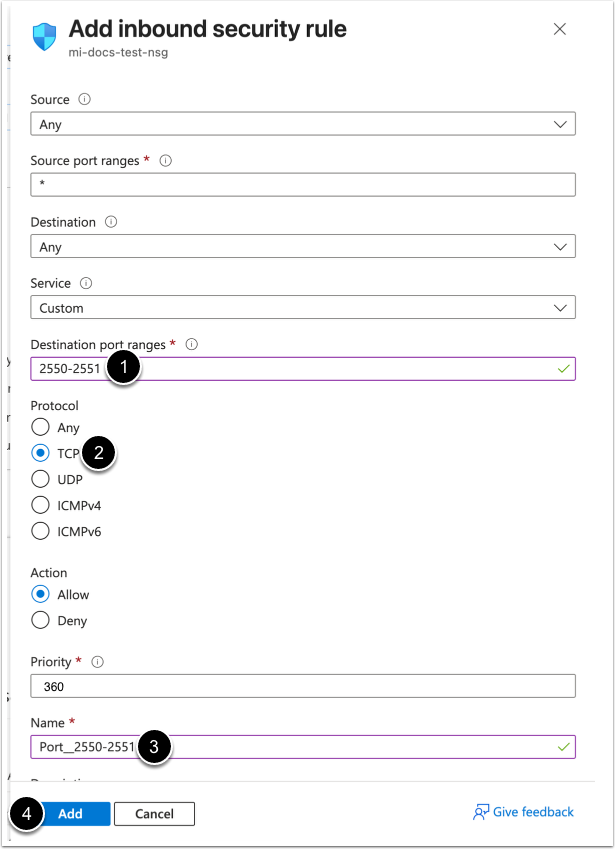
- Destination port ranges: 2550-2551
- Protocol: TCP
- Enter a rule Name.
- [Add]
3.4. Verify Opened Ports
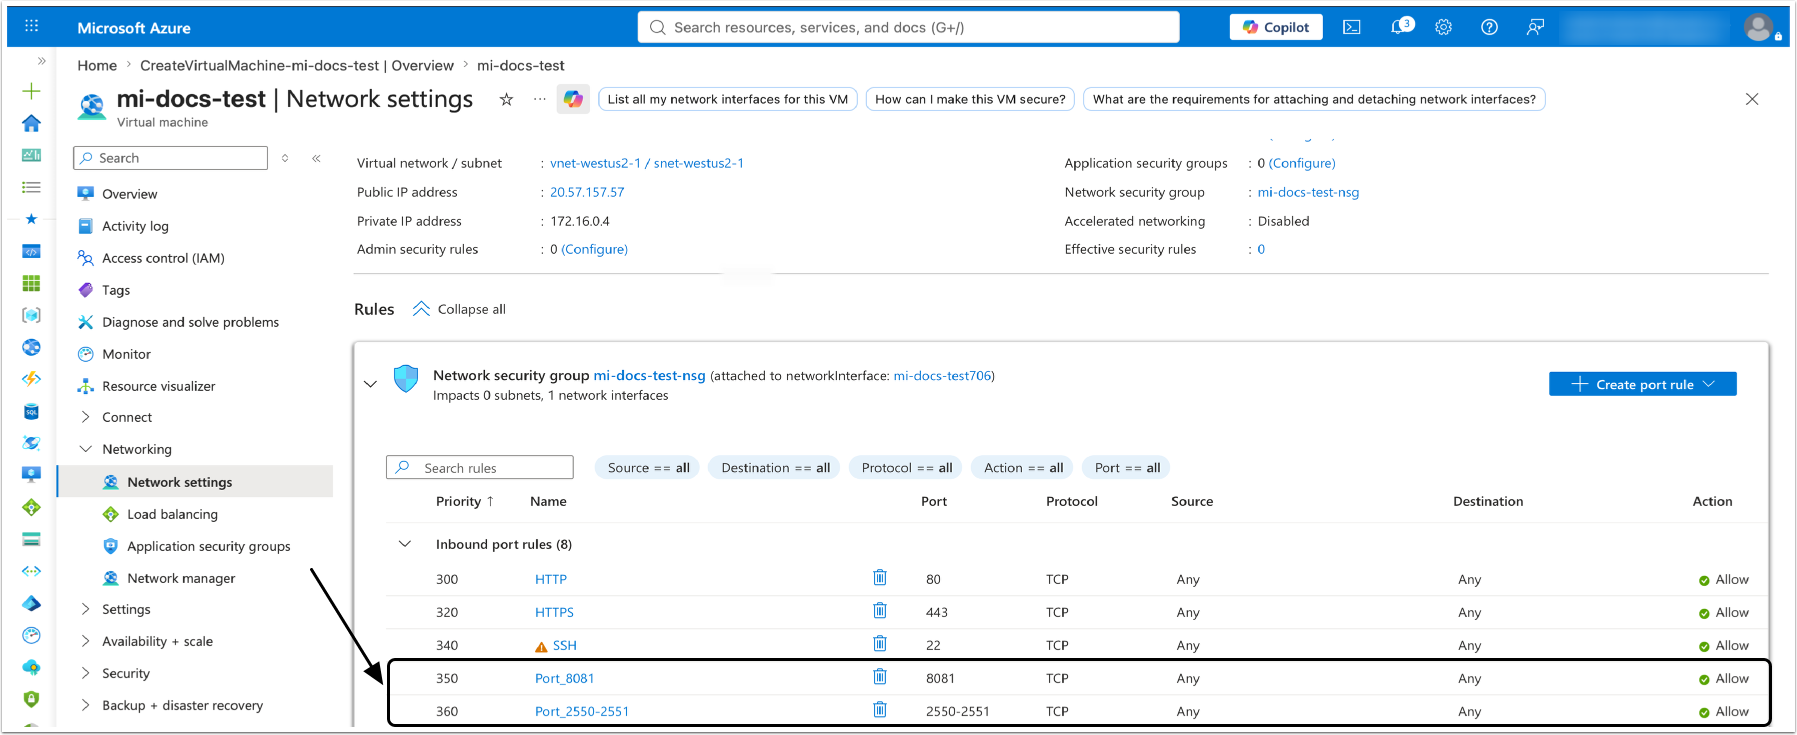
Check the added inbound port rules on the Network settings page.
4. Resize OS Disk
4.1. Stop the Virtual Machine
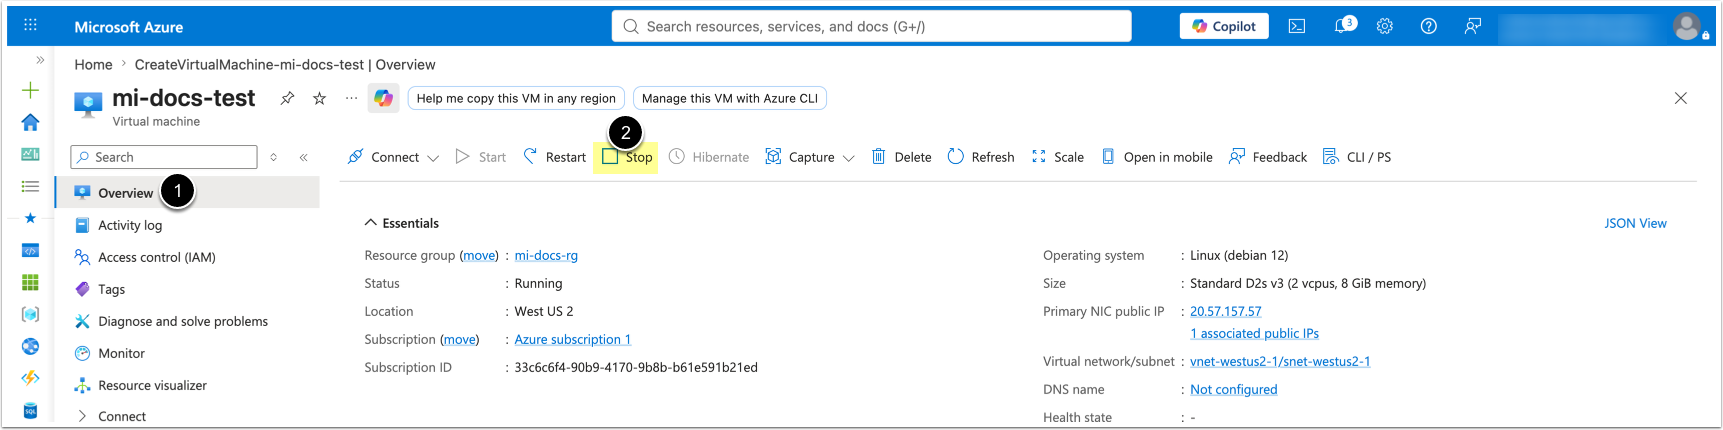
By default, the virtual machine has a 30 GB disk. To increase disk size you need to stop the virtual machine first:
- Access Overview
- [Stop]
4.2. Access Disk
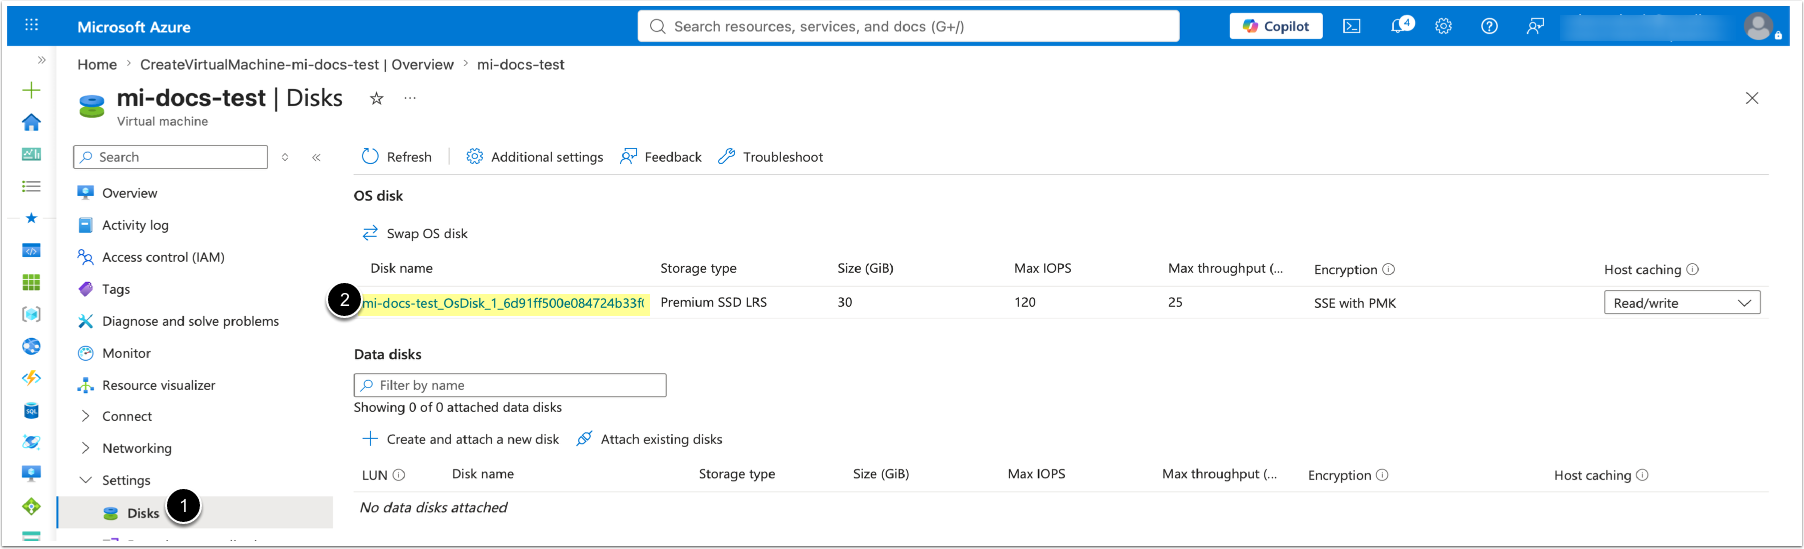
- Access Settings > Disks
- Select the Disk
4.3. Set New Disk Size
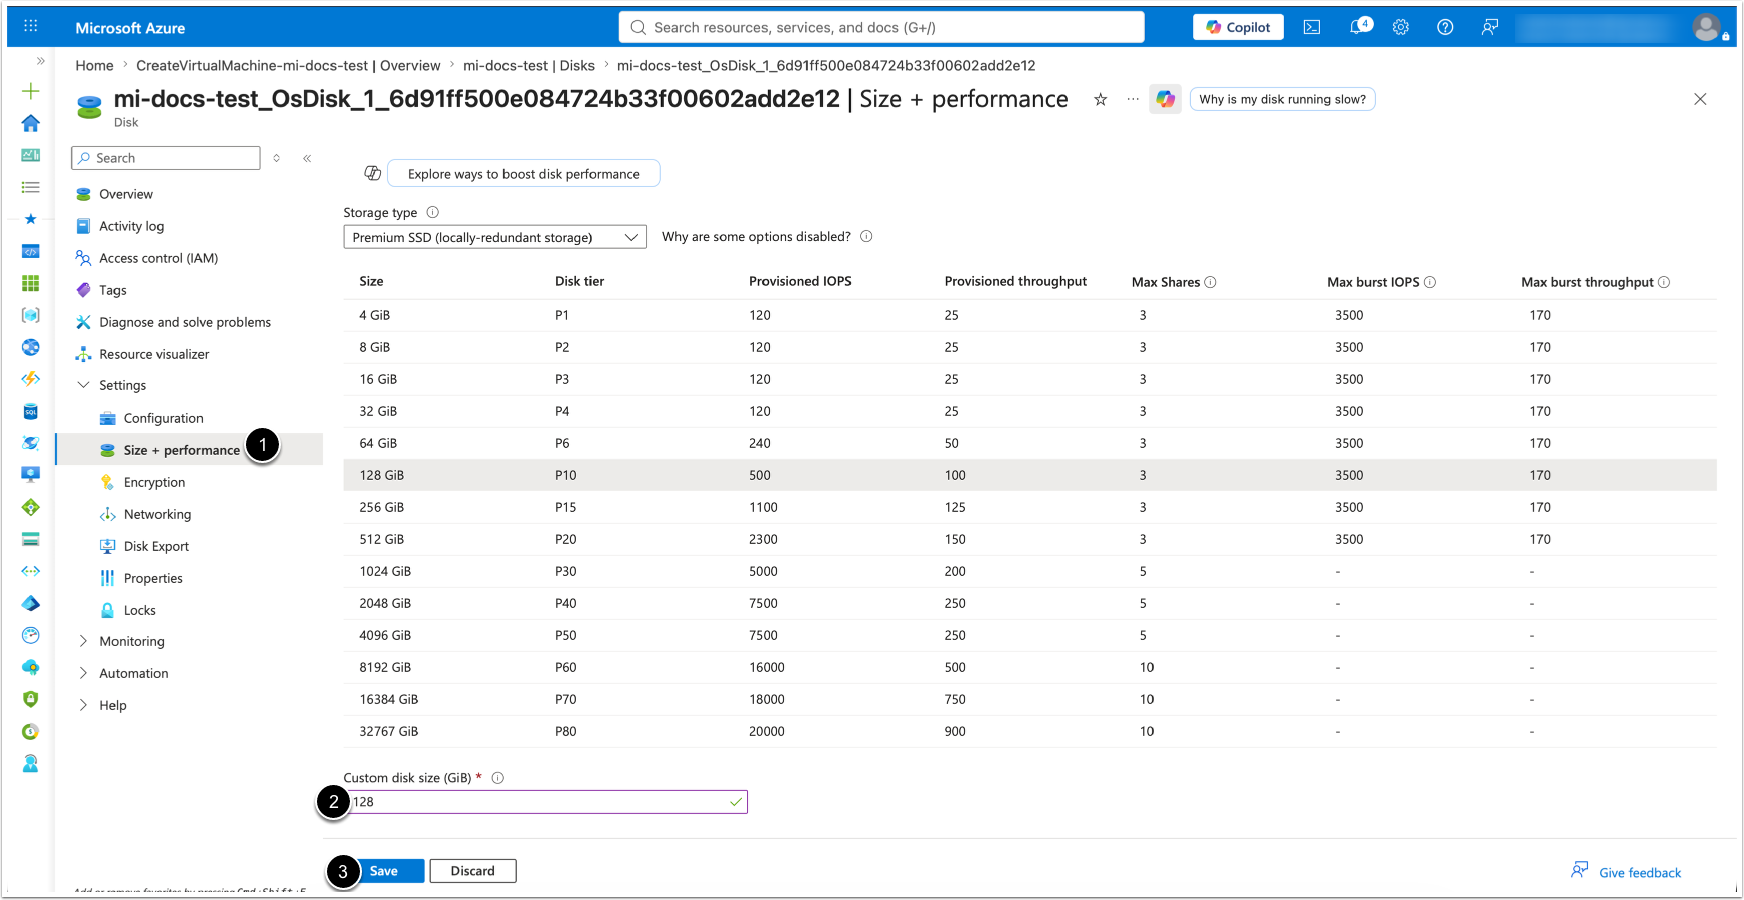
- Access Settings > Size + performance
- Set Custom disk size according to the System Requirements for a Metric Insights Server.
4.4. Start the Virtual Machine
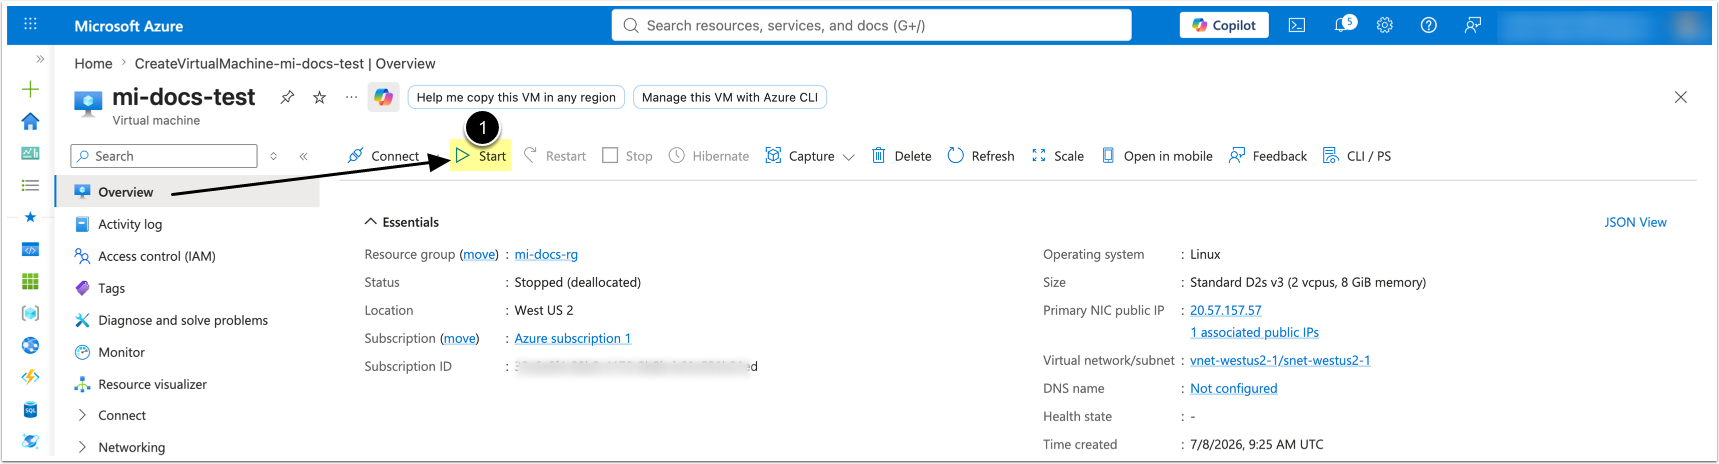
- Return to the Overview page and [Start] the virtual machine.
5. Connect to the Virtual Machine
5.1. Configure DNS
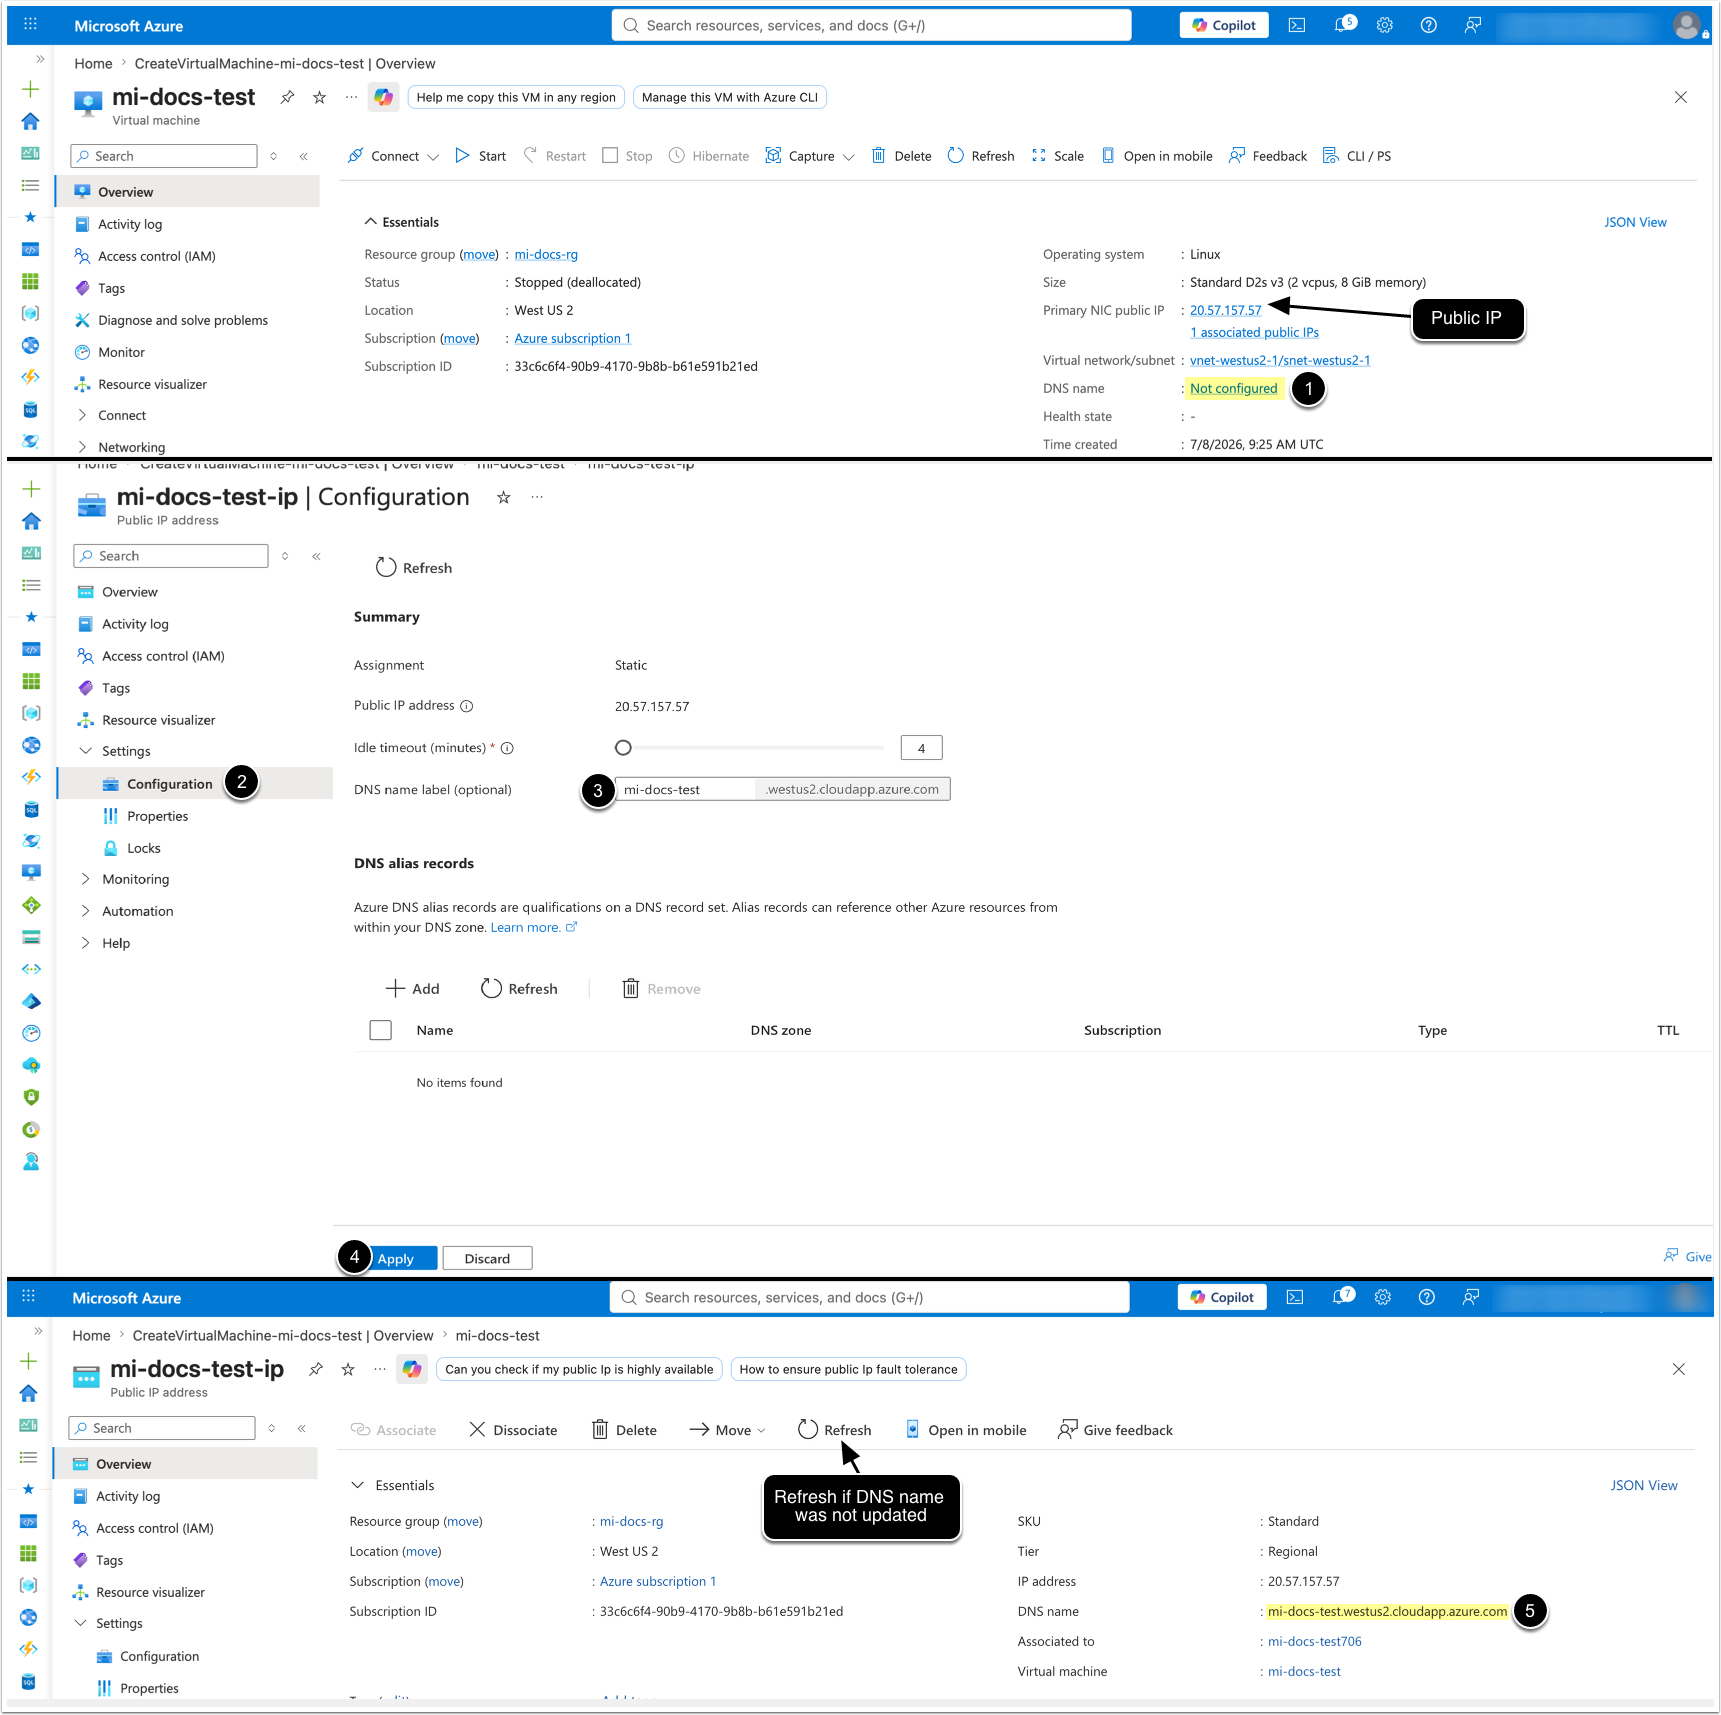
When the virtual machine has started, copy the public IP address to use with an SSH connection. You can also configure a DNS name:
- Click [Not configured] under the DNS name.
- Verify that you are on the Settings > Configuration tab.
- Enter a DNS name label.
- [Apply]
- Return to the Overview page and check the DNS name.
- If the DNS name was not updated, try to refresh the page by clicking [Refresh]
5.2. Connect via SSH
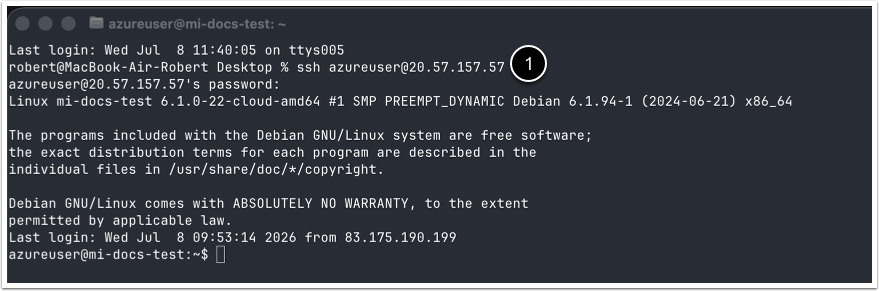
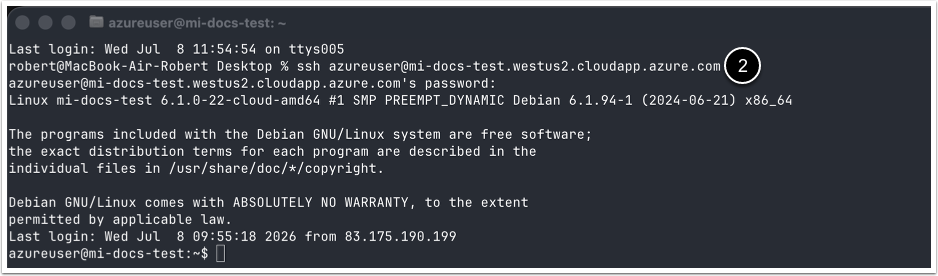
Connect to the virtual machine by either:
- IP address
- DNS name