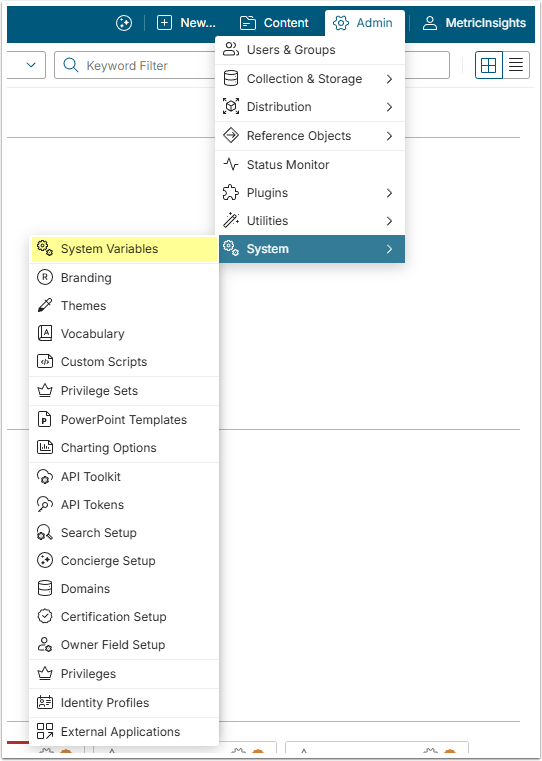
In order to configure LDAP connectivity, it is necessary to set the LDAP parameters in const.php.
This article describes how to set them properly using the UI for Config Variables.
2. Establishing a Сonnection to the LDAP Server
Investigate the type of directory server that is used; i.e., OpenLDAP or Windows ActiveDirectory.
The minimum parameters needed to be set in the Config Variables are:
- URL of the LDAP Server;
- LDAP Server username and password if required;
- LDAP_BIND_REQUIRES_DN for OpenLDAP only;
- BaseDN.
These settings may be edited by clicking on the edit icon (gear) for each item.
Setting these parameters correctly gives Users an ability to authenticate against LDAP. The remaining parameters are necessary to synchronize User information and are explained in Step 3.
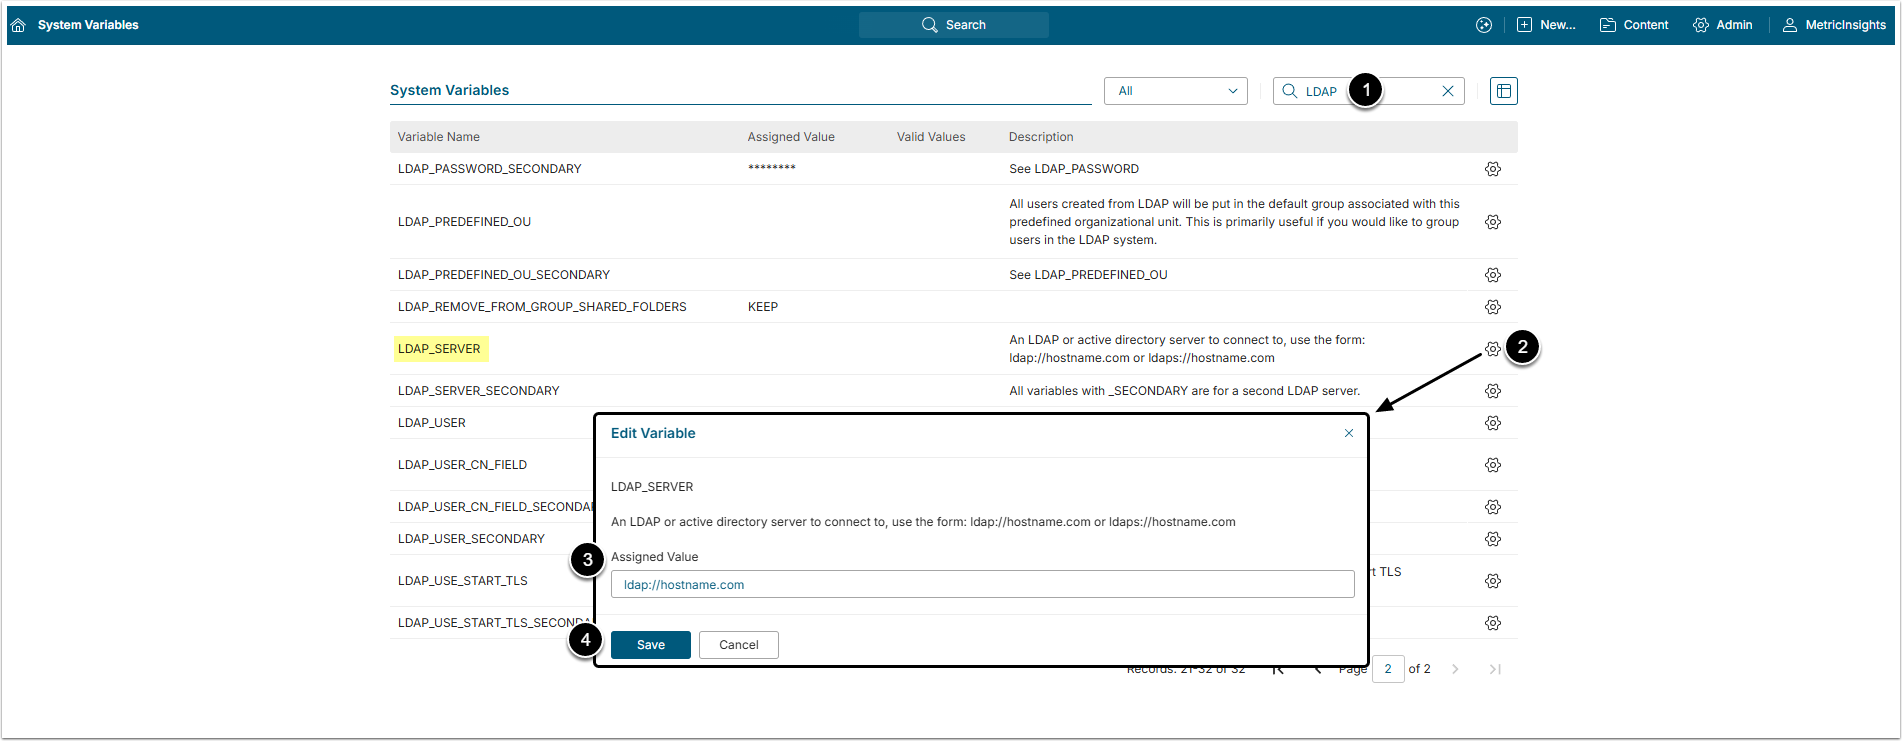
2.1. LDAP Server URL
- Filter the Variable by "LDAP".
- Find the LDAP_SERVER Variable and click the gear icon in its row.
- Assigned Value: Insert the server active directory address.
- [Save]
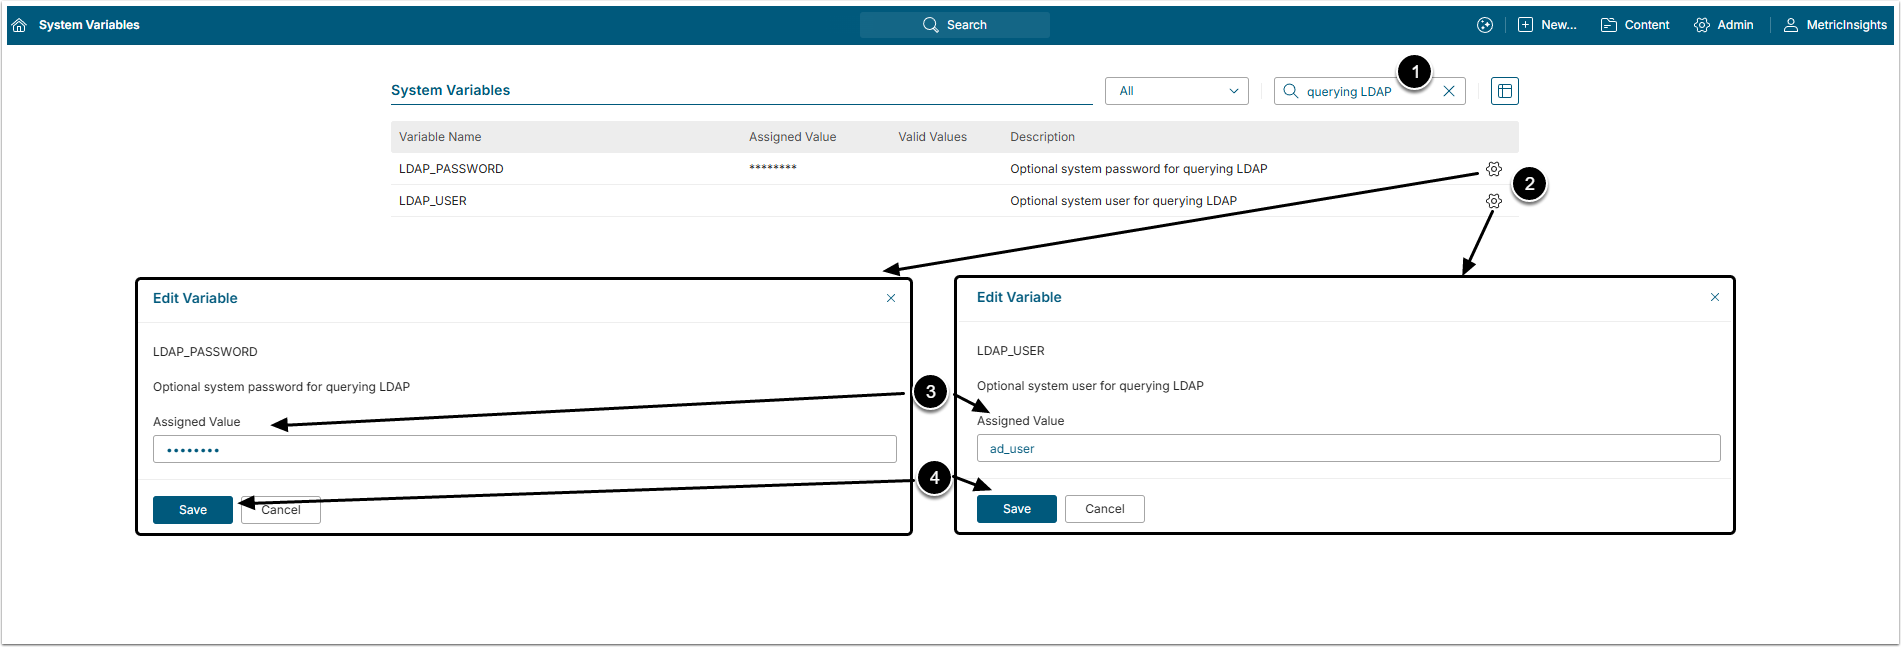
2.2. LDAP Username and Password
If the LDAP server requires a username and password to query the directory, set LDAP_USER and LDAP_PASSWORD Variables accordingly.
- Filter the Variable by "querying LDAP".
- Find the LDAP_USER and LDAP_PASSWORD Variables and click the gear icon.
- Assigned Value: Insert the Username and Password.
- [Save]
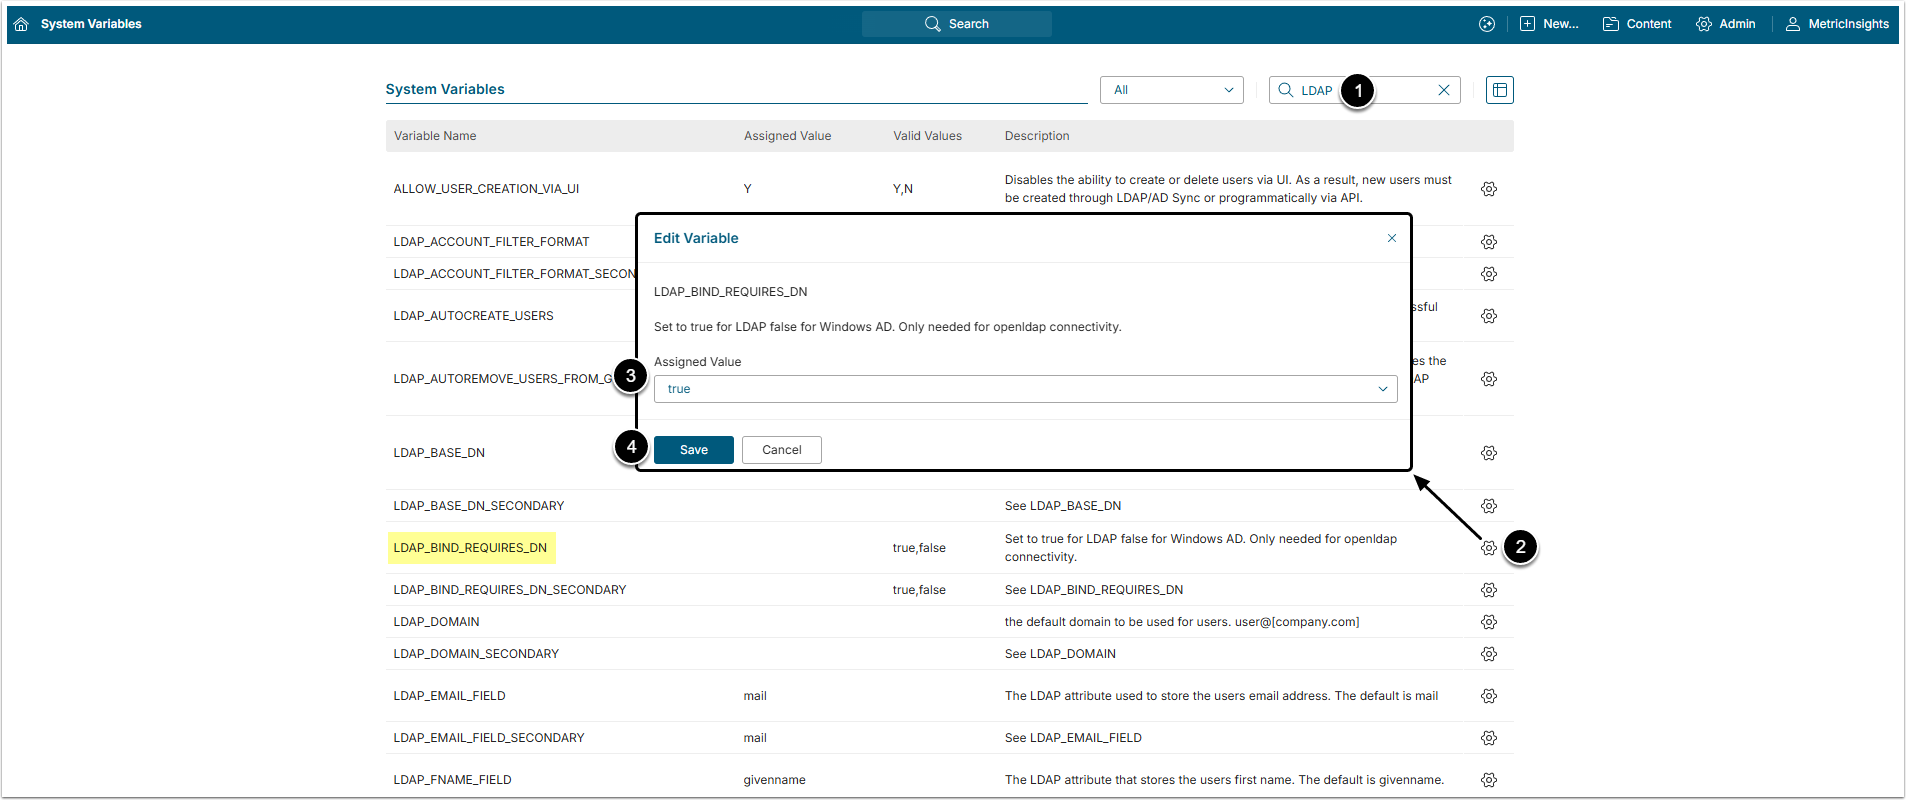
2.3. LDAP Bind Requires DN
If an OpenLDAP server is used, sometimes it is impossible to authenticate as user@domain, but instead, there is a need to authenticate as uid=user, dc=example, dc=com. If this is the case, set LDAP_BIND_REQUIRES_DN Variable to 'true'. Otherwise, leave this as false.
- Filter the Variable by "LDAP".
- Find the LDAP_BIND_REQUIRES_DN Variable and click the gear icon in its row.
- Assigned Value: Select "true" option.
- [Save]
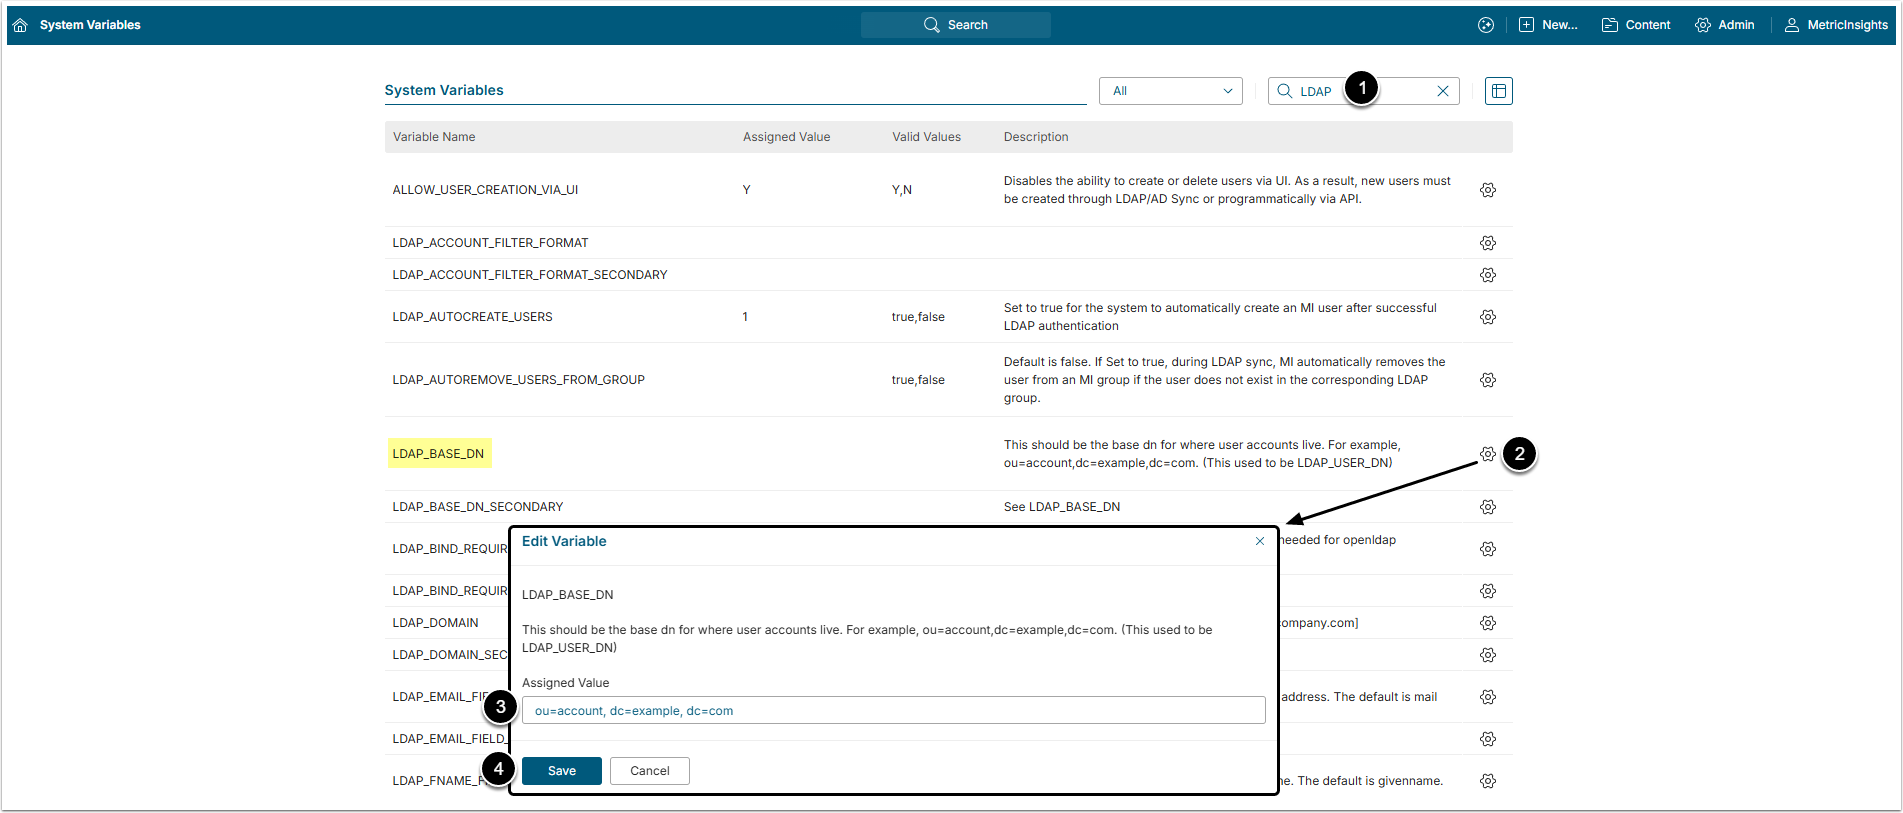
2.4. LDAP Base DN
- Filter the Variable by "LDAP".
- Find the LDAP_BASE_DN Variable and click the gear icon in its row.
- Assigned Value: Base DN needed a query to login to. For example, if your username is uid=user, ou=useraccounts, dc=metricinsights, dc=com, then the BaseDN would be ou=useraccounts, dc=metricinsights, dc=com.
- [Save]
3. Synchronizing User data
After the User successfully authenticated, Metric Insights needs to know a few more things about the LDAP user schema so we can properly sync information with the corresponding Metric Insights user. This can be done by setting the following parameters:
- LDAP_USER_CN_FIELD;
- LDAP_EMAIL_FIELD;
- LDAP_FNAME_FIELD;
- LDAP_LNAME_FIELD.
These should point to the corresponding LDAP field names.
Finally, if you have a failover LDAP server, you will need to repeat these steps and setup the corresponding LDAP_*_SECONDARY parameters to work for your failover LDAP server.
Be certain to [Commit Changes] to update the file.
4. OpenLDAP Example
- dn: uid=testuser,ou=people,dc=metricinsights,dc=com
- uid: testuser
- uidNumber: 1001
- gidNumber: 1000
- cn: testuser
- sn: Test
- objectClass: top
- objectClass: person
- objectClass: inetOrgPerson
- objectClass: posixAccount
- objectClass: shadowAccount
- loginShell: /bin/bash
- homeDirectory: /home/testuser
- givenName: Foopie
- mail: foopie@foo.com
In this case,
- LDAP_USER_CN_FIELD = 'uid'
- LDAP_EMAIL_FIELD = 'mail'
- LDAP_FNAME_FIELD = 'givenName'
- LDAP_LNAME_FIELD = 'sn'
5. "User Authenticated Via" Field
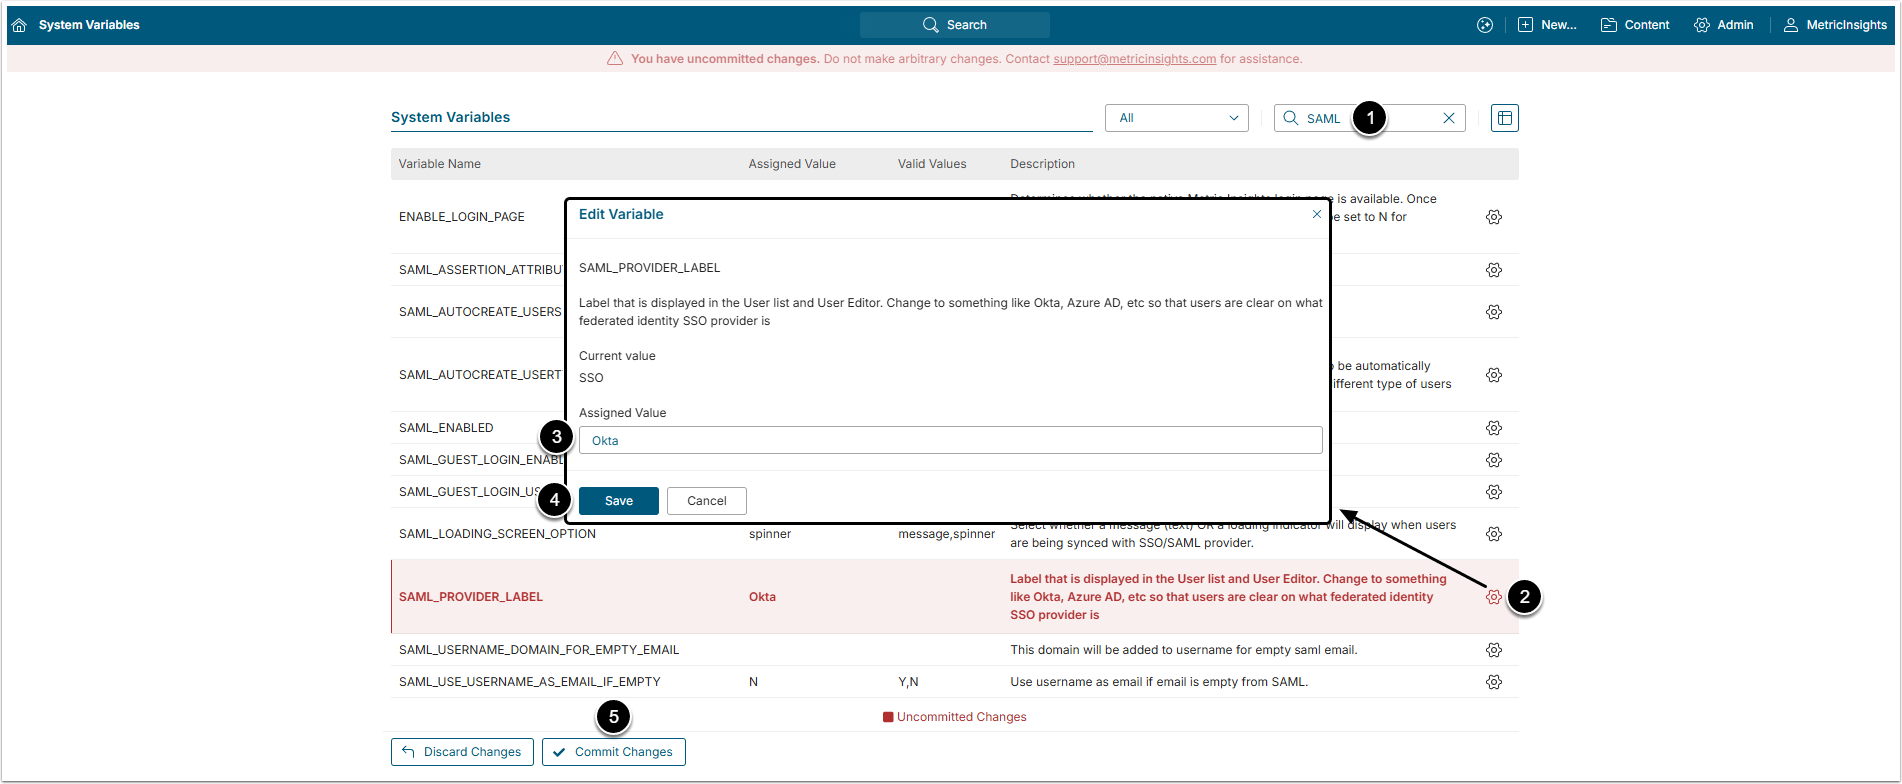
The SAML_PROVIDER_LABEL Variable defines the label that is displayed in the User list (in the Auth column) and User Editor (in the User authenticated via field).
- Filter the Variable by "SAML".
- Find the SAML_PROVIDER_LABEL Variable and click the gear icon in its rowю
- Assigned Мalue: The default value is SSO, change it if there is different provider.
- [Save]
- [Commit Changes]
