A Compound Dimension is created by combining Dimension Values from two existing Dimensions. A Metric and Report may be Dimensioned using a Compound Dimension that results in one instance of the Element for each combination of Dimension Values. This article describes how to create a Compound Dimension.
When creating a new Compound Dimension, one of the Dimensions is designated as the Primary and the other as the Secondary Dimension. Only "bulk loading", that is, automatically collecting all values with one query, is supported. As with any Dimensions, Dimension Values may also be entered manually or uploaded from a CSV file.
1. Open Dimensions List
Access Content > Dimensions
- [+New Dimension]
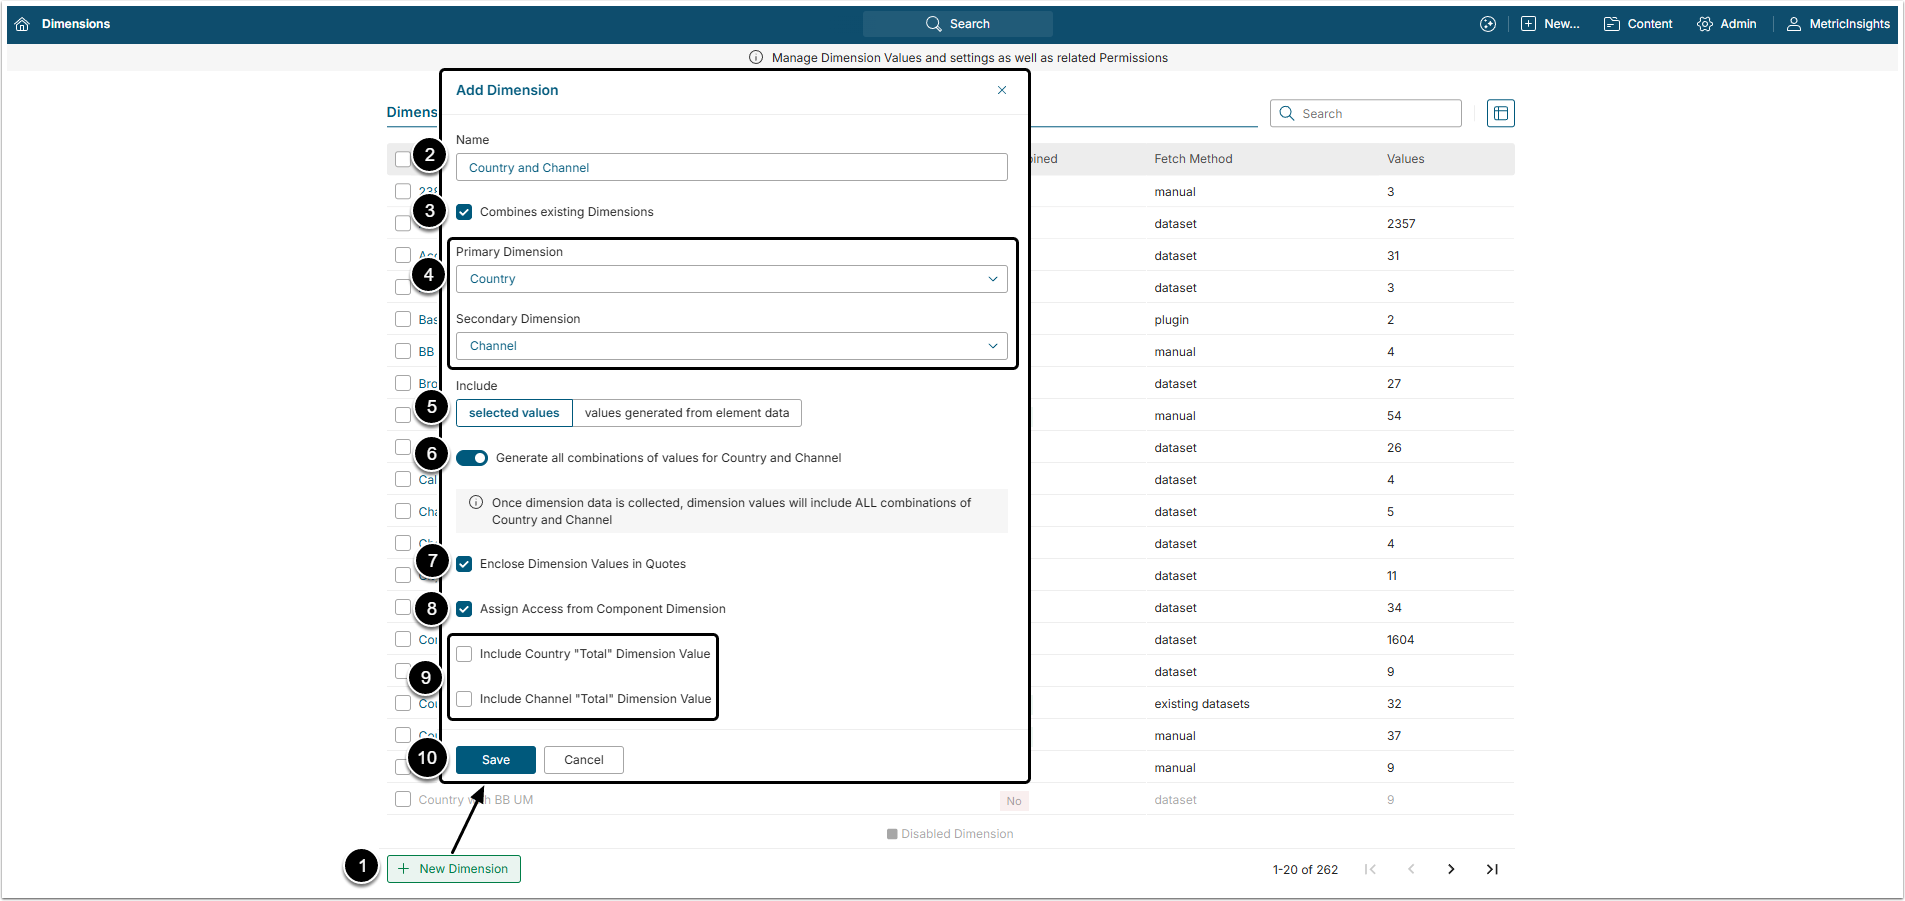
- Name: Give the Compound Dimension a descriptive name.
- Combines existing Dimension: Activate this checkbox to create a Compound Dimension.
- Primary Dimension / Secondary Dimension: Choose Dimensions from the dropdown lists.
-
Include: Define how Dimension Values are populated.
- selected values: Control what compound values are added to this Dimension. If you choose "Selected Values", provide a list of Dimension Values in order to complete this Dimension. It is also possible to have the system create the Compound Dimension Values based on all combinations the existing Dimensions.
- values generated from element data: This solution allows creating Dimension Values "on the fly" as Elements using this Dimension are run. This generates the list of Dimension Values based on the combinations of the two Dimensions that have actual data.
- Generate all combinations of values for Country and Channel: If this toggle switch is disabled, the user has to provide a list of Values that will go into this Compound Dimension in a form of a Dataset. If it is enabled, all the possible combinations of Values will be generated.
- Enclose Dimension Values in Quotes: This one is enabled by default. Enclosing Dimension Values in quotes simplifies organization.
-
Assign Access from Component Dimensions: Grant access to this Composite Dimension.
- If it is enabled, any User with permission to access BOTH the Primary and the Secondary Dimensions automatically receives access to instances of this Composite Dimension where the combination of the Primary and Secondary Dimension Values; that is, if the User has full access to both included Dimensions, then all instances are visible to the User. If the User has selected Dimension Values access to either of the Dimensions, the access is only granted to the combined instances where the User has access to both Dimension Values.
- If it is not enabled, a User must be granted access to the Composite Dimension in the same manner as to any other Dimension.
- Include <..> "Total" Dimension Value: Define either "total" Values are included into the Compound Dimension.
- [Save]
2. Complete the Info Tab
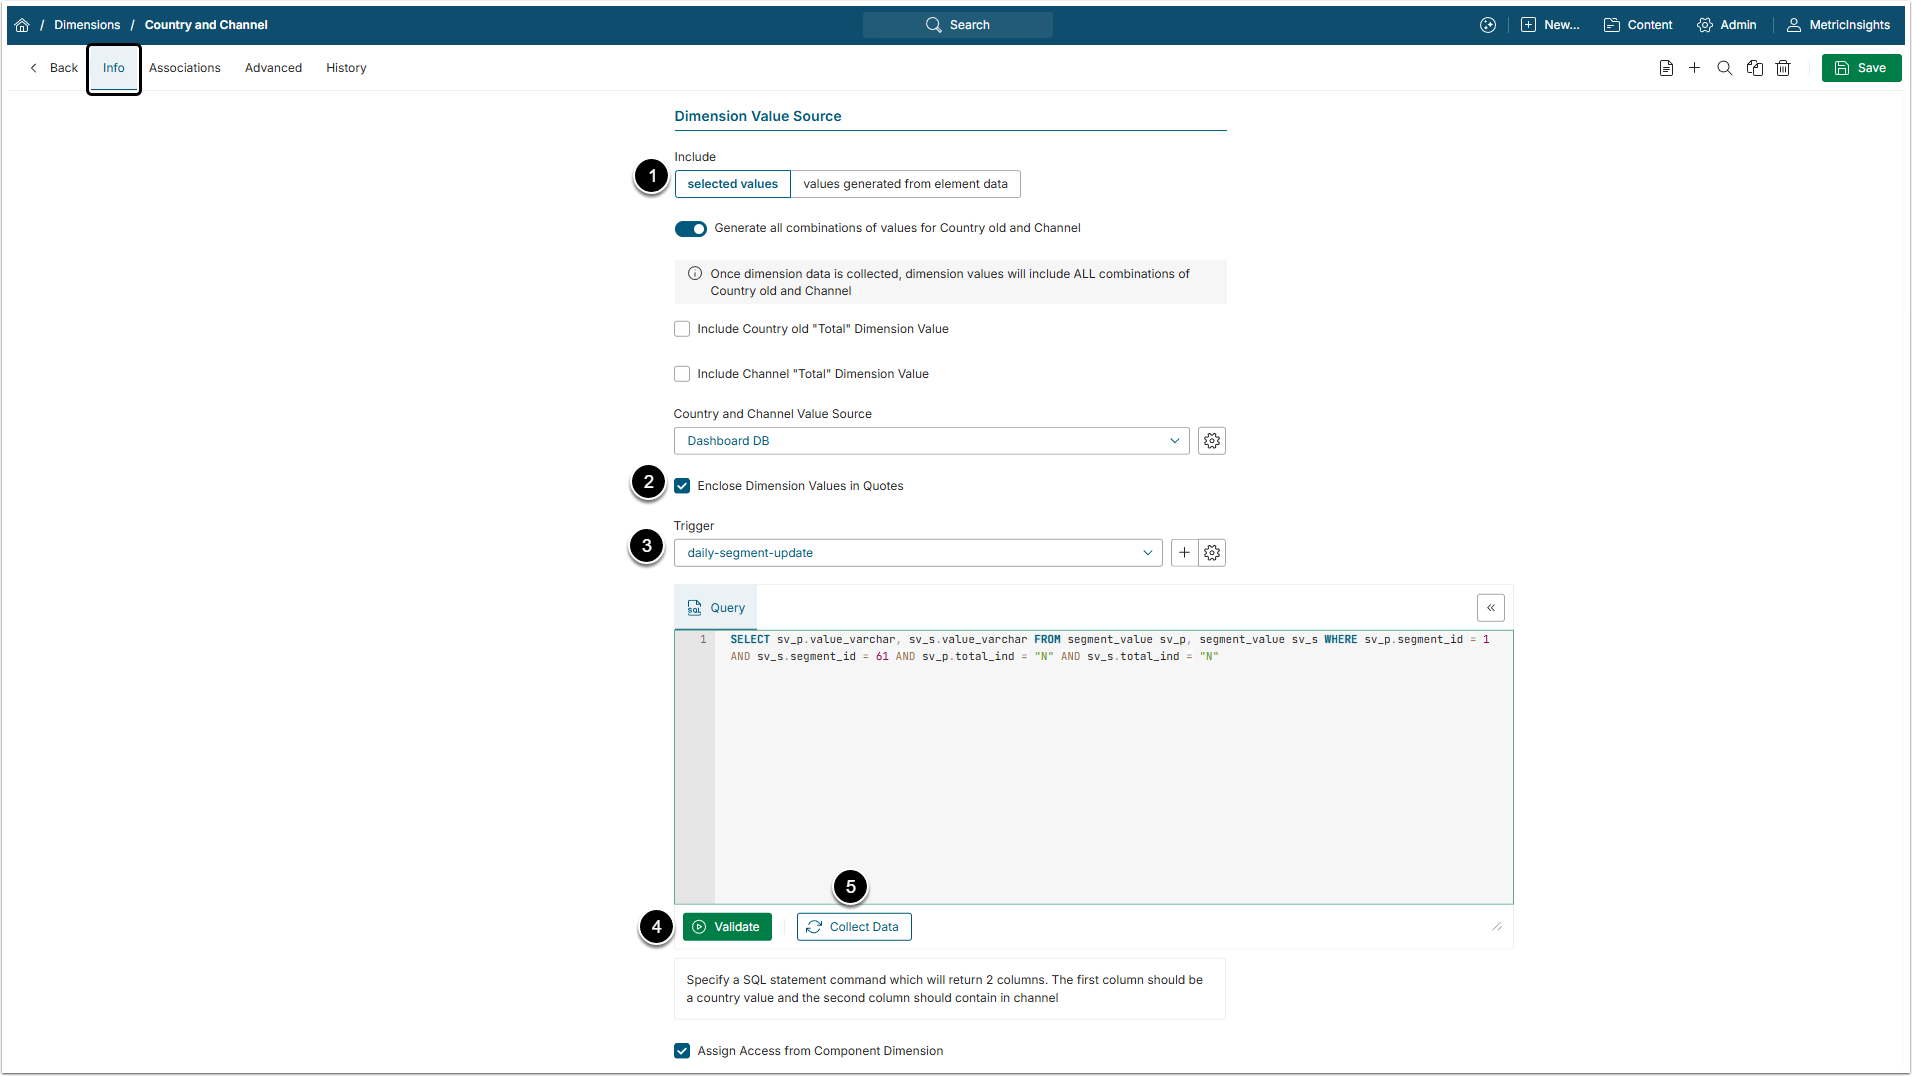
Open the Info tab and scroll the page to Dimension Value Source section
-
Include: Define how the Dimension Values will be collected.
- selected values: the Values are collected automatically by the SQL fetch request.
- values generated from element data: The Compound Dimension Values section will remain empty until it is populated automatically after an Element using this Dimension Value has been created.
- Trigger: Select how often the data for the Compound Dimension will be collected.
- Query: Enter the SQL statement to fetch the the necessary Values.
- [Validate] to validate the SQL statement.
- [Collect Data]
The results will be shown in the Compound Dimension Values grid at the bottom of the page.
3. Advanced Tab
- Element Name Template: Select a fitting naming template from the dropdown list. All the Elements Dimensioned using this Compound Dimension will be named according to this Template automatically. The name can be changed afterwards.
- Dimension Value "show as tile" default: Define either Dimensioned Tiles will be shown by default or not. They can also inherit defaults from component segments.
- Include individual currency prefix: Decide either to add individual currency prefix or not.


