Tags are used to relate Elements to each other for purposes of identifying similar Reports/Charts allowing a more in-depth analysis of trends. Tags are also used to filter and/or group Elements on the Homepage Main Panel.
Tags are one of the customizable Pick Lists that provide the ability to create a new value "on the fly" while in the process of defining or managing an Element. A new Tag may be required if none of the existing values meet the needs of the Element being defined. The same function may be used to edit or delete an existing Tag.
In 6.3.3, the Governed Tags functions have been replaced by a more comprehensive object, Glossary. See Create a Glossary Item.
1. Add New Tag
Access Content > Tags
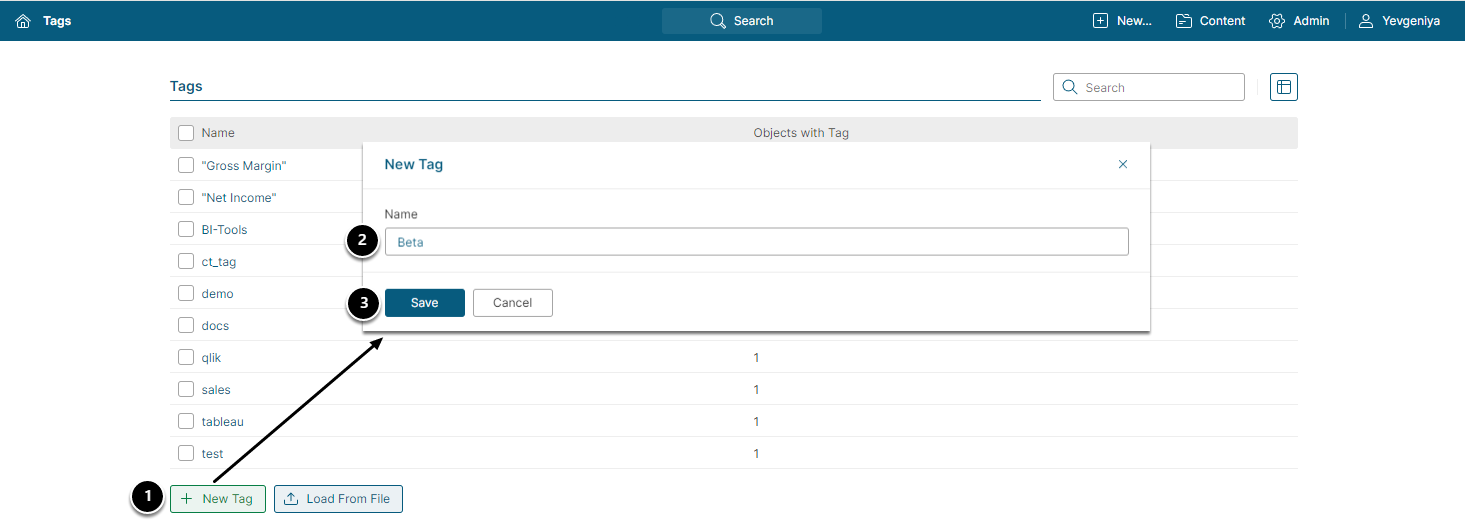
- [+ New Tag] to open the New Tag popup
- Enter a unique name
- [Save] will create the Tag and open the Tag Editor
1.1. [Optional] Associate Tag with Objects
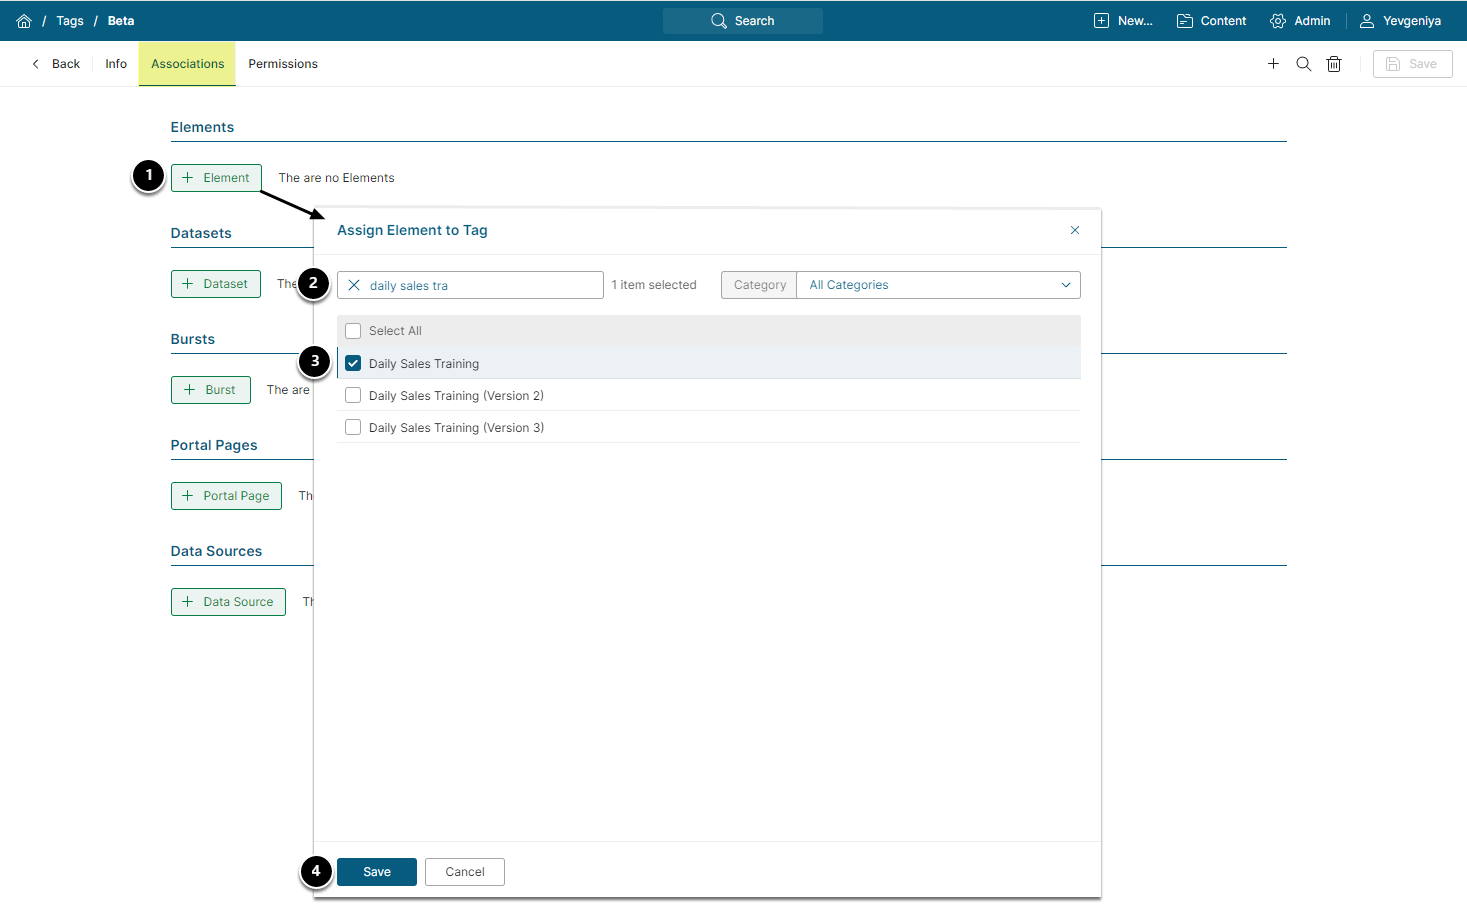
- Under the Associations tab, [+ object type] opens a drop-down list of the objects for multi-selection
- Narrow down your search by typing the name of the object or selecting a Category, if needed
- Select the object(s)
- [Save] your selections
1.2. [Alternatively] Create/Add Existing Tags in Supported Editors
Access Info or Content tab
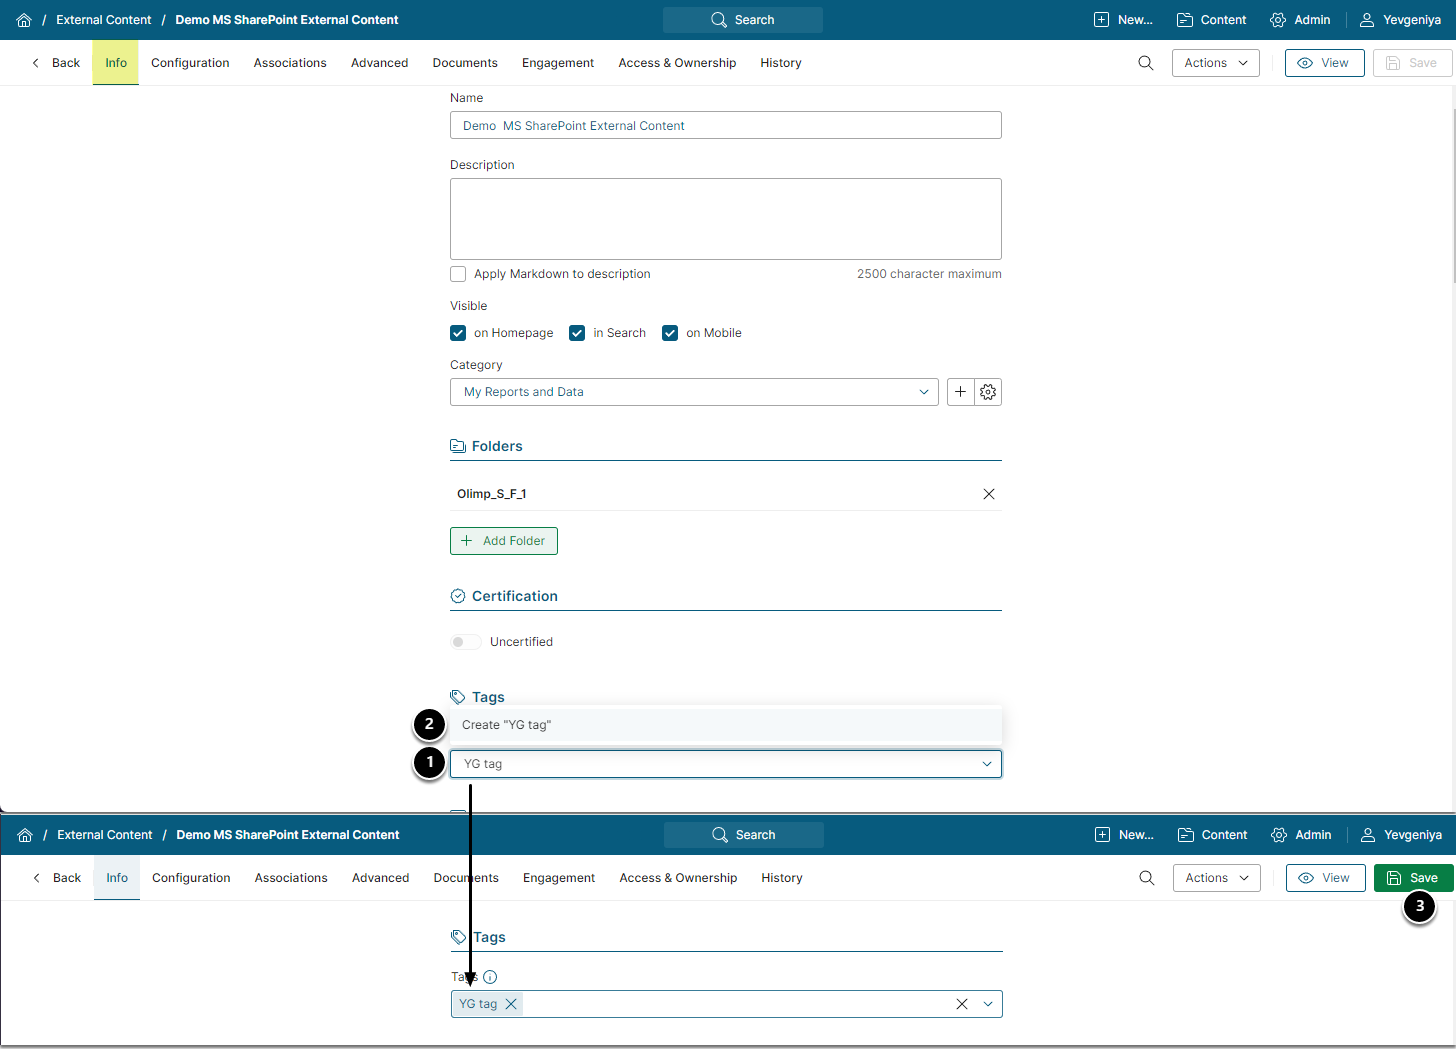
- Enter the new Tag name
- Select to create the Tag OR click Enter to create it
- [Save]
2. Move to Glossary Function
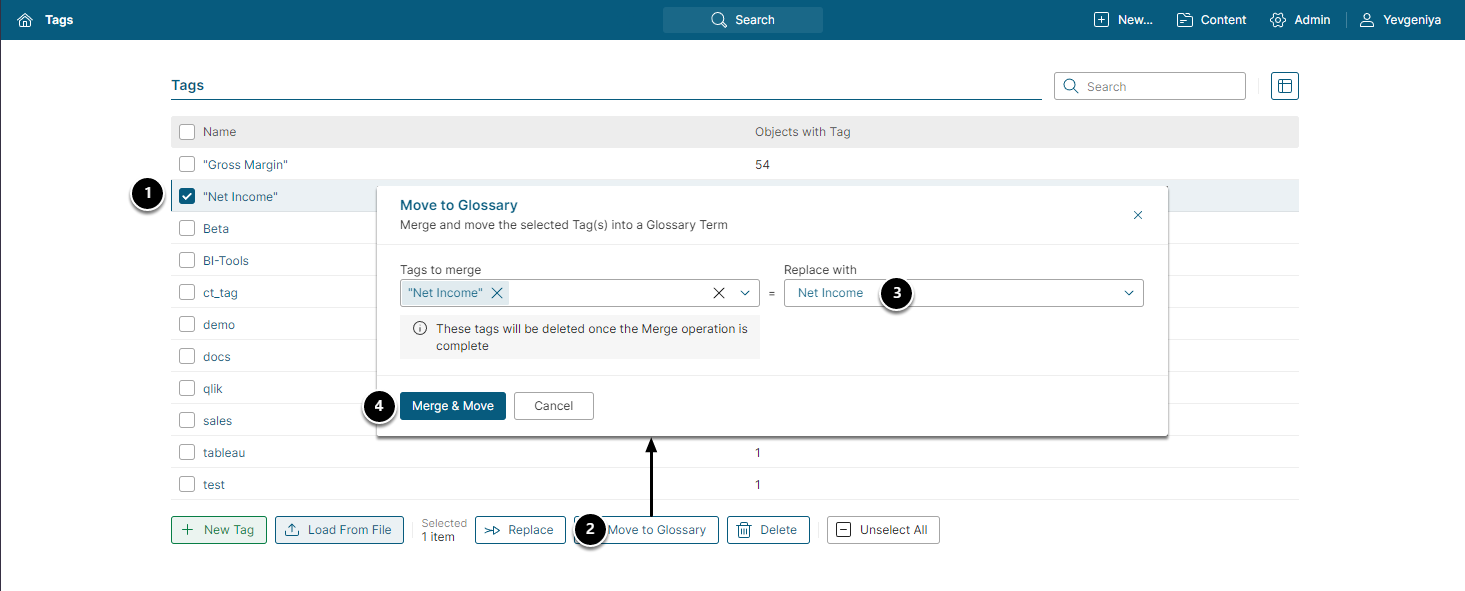
- Select Tags to be replaced by a Glossary Term
-
[Move to Glossary]
- [Tags to merge] will contain Tags chosen in Step 1. You can also type an existing Tag name into the field manually.
- Select an existing Glossary Term under Replace with
- [Move & Merge] will delete the Tags and replace them in all Elements with the desired Glossary Term
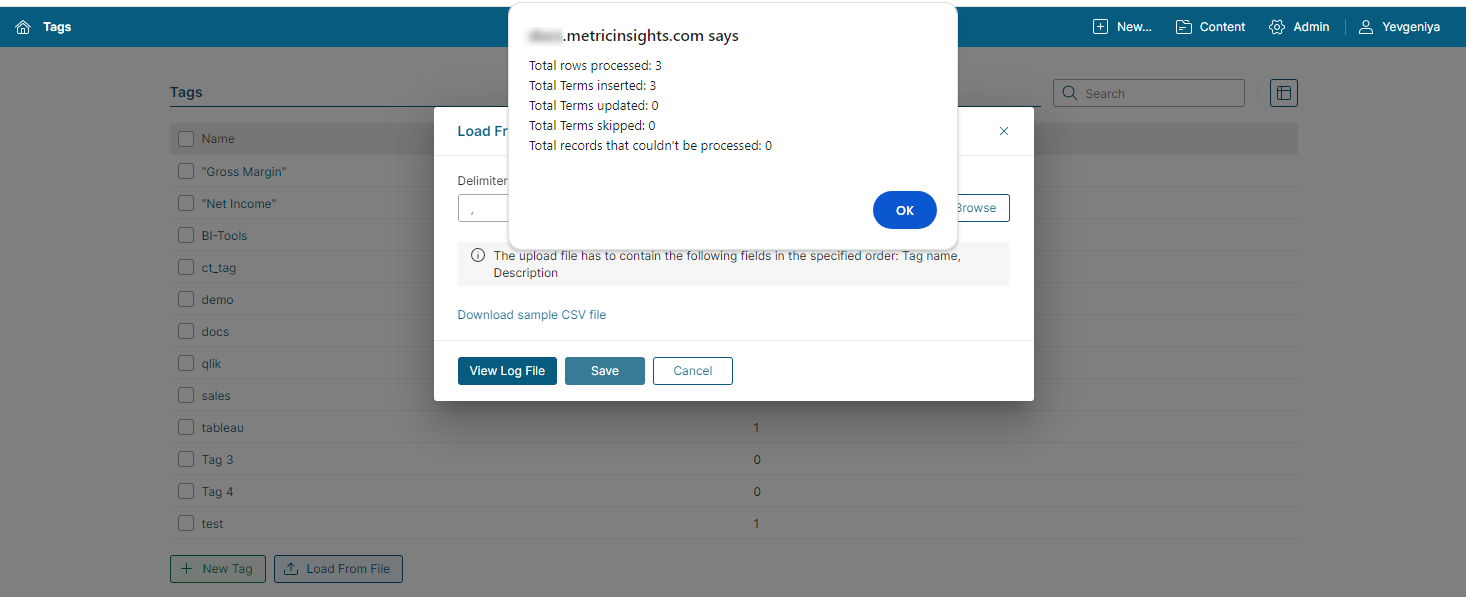
3. Load From File Function
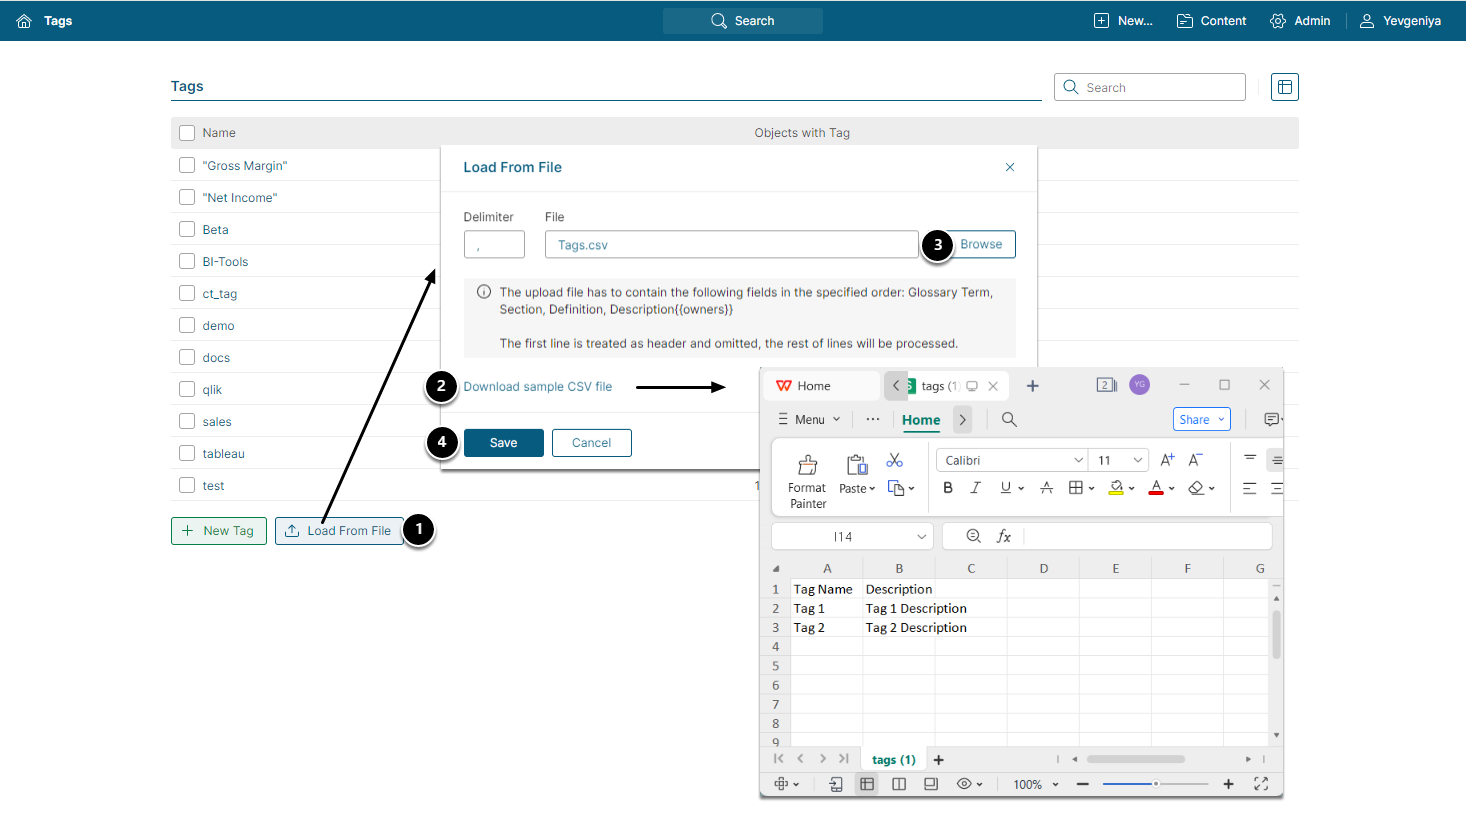
- [Load from File]
- Download and fill out a sample file leaving line 1 as a header
- Browse and locate the file
-
[Save] to create new Tags
- Upon successful import, you will see the following message.