In Version 6.3.3 the function for Governed Tags was replaced by the Glossary function.
For information on revised Tags, see Create a Tag version 6.3.3 and beyond)
Tags are used to relate elements to each other for purposes of identifying similar Reports/Charts allowing a more in-depth analysis of trends. Tags are also used to filter and/or group elements on the Homepage Main Panel.
Tags are one of the customizable Pick Lists that provide the ability to create a new value "on the fly" while in the process of defining or managing an element. A new Tag may be required if none of the existing values meet the needs of the Element being defined. The same function may be used to edit or delete an existing Tag.
[6.2.5] Introduces Tag Types and Governed Tags.
Tags as Governance Definitions
Tags can now be transformed into Governance Definitions—effectively making a tag more meaningful and metadata rich. A Tag that's been deemed "Governance Definition" includes the following additional fields:
- Tag Type (example: Enterprise KPI)
- Definition (example: Key enterprise performance indicators)
- Description (example: These KPIs are regularly reviewed by executives and below and are reviewed most rigorously by the Enterprise Data Governance team)
- Business Owner
- Technical Owner
- Data Steward
1. Add a New Tag
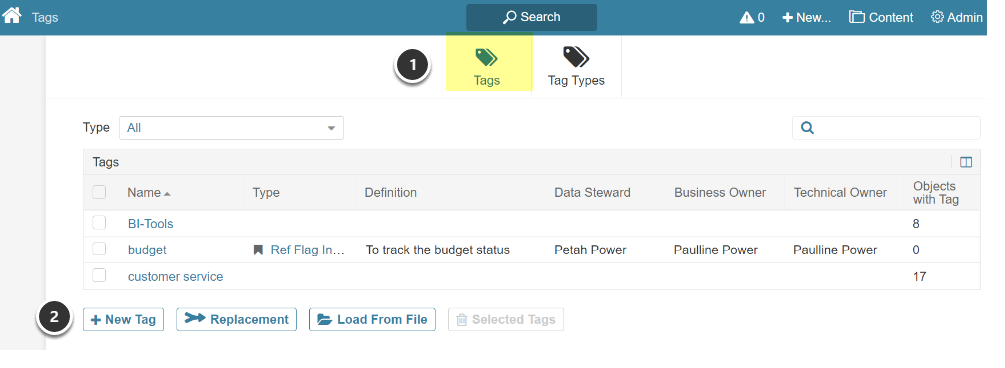
Access Content > Tags > Tags
- The list of Tags previously created in the system opens.
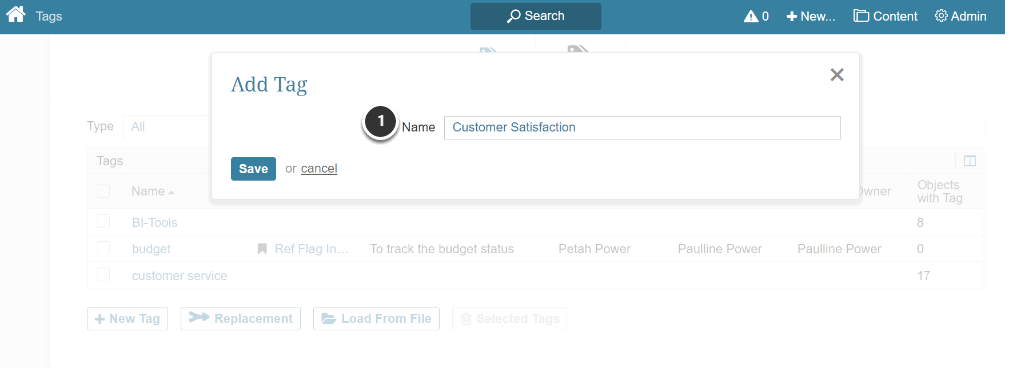
- Click [+ New Tag] to open Add Tag pop-up
1.1. Provide Tag Name
- Name: Enter a unique, meaningful name
[Save] to proceed with configuring this Tag in the Tag Editor.
1.1.1. Non-Governed Tag
- For a non-Governed tag, just [Save] and Tag is created
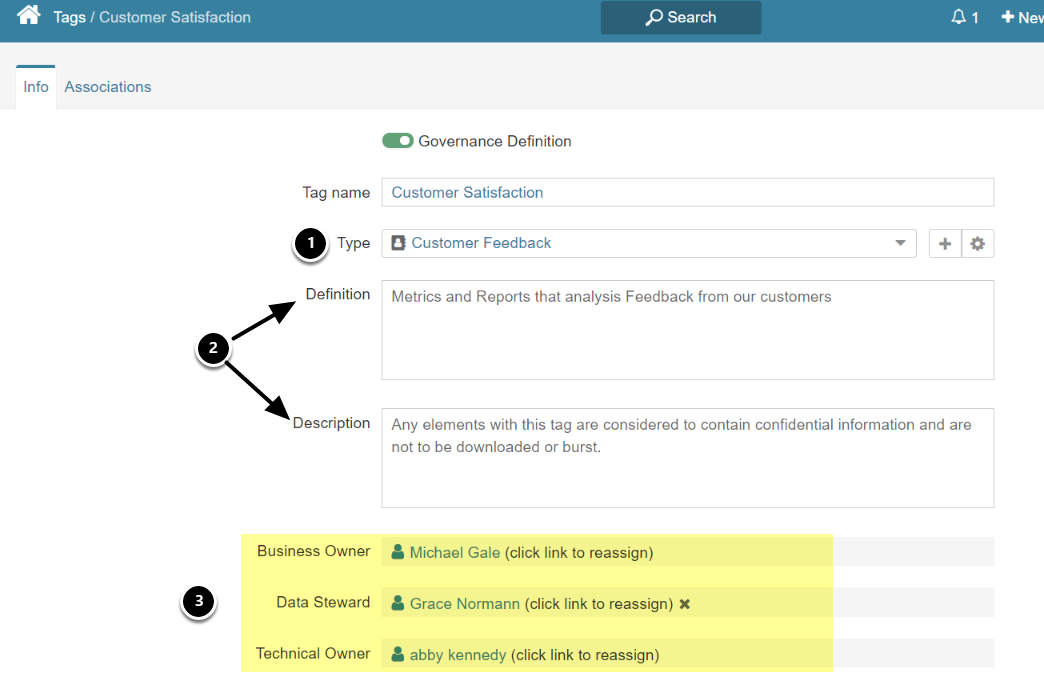
- If you want a Governed Tag, use the toggle to open additional fields shown in next screenshot
1.1.2. Governed Tag
- Type: Governed tags are required to be assigned to a Tag Type, use the dropdown. If you need to create a new Type, see Step 5.
- Definition / Description: Free-form optional fields
- Owner / Steward: These fields will be defaulted, but you can change them
2. Add Elements to Tag
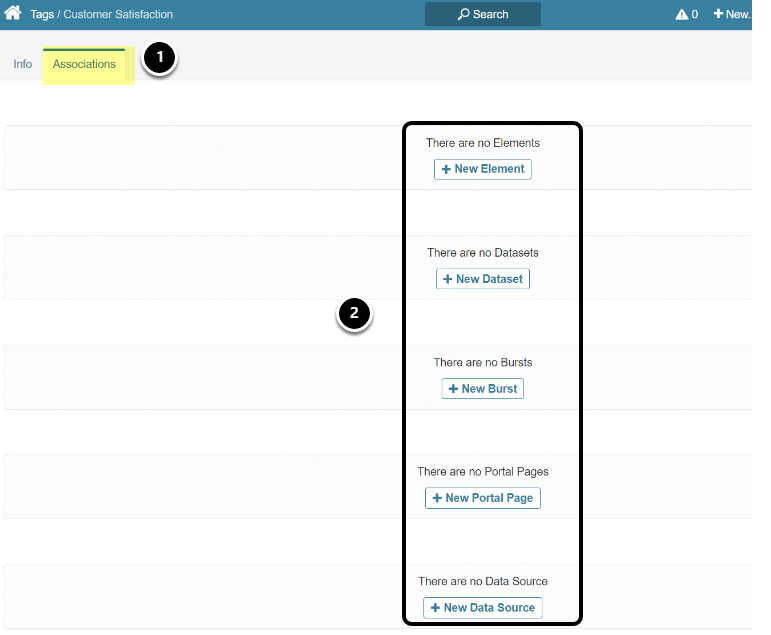
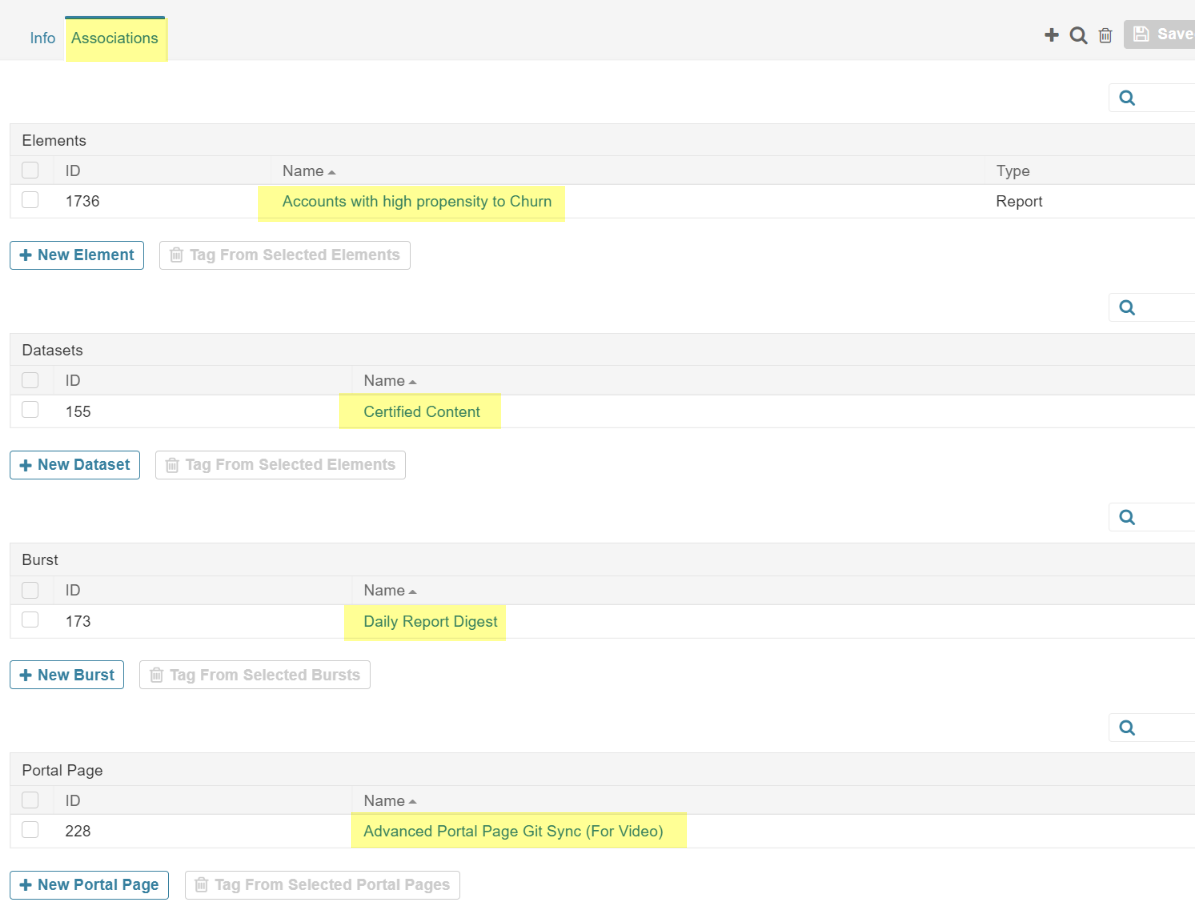
- Open Associations tab
- Use the [+ object] to open pop-up to select objects where this Tag will be displayed
Example of Adding Elements to Tag
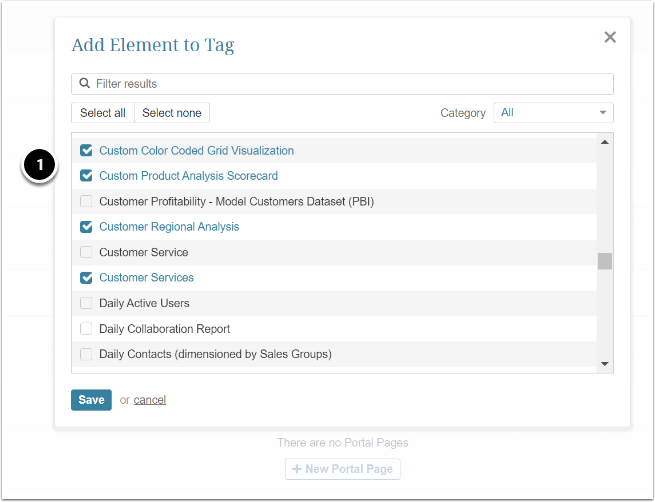
- Select object(s) via the checkbox
[Save]
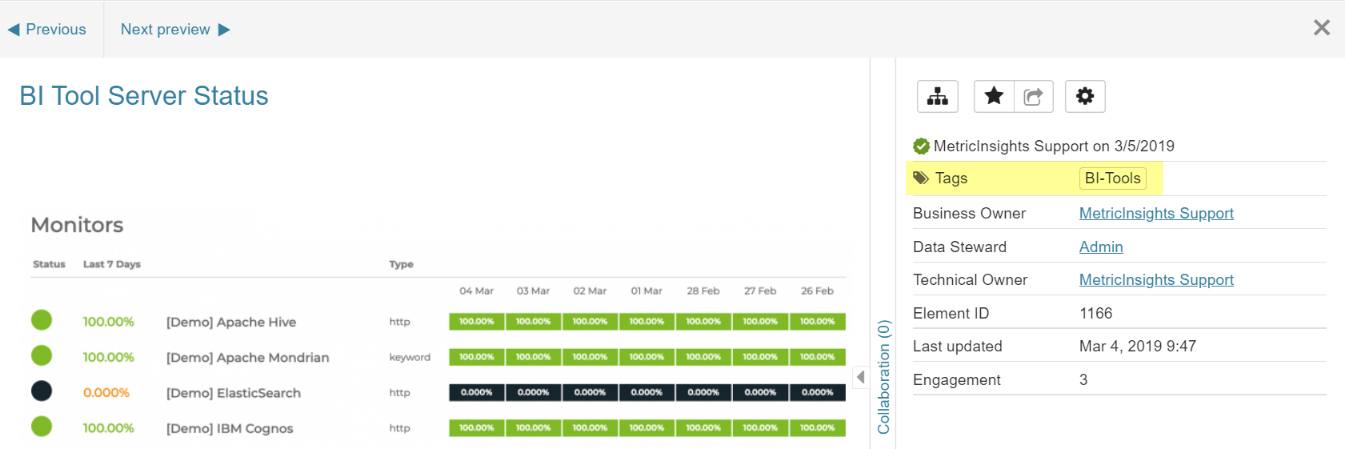
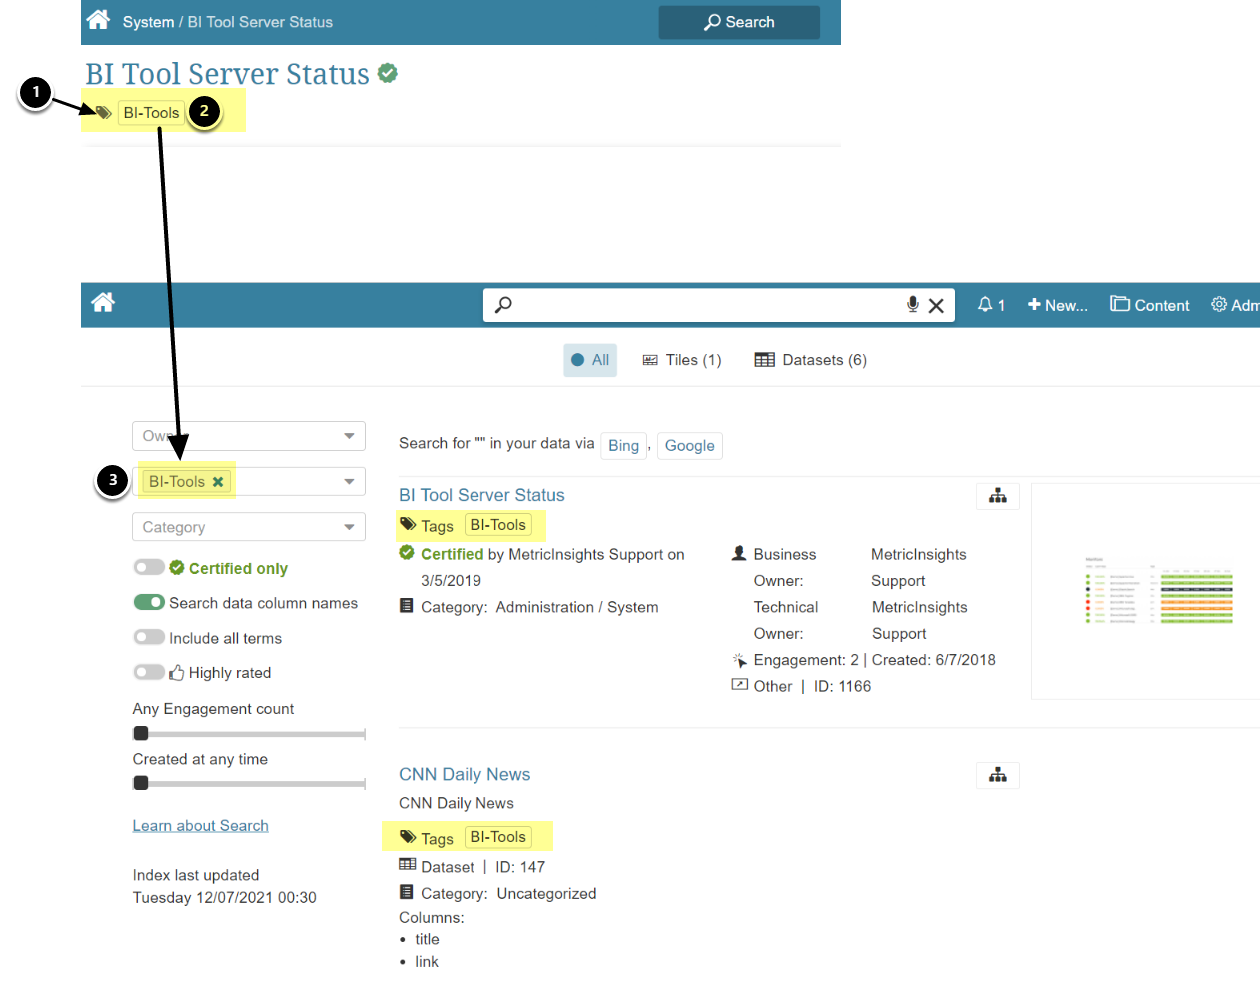
3. Verify Tag on Selected Objects
Select any (Object Name) to go directly to that Object's Editor. Tags will be displayed on Info tab, or on Content tab if no Info tab exists for the object.
4. Alternatively, you can Create or Add Existing Tags in any Supported Editor > Info or Content tab
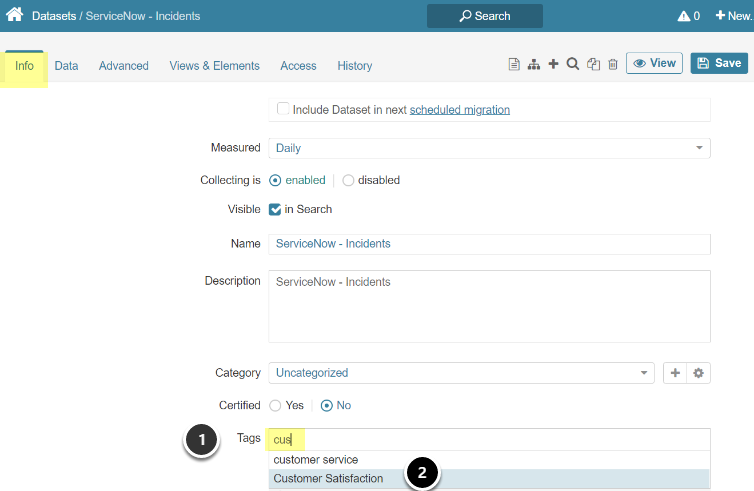
- Enter Tag name fragment
- Existing tags will display for selection
If you enter a full Tag name that doesn't exist, a non-governed Tag will be added when Enter is pressed.
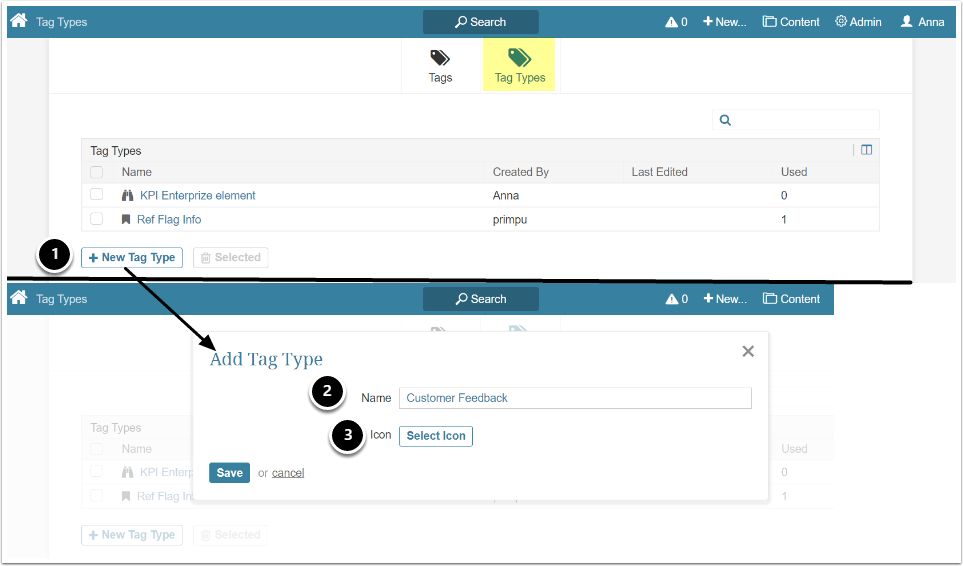
5. Create a Tag Type
Access Content > Tags > Tag Types
- [+ New Tag Type] to open popup
- Name the Tag Type
- (Optional) [Select Icon] will open a display of icons to choose from, or you may upload your own icon from that popup. Chosen icon will display in all Views before the associated Tags.
[Save] to display full Editor
6. Add Tags to Objects
On the Tags tab:
- Grid of all Tags assigned this Tag Type displays. Name link will be active if User has edit access to the Tag (Power Users)
- [+Assign Tag] to assign this Type to another Tag. Note: the dropdown will only display those Tags that have the "Governed Definition" activated.
7. How Governed Tags are Used
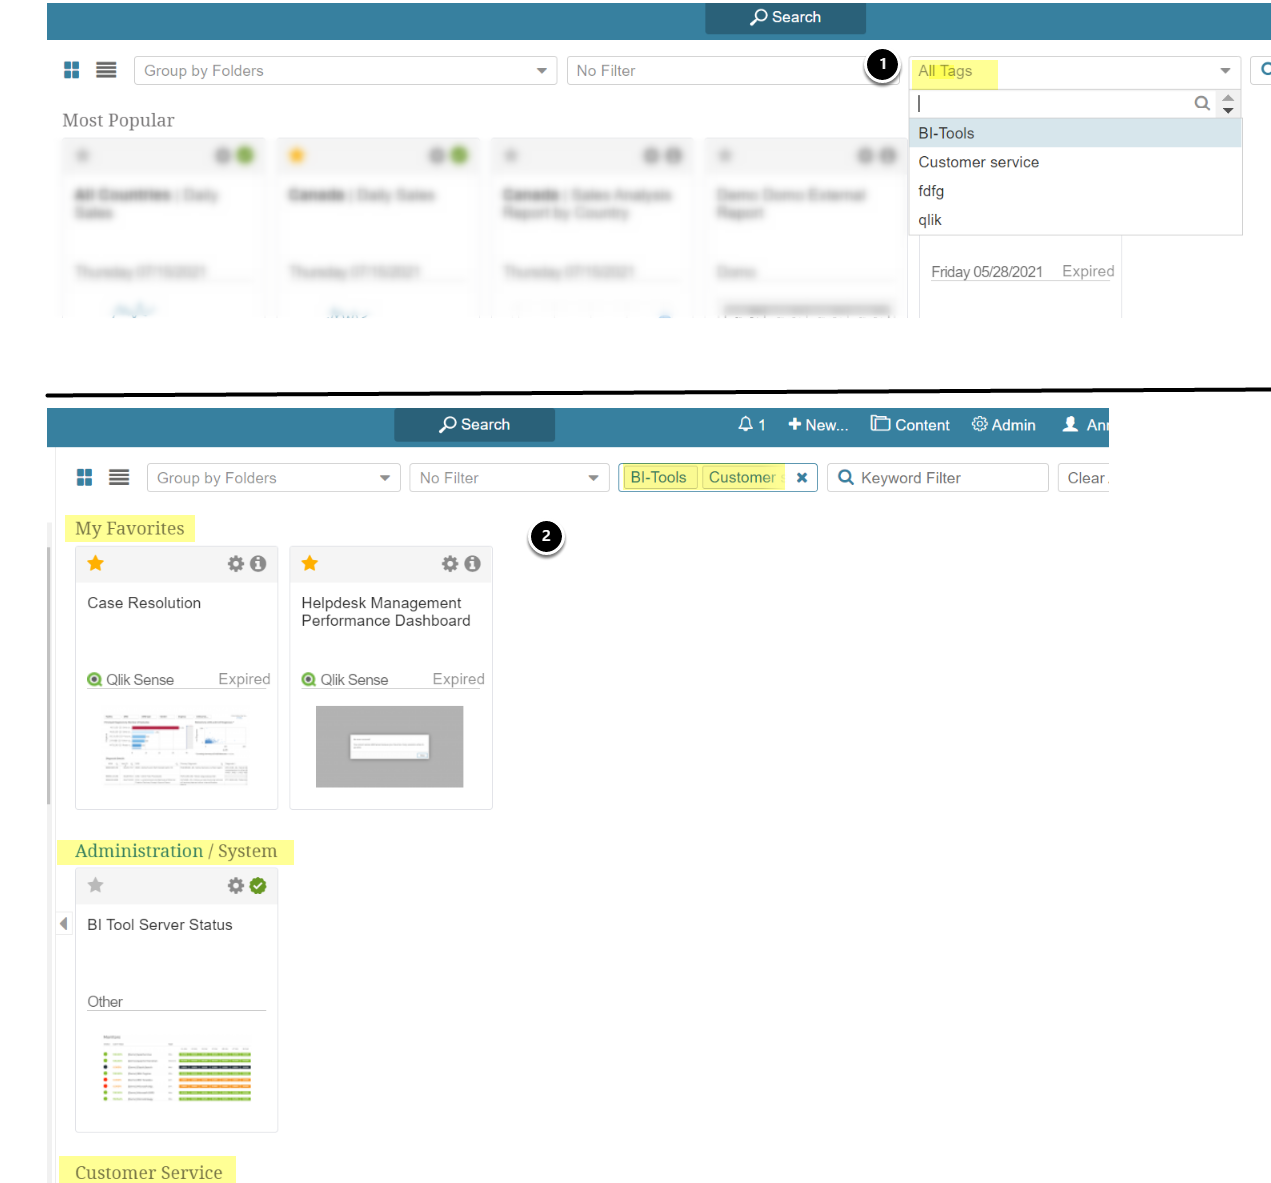
7.1. Filter by Tags on Homepage
- On Homepage, select one or multiple Tags from the All Tags dropdown
- All elements with Selected Tags with display in their assigned Categories or Folders
Note: If you have filtered your Homepage, the All Tags dropdown will only display those tags that exist in elements in your selection rather than all Tags defined.
