The Publishing Workflows feature is a way for Power Users to manage and supervise content creation in Metric Insights. The functionality helps ensure that new content has been validated by multiple stakeholders and is therefore trustworthy, including accurate metadata and information.
This article shows how a Power User can create a 2-Party Publishing Workflow.
NOTE: All Groups, Categories, Users as well as their Names have been created solely for the demo purpose of this article.
This example shows a sales reporting Workflow and involves two Groups: sales Report Developers and Sales.
- Report developers are responsible for building Reports in an external application and recreating them in Metric Insights.
- Sales team is responsible for verifying that the data in the Report is correct and that the Report is ready for wider business visibility.
PREREQUISITES:
- Existing Report Developers and Sales Groups;
- Existing Sales Category and Sales Category_Staging;
- For the staging Category, it is recommended to append "_Staging" to the name of the actual Category to which content will be published.
- Power Users responsible for configuring Publishing Workflows must be granted the Create Publishing Workflows privilege.
Before getting started, it is recommended to get acquainted with Execute Publishing Workflow in Content Center to get better understanding on how Publishing Workflows get executed by Power Users.
1. Add New Publishing Workflow
Metric Insights is shipped with the three default Workflows, depending on the number or parties(1-3) involved. Each of them can be edited in accordance with the needs of your organization. Newly-added Workflows are created as 1-party Review & Certification Workflow.
In this article, we are configuring a 2-party Workflow. You can choose to modify the default one or add a new Workflow.
Access Content > Publishing Workflows > Your Workflow
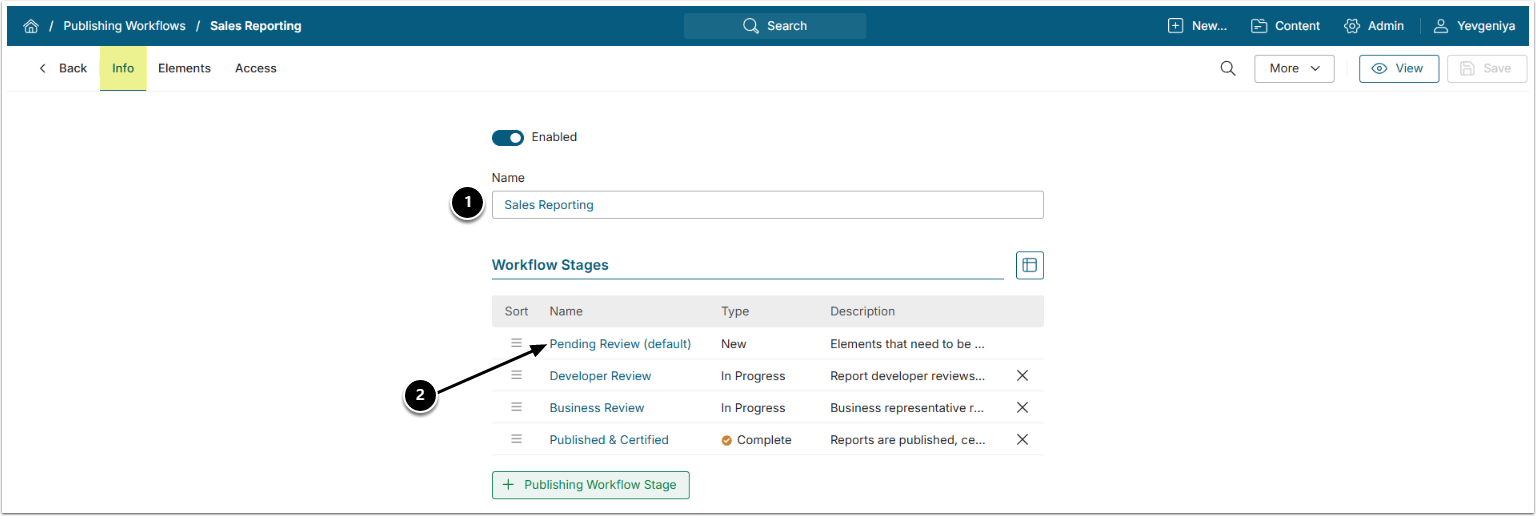
- Input a descriptive Name.
- The Stages include default configuration that can be changed, if needed; however, Groups and Permissions for them must be manually added.
2. Pending Review
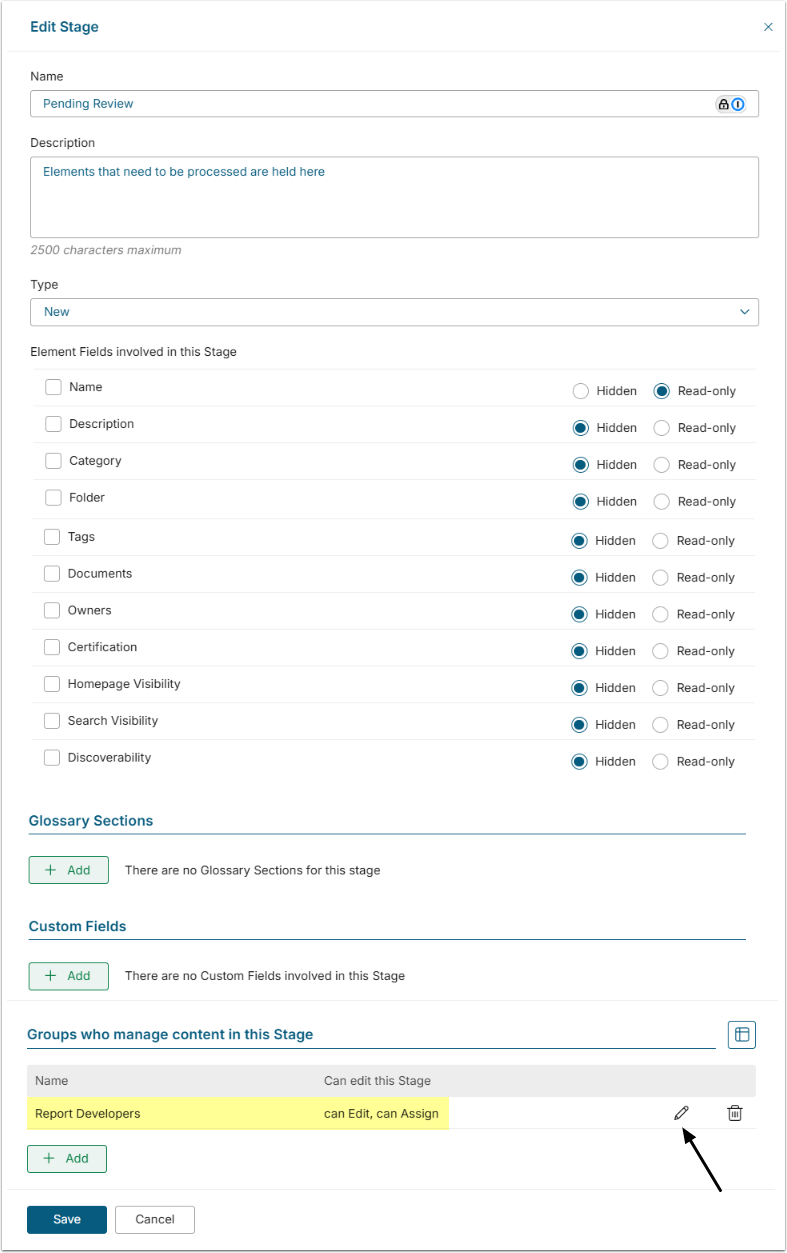
- Report Developers must have the Assign Permission to be able to move the content to this Stage.
- Edit access to Category field must be granted in order to move content to Category under which it will be published.
NOTE: When a Group is assigned to a Publishing Workflow Stage, the Group’s Power Users are granted View Access to the Publishing Workflow associated with the selected Stage and can access the Stage via the Publishing Workflow Board.
3. Developer Review
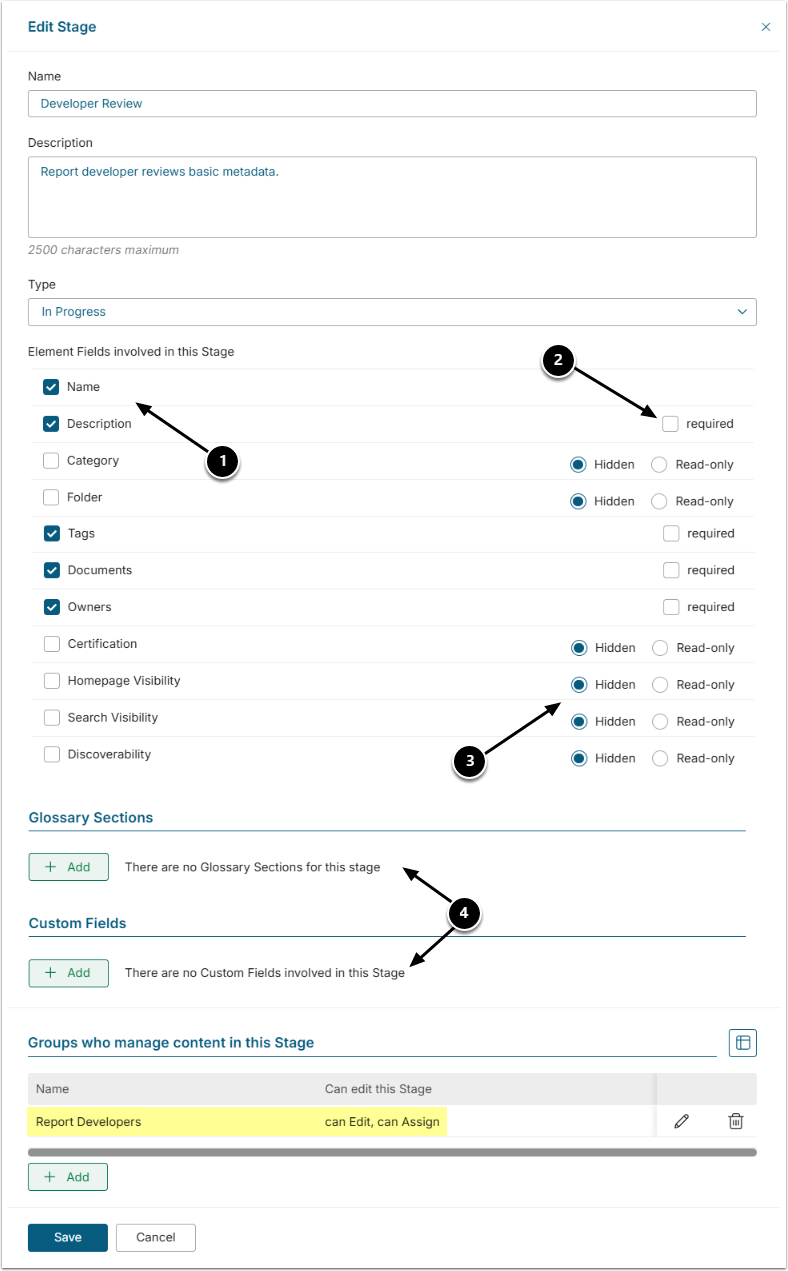
You can:
- Check fields to be edited by Assignees at this Stage.
- Define whether these fields are Required (can't be blank).
- Define whether the rest of the fields are Read-only(informational) or Hidden from the Stage Editor.
- Add Glossary Sections and Custom Fields. See the next Step.
4. Business Review

In addition to checking the editable fields like at the previous Step, you can:
- Add Read-only(informational) or Required(can't be blank) Glossary Sections.
- Add Interactive(can be edited) or Read-only(informational) Custom Fields. "Interactive" can be set to "Required" to make sure the field is not left blank.
NOTE: Make sure you have added the final reviewer (Sales Groups) and granted the current assignee (Report Developers) the right to assign the Stage for final review.
5. Published & Certified
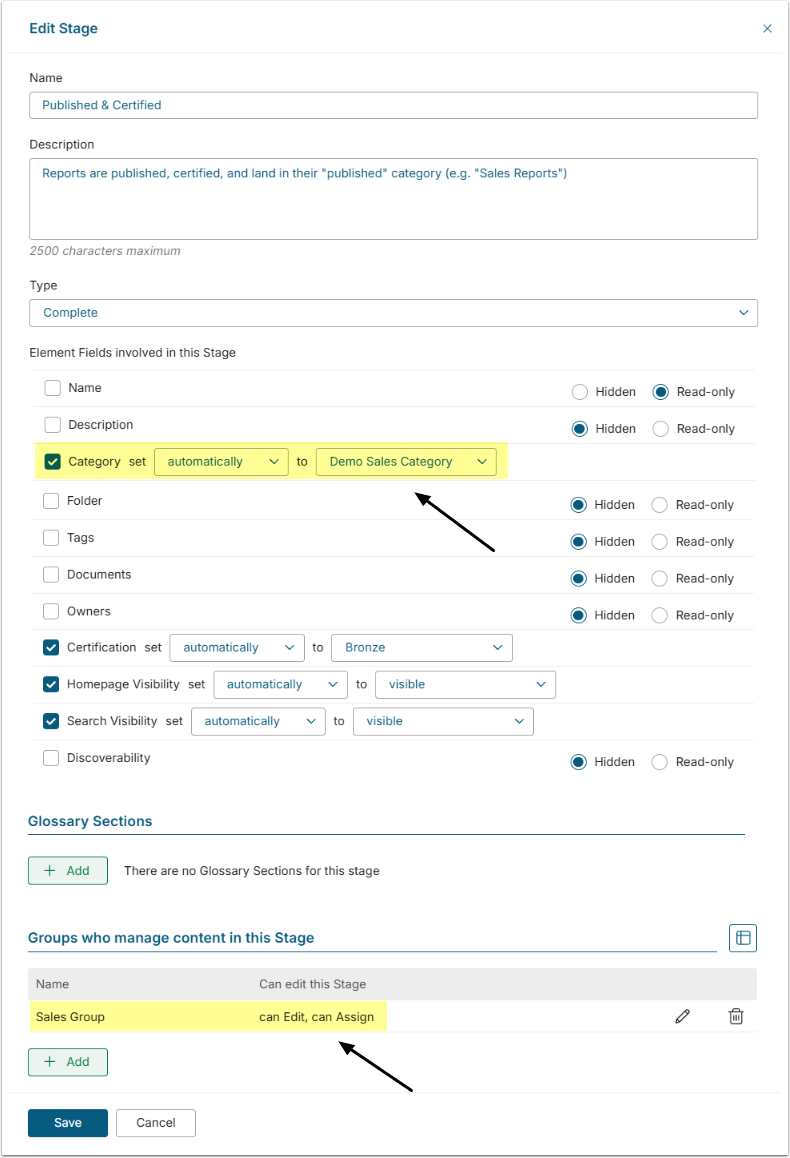
Make sure to:
- Set Category to automatically change to the actual publishing Category (Demo Sales Category). NOTE: The Category won't be available from the drop-down unless added under Publishing Categories. See the following section.
- Set the assignee to the final reviewer (Sales Group).
6. Add Categories

NOTE: [7.2.0] Staging and Publishing Categories were combined into Involved Categories.
Add the Categories:
- Demo Sales Category_Staging with Workflow is default for Category checked to Staging Categories:
- When Report Developers place new reports to Sales Category_Staging, this automatically puts content in the default Workflow.
- Checking Move Elements in this Category to will automatically place all Elements in this Category to the specified Stage upon [Save].
- Demo Sales Category to Publishing Categories.
7. Set Workflow Restrictions

You can check to allow only the current assignee to move or re-assign Elements in the Publishing Board.
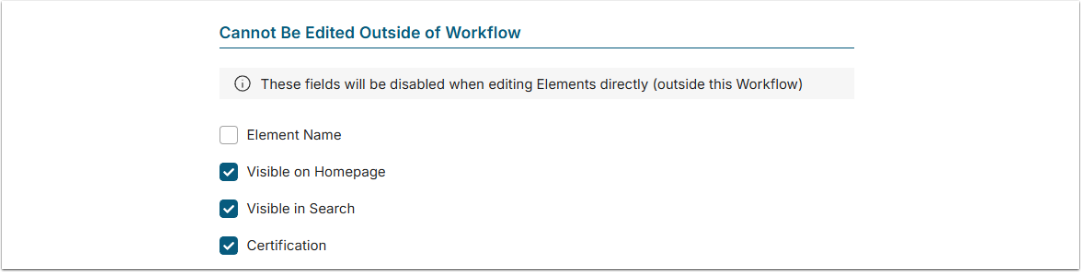
8. Define What Cannot Be Edited Outside of Workflow
For this Workflow, we expect that none of the below can be edited once the content gets into the Workflow. When checked, the options become unavailable in Element Editors.
NOTE: Element Name is available beginning in v7.2.1.
9. Configure Automation Settings
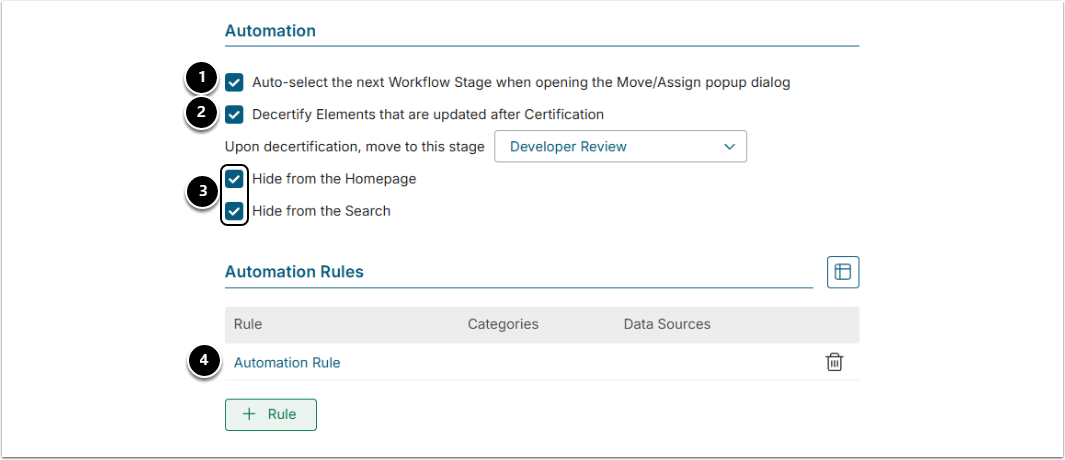
- The system can automatically suggest the next Stage when a User moves content.
- If the content gets modified after certification, it can be automatically decertified and moved to the required Stage. This way, all the stakeholders can make sure the Report is still a valid and trustworthy source of information.
- Elements can be hidden from the Homepage and Search upon decertification.
- Additional Automation Rules can be created for Workflows. Find more details in Configure Publishing Workflow Automation Rules.
Once finished, click [Save] in the upper right.