This article details how to establish connectivity to the Apache Superset Plugin.
1. Create New Data Source
Access Admin > Collection & Storage > Data Sources
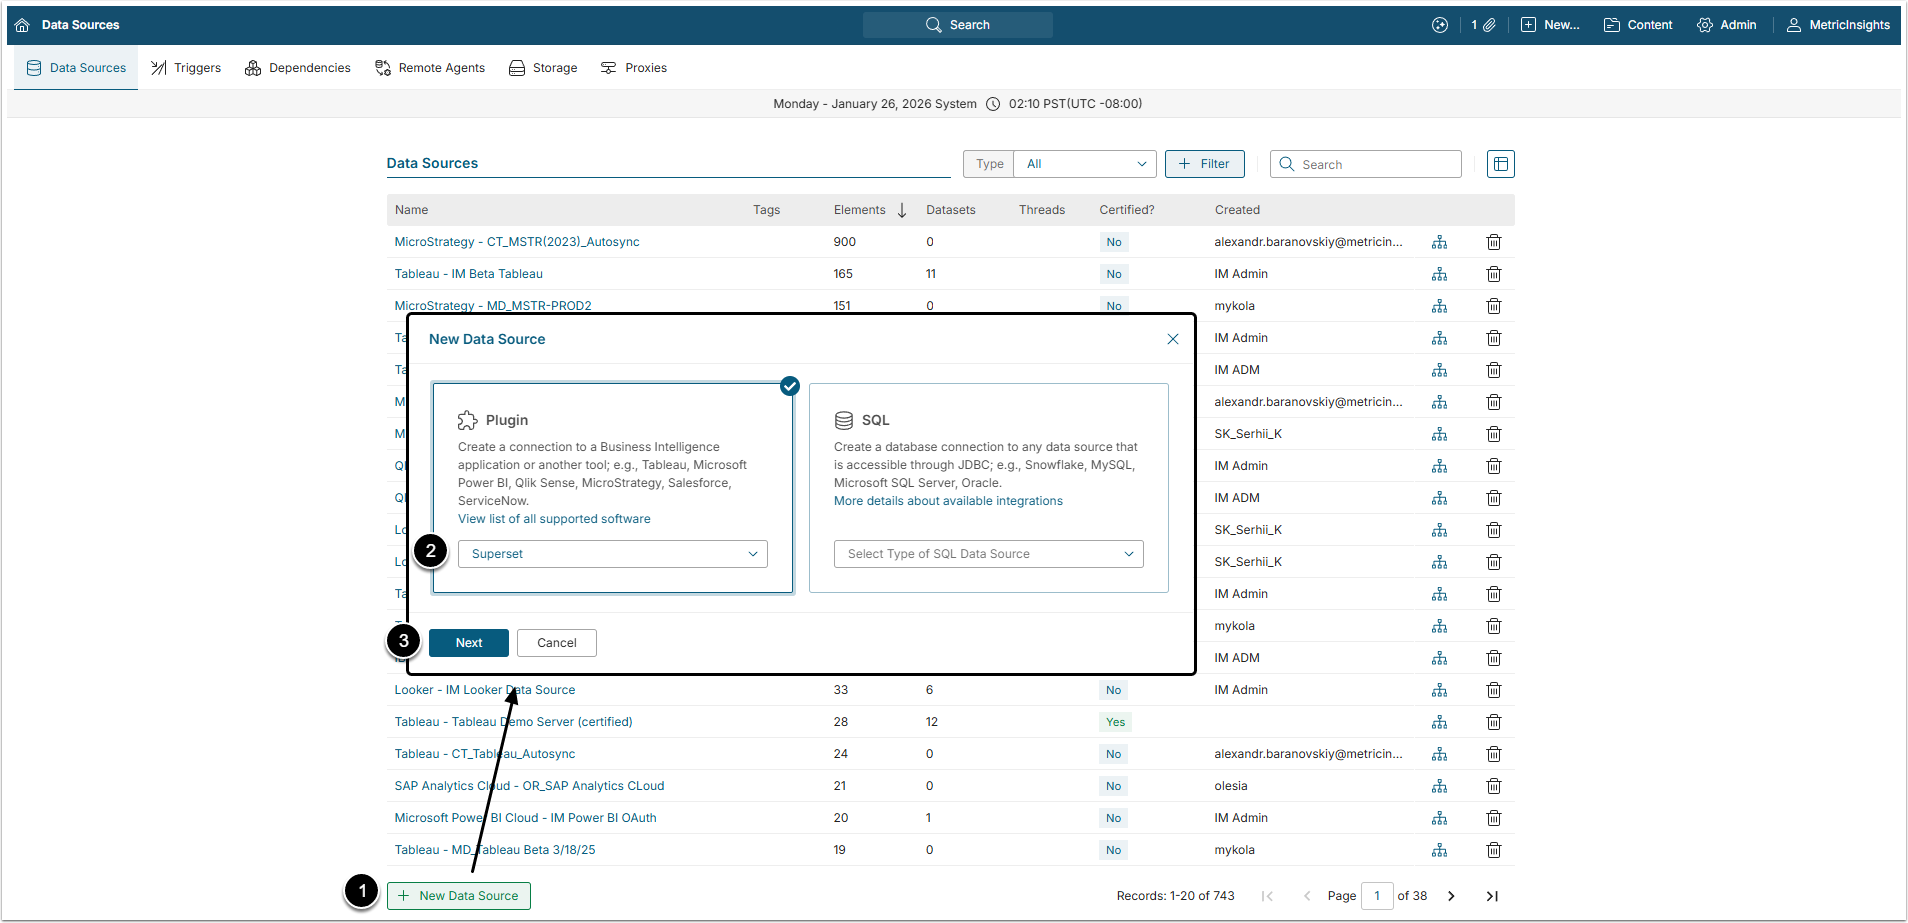
- [+ New Data Source]
- Choose "Superset" from the Plugin drop-down list.
- [Next]
2. Provide the Required Parameters
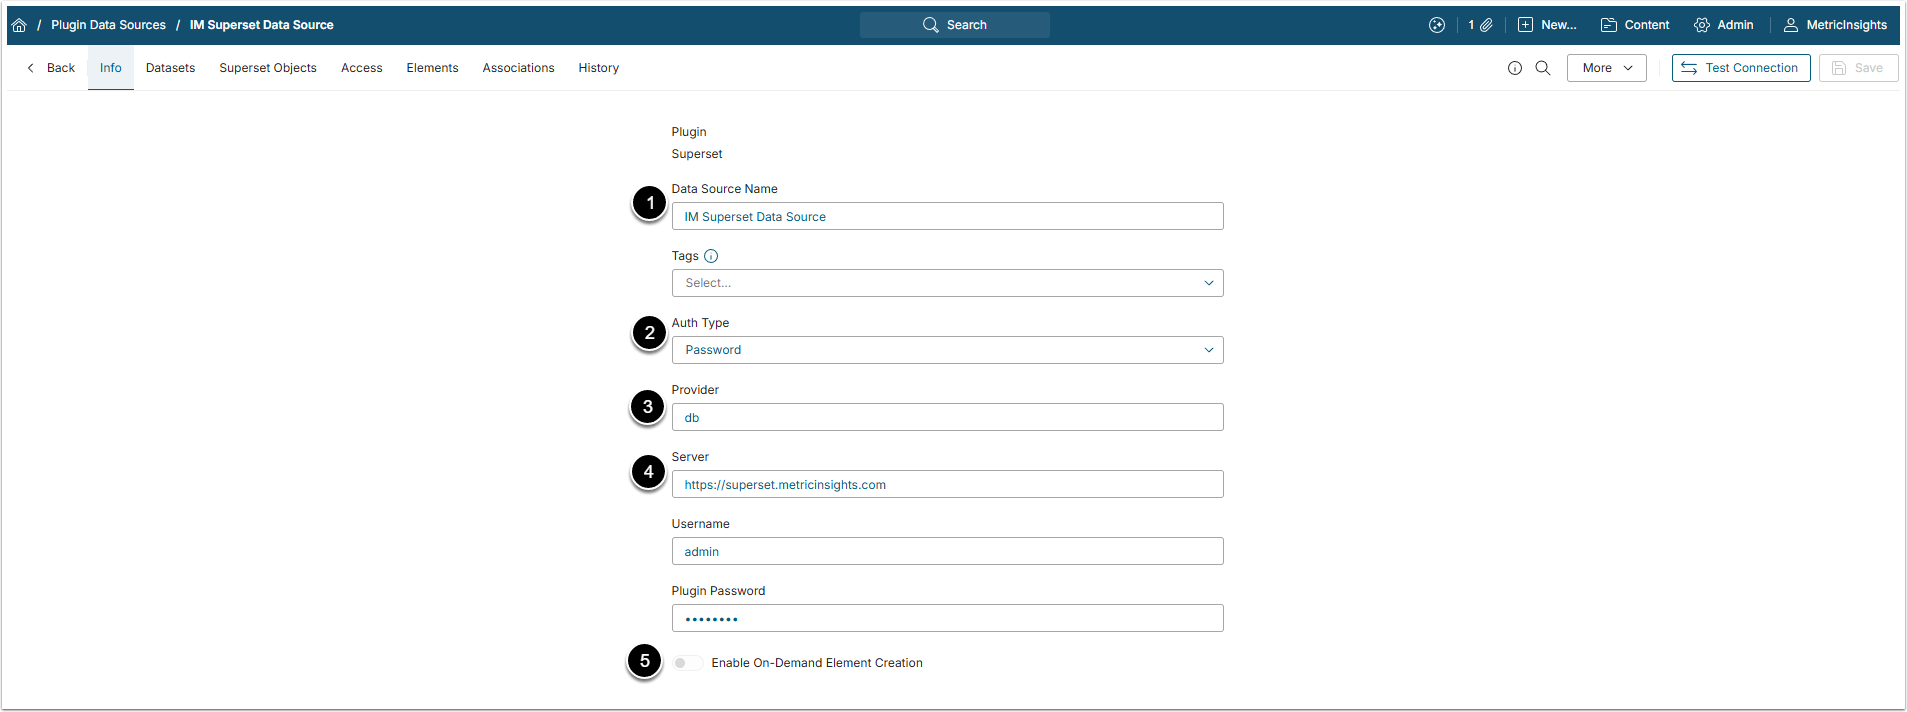
- Data Source Name: Give the Data Source a descriptive name.
- Auth Type: Select the authentication type:
- Password: After selecting this Auth Type, provide the Username and Plugin Password, copied from the Superset account.
- Identity Profile: After selecting this Auth Type, select the Identity Profile from the drop-down menu.
- Provider: Insert Apache Superset provider.
- Server: Insert the Superset server address.
- Optionally, toggle on Enable On-Demand Element Creation.
3. Configure Optional Parameters

| Description | |
|---|---|
| 1 | The number of attempts to try to get screenshot in case it is not computed in cache.
|
| 2 | Delay between the screenshot attempts (specified in milliseconds).
|
4. Proceed with Advanced Configuration
Advanced Configuration settings can be set to default values unless Data Source requires more precise tuning. For more details on how to proceed, refer to Advanced Data Source Configuration.
Use the [Test Connection] button to check if Metric Insights is able to connect with the plugin.