This article describes how to connect to Salesforce using Salesforce Reports Plugin in order to load data into Datasets and Reports in Metric Insights.
NOTE:
Our Plugin currently supports functioning with Salesforce Classic UI, so make sure that the User account has Salesforce Classic UI enabled on the Salesforce side.
1. Create New Data Source
Access Admin > Collection & Storage > Data Sources
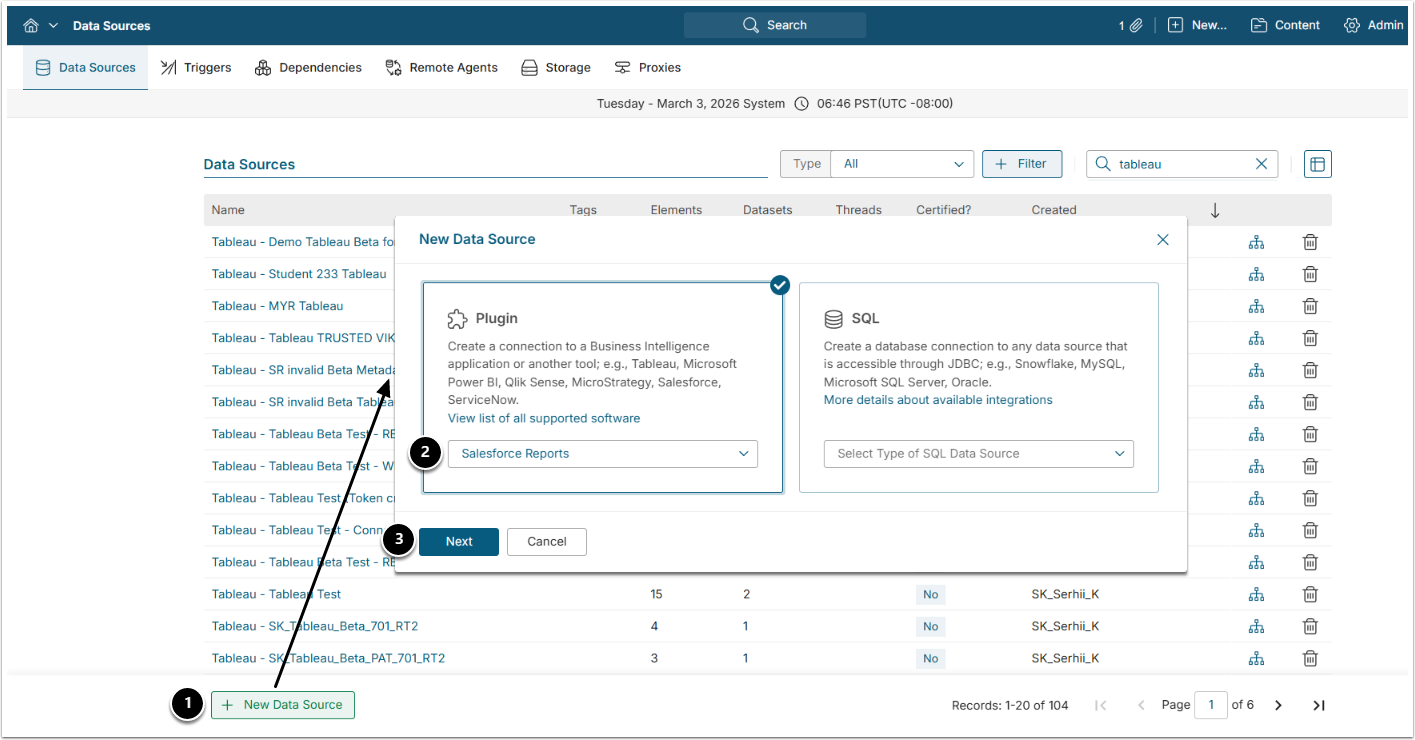
- [+ New Data Source]
- Select "Salesforce Reports" option from the Plugin drop-down menu.
- [Next]
2. Provide Required Parameters
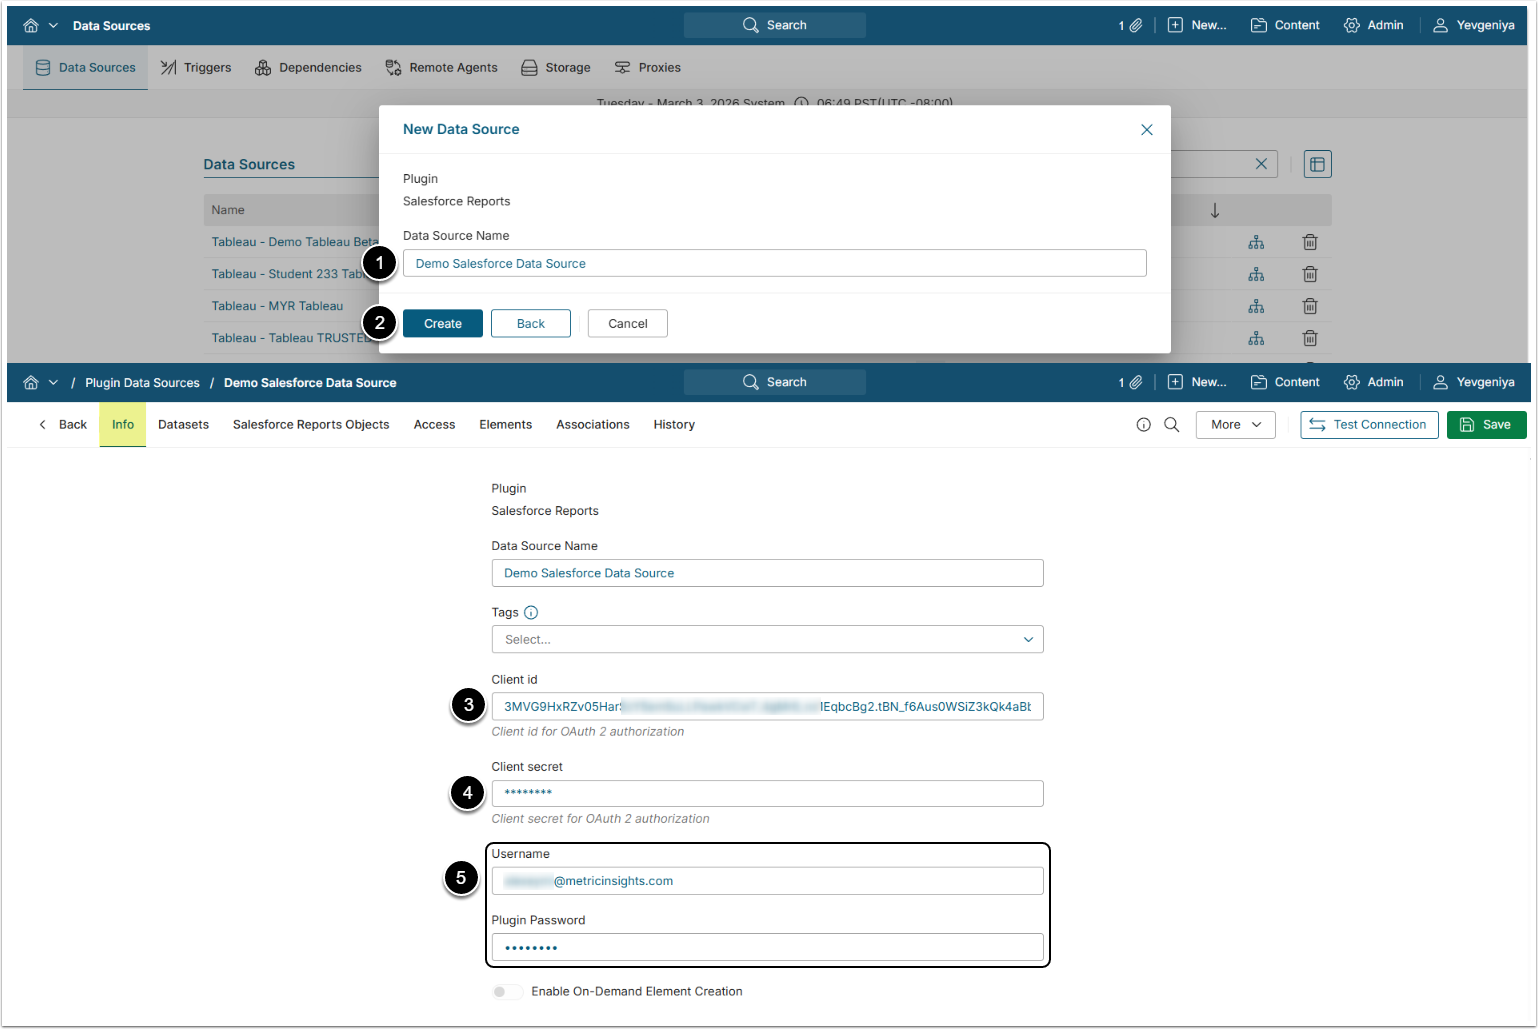
- Data Source Name: Give the Data Source a descriptive name.
- [Create]
- Client ID: Insert Consumer Key from Salesforce account.
- Client Secret: Insert Consumer Secret from Salesforce account.
- Username/Plugin Password: Provide the Salesforce account credentials.
Optionally, toggle on Enable On-Demand Element Creation.
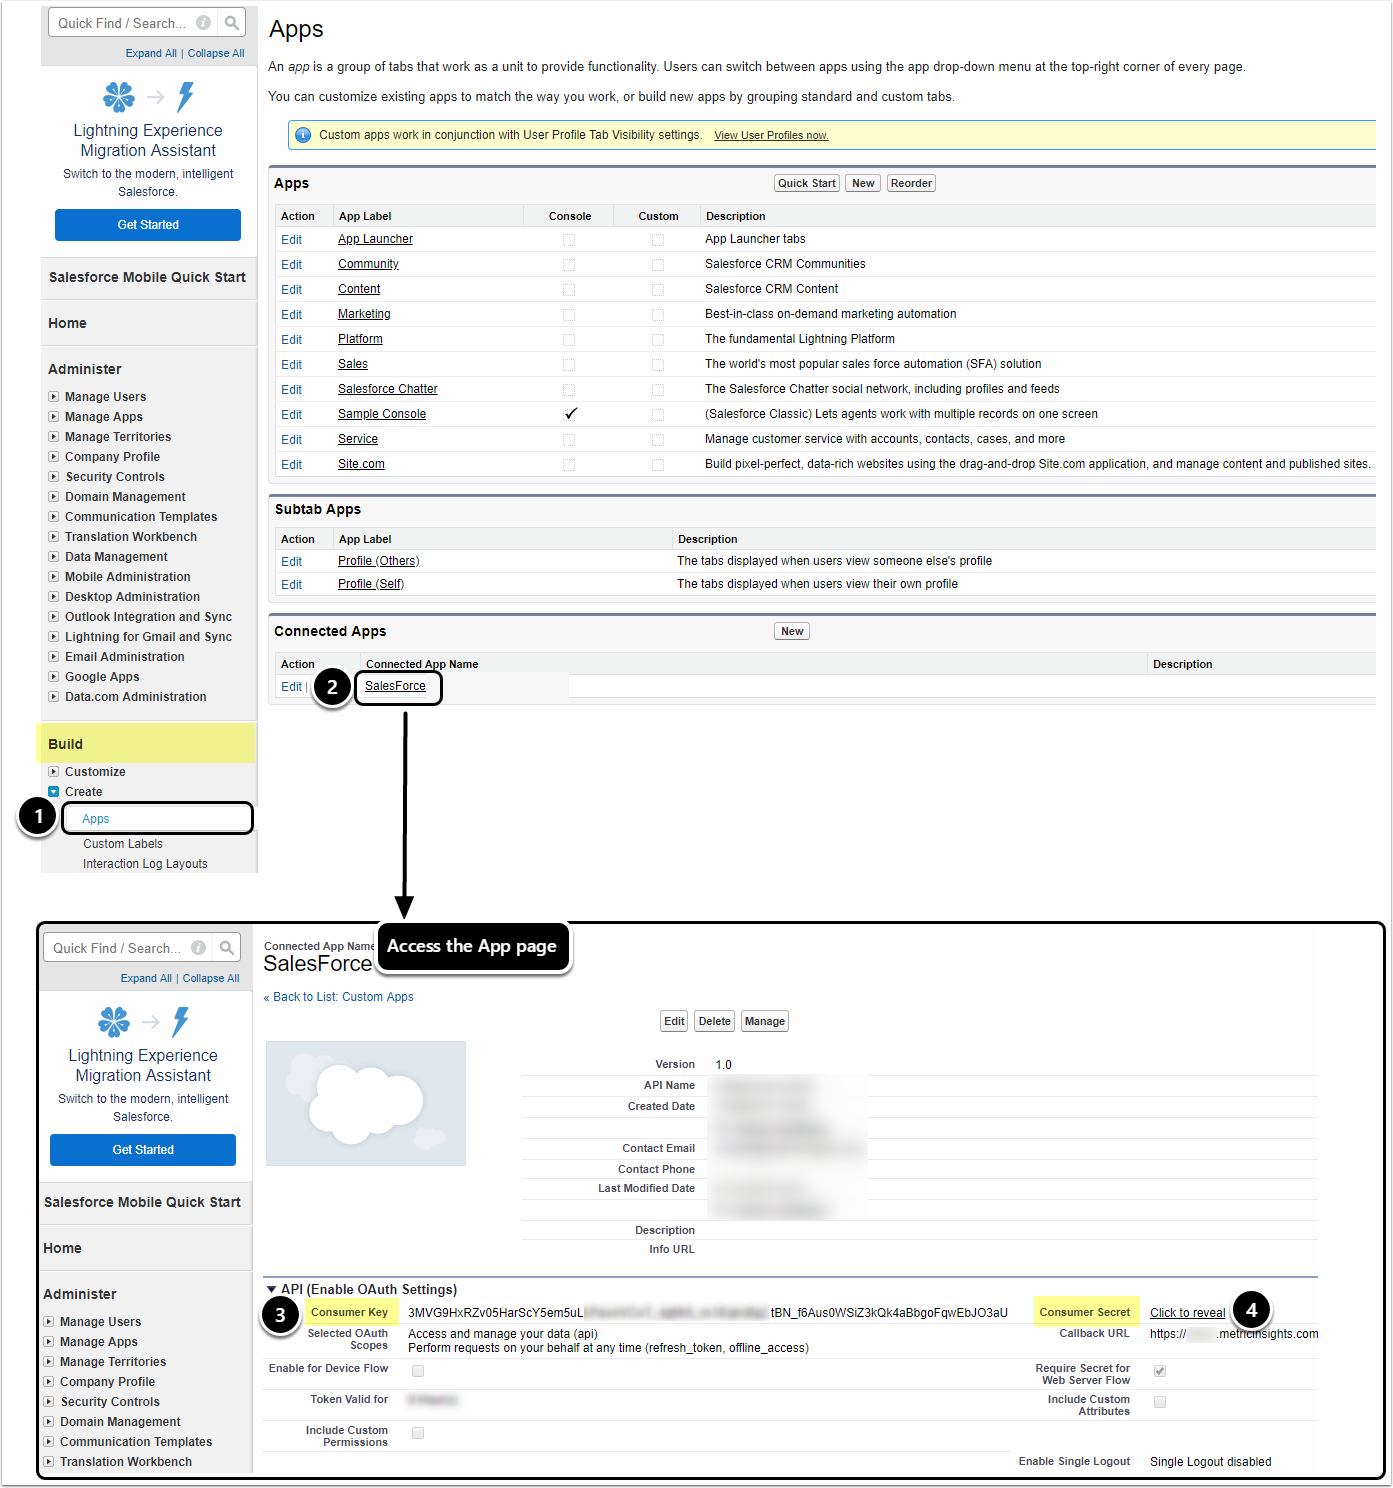
- Access Build > Create > Apps.
- Under Connected Apps, open the App link.
- In the API section, copy Consumer Key.
- Click the link to reveal and copy Consumer Secret.
3. Configure Optional Parameters

| Name | Description |
|---|---|
| Server | Specify the name of your custom Salesforce Server that you want to use instead of the default one. |
4. Proceed with Advanced Configuration
Advanced Configuration settings can be set to default values unless Data Source requires more precise tuning. For more details on how to proceed, refer to Advanced Data Source Configuration.
[Test Connection] in the upper right corner to check if everything work correctly.
5. Troubleshoot 4xx Errors when Getting External Reports List
A comprehensive list of Status Codes and Error Responses is provided by Salesforce REST API Developer Guide.
When trying to establish connection with Salesforce via the corresponding Plugin connection profile, you might get 4xx client errors caused by security constraints.
In order to alleviate the problem of authorization, you may need to relax IP restrictions in Salesforce.
For reference, see instructions below.

- To access Connected Apps:
- From the Homepage, go to Setup.
- In the Left Side menu, find the Build section.
- Expand Create to reveal the list of Apps.
- Move down to Connected Apps.
- Next to the Connected App name, click [Manage].
- On the Detail page, click [Edit Policies].
- On the Edit page, for IP Relaxation select Relax IP restrictions under OAuth policies.