This article describes how to connect to Microsoft Azure Analysis Services.
NOTE: This connection requires running a Remote Agent.
Locate Values for Location, Model, and Server
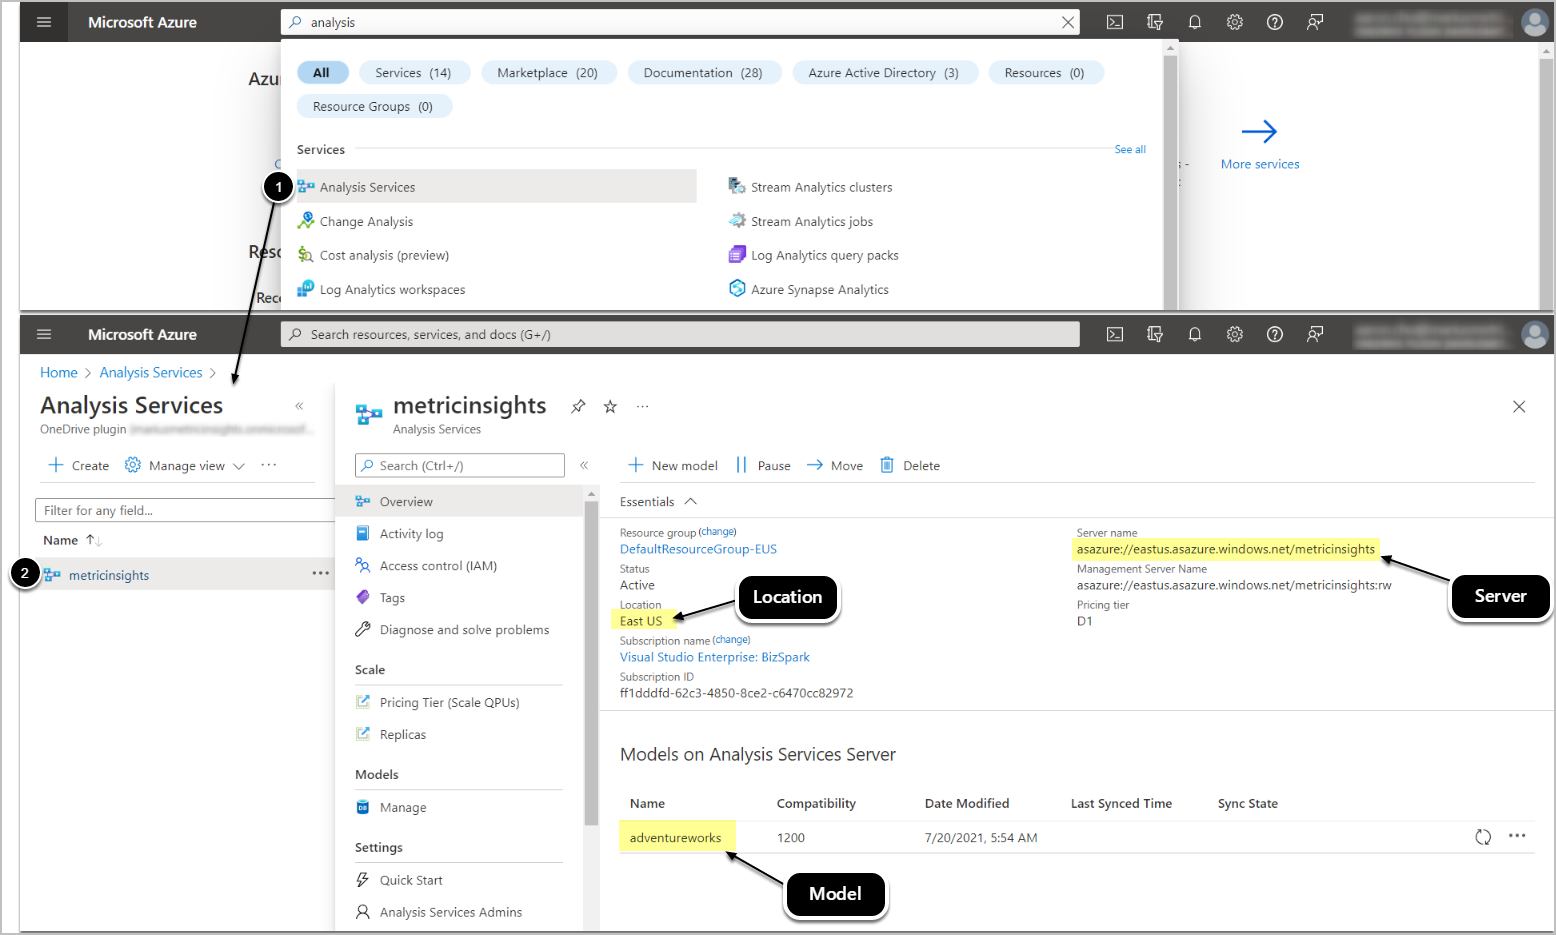
Access Microsoft Azure Portal
- Find Analysis Services.
- Access the service and locate values as shown on the screen.
Register an Application – for OAuth
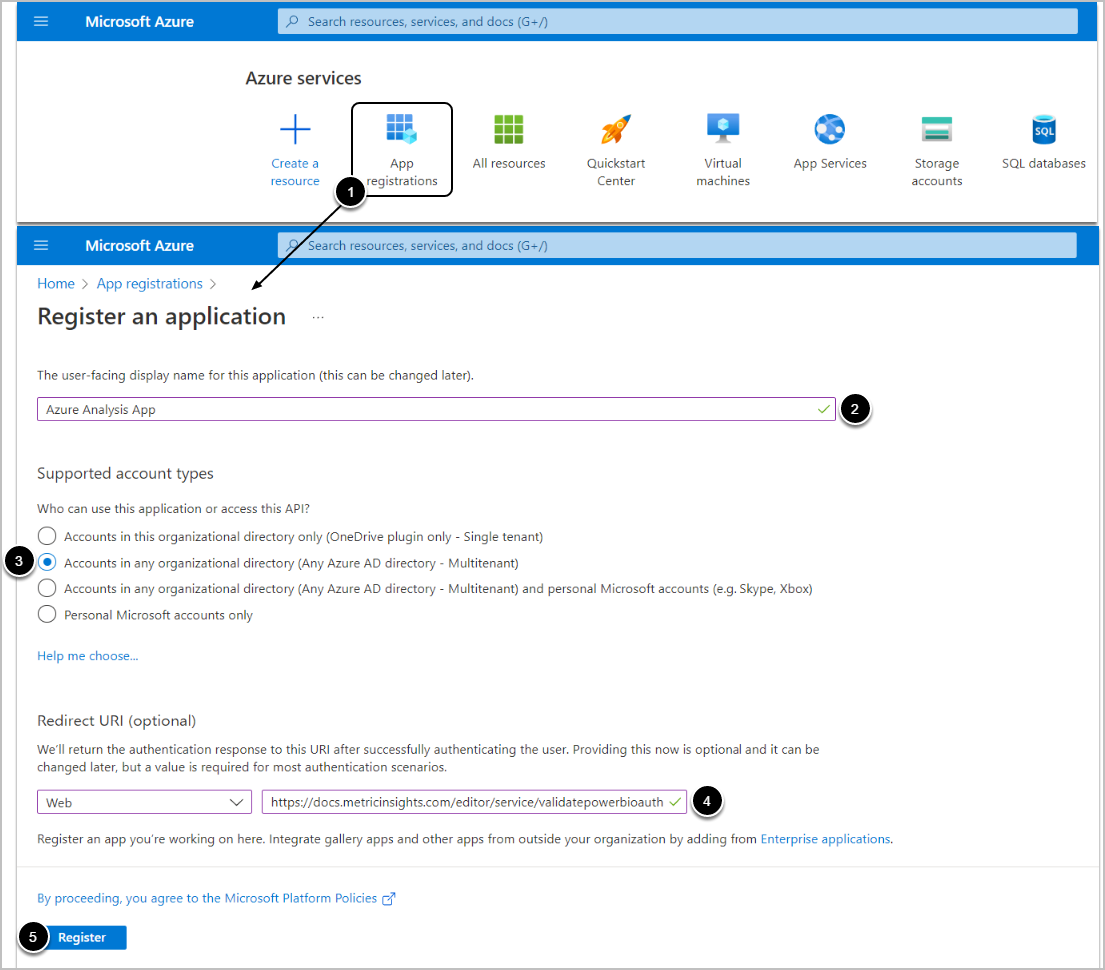

Access Microsoft Azure Portal
- Access App registrations.
- Input a descriptive name.
- Specify Supported account types as shown on the screen.
- Choose "Web" from the Redirect URI.drop-down and set the value for Redirect URI in the following format:
- https://hostname/editor/service/validatepowerbioauth
- [Register]
Locate Client ID
Access the Overview tab
Locate Client ID as shown on the screen.
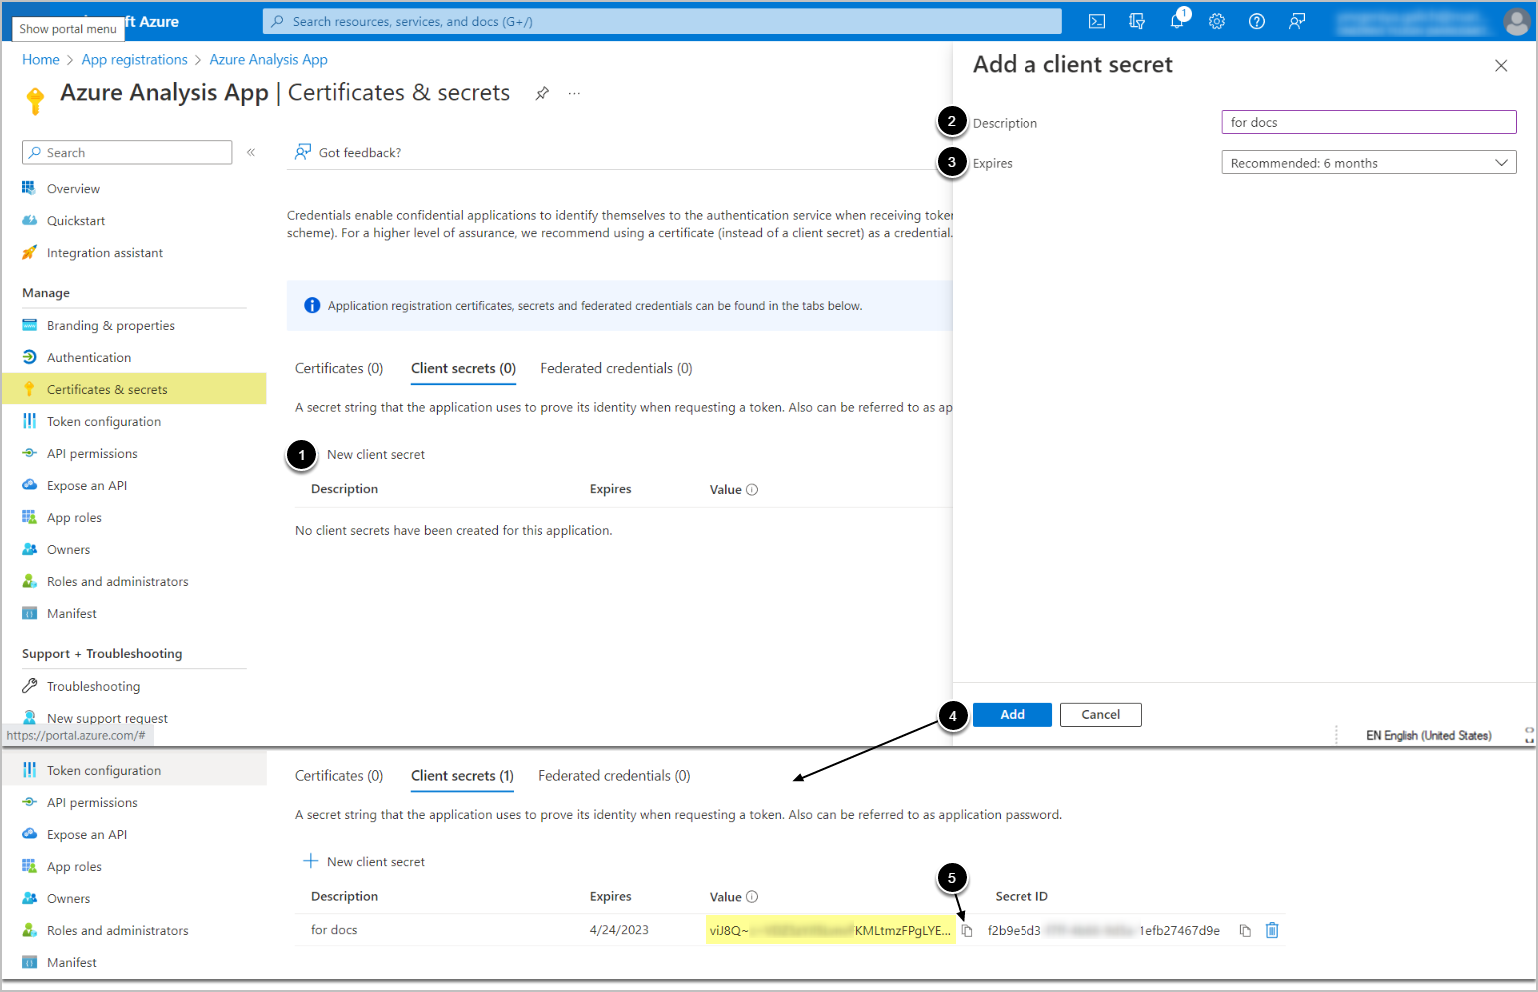
Create Client Secret
Access the Certificates & secrets tab
- [+New client secret].
- Enter Description.
- Specify validity period.
- [Add]
- Copy the Client secret Value.
- NOTE:the Value won't be available after you perform another operation or leave the tab.
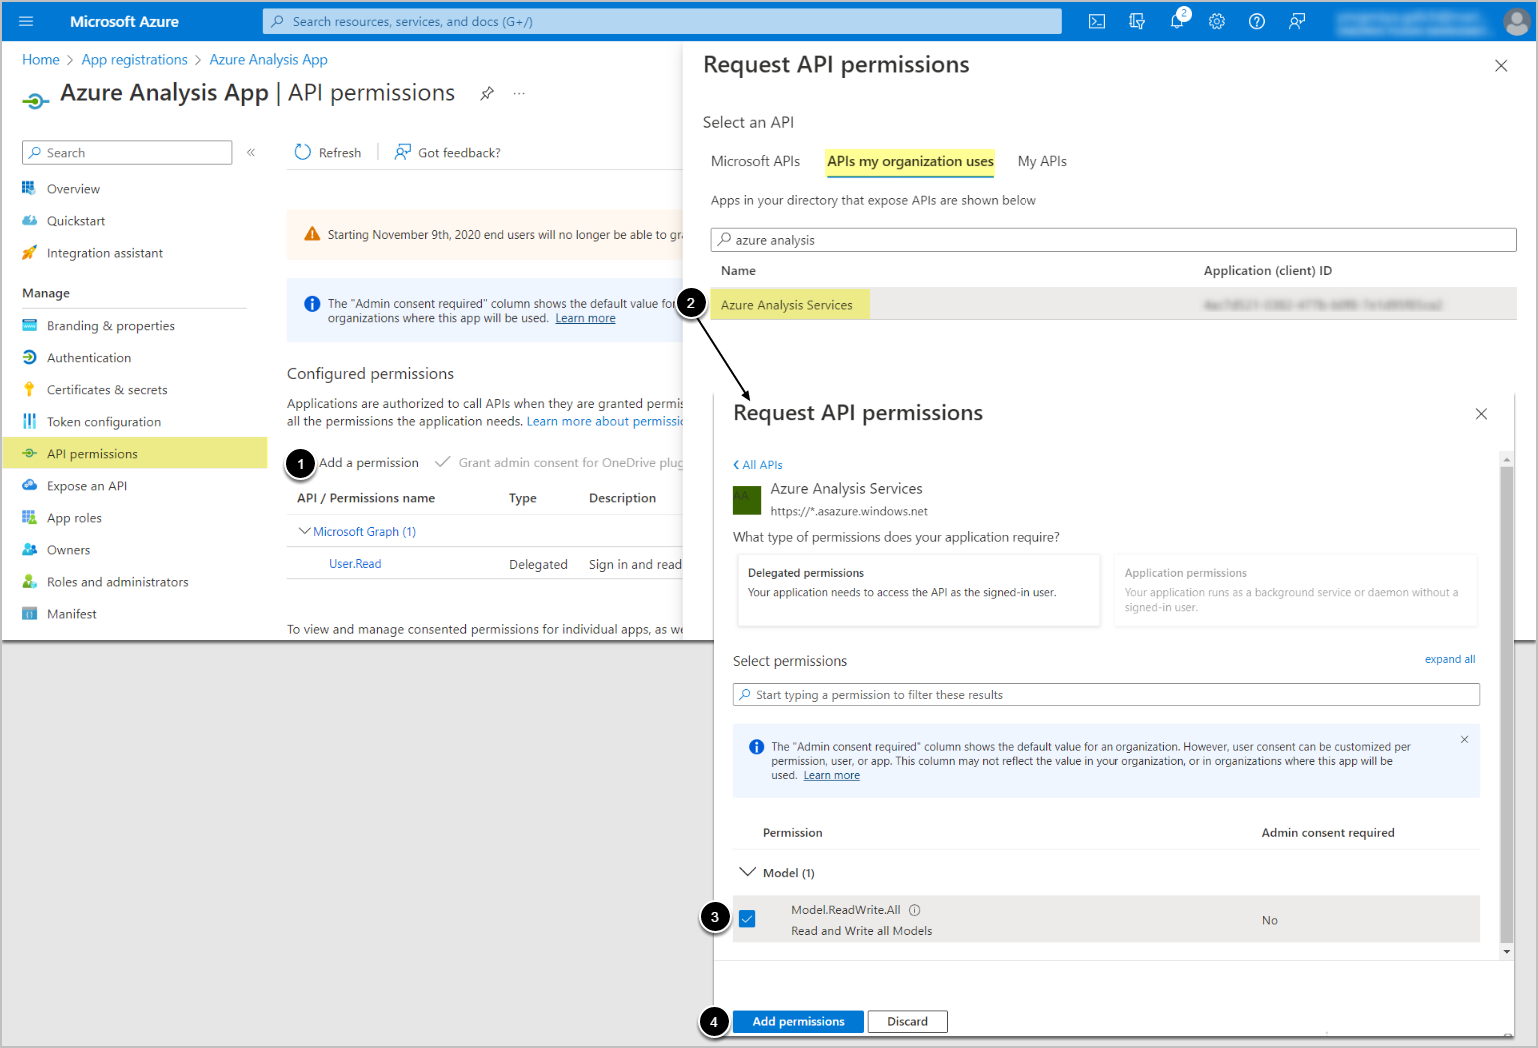
Enable Permissions
Access the API permissions tab
- [+Add a permission]
- Under APIs my organization uses, find Azure Analysis Services.
- Select Model.ReadWrite.All
- The permission allows the app to view and write to all models for the signed-in user and models to which the user has access
- NOTE: Microsoft Graph-User.Read is also a required permission and it is added by default upon the app creation. The permission allows users to sign in to the app, and allows the app to read the profile of signed-in users. It also allows the app to read basic company information of signed-in users.
- [Add permissions]
1. Add New Data Source
Access Admin > Collection > Storage > Data Sources
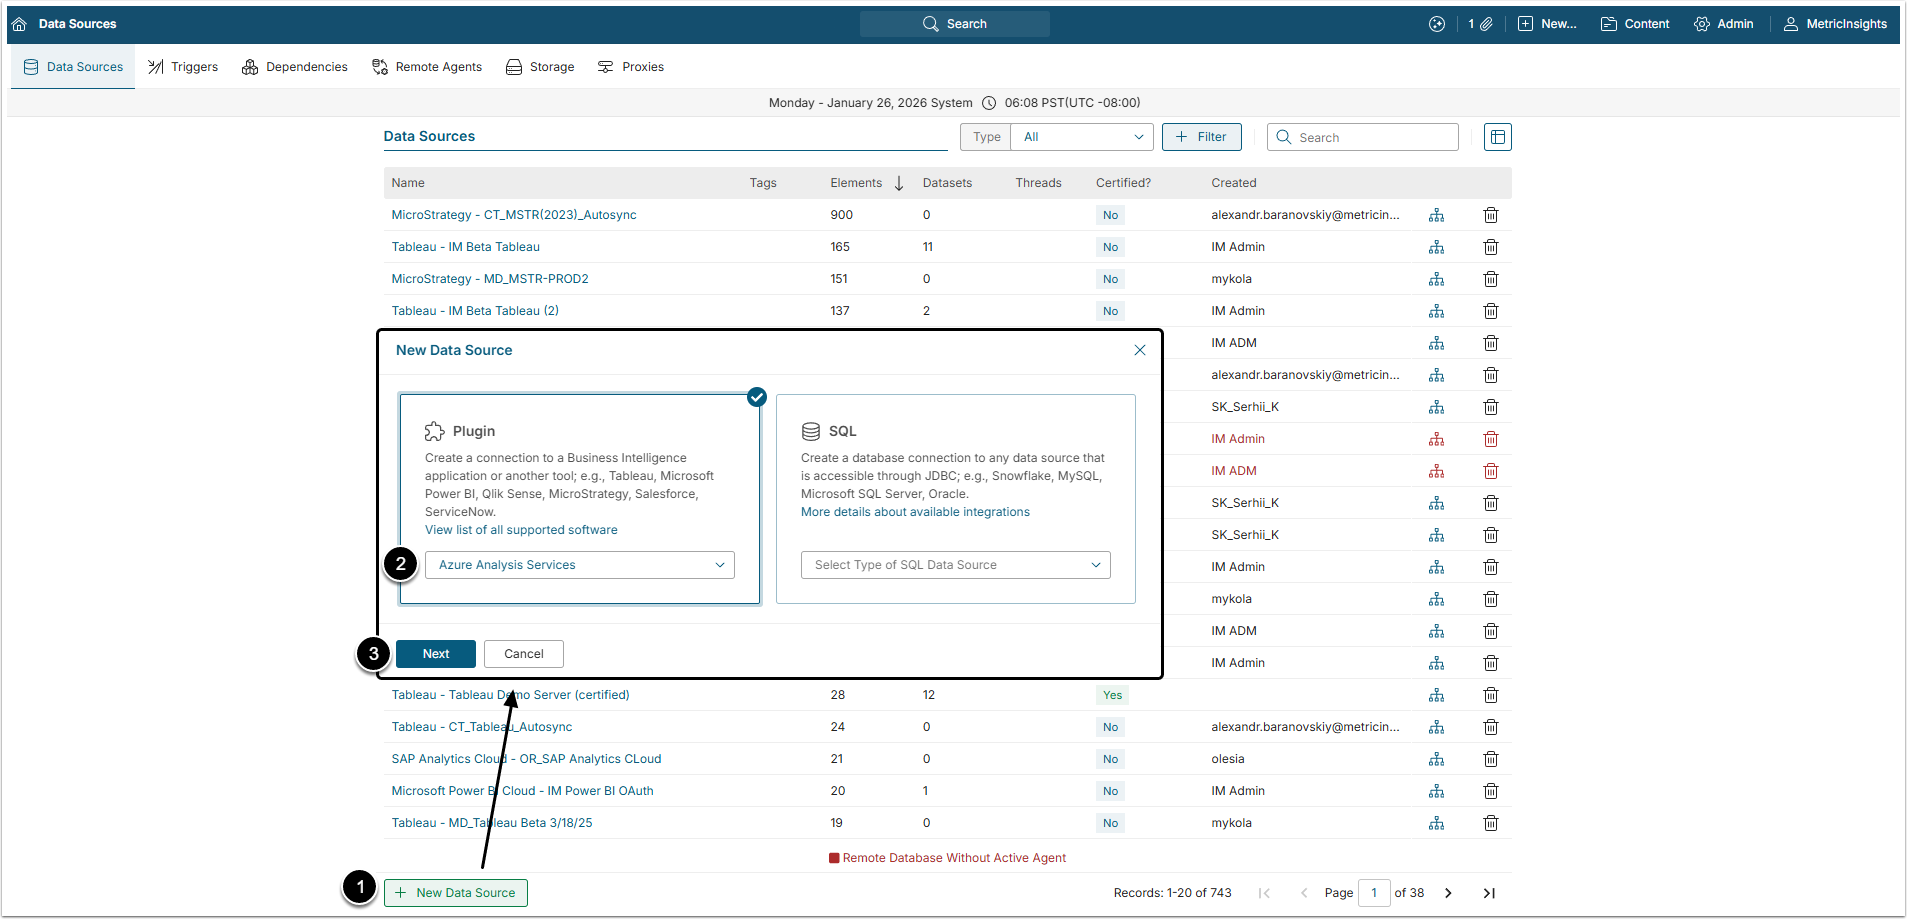
- [+New Data Source]
- Choose "Azure Analysis Services" from Other drop-down list.
- [Next Step]
2. Define Required Parameters
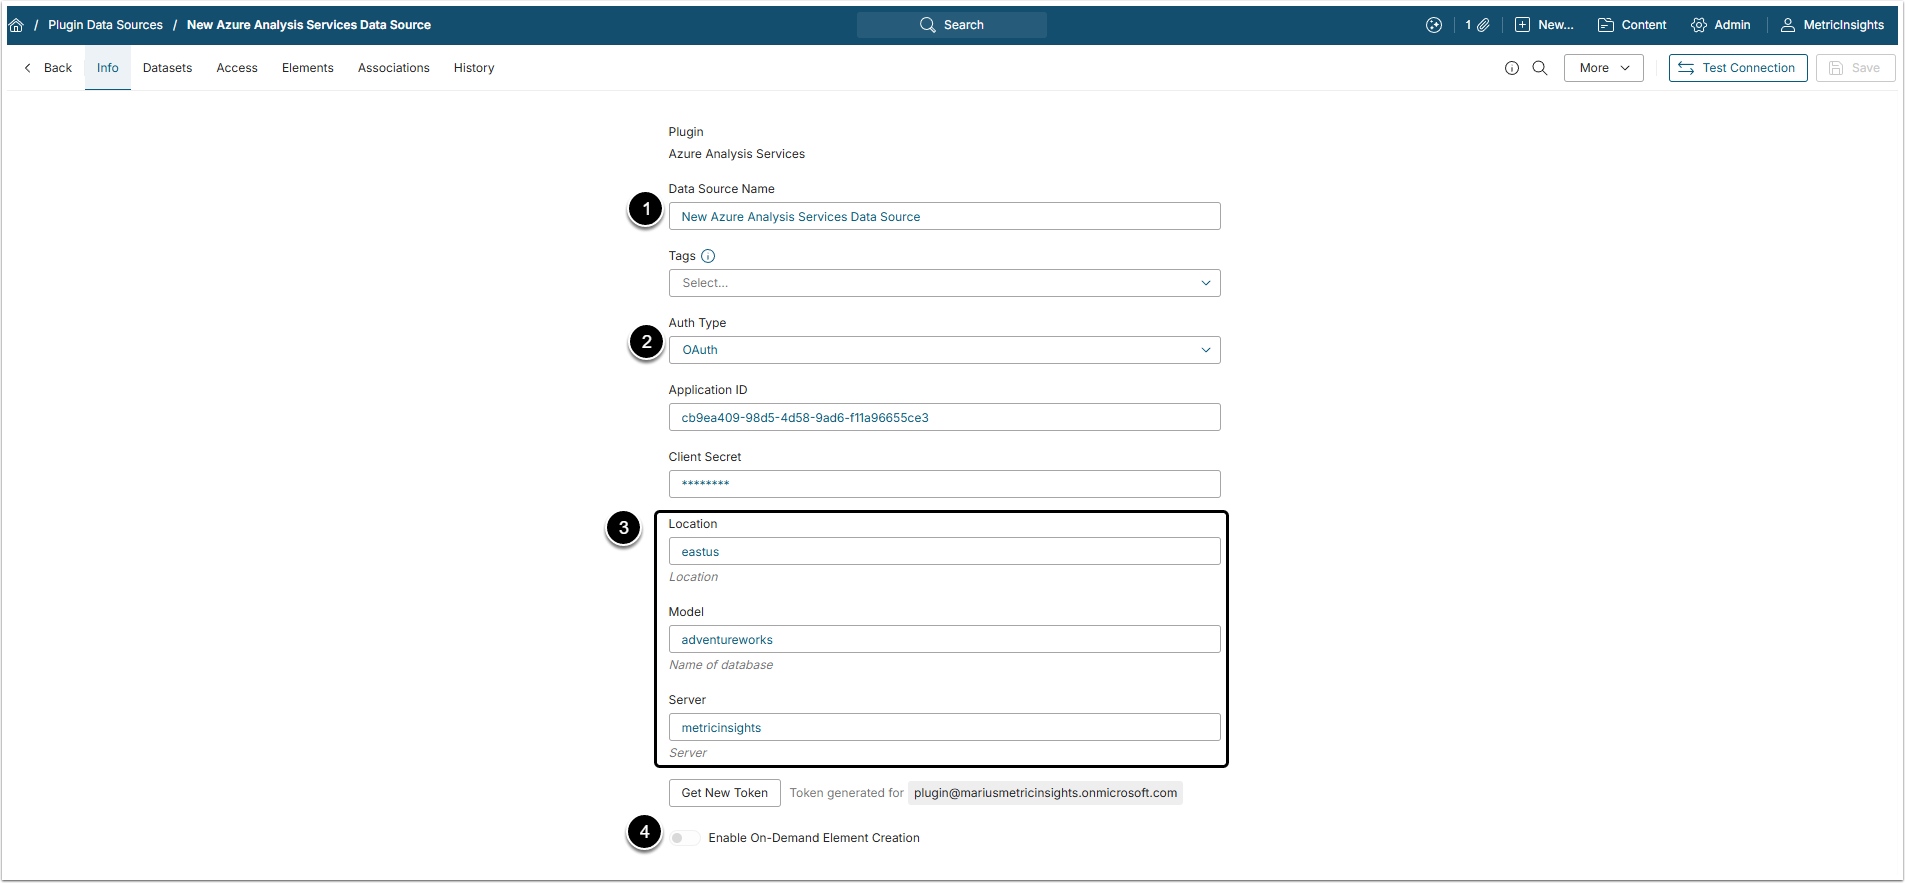
NOTE: Find the instructions on locating the required parameter values above.On-Demand Element Creation
- Input a descriptive phrase in Data Source Name.
- Select the required Auth Type.
- Password: input the Azure account credentials as described in this section.
- Identity Profile:select the required Identity Profile.
- OAuth: provide the required parameters and generate a token.
- Input Location
- Choose between a format shown on the screen or as it appears in Azure Analysis Services.
- Provide Model.
- Specify Server.
- Enter user credentials for the Azure account.
Optionally, toggle on:
3. Add RDP
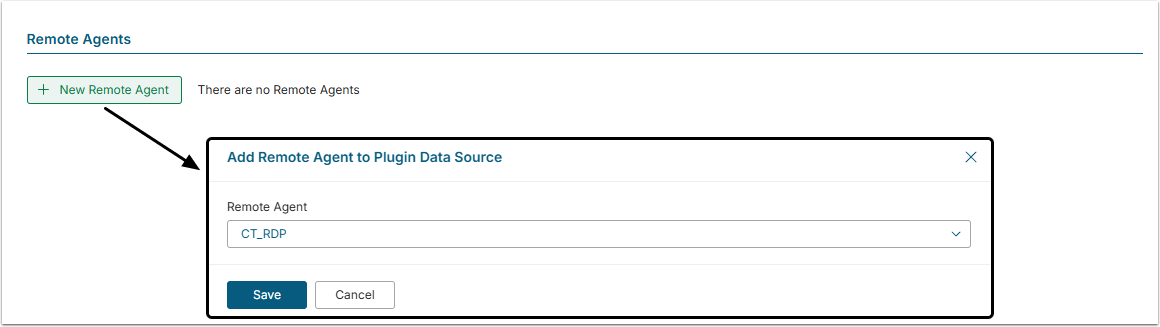
Add a Remote Agent via [+New Remote Processor] and [Test Connection].