This article details how to establish connectivity to Microsoft SharePoint Server 2019.
Find instructions on how to connect to MS SharePoint Online in this article.
1. Add New Data Source
Access Admin > Connection & Storage > Data Sources
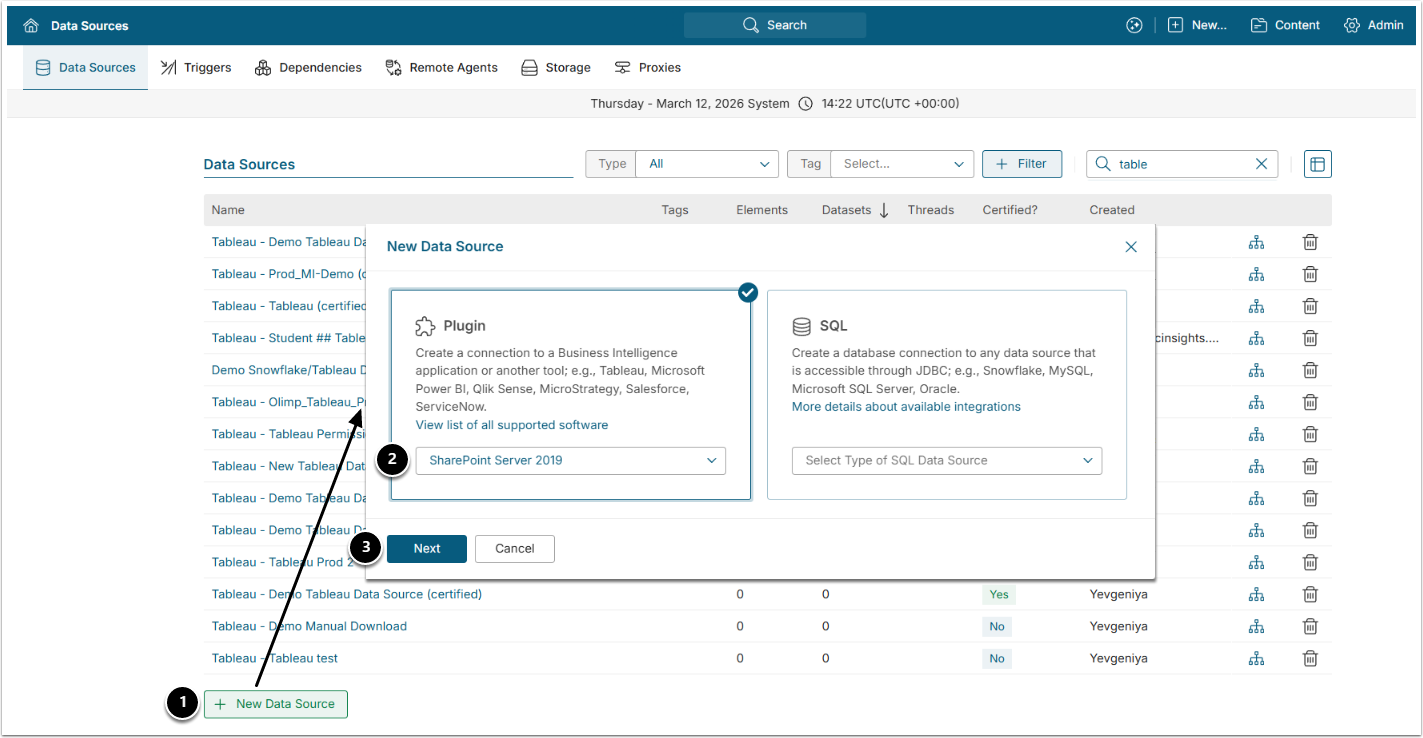
- [+New Data Source]
- Choose "SharePoint Server 2019" from the Plugin drop-down list.
- [Next]
2. Specify Required Parameters
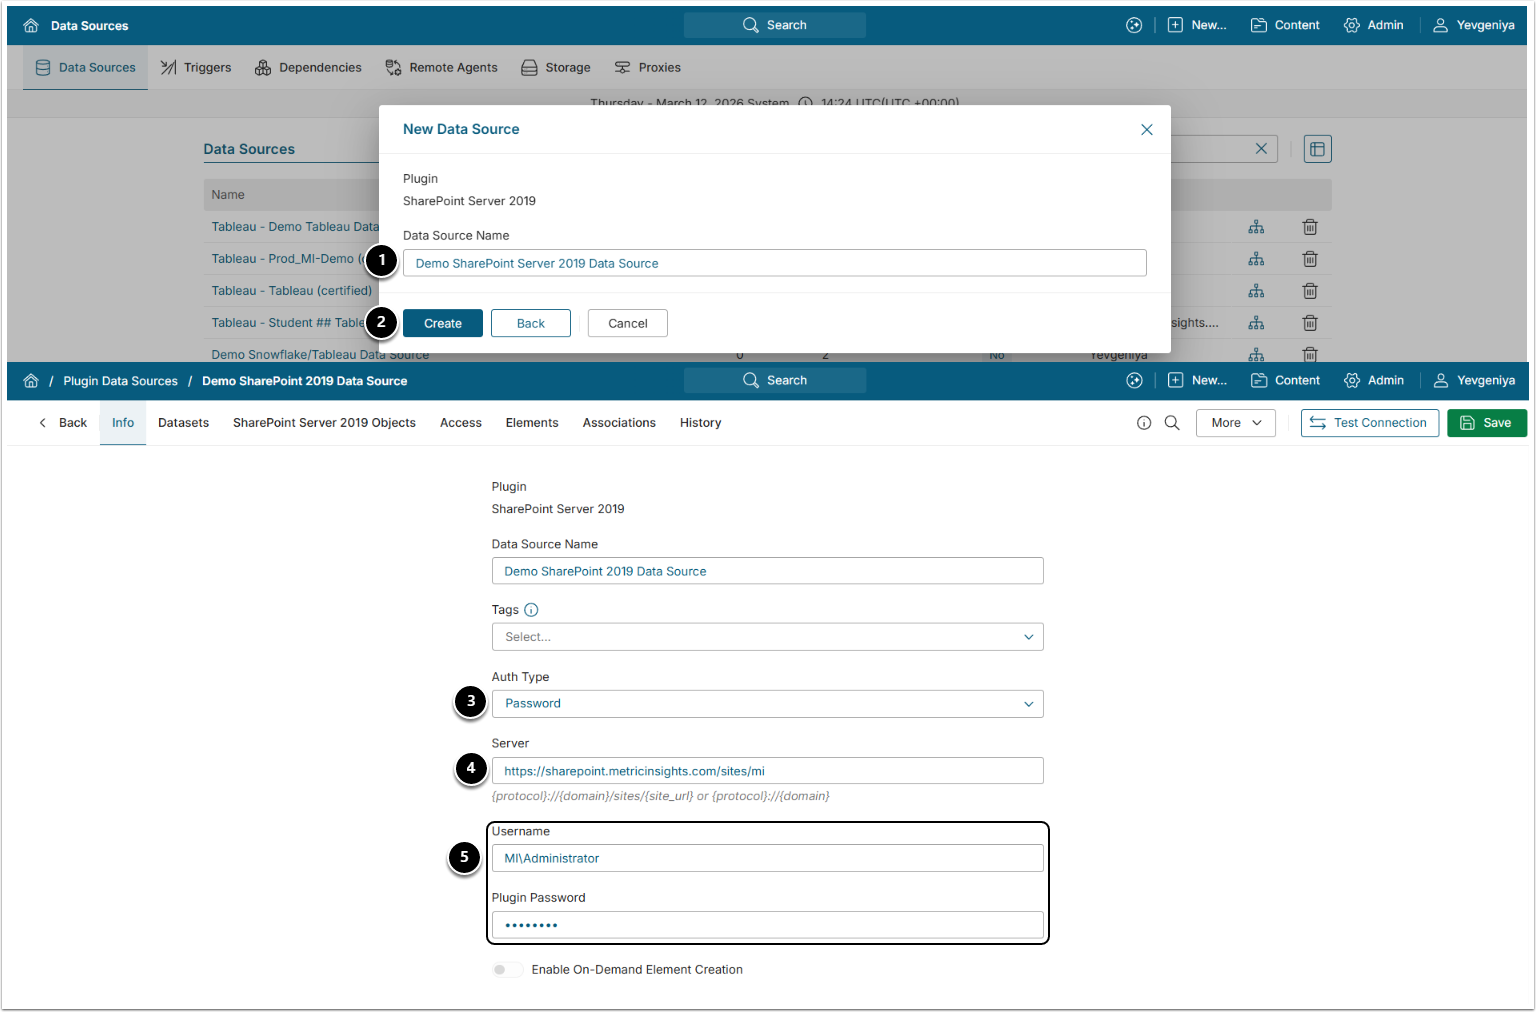
- Data Source Name: Input a descriptive phrase.
- [Create]
- Auth Type: Select the required type:
- Password: input the SharePoint Server credentials in the corresponding fields.
- Identity Profile: select the required Identity Profile
- Kerberos: input the SharePoint Server credentials in the corresponding fields.
- NOTE: Kerberos Auth requires adding Remote Agent. The Remote Agent service must be run in the same Windows domain as SharePoint Server and by the same user whose credentials are used in the Data Source.
- Server: Input the Share Point Server or Server and Site separated by slash "/".
- Username/Plugin Password: Provide the SharePoint Server credentials.
Optionally, toggle on:
3. Define Optional Parameters

| Name | Description | |
|---|---|---|
| 1 |
Include sheets | Set "true" to include both Excel files and their sheets as individual objects upon collection. |
| 2 | List filter | Specify List name(s) to filter and collect objects by Lists. Use the pipe "|" as a delimiter. |
4. Proceed with Advanced Configuration
Advanced Configuration settings can be set to default values unless Data Source requires more precise tuning. For more details on how to proceed, refer to Advanced Data Source Configuration.
Click [Test Connection] in the upper right corner.