1. Install Remote Agent
See Installing a Remote Data Processor on Windows Servers for instructions.
2. Create .Conf Files
- Access the
C:\Program Files\Metric Insights\Remote Agent\thirdparty\directory on the Windows server - Create a new folder
kerberos-configinside this directory - Within the new folder, create the following two files:
krb5.conf:
[libdefaults]
    default_realm = MI.LOCAL
    dns_lookup_kdc = false
    dns_lookup_realm = false
    ticket_lifetime = 24h
    renew_lifetime = 7d
    forwardable = true
    allow_weak_crypto = true
[realms]
    MI.LOCAL = {
        kdc = 1.1.1.1
        admin_server = 1.1.1.1
    }
[domain_realm]
    .example.mi.local = MI.LOCAL
    example.mi.local = MI.LOCAL
[logging]
    kdc = FILE=/var/log/krb5kdc.log
    admin_server = FILE=/var/log/kadmind.log
default = FILE=/var/log/krb5lib.log- Replace
MI.LOCALwith the Kerberos realm used by your organization. - Assign
kdcandadmin_serverwith the hostname or IP address of your Key Distribution Center (KDC) and admin server. - Replace
.example.mi.localandexample.mi.localwith the domain name of your SMB server.
login.conf:
 KerberosLogin {
    com.sun.security.auth.module.Krb5LoginModule required
    useTicketCache=true
    doNotPrompt=true
    debug=true
    renewTGT=true;
};- Save both files in the
kerberos-configdirectory
3. Generate Kerberos Ticket
Use the following command to generate a Kerberos ticket:
kinit usernameNOTE: Replace username with the actual username.
4. Ensure That RDP Login Matches Kerberos Authenticated User
To ensure Kerberos authentication is successful, the Windows service account running the Remote Agent must match the user that generated the Kerberos ticket.
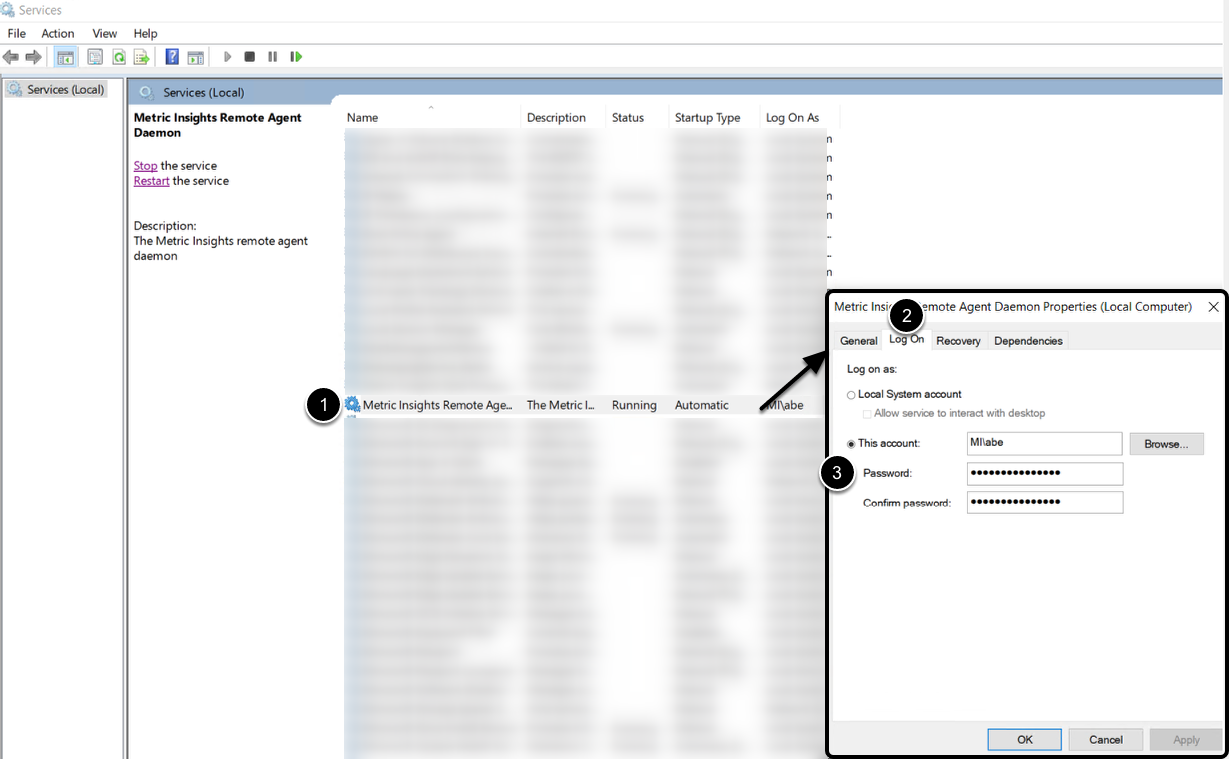
- Open the Windows Services console and locate the Metric Insights Remote Agent daemon. Right-click the service and choose Properties
- Access the Log On tab
- Set the Log On account to the same user who ran the kinit command
Restart the service to apply the changes.