Any person using Metric Insights must have a User Account. Each Account is related to one of three User Types that define the general level of security to be granted. This article describes how an Administrator can create a new User Account and assign it to the Group.
1. User Types
The Administrator creating an account initially defines a User as:
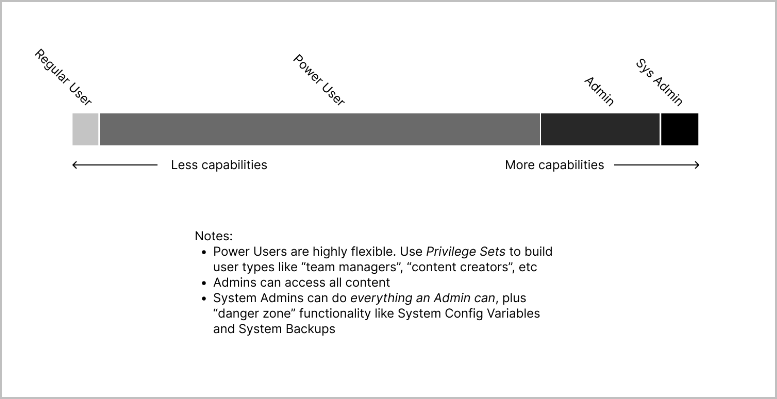
- Regular User: Has no authoring capabilities for creating or editing elements
- Power User: Can be assigned the ability to create elements and other objects from a specific set of data sources. For more details refer to: Understanding Power Users
- Administrator: Has full access to view, edit and create any Object or content in Metric Insights. Can also manage accounts, grant rights and perform other Administrative tasks that govern system behavior
User rights can be assigned either directly to a User or, more commonly, assigned to multiple Users through membership in a Group. These rights fall into two categories:
- Privileges: Determine system functionality that is available to the user
- Permissions: Control access to specific Elements, Dimension Values, Datasets and most other system Objects
Only Admins can create or update a User's account on the User Editor. Power Users with the proper Privileges and Permissions may grant direct access to objects to both Users and Groups.
NOTE: The Administrator can be designated as a System Administrator. See this article for more information.
2. Create a New User
Access Admin > Users & Groups > Users tab
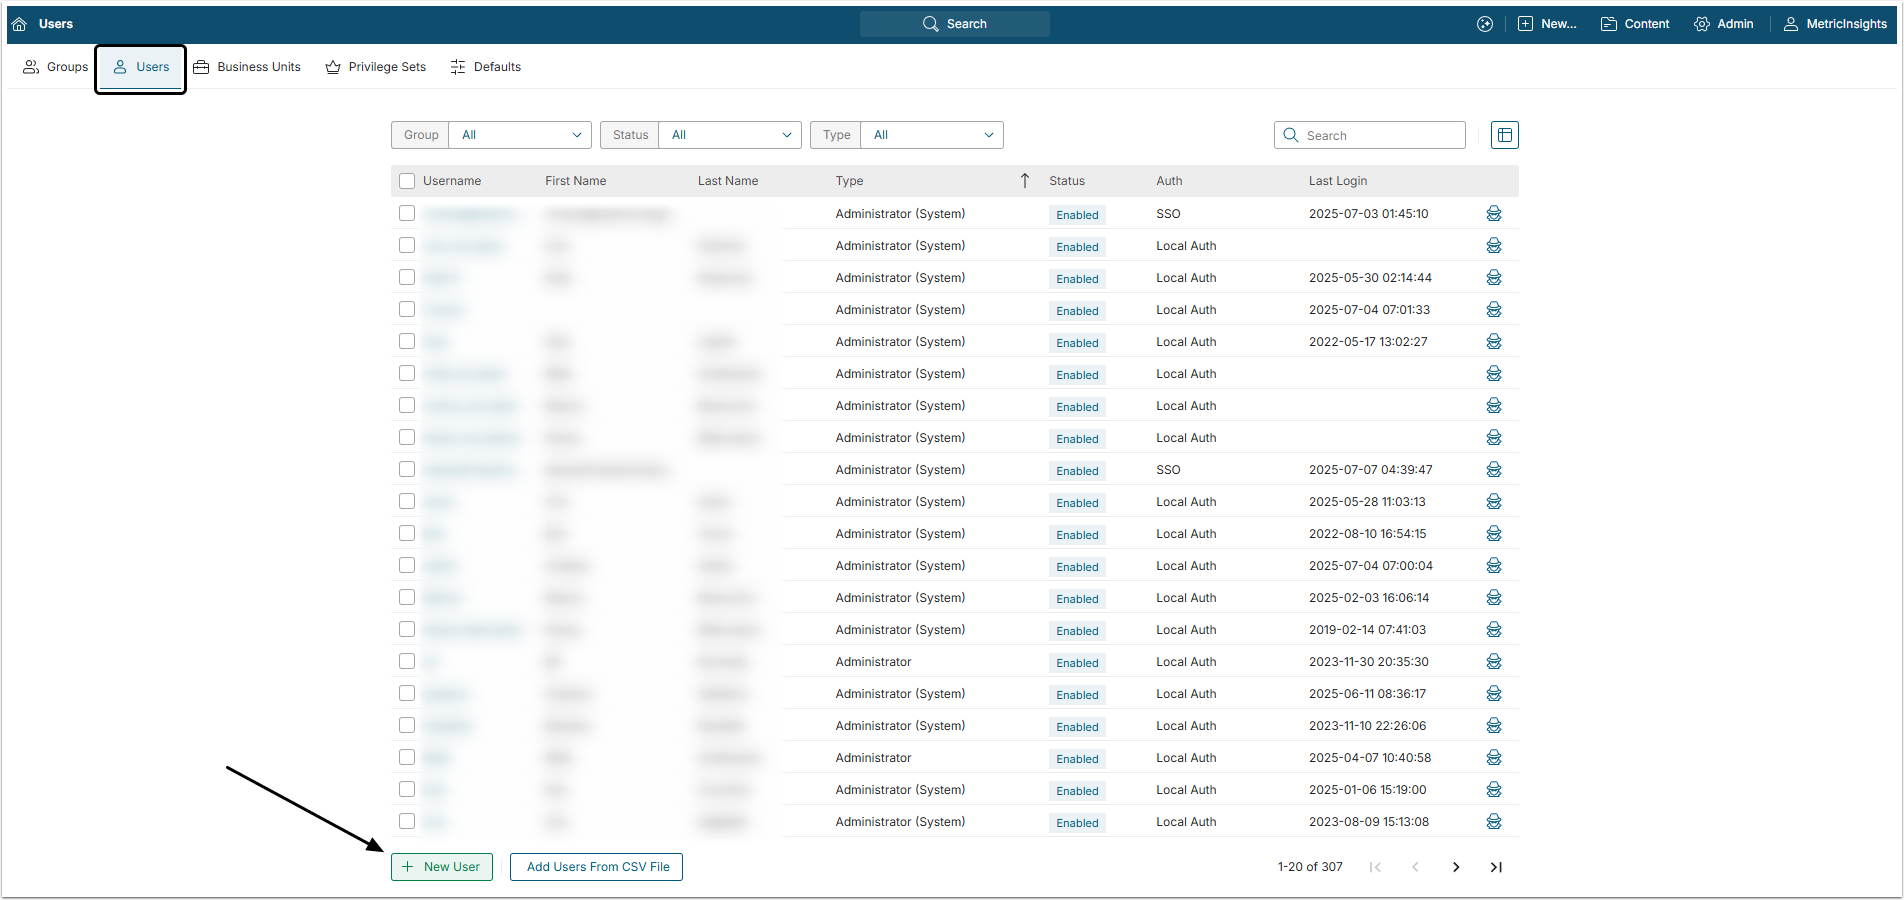
[+New User] at the bottom of the page to open the New User pop-up.
3. Specify Basic User Information
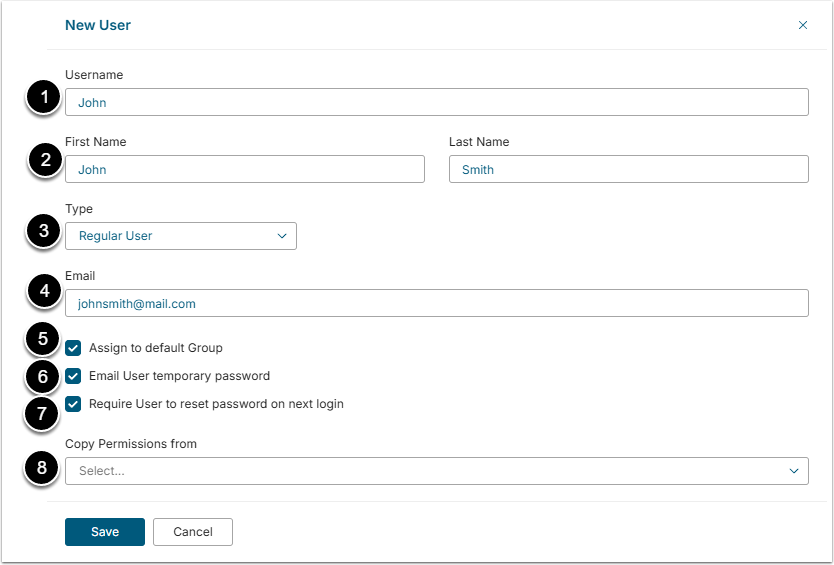
- Username: Give the User unique name.
- First Name / Last Name: Optionally, add the First and Last names. The maximum character length is 100.
-
Type: Define the Type of User.
- If an "Administrator" is selected, another setting "System Admin" is displayed. See this article for more information.
- Email: Enter User's Email address.
-
Assign to default Group: It is selected by default and puts the User in the "Default Group" that is established when Metric Insights is configured initially and contains Privileges and Permissions that your organization wants many users to have.
- If you deselect this checkbox, an Assign User to field appears.
- Email User temporary password: Determine whether you want the User to receive a temporary password via email.
- Require User to reset password on next login: Define if User is required to reset the password upon first login.
- Copy Permissions from: This option allows you to quickly define User Permissions by copying configurations previously specified for another selected User of the same Type.
[Save] your settings. The User Editor opens.
A User does not have to be assigned to a Group or granted any Privileges and/or Permissions at the time the account is created; however, a warning message cautions the Admin. The initial ability of the User to access content and perform system functions will be extremely constrained until the User has been added to a Group or directly assigned at least minimum rights.
4. Define Group Membership

Note that, based on the initial standard settings, this sample User is assigned to the 'Default Group'.
- Add Group(s) using [+ Group to User] to specify additional Group memberships for the User.
- Use the cross icon to delete a Group to which the User already has access.
Form more information in applying Security rules, see the Security Overview article.
The sections below all follow a similar format and contain buttons to allow Use, View, or Edit Access Permissions for specific objects.
5. Assign Dimensions
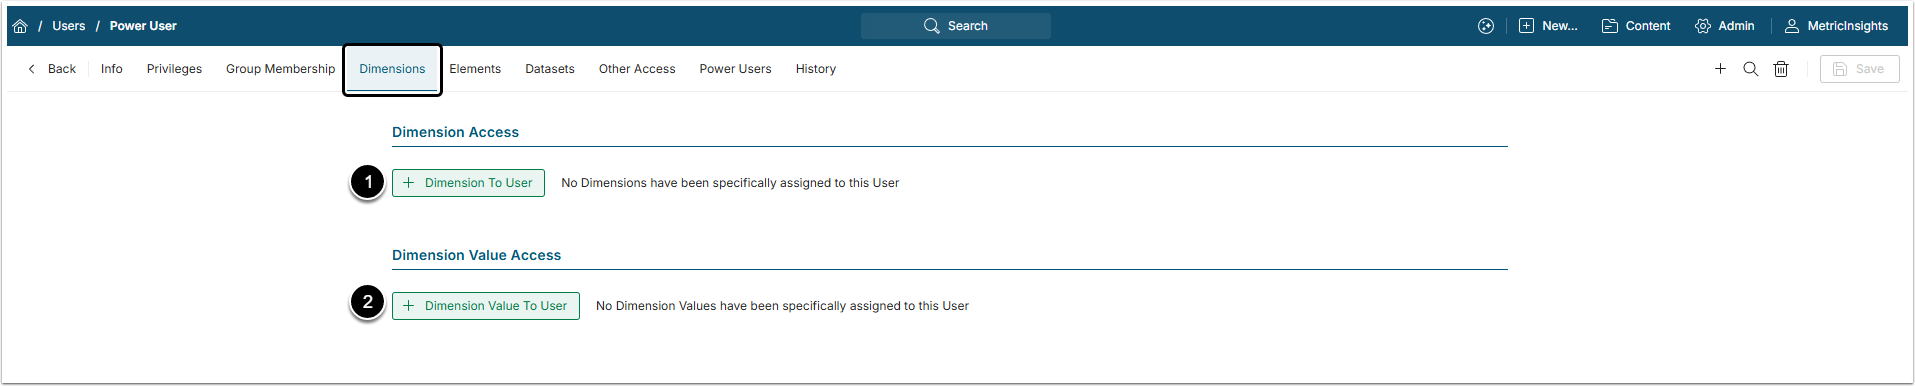
- Add Dimension via [+ Dimension To User].
- Add Specific Dimension Values as required if Dimension is added with a Scope of Access of Specific Dimensions.
For more details, check the Granting Power User Access to Dimension or Granting Access to Compound Dimensions articles.
6. Assign Categories and/or Elements
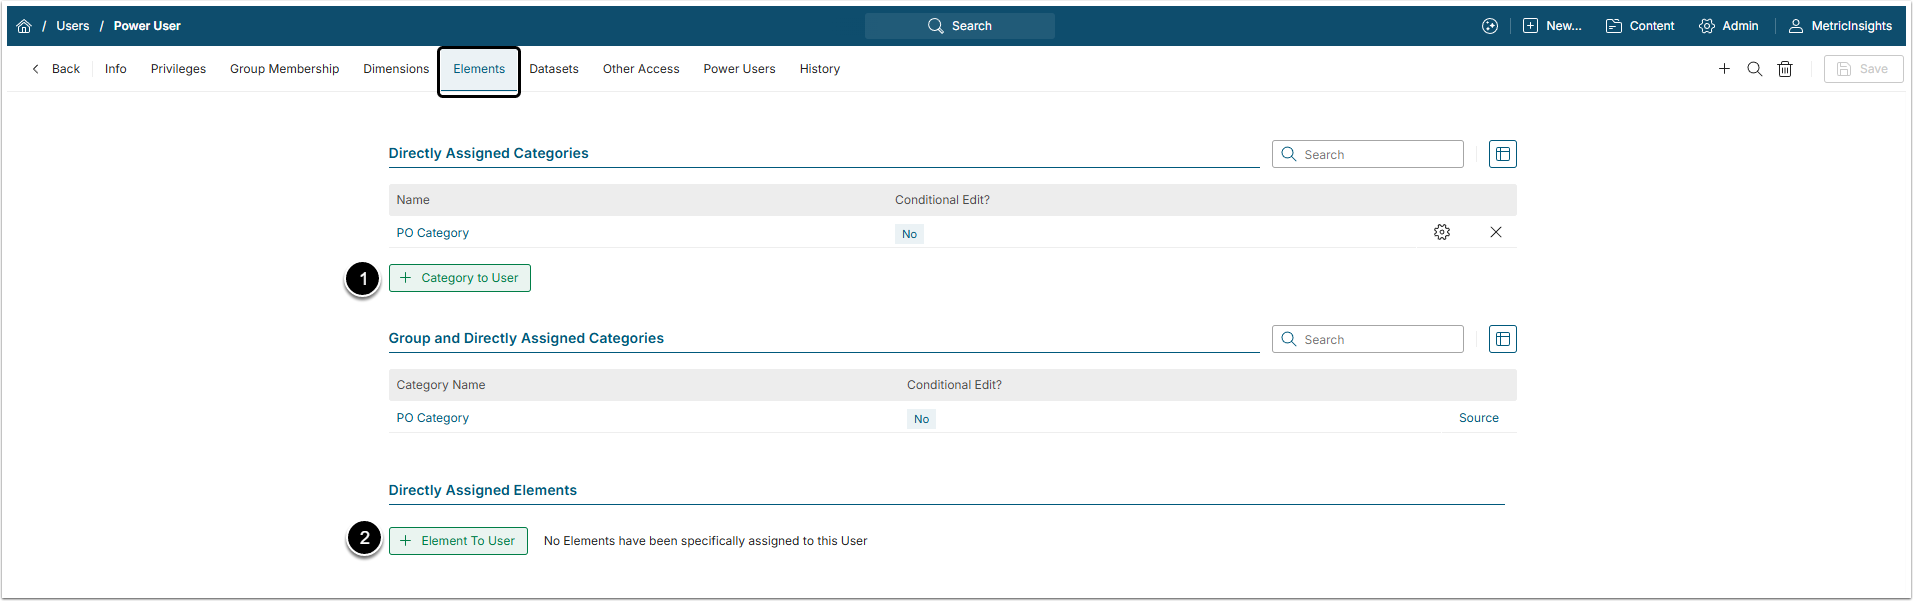
- Adding a Category will add all of the Elements contained in that Category.
- Add Elements individually.
NOTE: This tab contains Categories and Elements to which the User has Permissions, either inherited from an assigned Group or specifically assigned to the User. Some grids are hidden until at least one object is added.
7. Grant Access to Datasets and User Maps
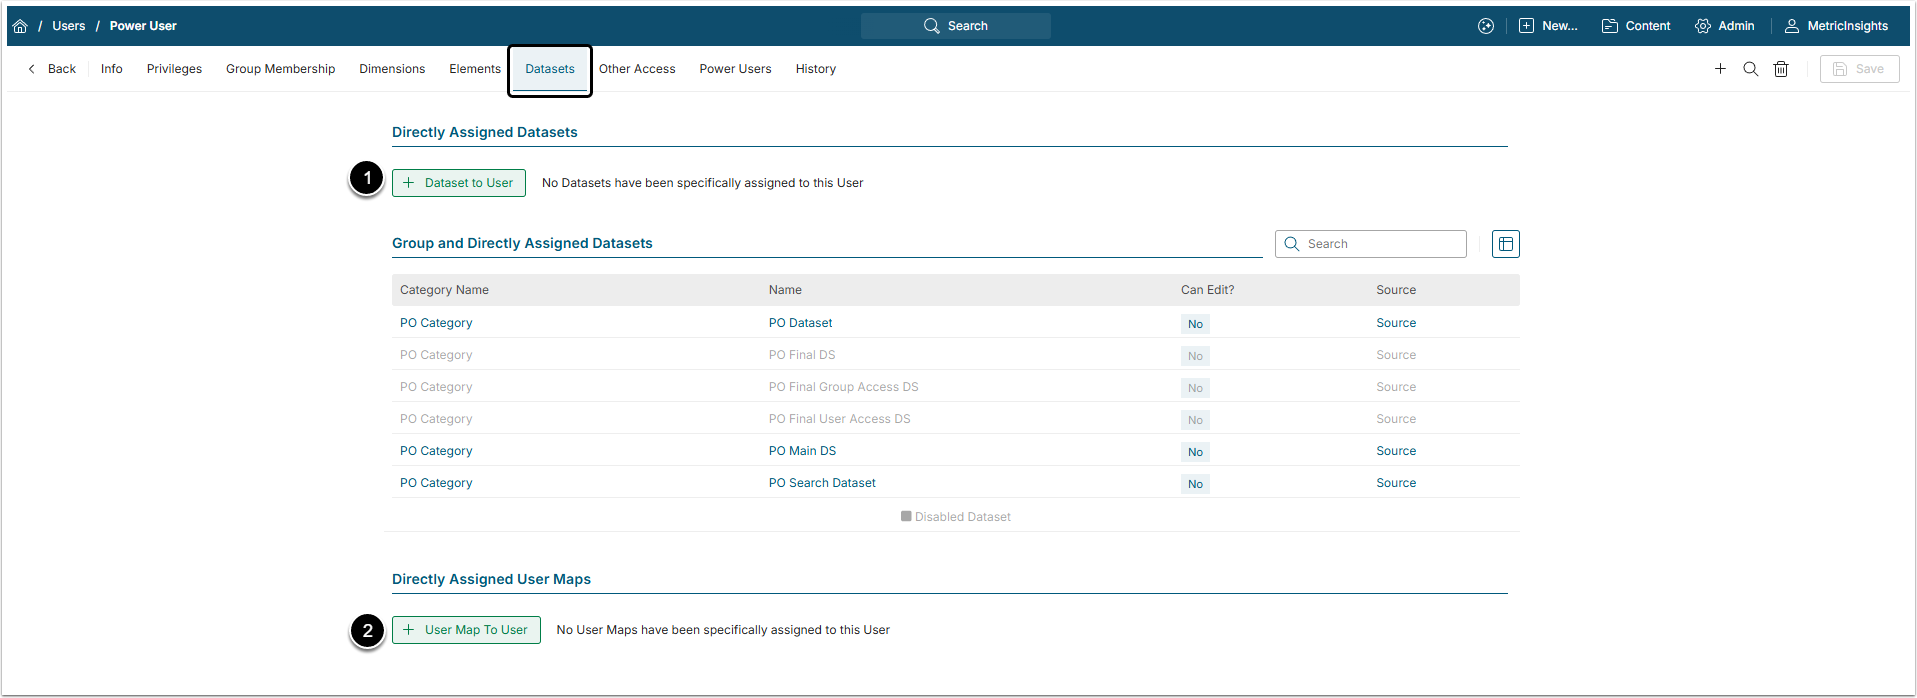
- Add Datasets from a drop-down.
- Add User Maps from a drop-down (only available for Power Users).
8. Grant Access Other Objects
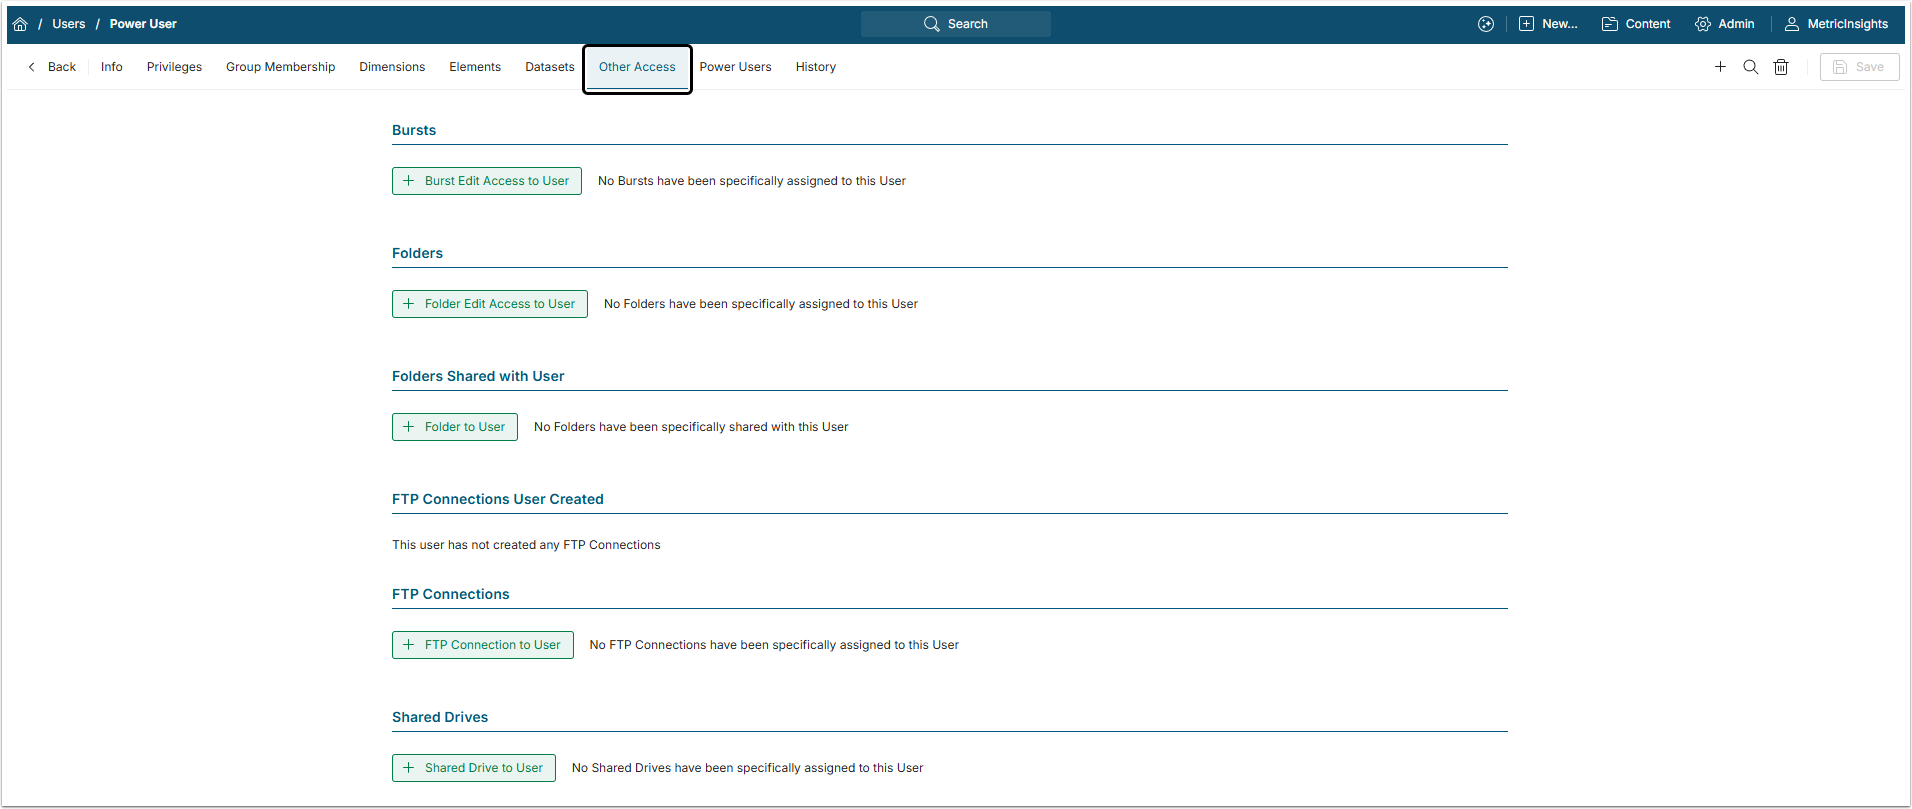
On the "Other Access" tab, an Admin may add the following Objects to either a Regular or a Power User:
- Portal Pages Shared with User
- Shared Drives
- FTP Connections
- Bursts
- Event Calendars
NOTE: The "Group and Directly Assigned ..." grid only appears after Permission to at least one object has been added to the User.
9. Grant Object Access for Power Users Only
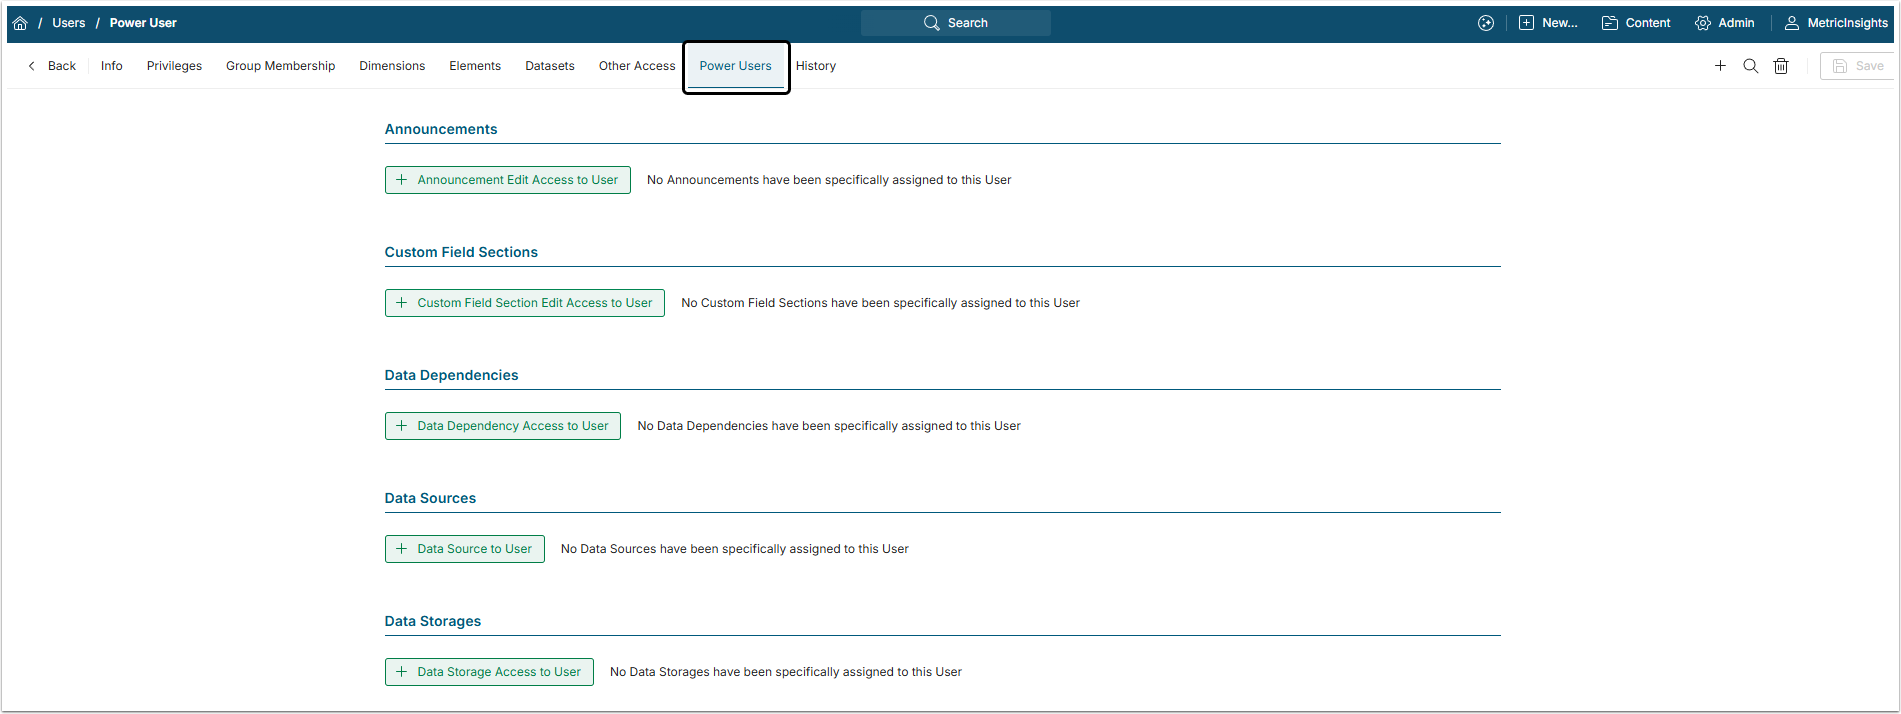
On the "Power Users" tab, an Admin may use the [+] button to add the following objects to a Power User:
- Data Sources
- Targets
- Groups
- Data Dependencies
- Data Collection Triggers
- Notification Schedules
- Data Storage Use Access
- Portal Pages that User can Edit
- Portal Page Asset Folders
- Announcements
- JavaScript Chart Templates
- Email Templates
- Managed Alert Workflow
NOTE: The "Group and Directly Assigned ..." grids only appears after Permission to at least one object has been added to the Power User.
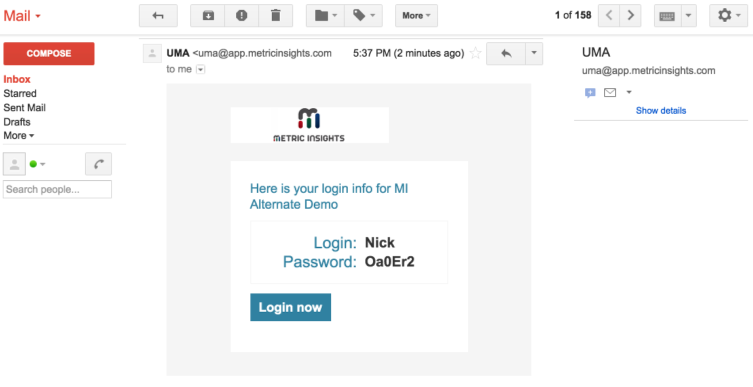
If you have selected to send the User a temporary password, the User will receive an email like the one shown above.
See First Login Options for more information.