This article outlines the process used to create a Dimension, Values of which are populated automatically based on a data fetch command. While SQL is used here to fetch the Dimension Values, the process described below can be used for any automated fetch method.
1. Start Creating a New Dimension
Access Content > Dimensions
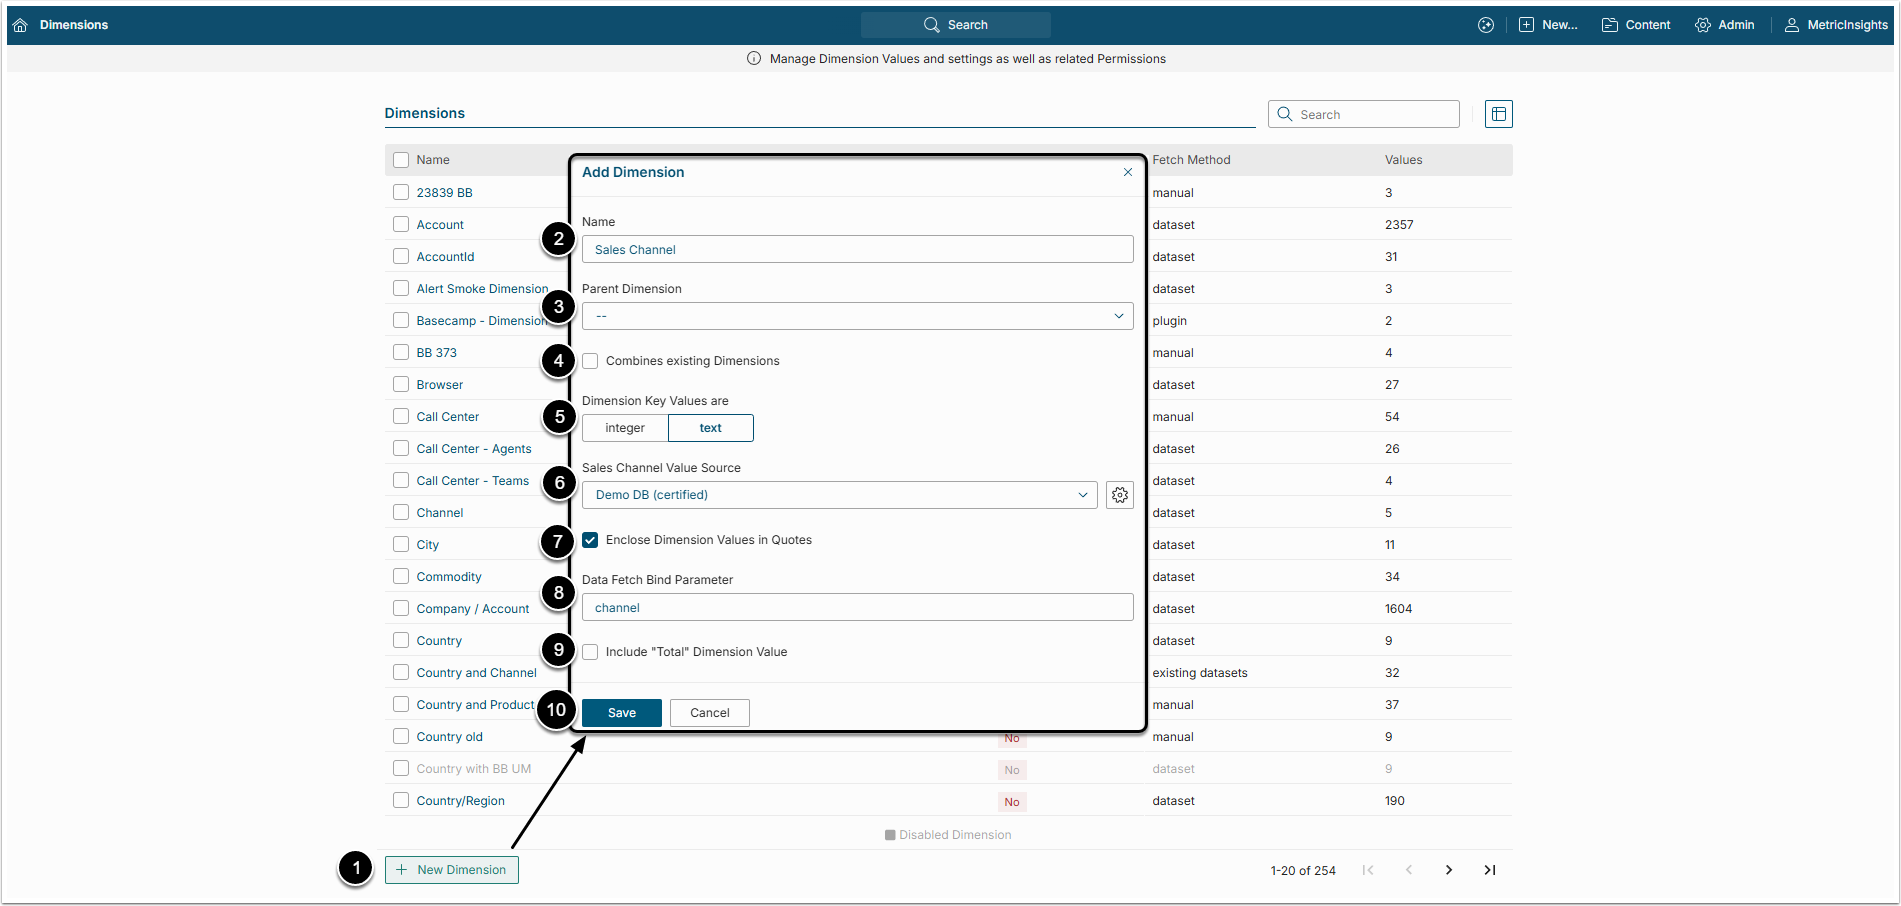
- [+ New Dimension]
- Name: Select a unique descriptive Name for your Dimension.
- Parent Dimension: Select another Dimension that becomes a "parent" to created one.
- For more details on Parent/Child Dimensions, check the Understanding Parent/Child Dimensions article.
- Combines existing Dimensions: Check this checkbox to create a Dimension that consists of Dimension Values of other existing Dimensions.
- For more information, go through the Understanding Compound Dimensions article.
- Dimension Key Values are: Select whether the Key Value for the Dimension is an 'integer' or 'text'. Set this based on how the Dimension Key Value is defined in your source system.
- Value Source: Select where the Dimensions Values will be sourced from.
- Enclose Dimensions Values in Quotes: This checkbox is selected by default. It encloses the Dimension Value names in quotes, so that they will be perceived as a single entity even if they consist of several words,
- Data Fetch Bind Parameter: This field is displayed if an SQL data Source is selected in Value Source field. Specify a Bind parameter's name. Setting this to match the column name for the data in the source system makes writing fetch commands for Dimensioned Element easier.
- Include "Total" Dimension Value: Select this checkbox to add a "Total" Valuethat accumulates all data for each Measurement Time.
- Check the Adding a "Total" or "Subtotal" to a Simple Dimension article for details.
- [Save] to open the Dimension Editor.
NOTE: Use caution when using special characters for Dimension Value Names asnot all 'special characters' will display correctly in Metric Insights :
- The'' will not display correctly for a Dimension Value when used as an Axis name on a Chart, nor will it download correctly to an Excel file.
- Neither '' nor '' will display correctly when used in a Dimension Value name.
2. Complete Dimension Information Using a Fetch Command
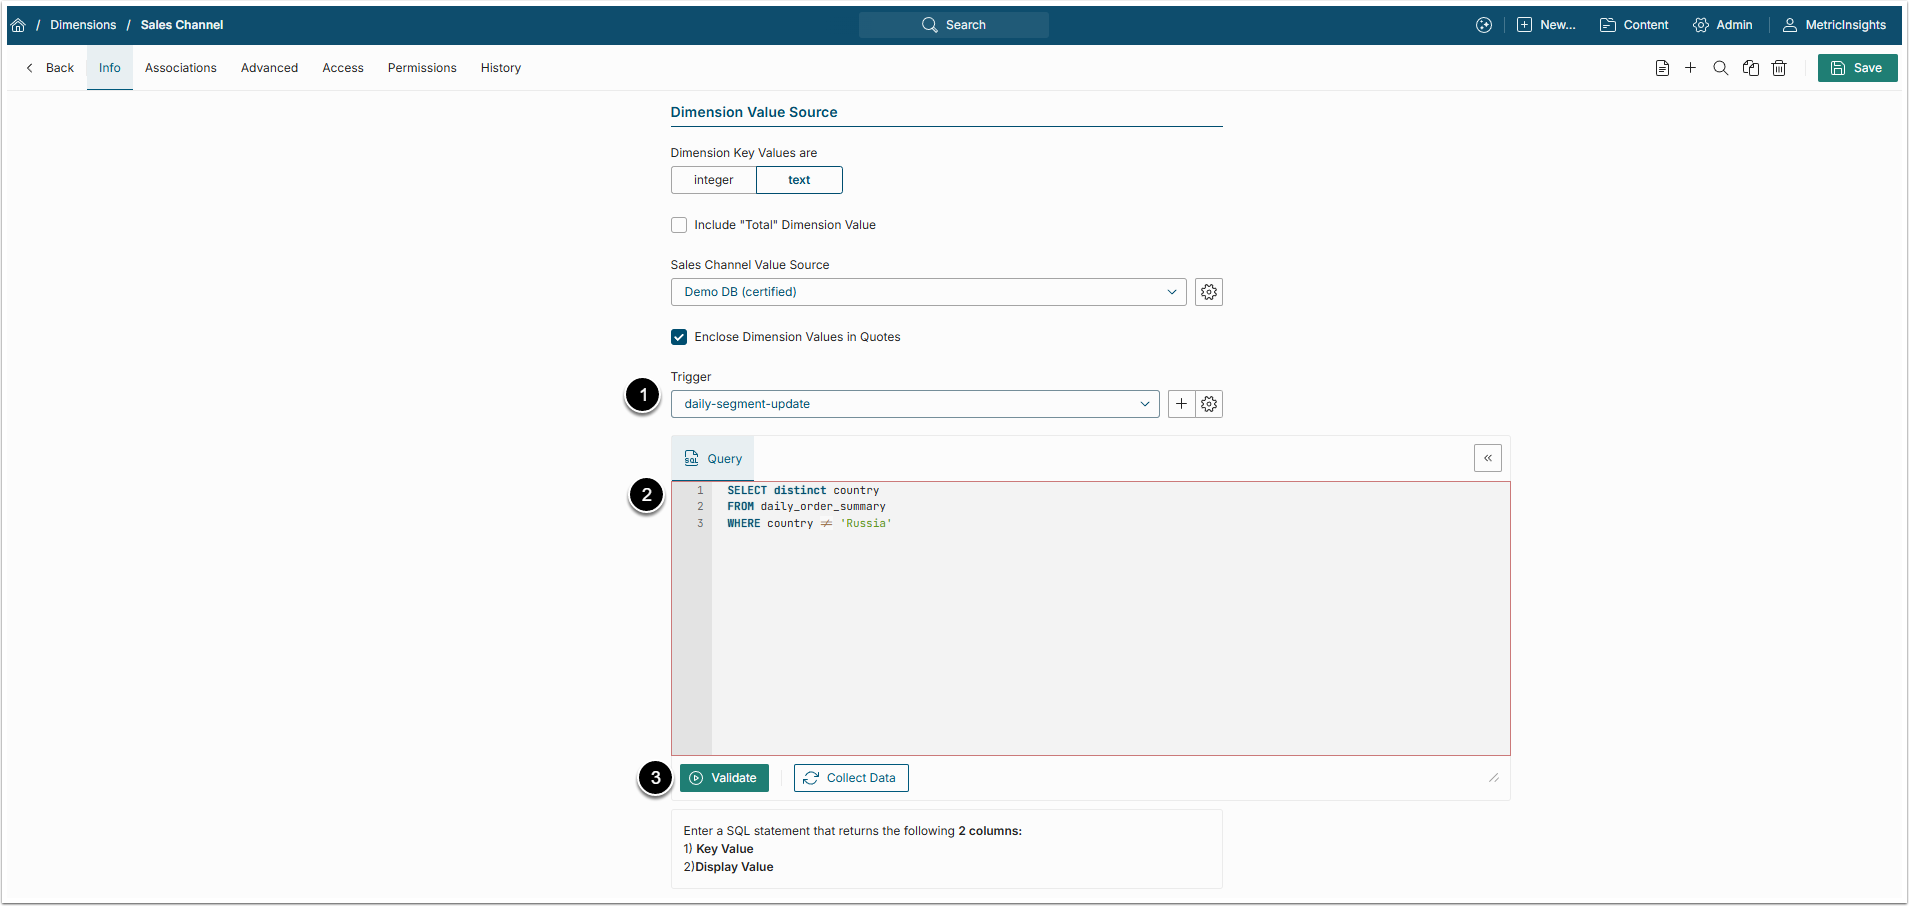
- Trigger: Select the Data Collection Trigger that will define how often and when the data is fetched.
- Query: Write the data fetch command that should be used to collect the Dimension Value data in the text field. This command should return one Key Value and one Display Value columns. If your Dimension does not have a key Value, select the display Value for both columns.
- [Validate] the SQL Statement.
3. Review Sample Dimension Values
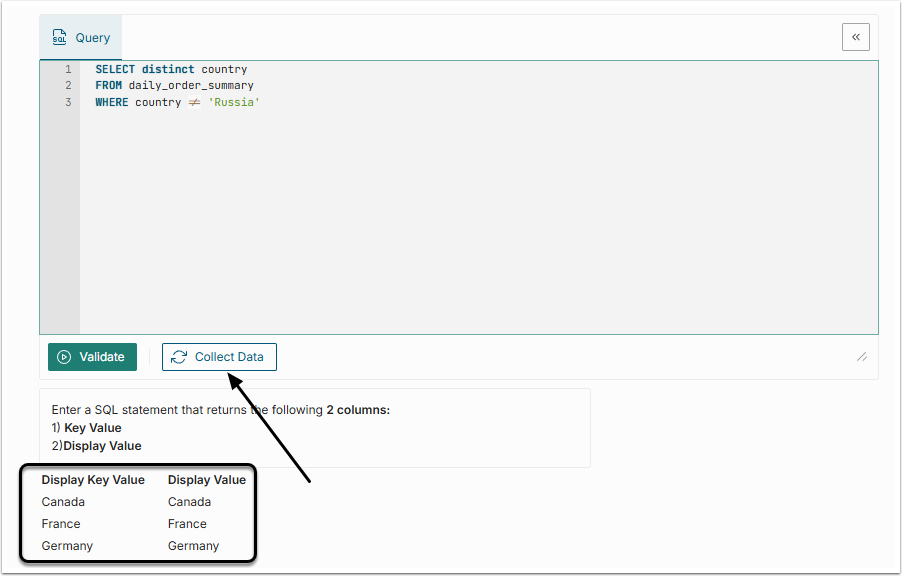
Upon successful validation, Sample Dimension Values will appear below the data fetch command field.
If sample dimension values are what was expected, click [Collect Values].
4. Review the Collected Dimension Value List
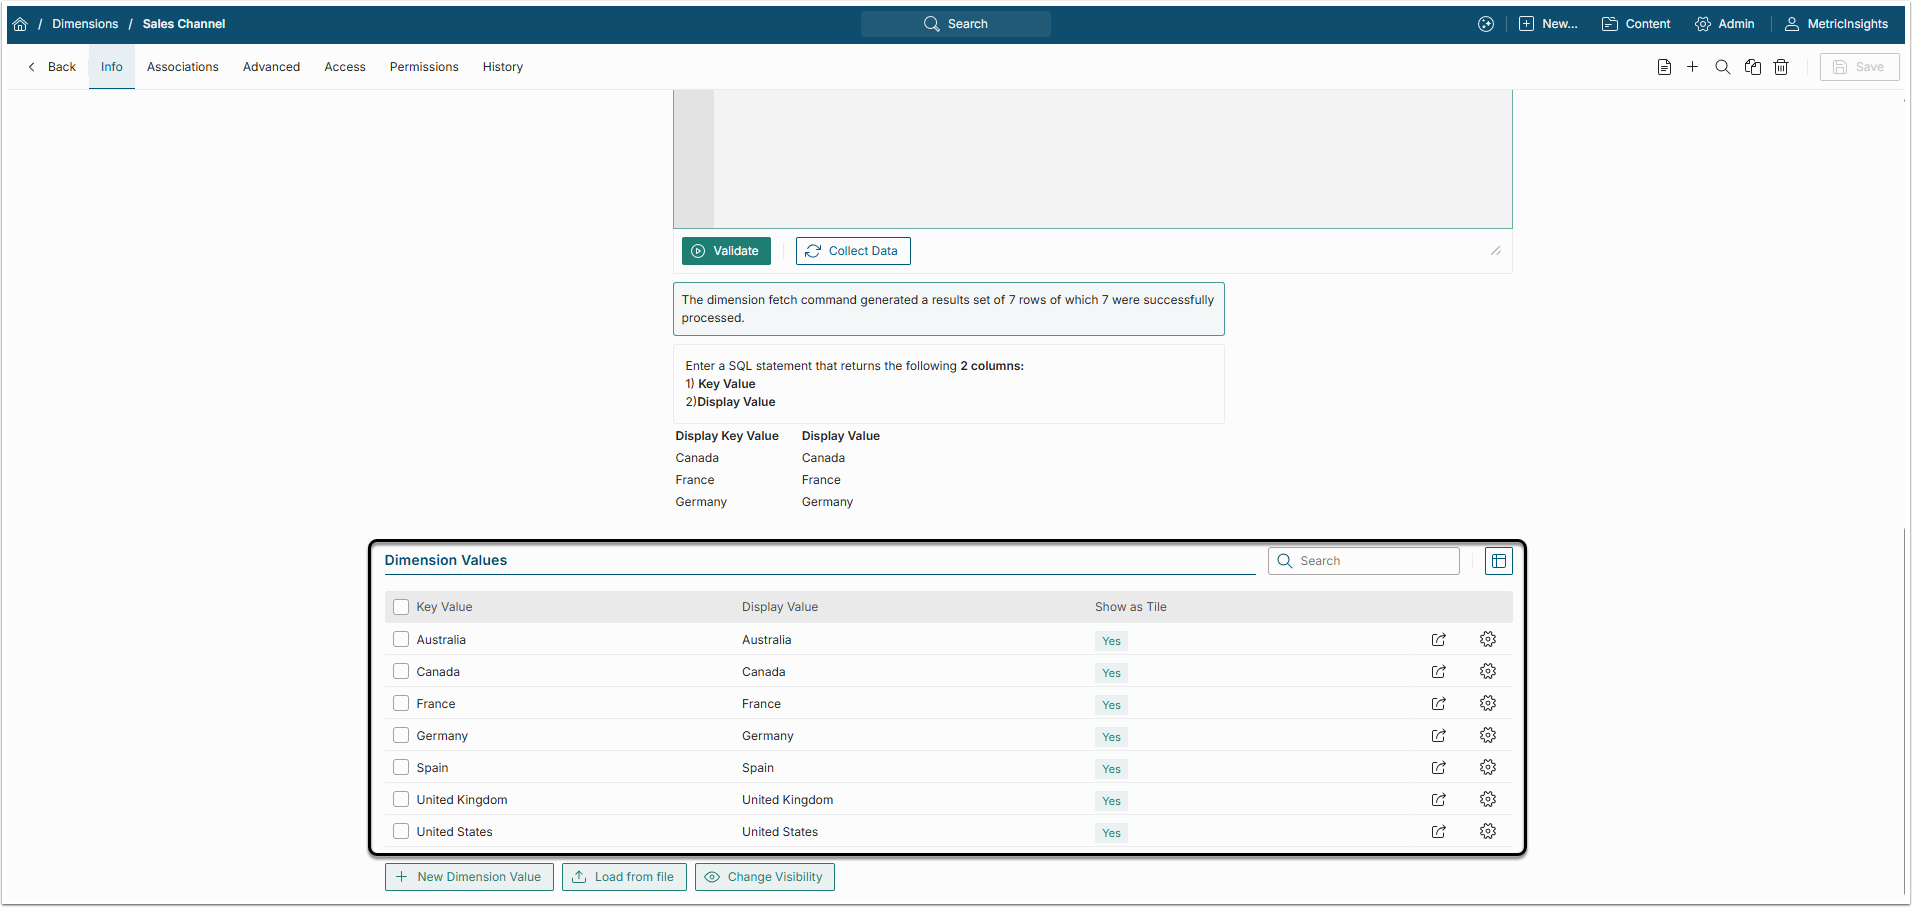
The full list of Dimension values appears in the Dimension Values grid.