The Target can be manually populated with Target Values. This method is perfect if there are little Values, because they have to be added one by one. This article describes how to add Target Values manually.
If there is a large number of Target Values, consider following the Populate a Target from a CSV file article.
1. Create a New Target
Access Admin > Reference Objects > Targets
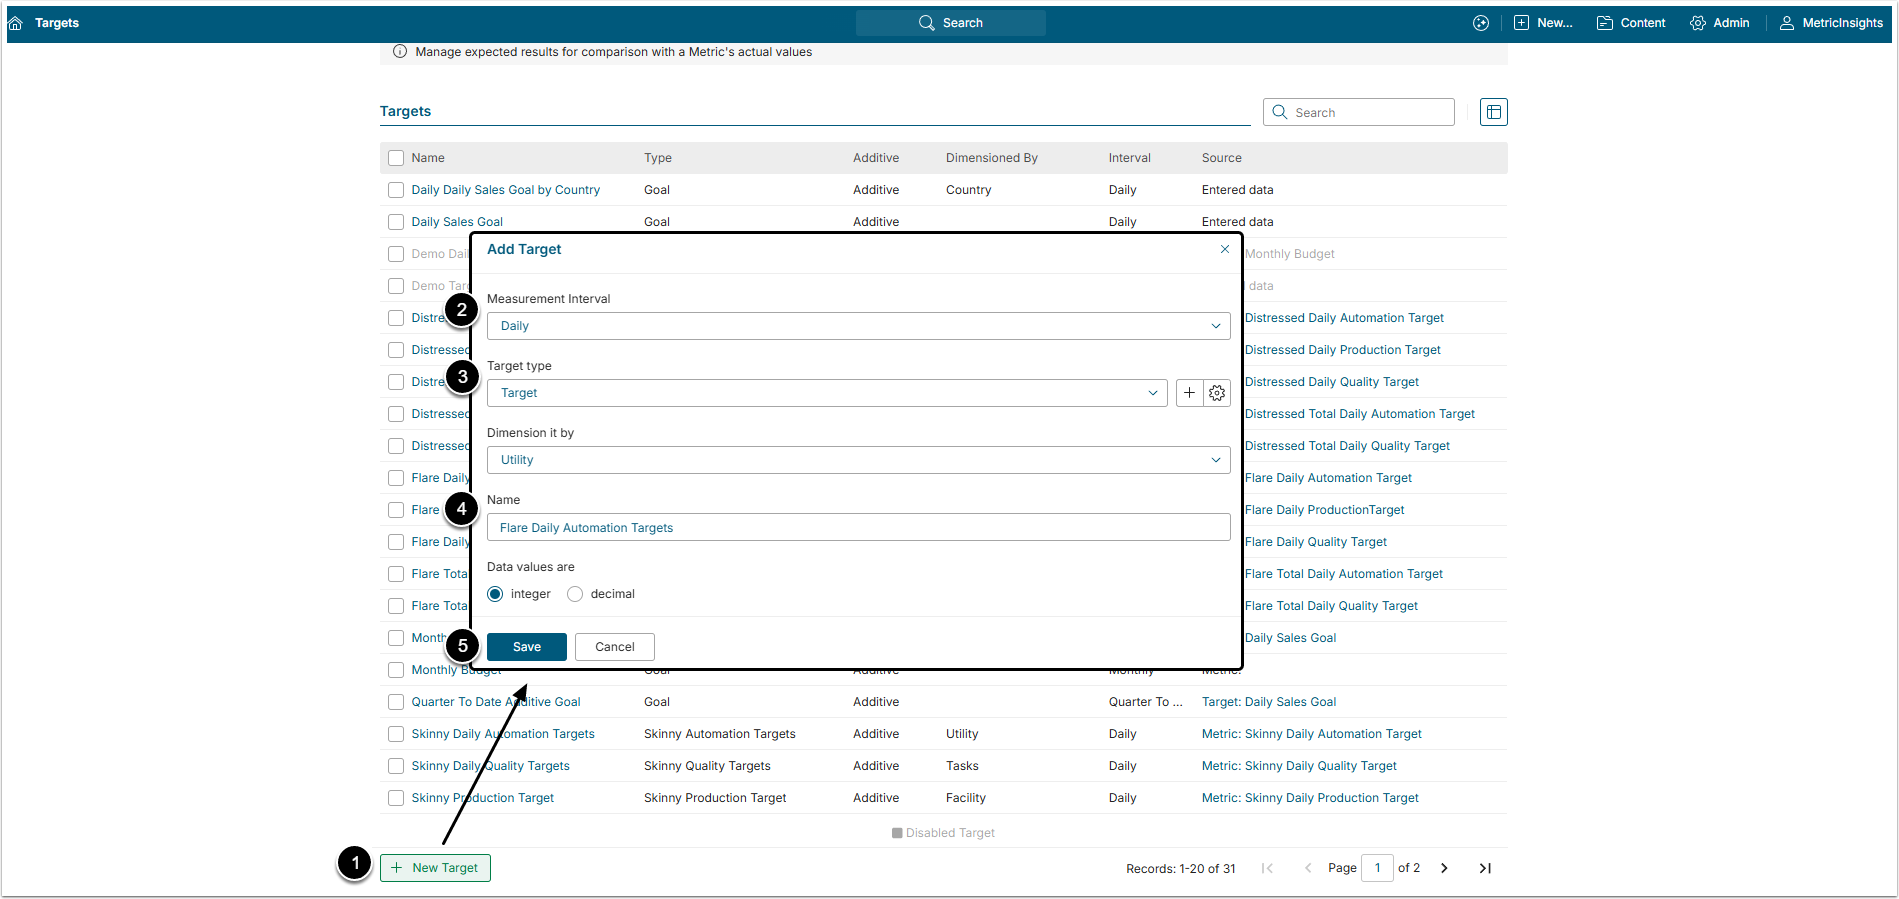
- [+New Target]
- Measurement Interval: Select the period that the Target covers.
- Target type: Choose the Target Type from the dropdown menu or add a new one.
- Name: Give the Target a descriptive name.
- [Save]
NOTE: All targets created in Metric Insights are unique. Only one Target can be created using a combination of the following values:
- Measurement Interval
- Measure
- Type
- Optionally, Dimension
2. Define the Target Data Source
Open Info tab of the Target Editor.
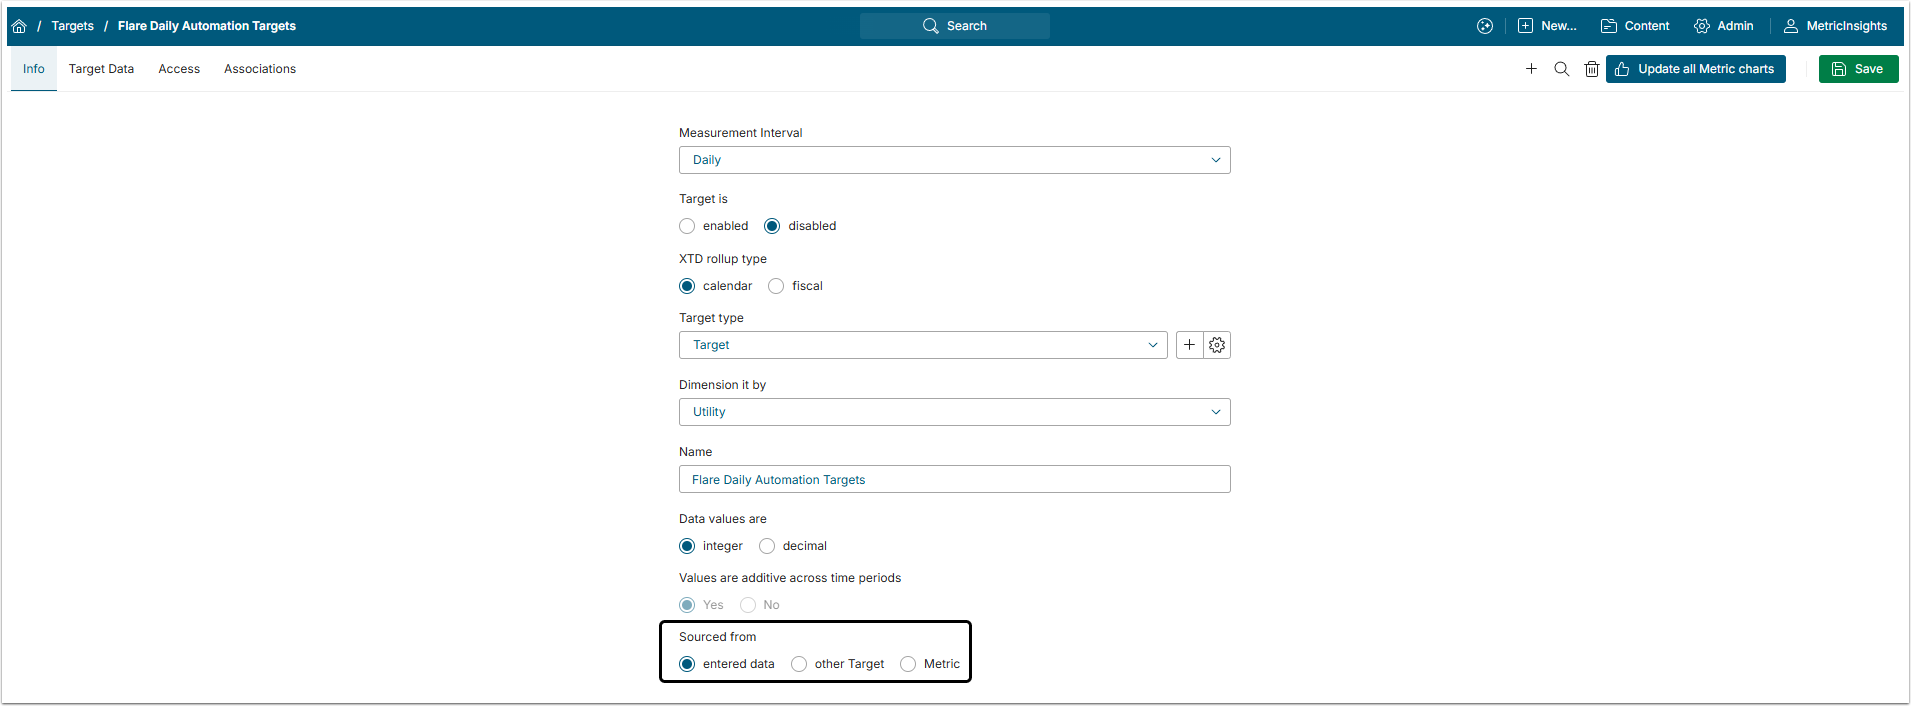
In the Sourced from field select the "entered data" option.
3. Populate the Target
Open the Target Data tab
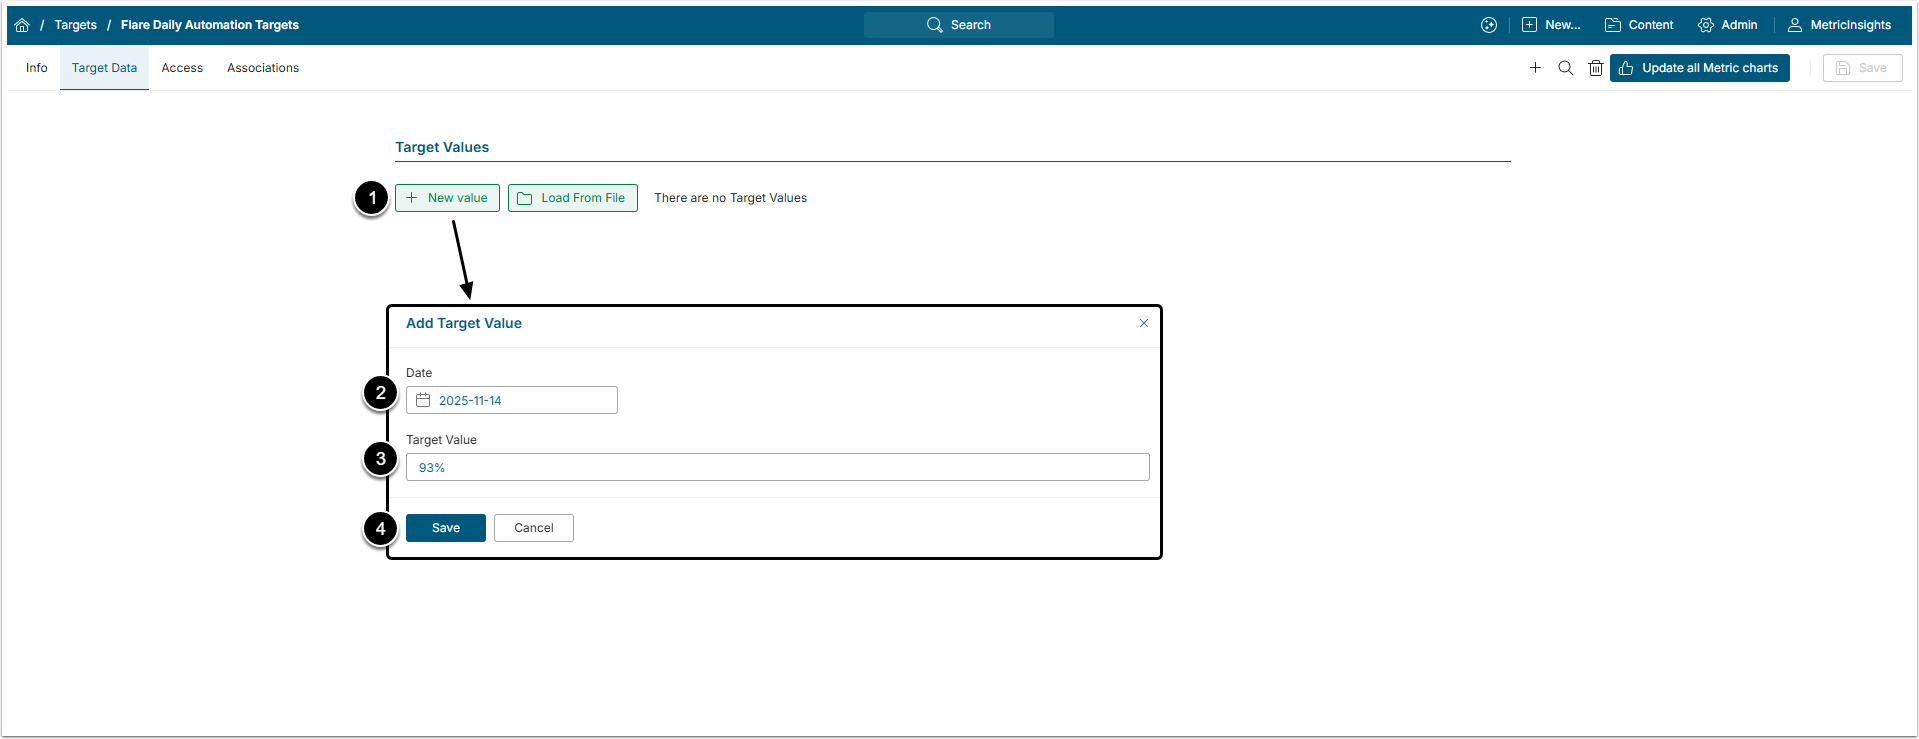
- [+ New value]
- Date: Select the date from the calendar.
- Target value: Enter a Target Value amount.
- [Save]
Repeat the procedure to add as many Values as necessary.
4. Enable the Target
Return to the Info tab.
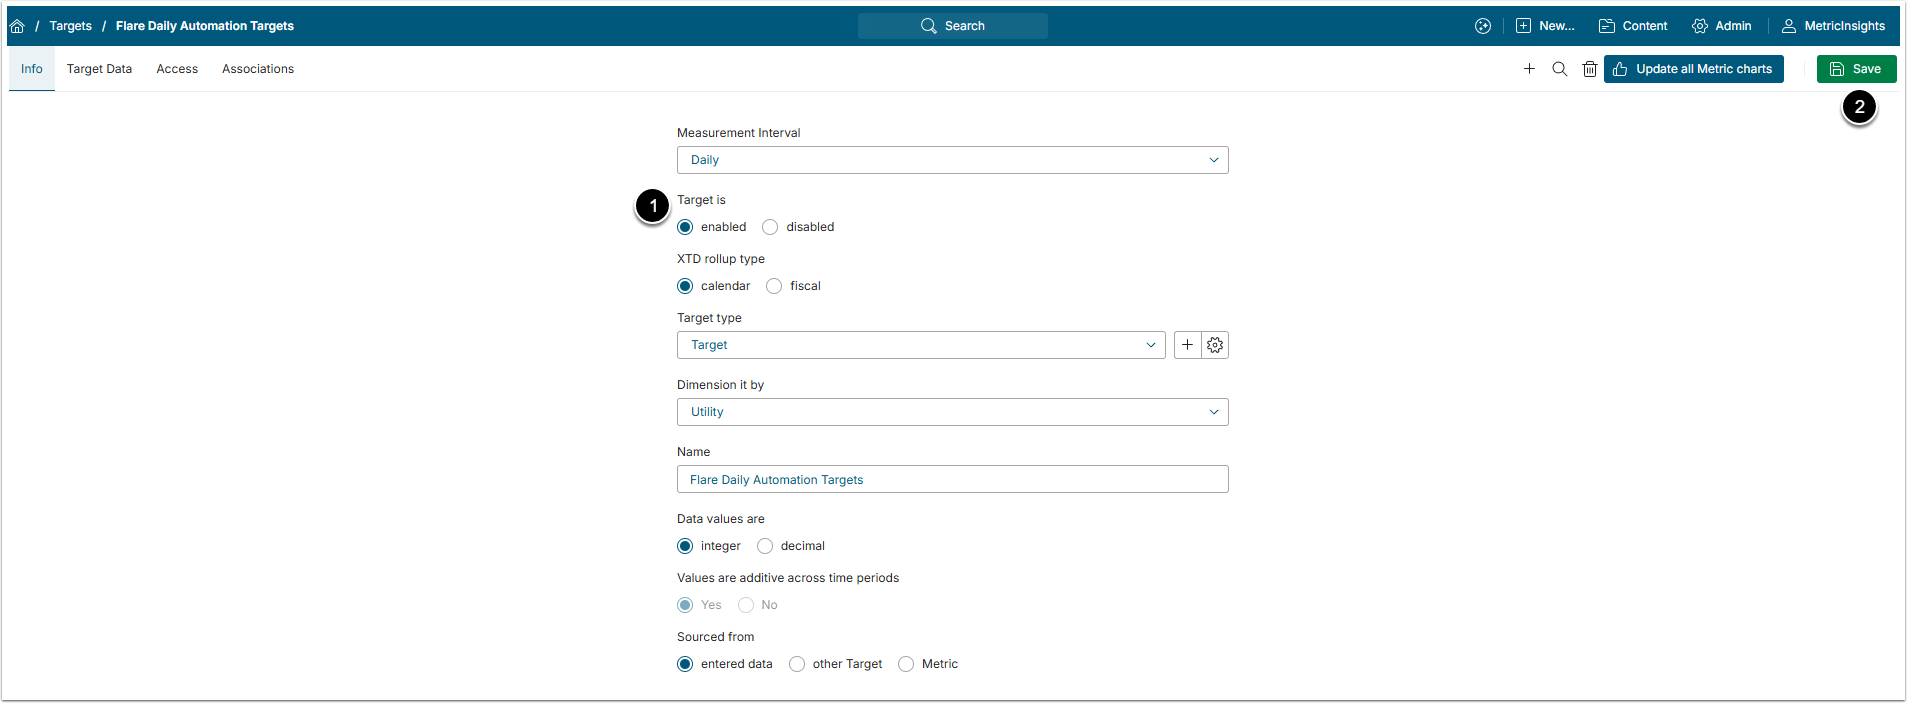
- Target is: Select "enabled" option.
- [Save]
5. Associate a Metric with a Target
Go to Associations tab.
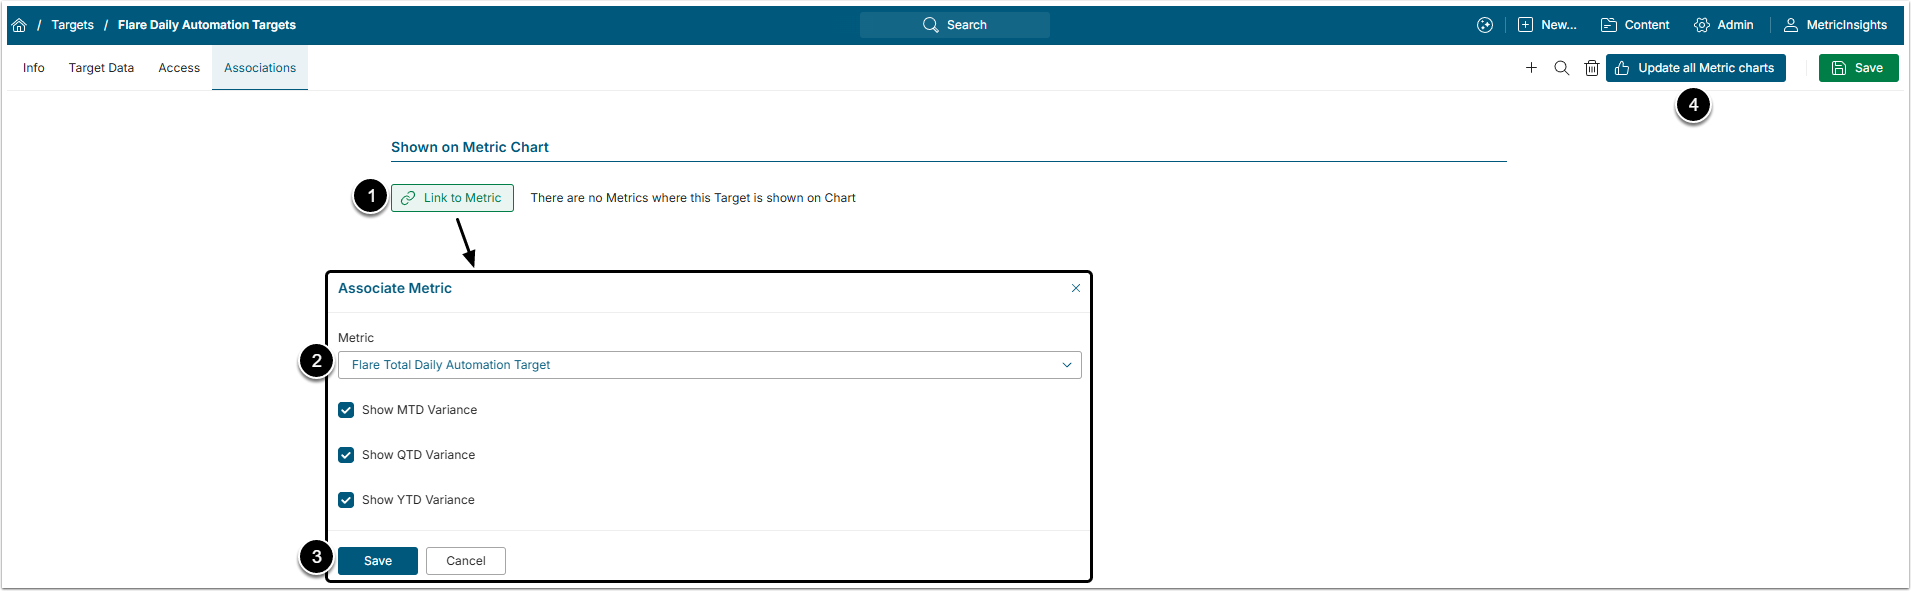
- [Link to Metric]
- Metric: Choose a Metric from the drop-down list. Only Metrics that have the same Measurement Interval will be shown there.
- [Save]
- [Update all Metric Charts] to apply the changes made to associated Metrics.
6. Check the Result
Click the associated Metric Active Name Link to open that Metric's Editor.
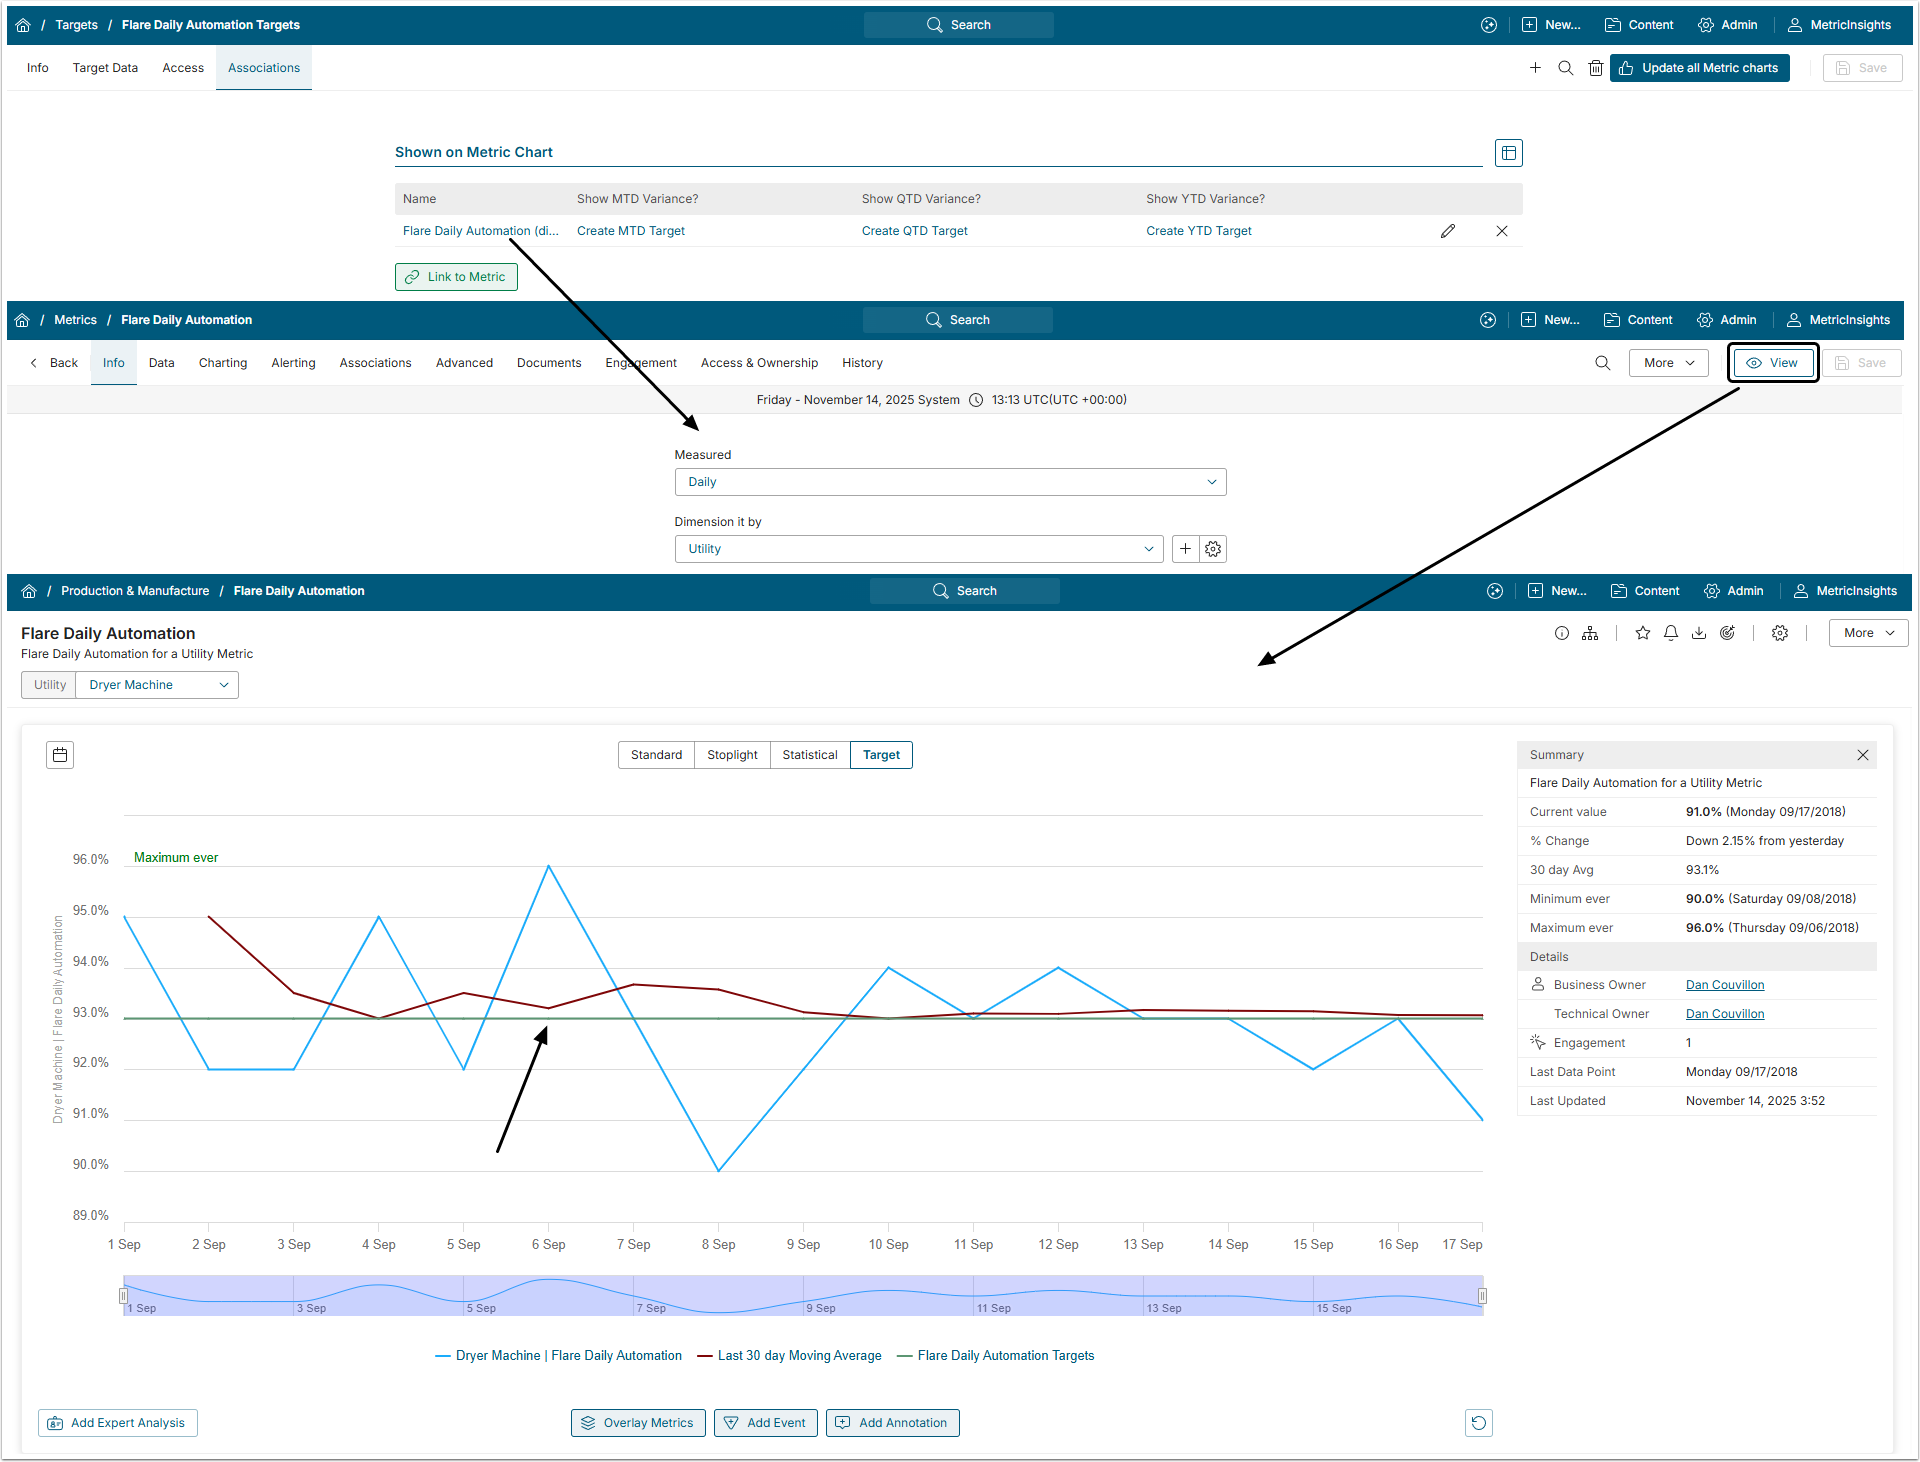
Click [View] to open Metric Viewer and go to Target tab to see the Target line.